Learn how to make your own macrame snowflake ornament with this free pattern and video tutorial. This post contains affiliate links, which help to support this site at no extra cost to you when you purchase through our links.
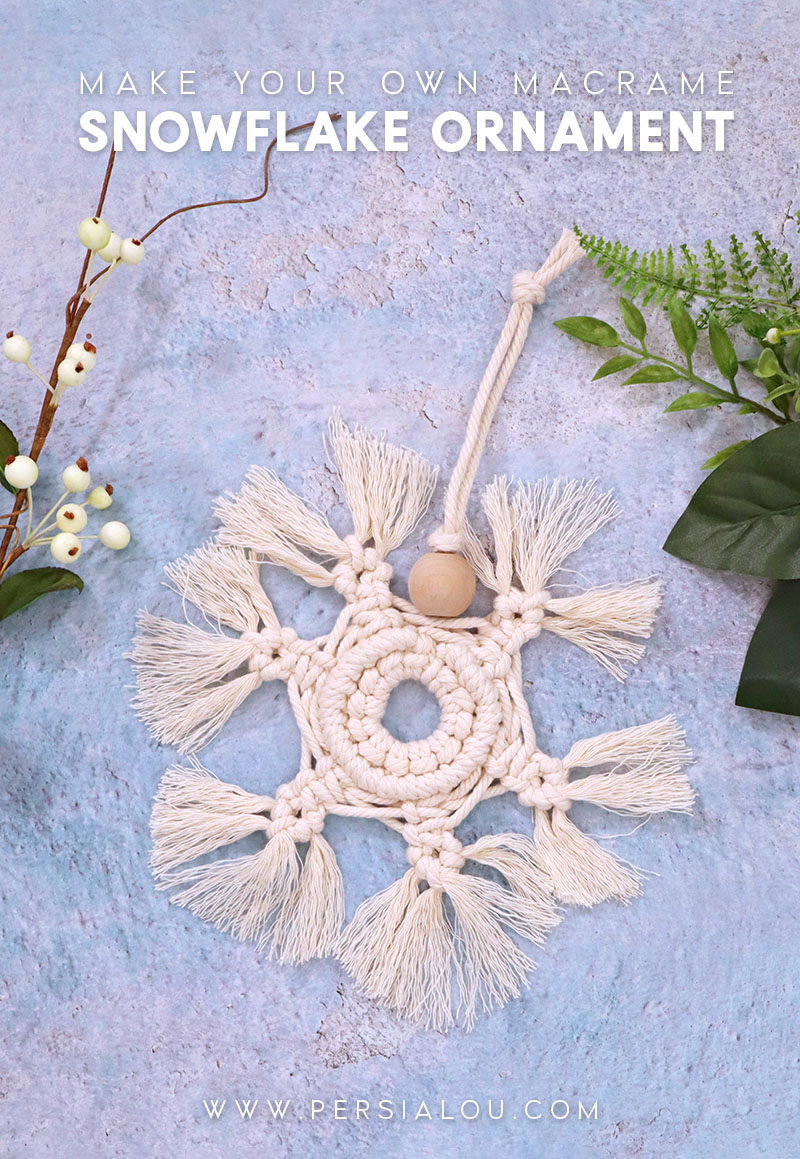
Hey there! I have a fun little holiday macrame project to share with you all today! This simple little macrame pattern is perfect for adding a boho element to your Christmas tree this year!
Today, we are going to be making some pretty macrame snowflake ornaments! These ornaments would be so pretty tied on a boho Christmas gift or strung onto a winter garland.

More DIY Christmas Ornaments
• 3D Paper Ornaments
• Crochet Star Ornaments
• Pom Pom Christmas Lights
• Winter Floral Vinyl Ornaments
I have a full written photo tutorial to show you how to make your own below plus a video tutorial as well! Ready to get knotting?
DIY Macrame Snowflake Ornament
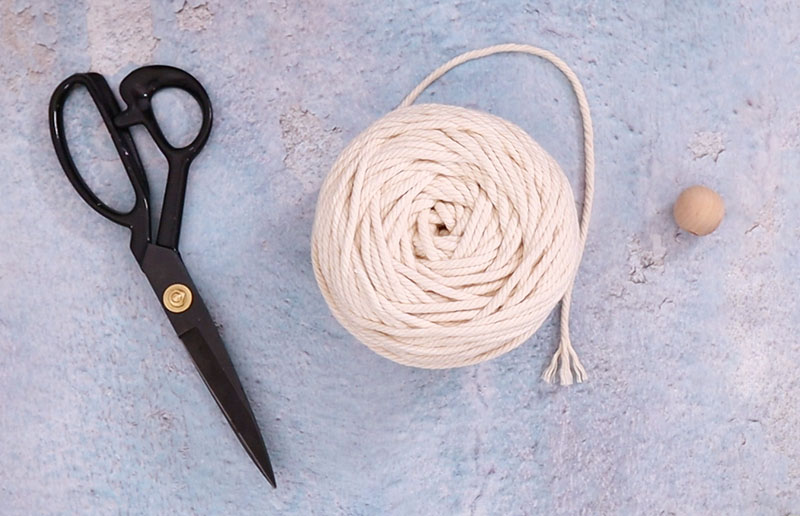
Macrame Snowflake Supplies:
How to Make a Macrame Snowflake
I have created a full video tutorial to show you how to make your own macrame snowflake ornament, which you can watch below. (P.S. If you like this video, please subscribe to my youtube channel!)
If you prefer written instructions, just keep scrolling!
Macrame Snowflake Ornament Pattern
Knots Used:
- Larks Head Knot
- Double Half Hitch
- Square Knot
Step One. Cut and Attach Cords.
First, you will need to cut 13 lengths of your cotton cord. Twelve of those pieces should be about a yard (three feet or a meter) long. The thirteenth piece should be 6 inches (15 cm) longer than that.
Pull out one of your 12 meter long pieces, and secure it to your work surface. This piece will act as the center of the snowflake and will also be the loop the ornament hangs from.
Attach the remaining 11 meter long pieces to this center cord using a larks head knot.
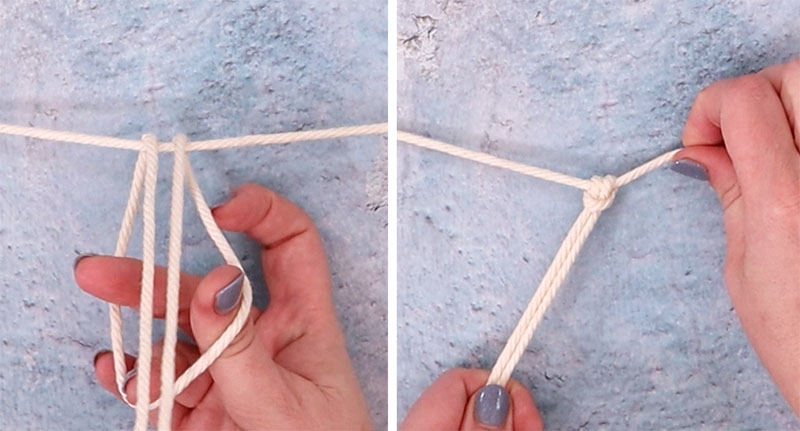
To do this, fold the cord in half, and pass the folded center of the cord over and under the center cord. Then, thread the tails of the cord through the loop and pull to tighten (as show in the image above).
Repeat this process with all of the remaining meter long cords.
Finally, use a larks head knot to attach the longer cord on the left side of all of the already attached cords.
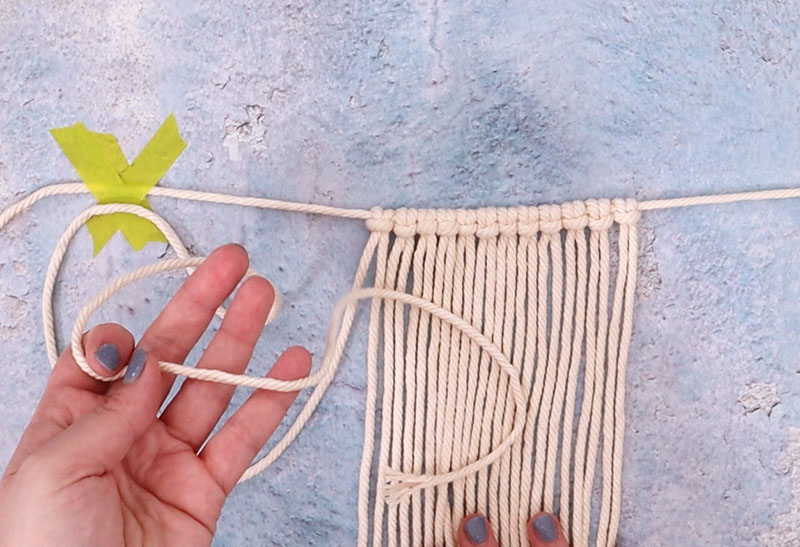
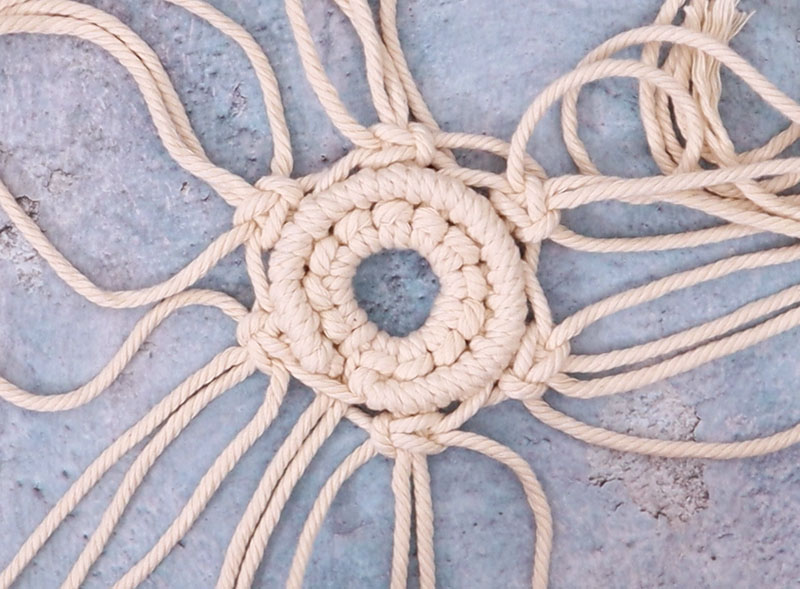
Step Two. Form Circle.
Remove your center cord from your work surface, and bring the ends together to form a ring. Close the circle using a double half hitch knot.
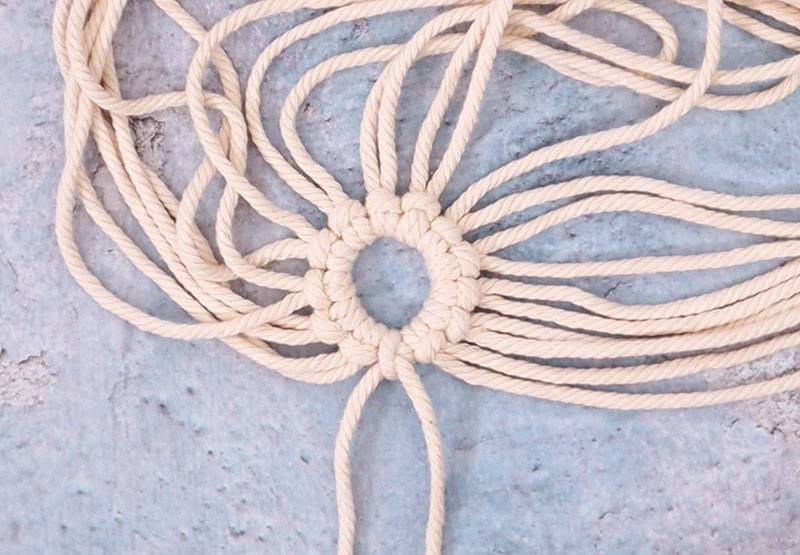
The two lengths hanging from this double half hitch will form the loop used to hang the ornament at the end, so try to keep them separate as you work the rest of the knots.
Step Three. First Round of Half Hitch Knots.
Next, we will take that longer cord at the end and wrap it around the circle. This will be the holding cord for the next series of double half hitch knots.
Starting with the cord just to the right of this longer holding cord, work a double half hitch knot with each successive cord around the holding cord.
Keep the holding cord close to the base of the larks head knots to make a tight wreath shape.
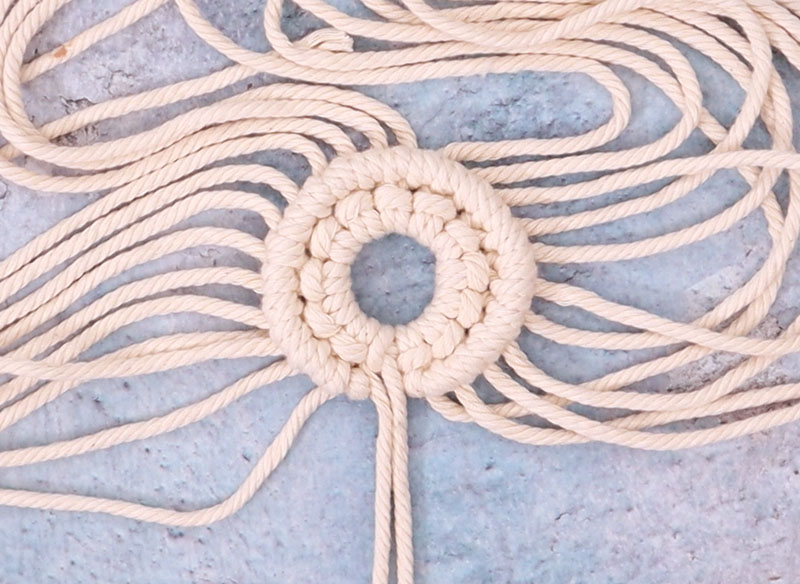
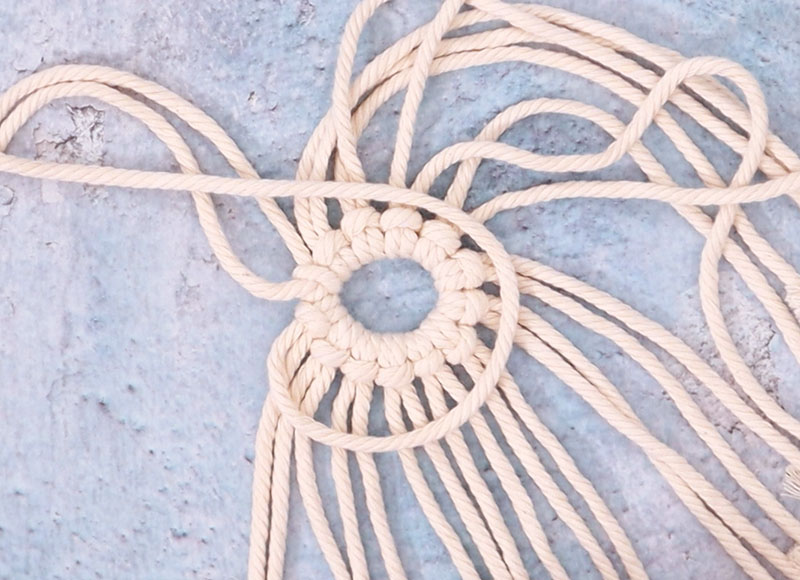
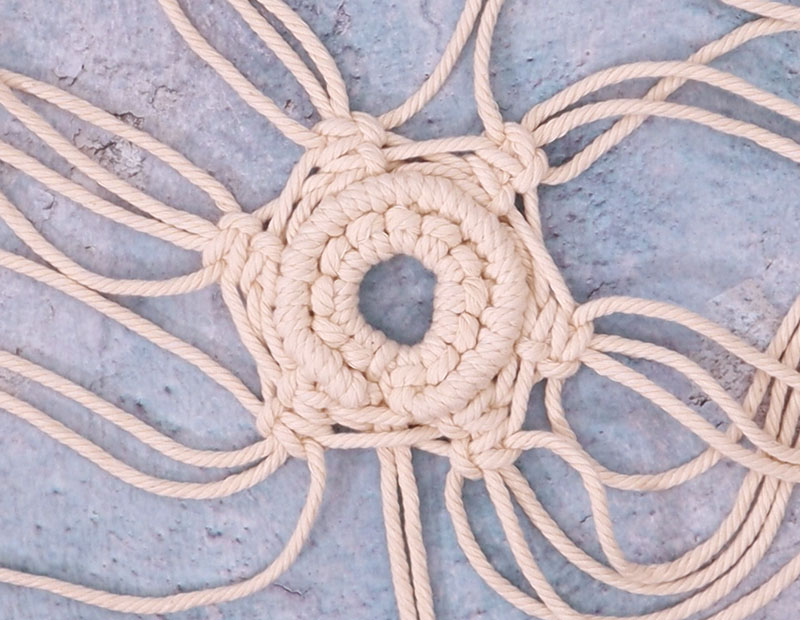
Step Four. Two Rounds of Square Knots.
Next, you will need to separate the cords into groups of four. Remember to keep the strands that formed the center of the loop separate.
Divide up the remaining cords into six groups of four as shown below.

Next, we will be tying square knots around the ornament. To give our snowflake more of a graduated star shape, we will be passing the edge cords from each group to its neighboring group.
To do this, I pass the left-most cord over to the group to the left and the right-most cord to the group on the right. I also bring the right-most cord from the group on the left over to become this group’s new left cord. On the other side, the left-most cord from the group on the right becomes this group’s new right cord.
Then, using this new group of four cords, I tied my square knot.
Repeat this process going around the circle until you have six square knots.
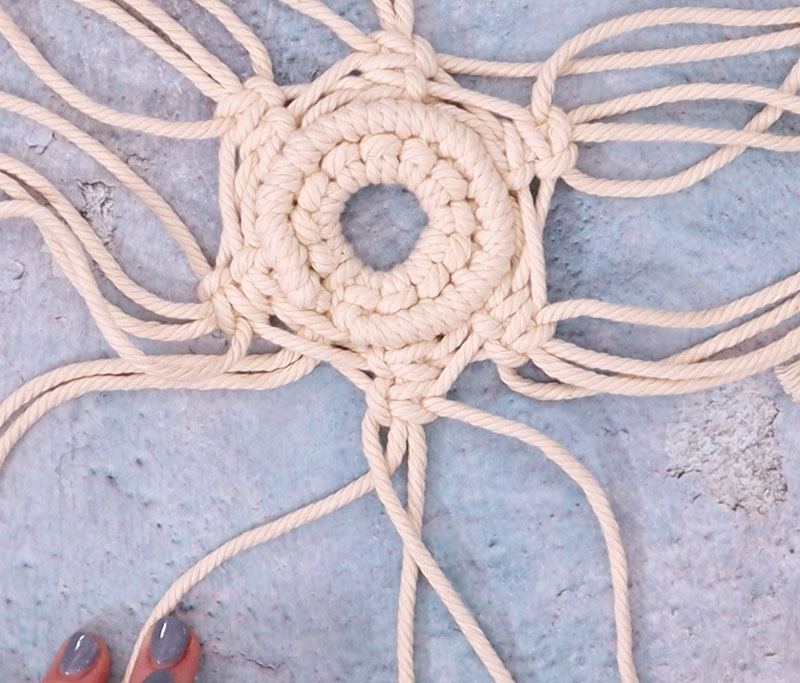
Next, we are going to do that whole process again to create a second round of square knots. Just as we did before, pull the edge pieces from the neighboring groups over to this new group.
As you tie your square knots, be sure not to pull to tightly to keep that flat circle shape.
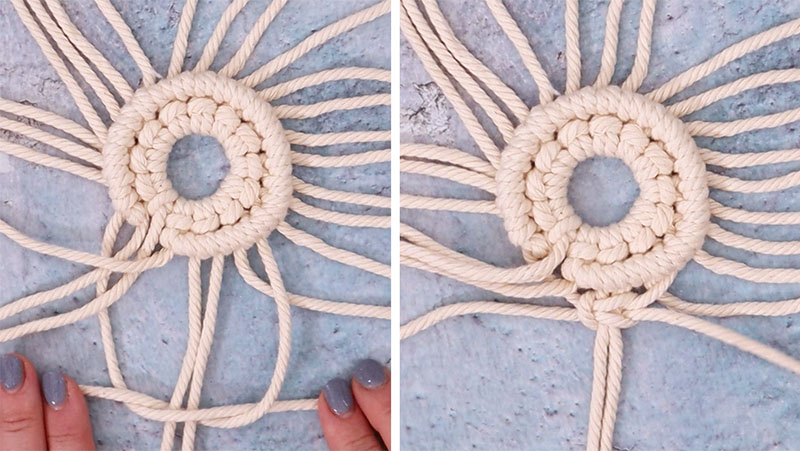
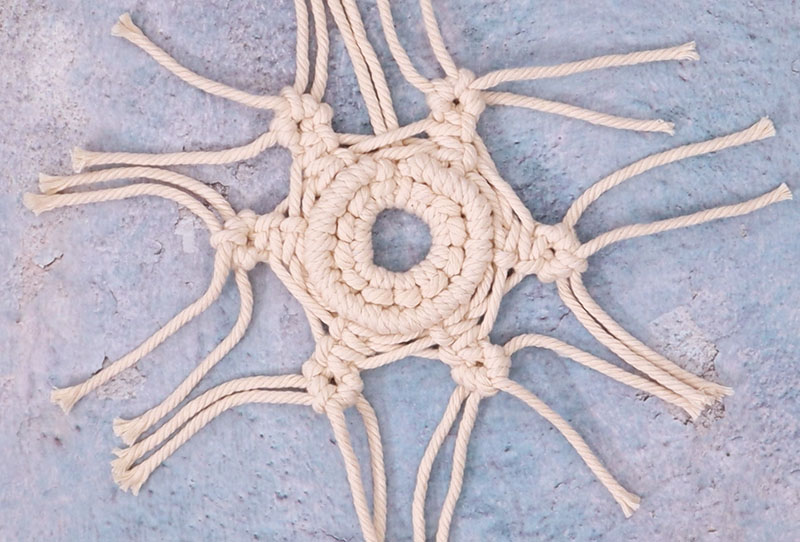
Step Five. Finish Snowflake Points.
After the second round of square knots, it’s time to finish off the snowflake points.
To do this, take the left-most cord of the four used to make one of your square knots, and hold it at a diagonal across the next cord.
Use the next cord to tie a double half hitch knot around the holding cord. Then, repeat this from the other side, using the right-most cord as the holding cord.
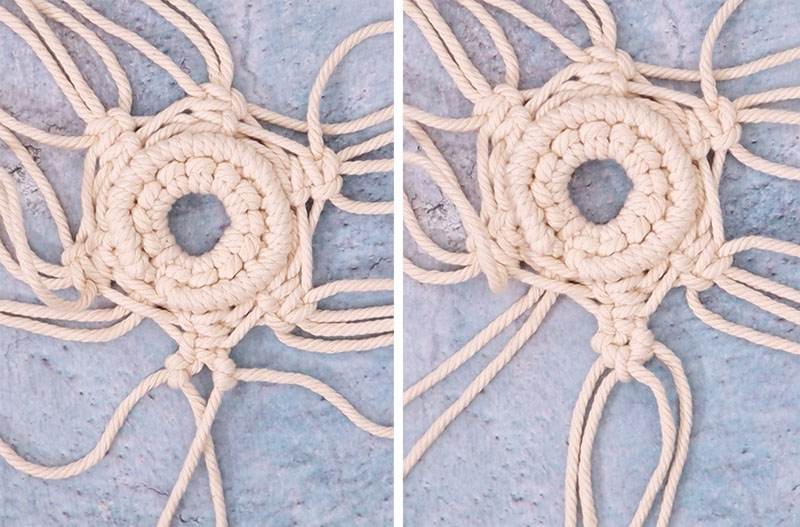
Finally tie the two holding cords together with a double half hitch knot to form a point.
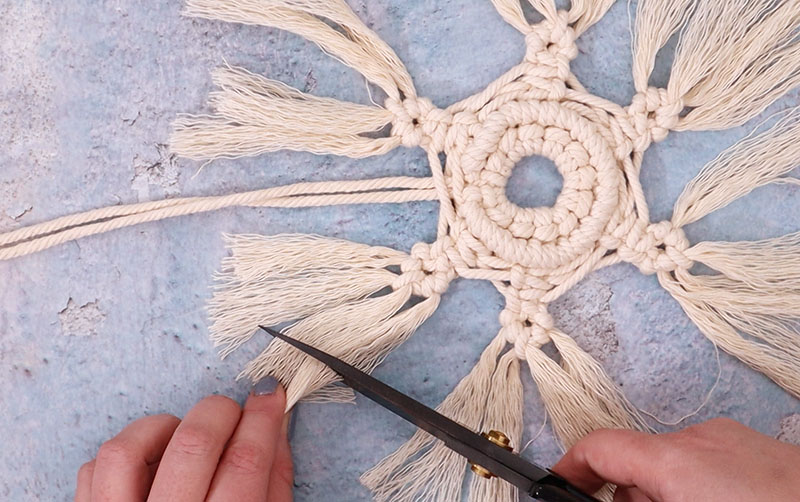
Step Six. Trim and Fray Ends.
After you have tied all your snowflake points, trim off the excess cord leaving a couple of inches past the points. (Remember not to trip off your center cords that will form the hanging loop!
Next, use your come to fray out the cotton cord.
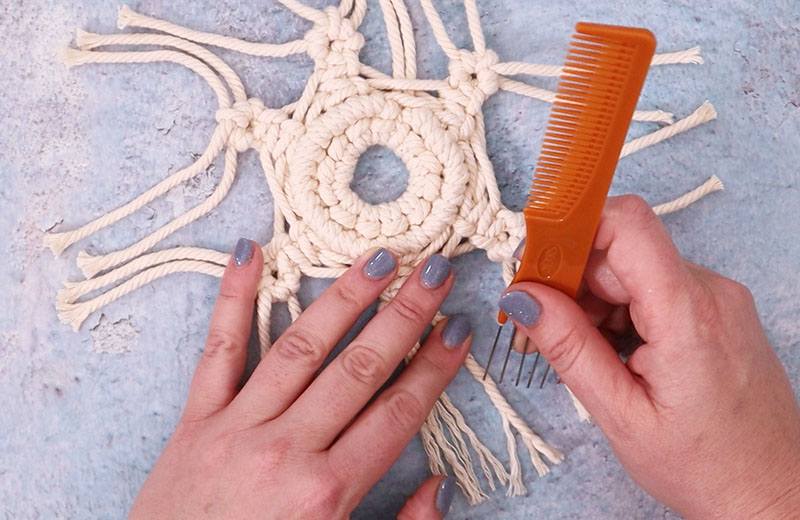
Then, evenly trim down the frayed edges.
Step Seven. Add Bead and Tie Loop.
Finally, slide your wooden bead over the center hanging cords. Tie a knot above the bead to keep it in place. Finally tie another knot a few inches up the hanging cords to create the hanging loop. Trim off excess cord.
At this point, your macrame snowflake is all done and ready to hang!
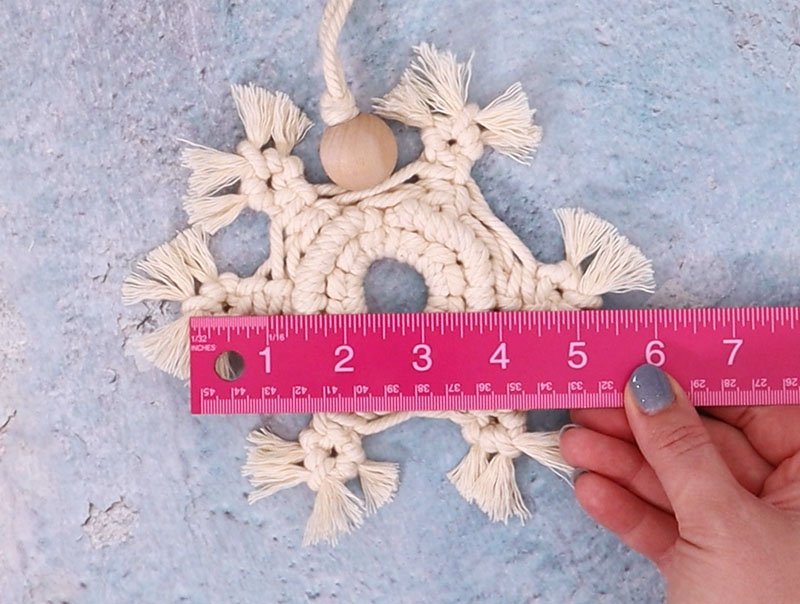
My snowflake is about five inches wide. You could use this pattern with thinner cord to create smaller macrame snowflake ornaments.
I hope this pattern and tutorial were helpful for you! If you make your own macrame snowflake, I would love to see it! Share your photos to my facebook page or tag me on instagram or twitter, so I can see. It totally makes my day. 😊
Happy Holidays and Happy Making!


More Macrame Projects
• Simple Macrame Plant Hanger
• Dip Dye Macrame Wall Hanging
• Simple Modern Fall Hoop Wreath


Let's Chit Chat!