Learn how to make your own easy acrylic fluid art pieces with this fun and simple paint pouring technique. This video tutorial will show you the basics of creating fluid art and hopefully inspire you to create your own marbled fluid acrylic masterpieces! This post has been made in partnership with DecoArt and may contain affiliate links, which help to support this site at no extra cost to you. Thanks!

I have another fun paint project to share with you all today, and I’m so excited to share it! If you haven’t tried making your own fluid art yet, then you need to! This technique is so much fun and such an EASY way to create beautiful art pieces.
Keep scrolling for step-by-step instructions (plus a video walkthrough) for creating your own DIY acrylic fluid art!
How to Create Simple Fluid Art

Paint pouring or fluid art is a simple technique for making gorgeous wall art, but it does require a few important supplies. Here’s everything you will need to make your own.
DIY Fluid Art Supplies:
- Blank Canvases (For this project I found three small hexagon canvases and grouped them together.)
- Plastic Gloves
- Plastic Cups
- Thumbtacks (Optional)
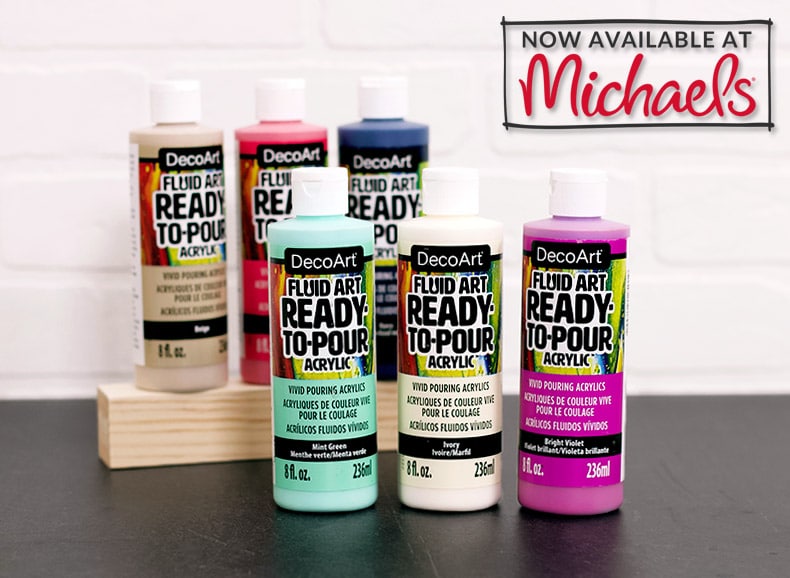
- DecoArt Clear Pouring Topcoat
- DecoArt Fluid Art Ready-to-Pour Acrylic (For these pieces I used White, Emerald Green, Mint Green, Navy, Sky Blue, and Beige.)
For this project, I used DecoArt Fluid Art Ready-to-Pour Acrylic, which is truly the easiest way to make gorgeous fluid art. This year DecoArt added even more colors to their Ready-to-Pour line, making it super easy to expand your fluid art color palette. You can now grab these vivid paints from Michaels (Order online or try out their new Curbside Pickup option!)
You can see my whole process of creating this little fluid art triptych in the video below. (You may need to turn off your ad blocker if the video is not showing below.) If you prefer written instructions, just keep scrolling. 🙂
Fluid Art Step One. Prepare Workspace and Canvases.
Making your own fluid art is so much fun, but it can also be really messy! To keep all your drips and pours contained, take a few minutes to prepare your workspace and your canvases before starting.
First, cover your table or work surface with some kind of heavy duty cover. A doubled up plastic tablecloth or a painter’s drop cloth would work well for this. Make sure you also have your plastic gloves and cups close by.
If you like, you can tape off the back of the canvas to keep it clean. Finally, you need some way to keep your canvas up off of the table to allow the paint to drip off. You can either place one or more plastic cups underneath the canvas or you can stick thumbtacks into the wooden frame on the back of the canvas, which is what I did for this project.
Fluid Art Step Two. Pour White Paint on Edges of Canvases.
This step is optional, but for my pieces, I wanted the marbled fluid art look to be contained to the middle of the canvas. To create that effect, I started off by pouring white paint on the edges of each canvas. Because DecoArt Fluid Art Ready-To-Pour comes pre-mixed, you can pour straight from the bottle directly onto the canvas.

Next, with your gloves on, pick up the canvases and tilt them to encourage the paint to drip over the edge of the canvas.
Fluid Art Step Three: Add Paint to Cup, Pour, and Tilt.
Then, grab a plastic cup and pour in layers of colored Fluid Art Ready-to-Pour. I started with Emerald Green and then layered on Mint Green, Beige, White, Navy, and Sky Blue. (Again, you do not need to add any pouring medium. Fluid Art Ready-to-Pour is ready to go straight from the bottle!)
Then simply pour the paint over the blank portions of your canvases. If you need more paint, you can add more layered paint to a cup and pour from there OR just squirt on more drops and lines of paint directly from the bottle.
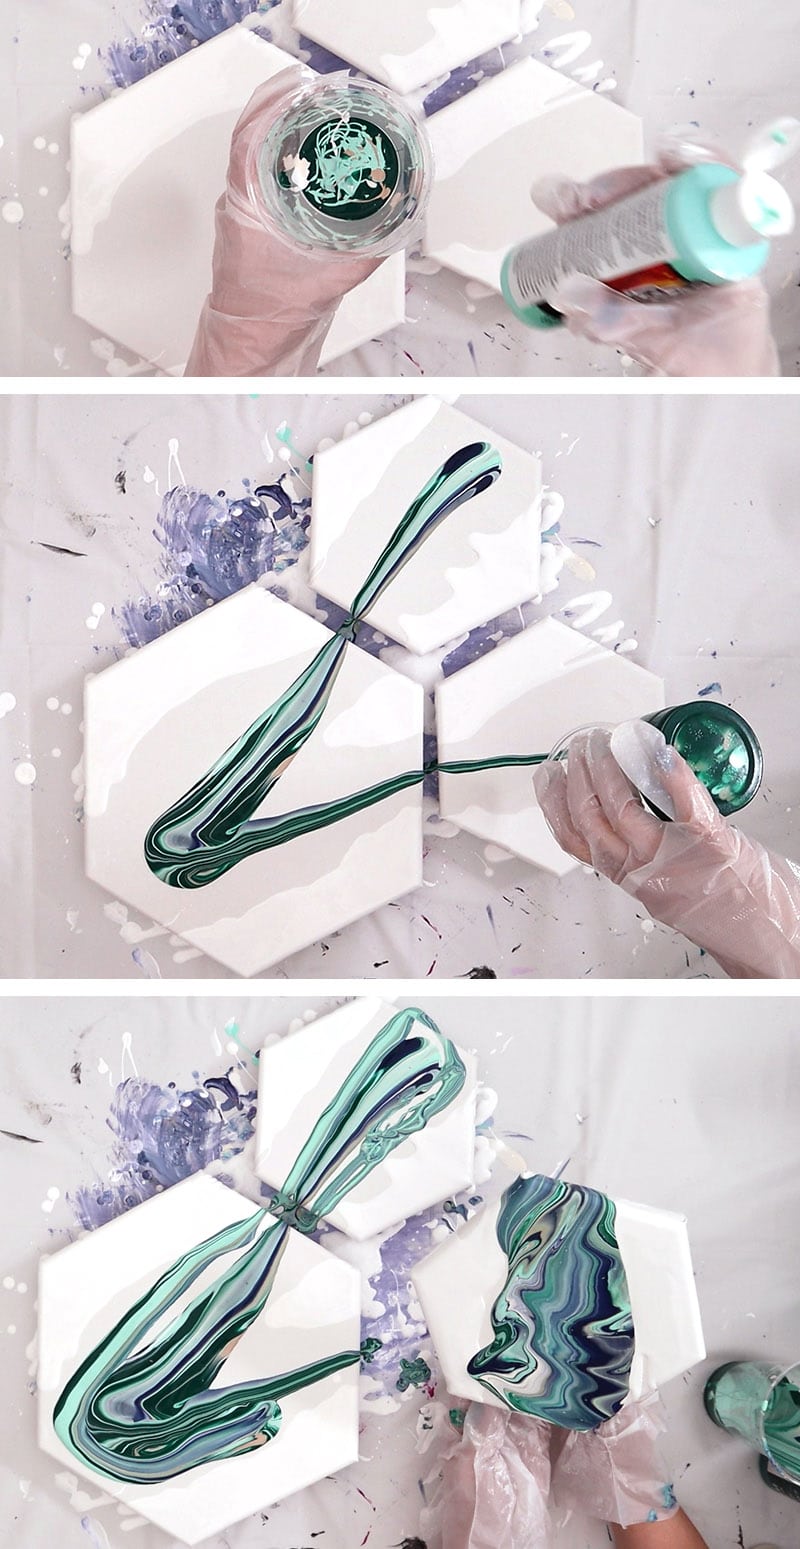
Then, with your gloves on, carefully lift the canvases and slowly tilt and turn them to encourage the paint to flow to fill the empty space and to drip off the uncovered canvas edges.
When you are happy with the coverage, leave the canvases to dry.
Fluid Art Step Four: Cover with Topcoat.
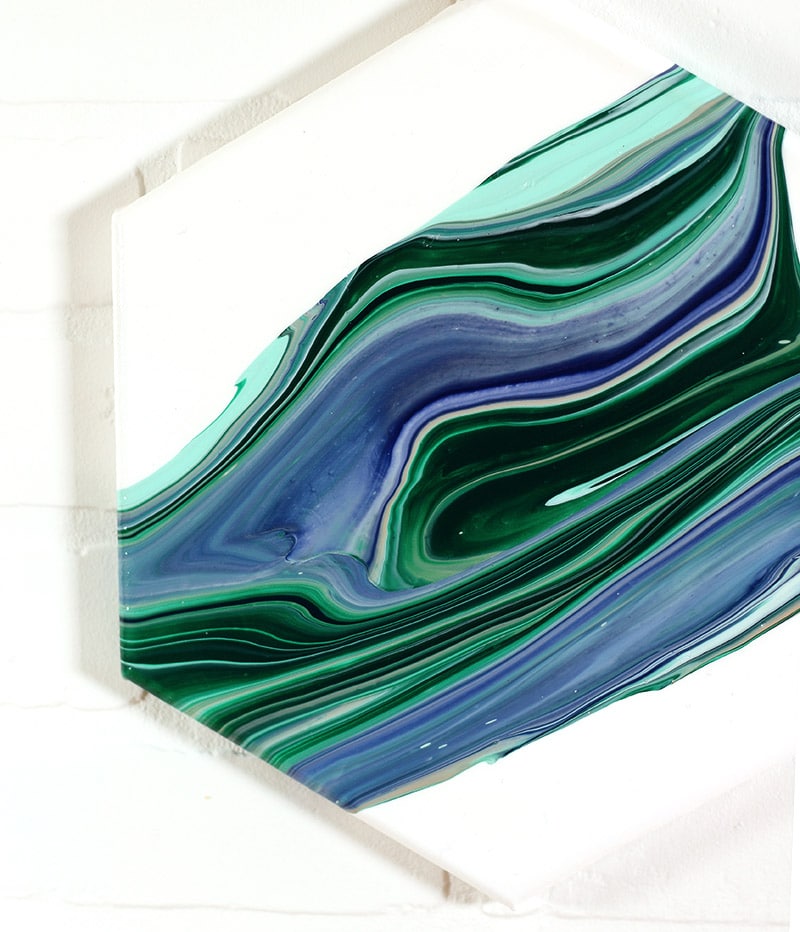
Finally, if you want to give your canvases a super glossy, lacquer-like finish, you can use the DecoArt Clear Pouring Topcoat. Simply pour the topcoat over your dry canvases. Then, tilt the canvases for even coverage and to drain off excess product.
The topcoat needs at least 24 hours to dry, but when it does your artwork will have a beautiful glossy finish!
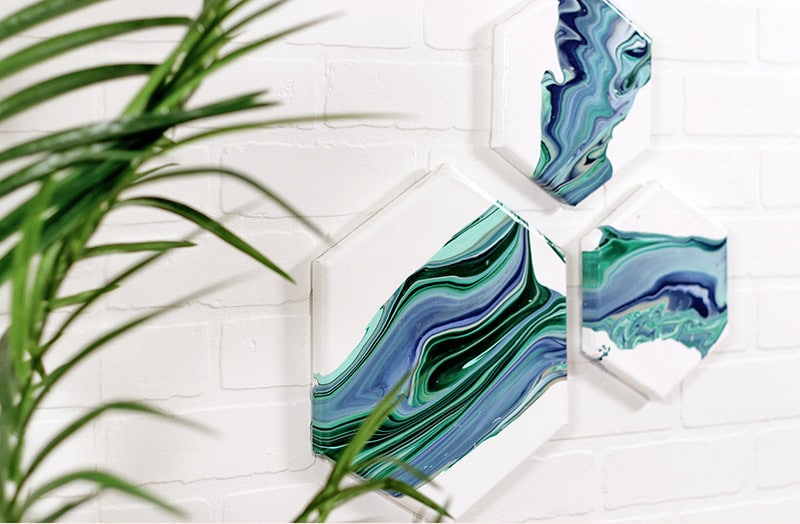
I just love the details of these pieces. So pretty!
If you haven’t tried making your own fluid art yet, I hope this post has inspired you to give it a try!
Until next time, Happy Making!


Comments + Project Love
Kathy says
I just love your new paint technique!!!! I am definitely going to give that a try!!! Thanks for sharing!!!
Alexis says
Thanks so much, Kathy!
MANO says
Bonjour ! J’aimerais essayer la méthode pouring sur une vasque dans une salle de bains. Cela est possible? Cela tiendrait il dans le temps? Y a t il un produit pour faire tenir la peinture ? Merci pour votre article très clair et ” rassurant” et font une envie folle de tenter l’aventure du pouring !