Learn How to Crochet the Shell Stitch with this step-by-step photo tutorial. This pretty stitch is simple to learn and great for many different types of crochet projects!

Hey there! Today I have another stitch tutorial to share with you all of one of my very favorite stitch patterns – the Shell Stitch.
I love this stitch because it creates so much pretty texture and it is simple to learn and remember. It was one of the first stitch patterns I learned when learning how to crochet, and I still use it all the time! While this stitch might look a bit complicated, it is really pretty simple to learn. It has definitely become one of my go-to stitches because of its simplicity and its lovely scalloped shape.
There are different versions of the shell stitch pattern, but the one I am teaching you today produces a nice tight fabric with lots of texture and not many holes. It’s perfect for cozy scarves or blankets and for washcloths that are as pretty as they are functional. I’m currently even working on a backpack that uses the shell stitch (can’t wait for you guys to see that! Coming soon).

So, if you have been wanting to learn how to crochet the shell stitch, you are in the right place! I am going to walk you through the stitch pattern and share a few tips for working with this stitch. You are going to be a shell stitch expert in no time!
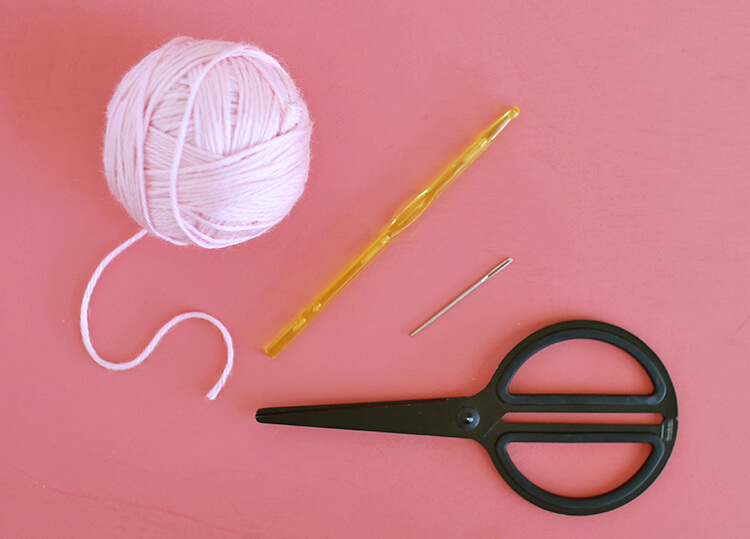
Crochet Shell Stitch Supplies:
- Yarn (For my sample swatch I used Caron Simply Soft and for my little shell scarf I used Wool Ease Thick & Quick)
- A Crochet Hook (I used an H (5.00 mm) hook for the swatch and an N (9.00 mm) hook for the scarf)
- Scissors
- Yarn Needle
How to Crochet the Shell Stitch
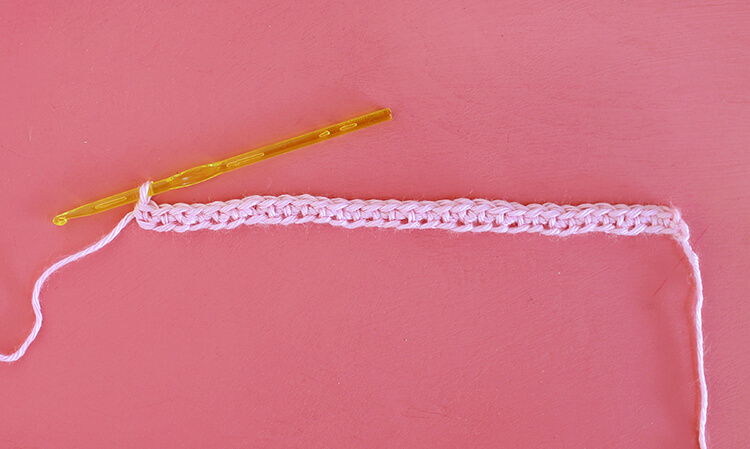
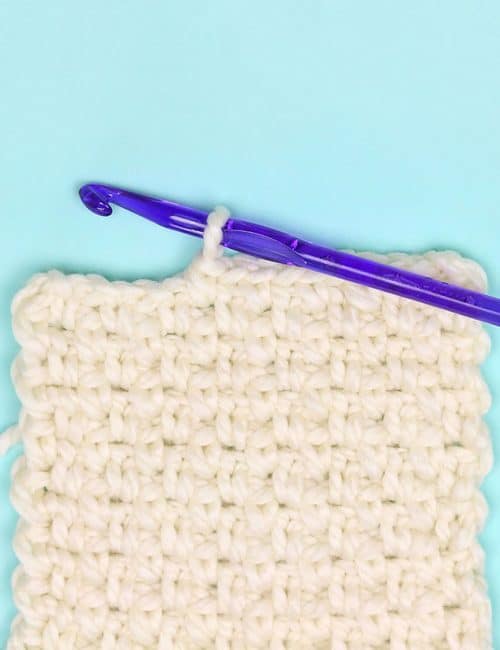
Row 1: To start off our little swatch, we will begin with a row of single crochet. You can either start with a chain and single crochet in each chain stitch or try out one of my favorite crochet tricks, the foundation single crochet stitch. (If you have never tried the foundation single crochet stitch, I highly recommend giving it a try! I have a video and photo tutorial to walk you through it right HERE.) Whichever method you choose, you need end up with a multiple of six stitches plus one. For this sample, I started with 31 single crochet stitches, which equals five shells across.
Row 2: Once we have our first single crochet row ready, we are all set to get going with our pattern!

- Start the second row by chaining one and working a single crochet in the same stitch.
- Next, skip two stitches, and work 5 double crochet stitches in the next stitch.
- Skip two stitches and work a single crochet in the next stitch. Your first shell is formed!
- Continue repeating the skip 2 stitches, work 5 double crochet in the next stitch, skip 2 stitches, single crochet in next stitch pattern until you reach the end of the row.

Ta-DA!
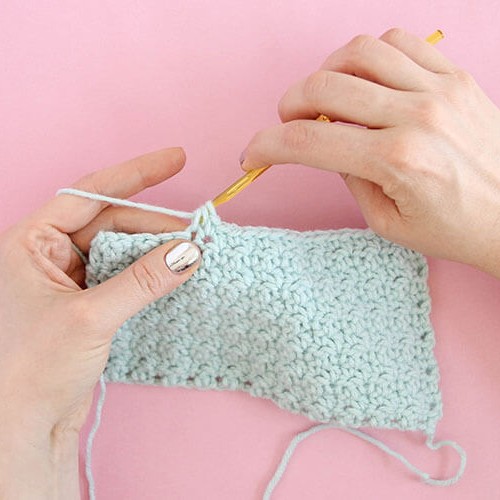
Row 3: Row 3 is worked very similar to Row 2 except we will start with a half shell instead of a full shell. This way the shells we are working this row will be positioned in between the shells from the previous row.
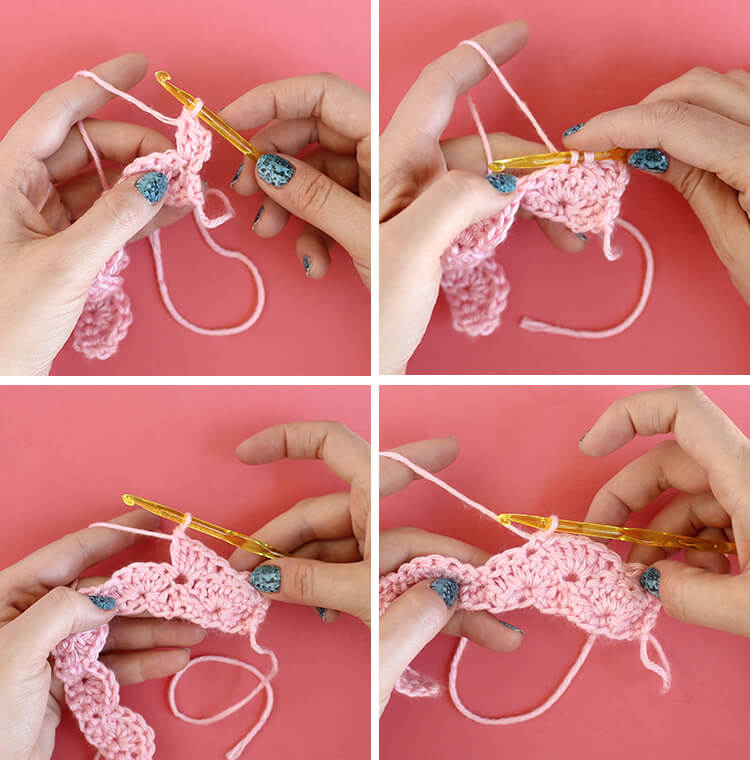
- Start by chaining 3 and working two double crochet in the same stitch
- Next, work a single crochet in the center double crochet of the first shell from the previous row. Your first half shell is formed!
- Work five double crochet in the next single crochet (it’s between the shells on the previous row) and then work a single crochet in the center double crochet of the next shell. (First full shell formed!)
- Repeat this pattern until you reach the end of the row.
- Finally, work 3 dc in the last single crochet stitch of the previous row.

For the remaining rows, you simply need to repeat rows 2 and 3 until your piece reaches the desired length. Easy Peasy!
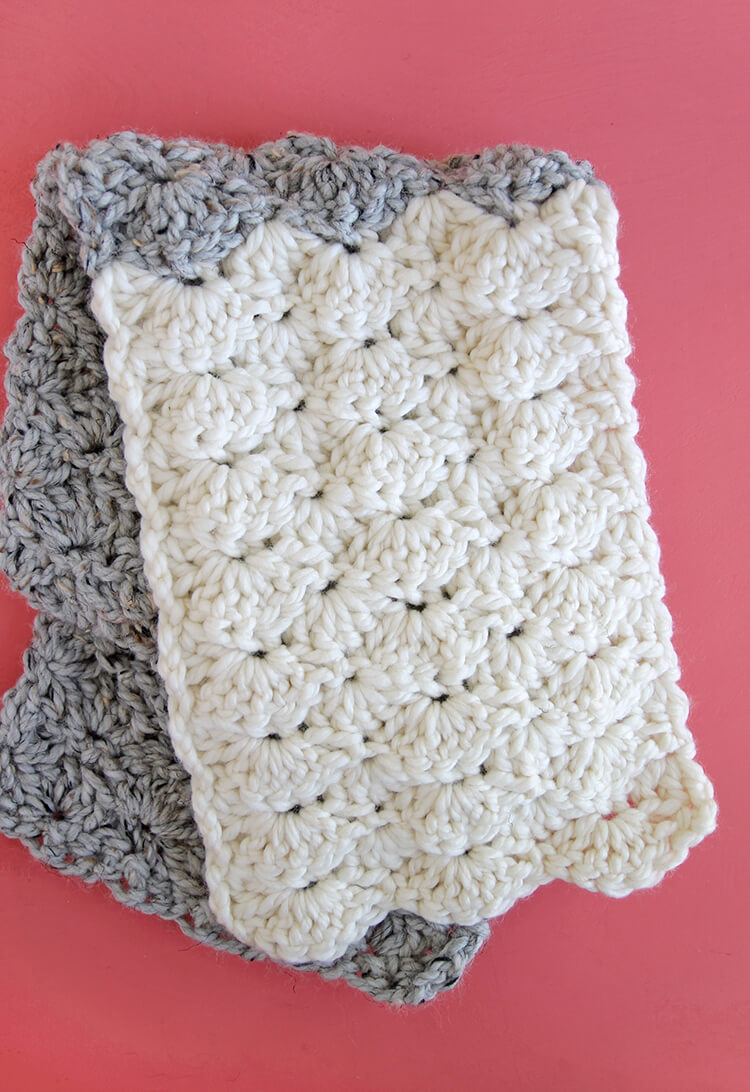
As I said before, the crochet shell stitch is one of my favorite stitch patterns. You can use it for so many things, but I especially love it for scarfs. I used a chunky yarn and a large hook to work up a pretty, chunky scarf in just a couple of hours. And there you have a perfect little gift all ready for the holiday season – no pattern required! I love projects like this because I can work on it mindlessly while watching TV or relaxing at night without having to constantly reference a pattern.

For this scarf, I started with 19 single crochet and my scarf was 3 shells across. I just kept on repeating the pattern until my scarf was as long as I wanted. It came together SO quickly, which I love, plus how cozy is the shell stitch in this chunky yarn? 😍
I hope this has helped you learn how to crochet the shell stitch. If you have any questions about the stitch, just leave it in the comments, and I will do my best to help!
If this tutorial was helpful for you and you make your own project using the shell stitch, I would LOVE to see it! Share your photos to my facebook page or tag me on instagram or twitter (@persialou).
Happy Making!

More Crochet Stitches

How to Crochet the Moss Stitch (Granite, Linen Stitch)
Learn how to crochet the moss stitch, a simple stitch that creates a beautifully textured fabric. Hello Hello Hello! In this post, I am
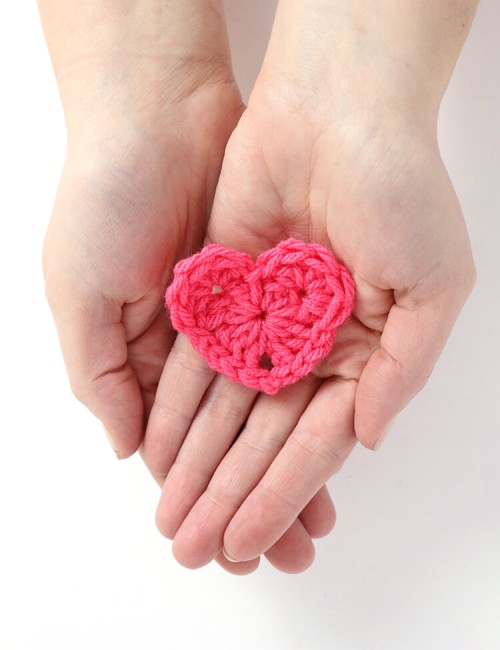
How to Crochet a Heart – Free Crochet Heart Pattern
Learn how to crochet a heart! This free crochet heart pattern and video tutorial is a simple way to make a cute

How to Crochet Lemon Peel Stitch
Learn how to do the Crochet Lemon Peel Stitch, a great basic stitch to have in your arsenal. The Lemon Peel Stitch


Comments + Project Love
Penny says
Hi Alexis,
love this pattern, has an original vintage yet modern look, would love to try it on a clutch project maybe!
The tutorial rocks, thanks for sharing!
Alexis says
Hi Penny! It would be beautiful on a clutch! Thanks so much for stopping by and commenting. 🙂
Gracie says
Hi I was just wondering if I can use 5his stitch for a cute lil’ headband if not which do you recommend
laure says
Hi Alexis,
J’adore tes créations !!! … et je vais tenter de refaire tes jolies crochets 🙂
Ton site est une réelle découverte de bonheur 😉
I love your créations they are so lovely !!! and I will try to do it by my self 🙂
Your website … what a great discovery !!!
Sorry for my English … I’m french 🙂
Alexis says
Hi Laure! Merci Beaucoup! Thank you so much for such a nice comment! 🙂
Karla says
Hi! I love this pattern and am near the end. How do I complete it?
Alexis says
Hi Karla! You can just finish off when you reach the end of one of the rows, if you like the shell edge, which is what I normally do. If you want a flat edge, you can crochet the five stitches between each shell bump together. To do that, you would work a single crochet into the center dc of each shell, then yarn over (yo), draw loop through next stitch (like you were starting a dc), then yo and draw through the first two loops, leaving two loops on the hook. You will repeat that four times until you have worked the first half of a dc through five stitches and you have six loops on your hook. Then you will yo, and draw through all six loops. Ch 1 and sc in the center dc of the next shell. If you have ever done the Catherine’s wheel stitch, this is kind of like that. I know the straight text can be a bit confusing. I hope that helps! I can try to put together a video or photo tutorial soon. Good luck!
Kelly says
This worked amazingly 🙂 I added a row of sc to it and it gave a similar edge to the fsc at the bottom. Thank you so much for the tutorials. Very nice and easy to follow. You rock!!
Cindy from California says
I am a “beginner” crocheter. I made this pattern for a baby blanket for my new granddaughter. It was super easy, but looked more complicated! I love it and will make more. I agree the pattern is very “mindless”.
Thanks so much for sharing! Very clear directions!
Alexis says
Yes! That is absolutely why I love it – it looks way more complicated than it is! 🙂 Thanks so much, Cindy!
Katie says
I swear I’m following your tutorial exactly, but my shell stitch scarf keeps turning out a triangle. I know I’m chaining, and I’m not missing stitches that I can tell. What could I possibly be doing wrong? 🙁
Eunice Flagler says
Can you use this shell pattern to make an afghan? I think the shell stitch is very pretty.
Alexis says
Yes! You could definitely make an afghan with this stitch. You could try a larger yarn and hook to make things go a bit more quickly. 🙂
Reanna says
I would like to do a king size blanket but I am confused about how to count my stitches for my start and figuring out how many I need in order to make the Shelia come out right. How many starting stitches do I need for a king size quilt? And how many shells would that make across? Please help!
Alexis says
Hi! To figure out that I would recommend starting with a little swatch using the hook and yarn you will be using for the blanket to determine your gauge. Once you have your swatch, you need to measure to determine how many shells you get per inch. A king sized blanket is usually about 106″ x 95″. Use that information to figure out how many shells you will need to crochet to get the width you want. For example, if you crochet one shell per inch, then you would want to start 95 shells across each row. Hope that helps!
Michelle says
I love the single crochet row to start! I like how clean it looks versus starting the shells in a chain.
Lorraine says
Is the shell stitch the same as a puff stitch?
Alexis says
Hi Lorraine! No, usually with a puff stitch you only work half of each double crochet stitch leaving loops on your hook, then you finish off all of the loops at the same time. I need to do a puff stitch post!
Paula says
I have only been crocheting a little over a year. I wanted to master a new stitch this year. Your instructions had me working the shell stitch in just a few hours! Thank you!
Alexis says
Oh yay! Love to hear that! Thanks so much for leaving me a sweet little comment, Paula! 🙂
Minnie Sasso says
Is It possible to speak to someone by telephone. Working a blanket doing the shell stitch
First row 1 sc then 5 dc then 1 sc until the end of 1st row with 5 dc and 1 sc.
2nd row 3 dc 1 sc until end of row with 3 dc
Continue with pattern until end of rows.
The problem is that the blanket is getting wider as I go along. Your help would be very much appreciated. Thank you Minnie Sasso
Mary says
Are you remebering to skip 2 stitches between the shells and the single crochet? When I first started, I always forget the skips.
Ruth June Konopka says
I crocheted a lovely afghan following your tutorial on you tube…as well as reading the beautifully pictured instructions…so I searched and found your web site …so I was able to print out the instructions because I intend to crochet at least two more afghans in this beautiful shell stitch.
Thank you Alexis for sharing your expertise…I keep wanting to learn more of these stitches…you make it so easy.
Alexis says
Thanks so much for your sweet comment! 🙂
Marissa says
Do you have a video tutorial for this stitch? I think I’m messing up between the end of row 2 and beginning of row 3. I followed your video on the FSC and it was so helpful!
Layne says
Thank you for a well written pattern and good pictures!!
I tried two other shell stitch
patterns first and got very frustrated. After trying yours, I
can see why. They were poorly written. Glad I kept looking!
Leta says
I’m having the same problem
Tracy says
I had the same experience. This was so simple! Thank you for the tutorial, I will be looking at more for sure.
Melissa says
Hi! I love this pattern and would like to make it into a scarf, but I think I might have messed up the first row. I ended up with 5 shells and then 2 extra stitches at the end. Is there a video I can watch so I can see how to do it step by step?
Melissa says
Is it 31 fsc + ch 1?
Or
30 fsc + ch 1?
Marcia says
I would like to know how to increase doing the shell stitch.
Thank you
Rhonda Woods says
I love this shell pattern. I’m making a baby blanket for my new grandson and I would like to know the easiest way to finish around the edge of the whole blanket. Would like a scalloped/shell edge if possible. I have a hard time making it look nice and even on the sides of the blanket.
Jere says
Love the FSC stitch. I will be such a time and frustration saver. Question: When making the shell stitch into a large afghan do I use multiples of 4 or 5 to figure out how wide I’m going to make it?
Carole Berry says
Where do I go to print this beginner shell pattern?
Carol Mcvicker says
Hi, Loved your instructions and pictures. My question is how many chains to start with for a medium baby blanket or what is the repeat pattern to determine the number of starter chains. Thank you very much.
susan weiss says
Loved learning the shell stitch. I have 2 grandbabies coming this year and they will each be getting a shell stitch afghan.
Also, love ,love love the foundation single crochet. So easy and looks beautiful!!
Thank you!!
Susan
Nell says
Hi! Would it be possible to crochet this stitch in the round, and if so, would anything be different about it? How would you do that?
Rachel Lunceford says
Hi. Like your suggestion on the FSC. wondering if I’m doing something wrong on your shell stitch. It seems on the 3rd row going from chain 3 and doing 2 DC in same stitch there is a huge gap/ space between end of the stitch to the middle of previous rows middle shell stitch (sc).
Jacqui says
Hey Alexis, I’ve been working one a pattern using that beautiful shell stitch. However, I keep getting large holes in the beginning of my shell between the single crochet and shell stitch, in that chain two space. I don’t know if I’m stitching too tight or too loose. Either way, I’ve been working on trying to fix it for days and struggling like crazy.
Please help, Jacqui
Debby Lyon says
How do you end and begin rows of a shell stitch?
Elvira Rodriguez says
I need to make a lap blanket for my niece’s 40th B-day. I have muave for main body n wine for in-between or edging- but I need a pretty stitch. What stitch do you recommend ?? Help 🤔🤔