Learn how to make your own simple DIY macrame wall hanging! This pretty wall hanging uses just a couple of simple macrame knots and a fun dip dye technique to create a wall hanging that adds instant texture and color to any room. I originally shared this post at Crafts Unleashed, and this post may contain affiliate links, which help to support this site.

Have you jumped on the macrame trend yet? I am fully on board! I just love the boho texture that a macrame piece can bring to a room. I have already added several DIY macrame plant hangers to my home, but it definitely felt like time to add a wall hanging to the mix.
For this project, I decided to keep things really simple and use really just one knot type to create my design. Then, I added some color with an easy dip dye, and I’m really happy with the way it turned out. I think it has a more modern vibe. What do you think?

If you have wanted to learn more about how to make your own macrame wall hanging then you are in the right place! I have a step-by-step photo tutorial to help you make your own wall hanging plus a quick video explaining the macrame square knot.
DIY Macrame Wall Hanging Supplies:
- 3 mm Cotton Macrame Cord (This is what I used, but this is another good option)
- 12″ Wooden Dowel Rod
- Scissors
- Liquid Fabric Dye
- Plastic or Metal Container
- Plastic Gloves
- Salt
- Liquid Dish Soap
How to Make a Macrame Wall Hanging (with dip dying!)
I wanted to do a super simple macrame wall hanging, so I really only used two knots – the larks head knot and the square knot. The larks head knot is simply the way to attach the cords to your dowel, and I have a full video tutorial for the square knot below, so you should have no problem making your own macrame wall hanging even if you are new to macrame. Okay, let’s get started!
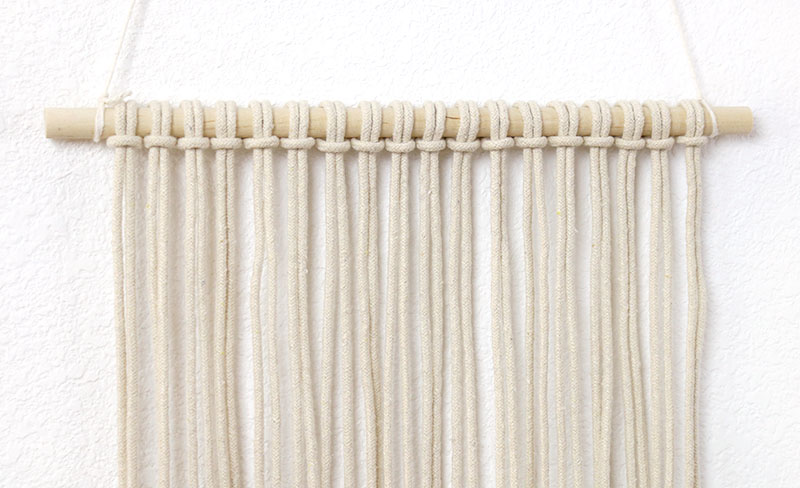
1. Attach Cord to Dowel
Start by cutting an even number of cord lengths [I used 18 pieces that were each about 10 feet (3 meters) long].
Next, attach each cord to the dowel using a larks head knot. To do this, fold the cord in half, place the folded end over and behind the dowel, and finally, pull the tails through the loop as shown in the image below. (You can also see me make this knot in the video a bit further down.)

This is a common way of attaching your macrame cord to your starting dowel or ring. Attach all of your cords to the dowel rod using this method.
2. Make Square Knots
The rest of this wall hanging is made using just one type of macrame knot – the square knot. To lean how to make a square knot, you can watch the video below or scroll a bit further for the written tutorial.
How to Make a Macrame Square Knot
To make a square knot, you need four strands. The two outside strands will be used to tie the knot around the two middle strands.
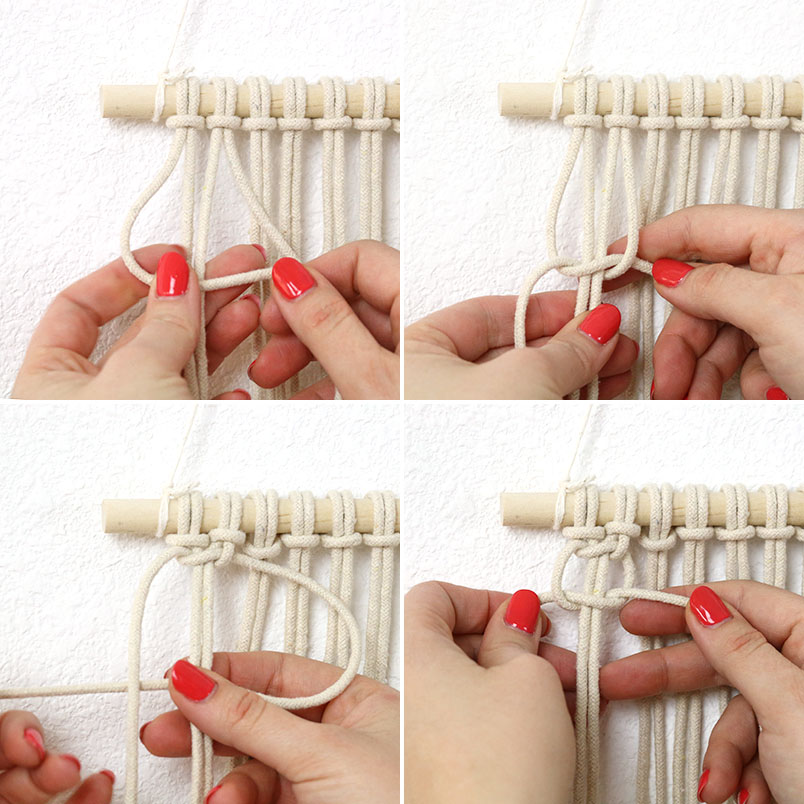
To make a square knot:
- Cross the left hand strand over the two middle strands.
- Pass the right hand strand over the left hand strand, under the two middle strands, and up through the loop formed by the left strand. Pull to tighten.
- Repeat this process on the opposite side: Cross the right hand strand over the two middle strands.
- Pass the left hand strand over the the right hand strand, under the two middle strands, and up through the loop formed by the right strand. Pull to tighten.
For the first row, make square knots all the way across the rod. Starting with 18 cords, I made nine total square knots in my first row.
For the second row, you will make your square knots using two strands each from two adjacent square knots (see the image below). Now, the strands that were center strands in the previous row will be outside strands for this row. Alternating rows this way gives you a nice mesh pattern in the final piece.

Make a knot between each of the square knots of the previous row. For this second row of knots, two strands on each side will not be used. I had 8 total square knots in my second row.
For Row 3, again you will make square knots between the knots of the previous row (9 knots total). The strands on the edges that were not using in the previous row, will be used again on this row (see image below).

Continue making knots in this pattern until your piece is as long as you want it to be. I worked 23 total rows for a piece that was about 9 inches long not including the dowel or fringe.
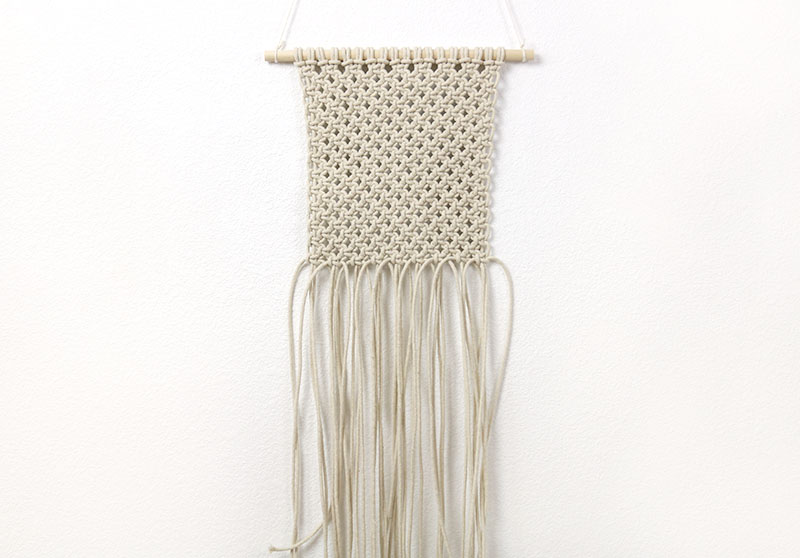
Finally, use a pair of scissors to trim up and even out your fringe. You can cut the tails evenly as I did or go for a point, steps, or a more organic look.
If you want to keep your piece in its natural cotton color, then you are done at this point. Yay! To add a punch of color as I did, let’s bust out that dye!
3. Dip Dye (Optional)
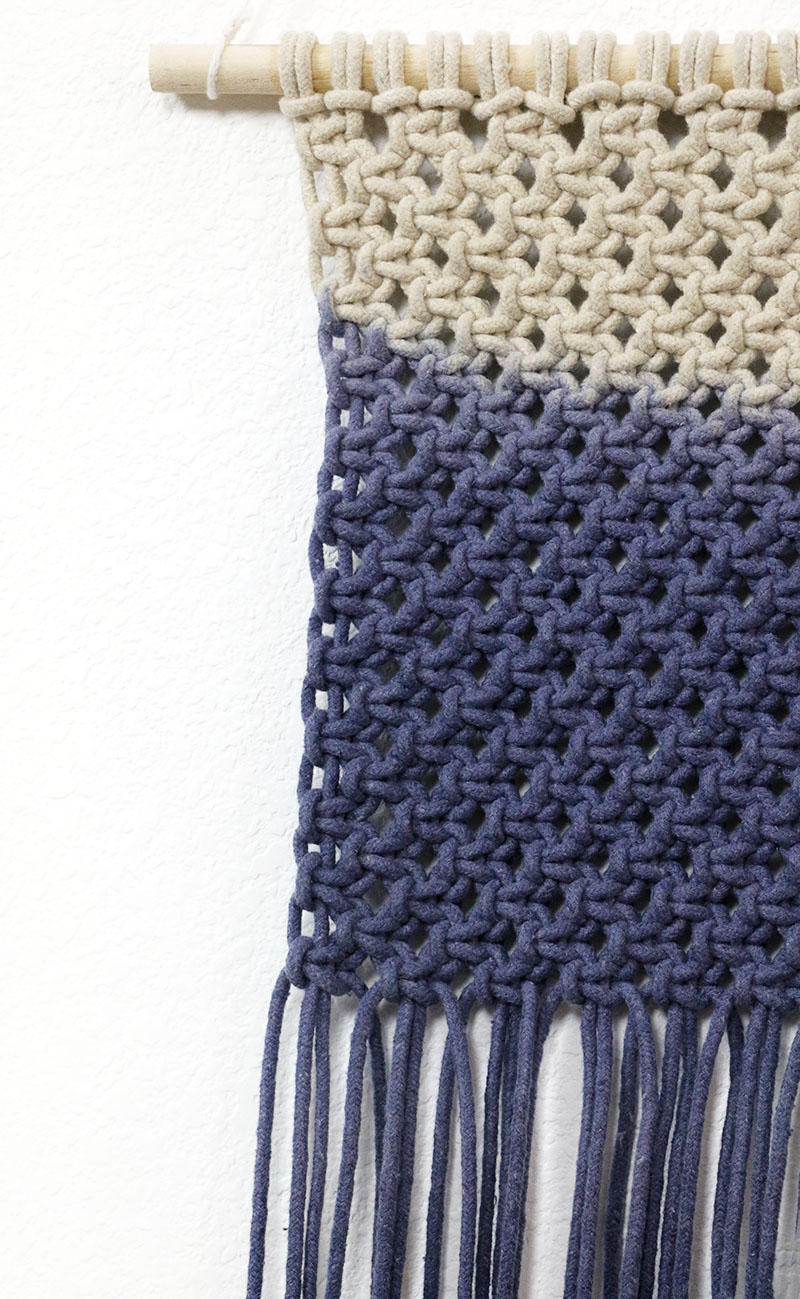
I really liked the texture of my piece at this point, but because it was so simple, I thought adding a little color with some dye would be fun. I decided to go for an ombre dip-dyed look, and it was really easy to achieve if you want to try it too!
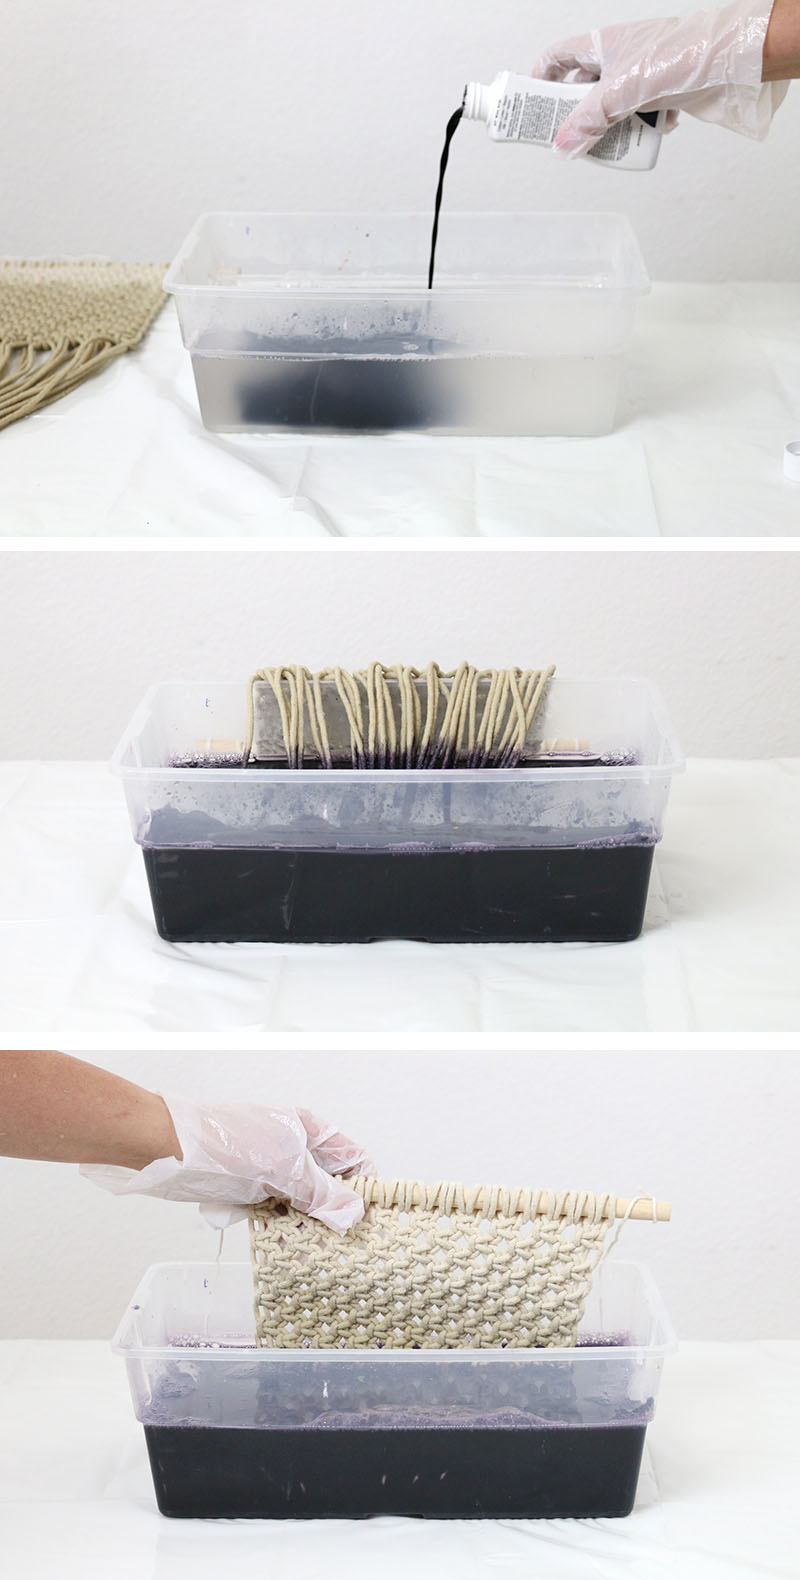
- First, fill a container with hot water. I followed the dye label’s recommendation to add a cup of salt and a teaspoon of dish detergent for dying cotton.
- Next, pour in the liquid dye (I used about half of the bottle) and mix gently. (Don’t forget to wear gloves to protect your hands!)
- Get your macrame wet before placing it in the dye bath.
- Then add it to the dye bath. I started by placing just the bottom third or so in for about ten minutes and then I moved a bit more down for another five or so minutes. Finally, I just quickly dipped the last couple of inches in briefly to get the lightest color at the top.
- Finally, rinse the dyed piece under running cool water until it runs clear.
And that’s it! Once your macrame wall hanging has dried, it is all ready to hang!

Love that texture and color together!

What do you think? Would you give this little macrame wall hanging a try? If you are a crocheter interested in wall hangings, you might want to check out my crochet wall hanging pattern here.
Until next time, Happy Making!

[the_grid name=”Craft Projects Footer”]


