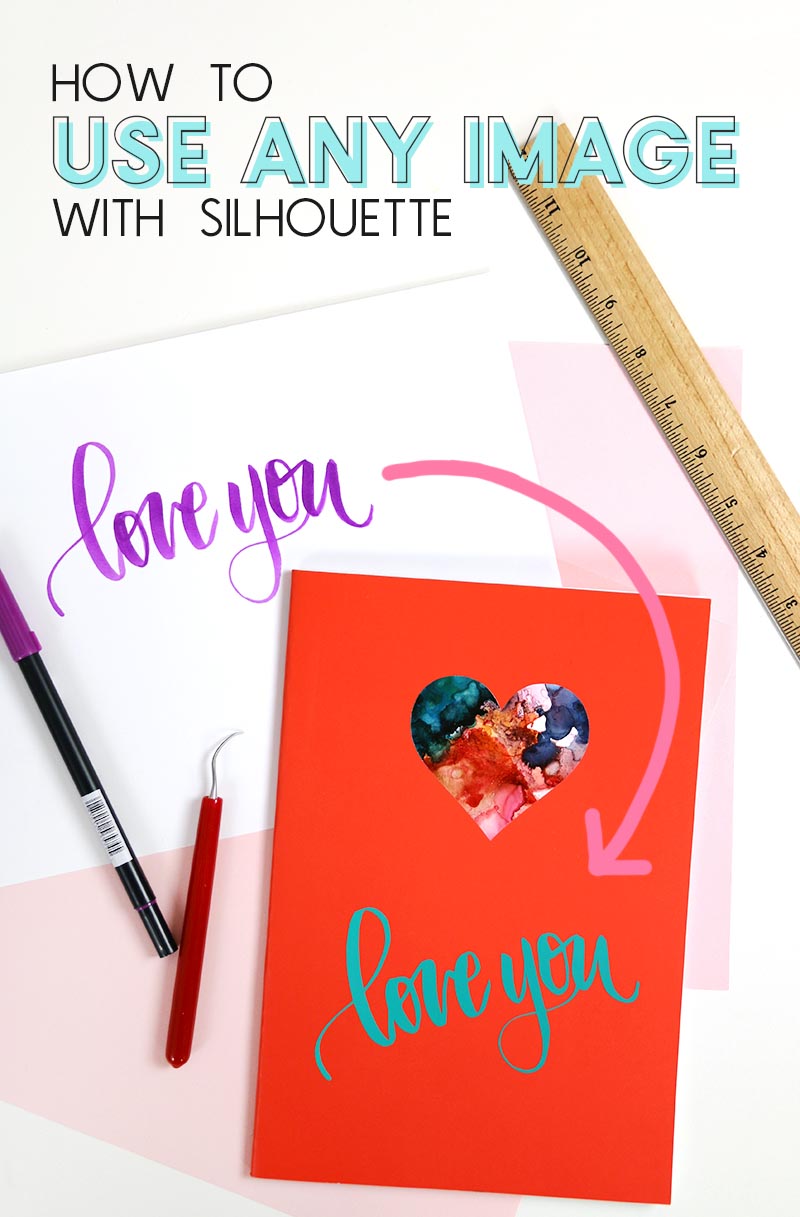
Learn how to use any image with your Silhouette! You can cut all kinds of files with your Silhouette Cameo or Portrait, and I will walk you through the process of using each file type with both written and video tutorials. This post may contain affiliate links, which help to support this site.
When I got my first Silhouette years ago, the thing I was most excited about was the ability I had to cut anything I wanted – absolutely any image! It was amazing to me, and it still is probably my favorite thing about working with this machine. You can do so much with it, but of course, you first have to learn how!
The Silhouette (Cameo, Portrait, and Curio) can work with a lot of different types of images and different file types, but the steps for working with each one are a little different. I wrote this post to help explain the different file types you can use with the Silhouette Studio software and to share some tips and tricks for working with each one.
I also made a video to walk you through the whole process too. You can watch it below or check out the written tutorial after that. (This video is part of the Silhouette vs. Cricut series with my friend Colleen of Lemon Thistle, so if you are a Cricut user, you can learn all about working with any image in Cricut from her video right HERE!)
How to Use Any Image with your Silhouette
So, let’s talk about uploading your own images into the Silhouette software. These could be images you made yourself, things you have found online, or even hand drawn images that you want to turn into vinyl decals or cut out of some other material.
First, lets talk about the file types you can use with the Silhouette Studio software.
File Types You Can Use with Silhouette Studio
There are a few different versions of the Silhouette Studio software, and with each upgrade to the software you get more features and can open more file types. Let’s start off with the basic edition of the software that comes for free when you purchase a machine.
File Types You Can Open with the Basic Edition:
- .STUDIO / .STUDIO3 – Studio files are the proprietary file type used by the Silhouette Studio software. These files are ready to cut in the software and are what you will find in the Silhouette Design Store.
- .DXF – Read more about DXF files below.
- .JPG / .JPEG
- .PNG
- .BMP
The last three file types on that list are image files that are made up of pixels, which means they will lose some of their definition and shape if scaled up too much. To cut them with the Silhouette, you will first have to trace them in the software, but that is easy to do, so don’t fret!
DXF files with Silhouette Studio Basic Edition
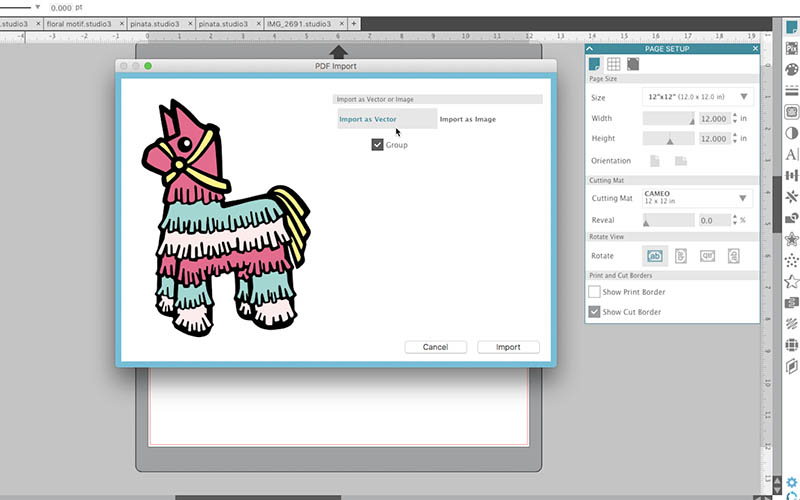
DXF files are actually a great option for Silhouette users who have only the Basic edition of the software. Like SVG files (read more about those below), DXF files already contains the cut lines for your design, so they do not need to be traced like the image files we just discussed (JPG, PNG, BMP). This is what the DXF piñata looks like when opened with Silhouette Studio:

As you can see, you lose the colors that you get with SVG files, but you still have the cut lines and can use the fill tool (the paint palette icon) to add colors to the image if you like. So, if you are using the Basic Edition of the software, DXF files are a great option. Where can you get DXF files?? Well, I always include DXF files with the cut files you can purchase in my shop and So Fontsy cut files also will always include DXF files, so those are some great options to check out.
The piñata cut file design I used in my examples is available in my shop.
File Types You Can Open with the Designer Edition:
- All of the above listed file types
- .SVG
SVG files are vector images, which means they can be scaled up or down without losing their shape or definition. SVG files also already have the cut lines embedded into the file. They are super easy to work with and are the most common cut file type.
PDF files can be imported as vectors, which means they can work similarly to the way SVGs work. (This may depend on how the PDF was created.)
I almost always recommend that people get the Designer Edition of the software. I think the small extra cost is worth it if only for the ability to open SVG files. Plus, you can almost always find it for a good price on Amazon (Although please note that if you buy it from Amazon, you are buying a card that will be mailed to you. To get instant access to the software, you will need to buy it through Silhouette directly. You can use the code 10OFF for 10% off your purchase.)
There are higher levels of the software available too that allow you to work with even more file types (the Designer Edition Plus allows you to open embroidery files and the Business Edition allows you to open Illustrator and Corel Draw files), but I only recommend those if you work with embroidery a lot or if you are an experienced designer.
One big file-related bonus to the Business Edition is that it allows you to export SVG, PDF, and JPG files. That basically means that you can design in Studio and then export those files to share outside of Studio.
How to Use JPEG, PNG, or BMP Files with Silhouette
Now that you know what file types you can use with the Silhouette Studio software, let’s talk about how to use the different file types. First, let’s chat image files such as JPEGs, PNGs, and BMPs. As I mentioned before these are simple image files made up of pixels that do not contain cut lines. To turn these files into cuttable images, you first need to use the trace tool to tell the software where to cut.
How to Trace in Silhouette

- First, open the trace panel by clicking on the trace icon (I think it kind of looks a butterfly.)
- Next, click “Select Trace Area” and drag a rectangle around your image.
- Adjust the threshold until the image is filled with yellow.
- Click on Trace or Trace Outer Edge to create the cut lines around the yellow filled sections.
P.S. The floral designs in the images above are free floral cut files available on my site right HERE.
How to Turn Your Drawings or Hand Writing into Cut Files in Silhouette
Now that you know how to trace in Silhouette, you can turn any image you have, including your own hand drawn images and hand writing into cut files!

All that you need to do is draw or write whatever you want to cut, take a picture of that design, upload the image into the software, and use the trace tool to turn it into a design you can cut! I have done this a few times with my kids’ artwork and it makes for great gifts.
How to Use SVG Files with Silhouette
Unlike JPEGs and PNGs, SVG files come into the Silhouette software ready to cut. All you need to do to work with an SVG file in the Silhouette Studio software is open up the file by clicking on the file folder icon in the upper left corner of the software or by clicking on “File > Open.” (Remember that you must have the Designer Edition of the software or higher to be able to open SVG files!)
Tips for working with SVG Files in Silhouette
- You may need to ungroup. Some designs may need to be ungrouped if you only want to cut one part of the design at a time. Select the design and then click “Object > Ungroup” to ungroup.
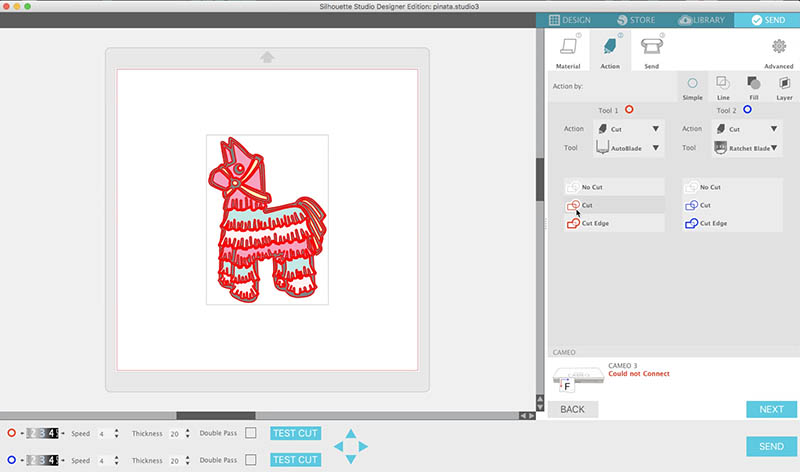
- If you send an SVG design to cut, and nothing happens, you probably need to turn on your cut lines. I have done this so many times! Most SVG files do not open with the cut lines already turned on. They are there, but you have to tell the software to use them! To make sure the lines are set to cut, select the design and then click on “Cut” in the Action section of the Send tab. (See image below)
- You can easily change the colors of different portions of a SVG file to make it easy to cut by color. Simply click on the section you want to change the color of (remember, you may have to ungroup it first), and then choose a color from the fill panel. This post walks you through all the steps and benefits of cutting by color in the Silhouette software.
Where to GET SVG Files
You can buy SVG files in lots of places or you can design your own using a design software such as Adobe Illustrator. If you are looking for SVG cut files, then be sure to check out the free cut files I have here on the blog. I also have a SVG shop and participate in a monthly cut file bundle that you may want to check out. Finally, I am also regularly pinning awesome cut files to my Silhouette board here.
I hope all of that helps you understand how to cut your own images and designs in the Silhouette Studio software. If you have any questions about the types of files you can use with your Silhouette or how to use them, let me know if the comments below. 🙂
Until next time, Happy Making!

Check out more Silhouette posts below:
[the_grid name=”Silhouette Crafts Footer”]


Comments + Project Love
tiffany buchanan says
I am totally new to all this but determined to figure this out lol
I have a Halloween hat the entire hat is black however the front little centerpiece buckle is neon green
When I go cut it has the cut lines around the hat for the buckle piece or to cut that separate and exclude the hat cut lines – I am just guessing and of course I probably picked the hardest file to start with. The legs will be even harder – I wish there was a way to attach a picture to this
Alexis says
What kind of file are you using? Are you tracing an image file or are you using an SVG?
Deanna says
I have the designer edition plus and I have a Mac. My question is if I copy a picture I find and upload to silhouette then I trace it and cut out just the image, how do I turn that picture into a svg file to design a shirt for?
Alexis says
Hi Deanna! In order to export SVG files from Silhouette Studio, you have to have the Business Edition of the software or higher. Does that answer your question?
Kelly Milowski says
I am totally new and not good with electronics. If I want to use my own image, after I take a pic of it, I don’t know how to upload it to the software. Can you tell me step by baby step plz?
Dawnn says
My sister bought a Silhouette a few years ago thinking one of her kids would set it up and learn how to use it – never happened! Anyway, I have a project in mind and, before I try to “borrow” it and figure it out, I need to know if what I want to do is even possible. I have several photographic figures that have been cut out from the background in PhotoShop. I want to make photographic prints (I own a professional digital studio and printers) and cut out the figures to use in a pop-up style card/book. Not asking for directions, just need to know if I’ll be able to program the machine to cut out the figures after I print them. Thanks!
Jennifer Hill says
Thanks for helping us helpless ones!Yesterday went great. No problems. Today my cutter opens in 3D with a box around it. There’s no box in the picture! Help!
shawna Mize says
I use to save photos and open them in silhouette and trace but I haven’t done it in a while and I tried to do it last night but says file may be corrupt. Any way to fix this? I hope so cause that was my favorite. Part also.
Alexis says
Check to see if you have the latest version of Silhouette Studio installed. That often fixes software problems for me. Good luck!
Ashley says
This information is EXACTLY what I needed! Thank you so much for sharing your knowledge! i kept trying to get my cameo to cut an image i imported but it would only cut my cut box and leave the inside blank!! trial by error but boy was i getting frustrated
Cori Hede says
I’m totally new and have the cricut air 2. Is it possible to import cricut images into the Silhouette software?
Alexis says
Hi Cori! Cricut machines mostly use SVG and PNG files. You can open these file types with the Silhouette Studio software, but you do need the Designer Edition upgrade to open SVGs in the Silhouette Studio software. Hope that helps!
Sophia Nguyen says
Hi! I’m thinking about purchasing a silhouette but I have seen some people say that you have to pay to upload your own images. I own a sticker business and already have my designs ready to go, I just need an easy cutting machine. So do you need to pay to upload your own images? Thank you!
Alexis says
There is no cost to upload your own images to the Silhouette software. If you want to use SVG images, you will need to purchase a paid version of the software (as I explain in the post), but that is a one time fee. Hope that helps!
Jacqueline Young says
Hello. I want to take a picture in my phone camera and put it on a mug with sublimation. I have Silhouette basic edition. It seems like I need to convert the picture into PNG and I don’t know how to do that. Can you help please?
jane inscore says
I have a question. I am new to this. A friend sent an image to me through email to use for shirts for church ministry.
I saved the file, a file, and I even was able to enter the design into my Silhouette in order to cut it. However, although it is bright on my design page, once I hit Send, it is as if the machine does not recognize it, and and all I get is cuts around the perimeter of the page. Help. Please. My brain is on overload at this point. Thank you!