Make your own cute heart tab envelopes and heart top boxes easily using my new SVG cut files with your Silhouette, Cricut, or other cutting machine. These sweet envelopes and boxes are the perfect way to package love notes and small treats to your loved ones this Valentine’s Day or any day of the year! This post may contain affiliate links, which help to support this web site at no extra cost to you. Thanks!

Today I am excited to share some new SVG cut file designs with you all! These designs are perfect for Valentine’s Day or any time you want to spread the love.
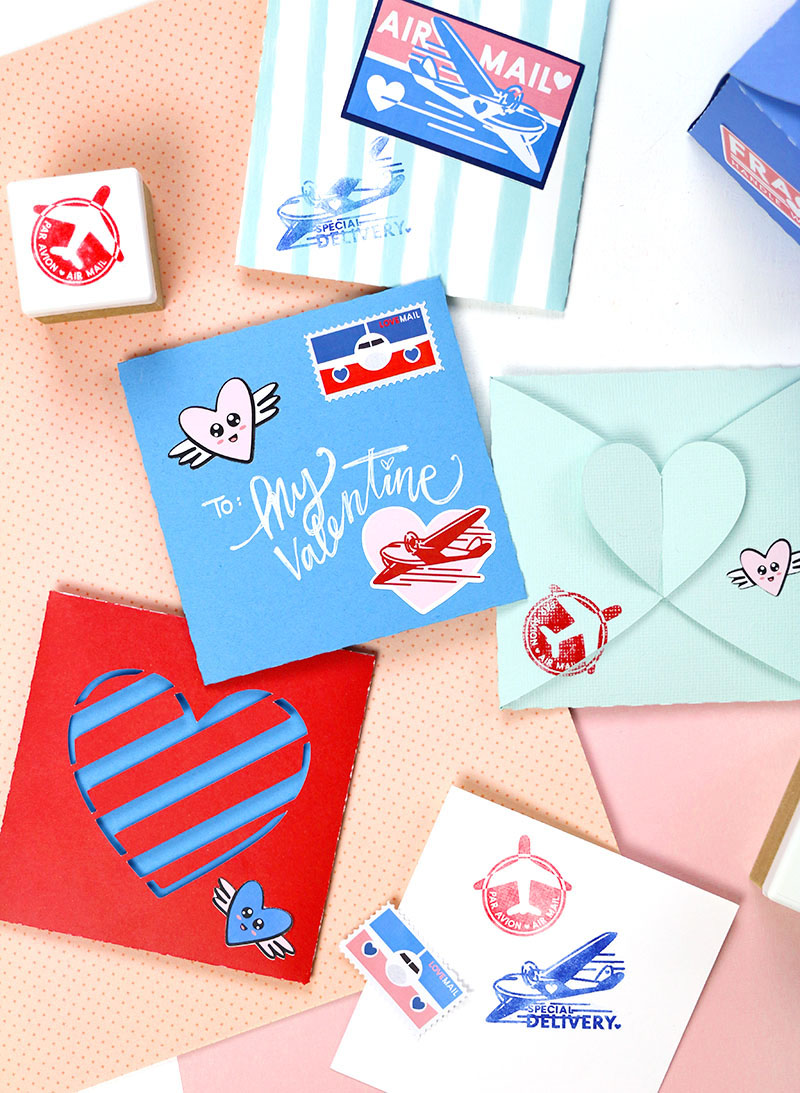
I have put all of these designs together into the Love Notes cut file bundle, which includes envelopes, treat boxes, as well as designs perfect for making stickers and stamps to decorate your envelopes and boxes!
In this post, I will walk you through how I made these cute little boxes and envelopes. The envelopes and boxes all have self-locking heart-shaped tabs that keep them closed and looking cute!
The cut file bundles comes with SVG, PNG, and DXF files, so you should be able to use them with any cutting machine you have. Plus, the files include perforation lines to make folding and assembly super easy.
Ready to learn how to put together these little paper cuties? (Spoiler alert: it’s really dang easy.) Let’s do this!
How to Make Heart Tab Envelopes

These little heart tab envelopes really couldn’t be any easier to assemble!
The cut files make little square envelopes with locking heart tabs to keep them closed. The design is sized to make envelopes that are four inches square (about 10 cm), but you can adjust the size of the envelopes by simply scaling all of the components together. The file comes in two variations, one with a plain envelope front, and one with a striped heart cut out.
DIY Heart Tab Envelope Supplies:
- Colorful Card stock or Paper (For a 4″ envelope, you will need at least an 8″ x 8″ piece of paper.)
- Silhouette, Cricut, or other cutting machine
- My Heart Tab Envelope Cut Files
And that’s it! Here’s how to put them together.

- Start by cutting the design from your card stock or paper using your cutting machine. I mostly used lightweight card stock, but I also loved the look of patterned papers.
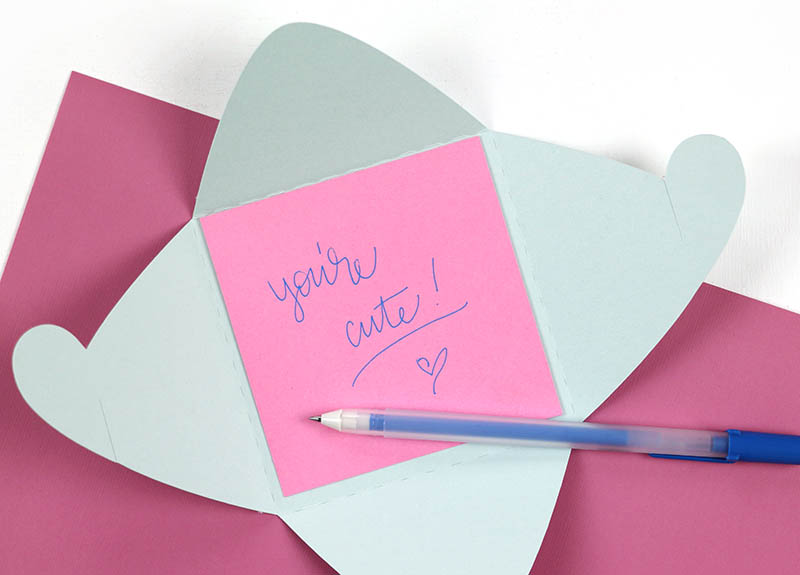
- Fold along each of the perforated lines. Write or place a note inside.
- Slide the slits in the half tabs over one another to lock the envelope closed. All done!
I decorated my envelopes with some of the label and stamp designs also included in my Love Notes bundle. I both created stickers using the designs and my Silhouette Cameo and made some custom inked stamps with my Silhouette Mint.

For the envelopes with the cut out heart on the front, you simply need to cut a square of paper (which is included in the cut file) to add a note inside.


Easy peasy! Love how these turned out, and they pair perfectly with their little heart tab box buddies too.
How to Make Heart Top Boxes

The boxes are cut from 12″ x 12″ paper and create an adorable box (2.8″ x 2.8″ or 7 cm x 7 cm) with the same self-locking tab on the top. They are assembled in much the same way as the envelopes, but just take a *little* more assembly, mostly just because they actually require adhesive. Ha!
Here’s how to put them together.
DIY Heart Top Box Supplies:
- 12″ x 12″ Colorful Card Stock
- Cutting Machine (I use a Silhouette Cameo 3)
- Adhesive (I used my permanent tape runner)
- My Heart Top Box Cut Files
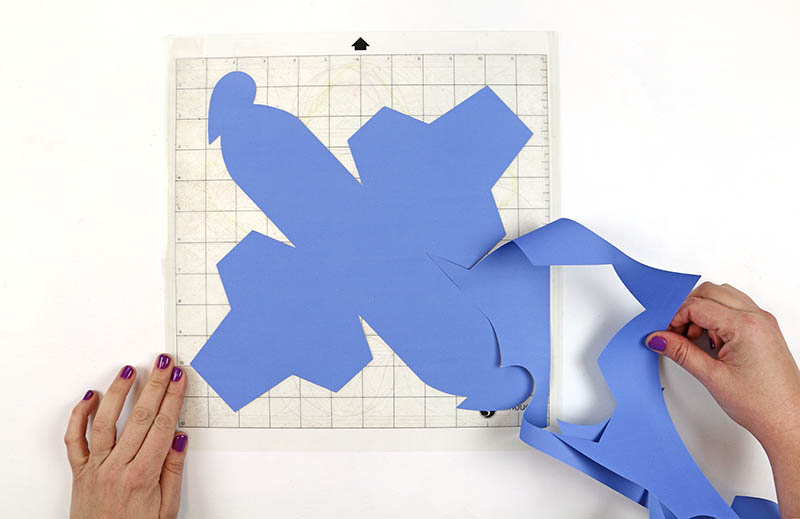
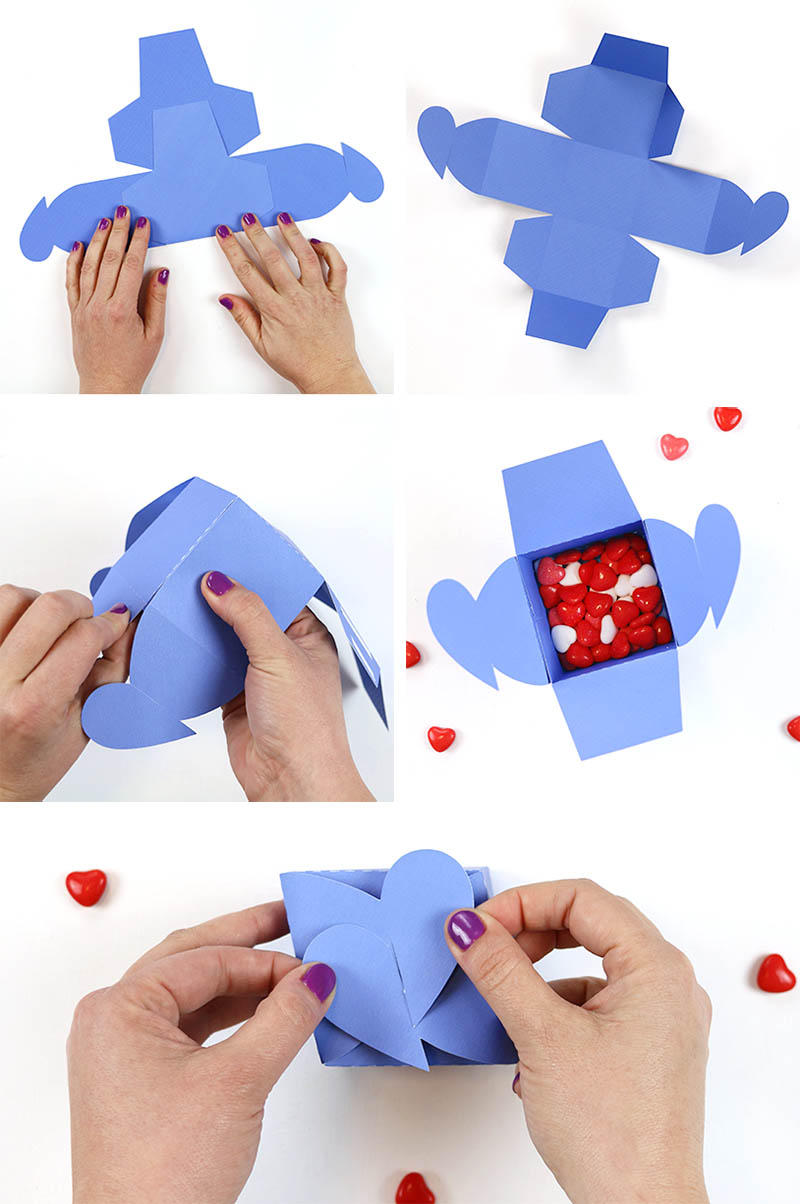
- Start by cutting the design from card stock using your cutting machine and carefully removing the cut box from your cutting mat.
- Fold along each of the perforation lines.
- Use your adhesive to adhere the tabs to the adjacent box sides to form the box shape.
- Fill with whatever small goodies or gift you like.
- Close the box by sliding the heart tabs over one another.
That’s it! I decorated my blue box with some of my Love Notes labels, and it turned out pretty cute, but I am kind of obsessed with how the box I made from marble paper turned out.

Isn’t it cool? I got the paper at Joann, and I think it’s kind of perfect for boxes. I had so much fun making these envelopes and boxes, and I hope you will love making them too!
That’s it for today! If you use these designs to create your own love notes or Valentine’s Day treats, I would love to see what you make!
Here’s to Happy Mail and Happy Making!


Comments + Project Love
Mel says
These are super cuuuute! Are these still available? :O
Cassandra Staples says
These are so cute 🙂