Learn how to paint your own rainbow box! This colorful little painting project is perfect for storing jewelry or other little treasures. The project was made in partnership with DecoArt, and this post contains affiliate links, which help to support this site at no extra cost to you.

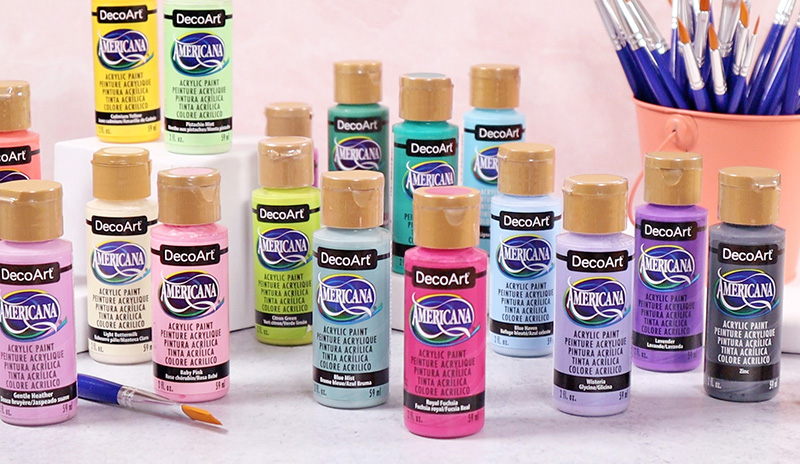
Hello Hello! I have a new simple painting project to share with you today! This little painted box craft was inspired by the new DecoArt Pastels with Pop Paint Set, which is a new collection of DecoArt Americana Acrylic paints that comes with a ready-to-go color story.
The Pastels with Pop Paint Set is kind of exactly what it sounds like – a bundle of paints in a variety of pastel shades with a few bolder pops of color.
When I first received the paint set, the color story felt like my kind of rainbow – all the colors of the spectrum are represented, but these aren’t your basic primary colors.
This beautiful collection of colors inspired me to paint my pastel rainbow trinket (or jewelry) box, and I’m going to show you just how I made it so you can paint along with me!
How to Paint Your Own Pastel Rainbow Trinket Box
You will need just a few supplies to make your own cute rainbow box.
Painted Rainbow Box Supplies:
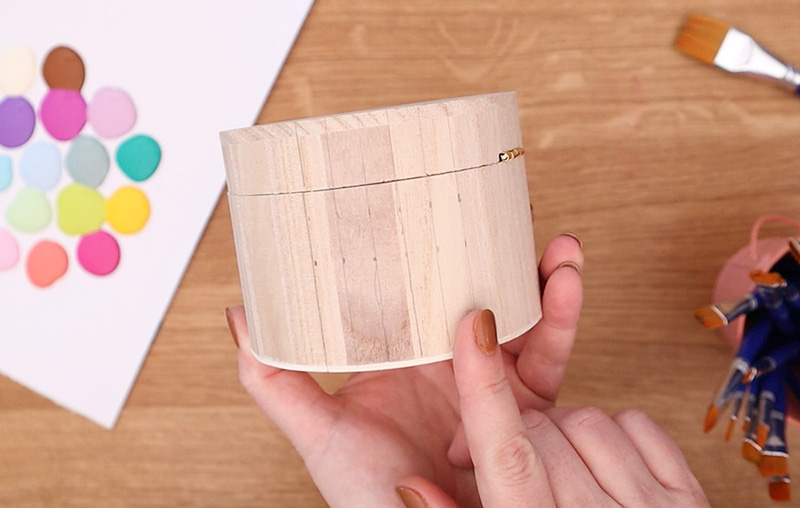
- Round Wood or Paper Maché Box (I used this wood box from Michaels, but Amazon has some good options as well.)
- Pencil
- Measuring Tape or Ruler
- DecoArt Designer’s Brush Sets
- DecoArt Americana Pastels with Pop Paint Set
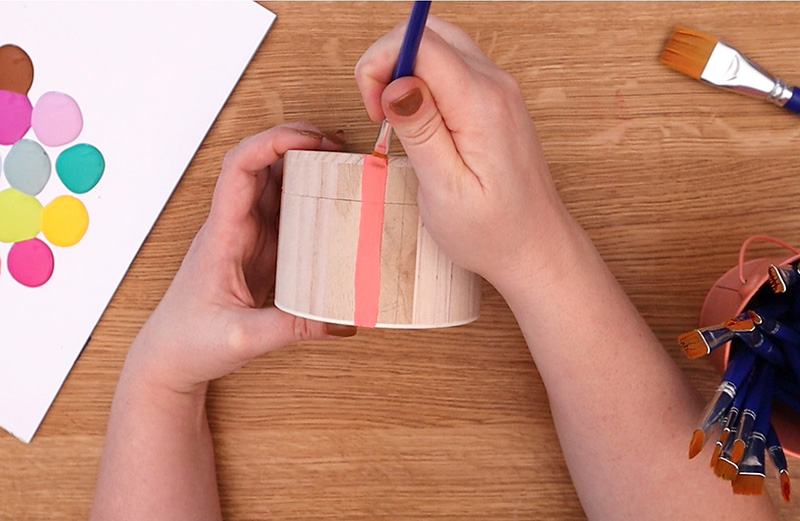
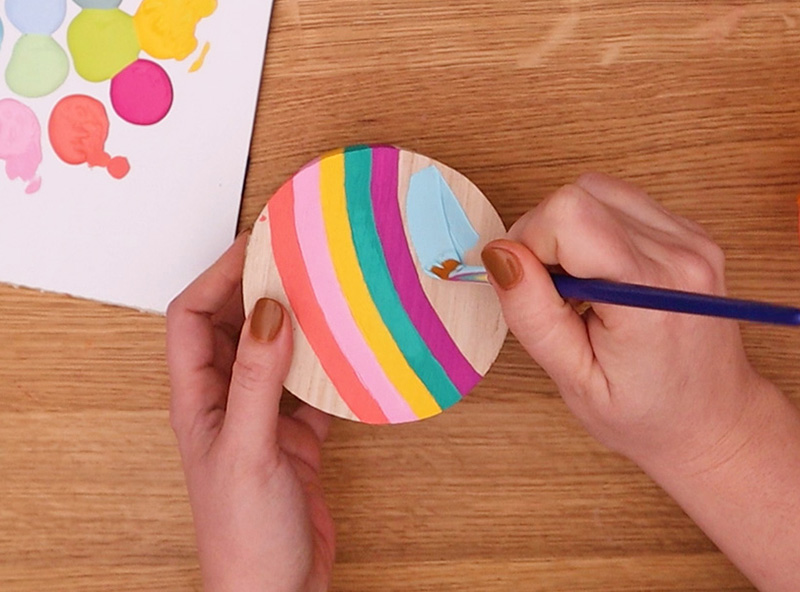
Step One. Mark Rainbow Design.
Before painting, take a few minutes to mark off the rainbow design on the box.
First, start by finding the center line of the front of the box (the point opposite the lid’s hinge) and lightly mark this point with your pencil.
Next, move a few centimeters to the left of that center point, and mark off five adjacent vertical stripes, each one centimeter wide.
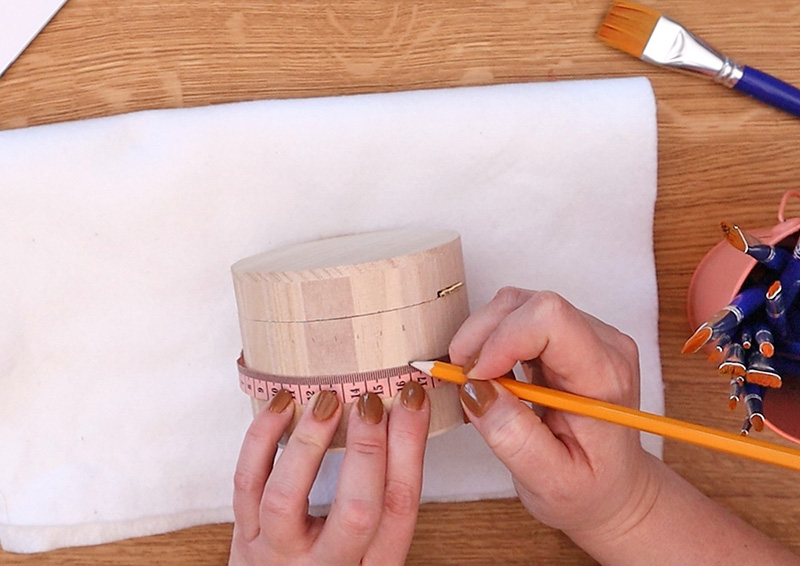
Then, repeat this process on the other side of the box to mark off five more adjacent centimeter-wide vertical stripes. These two groups of stripes will be where you paint your rainbow on the side of the box.
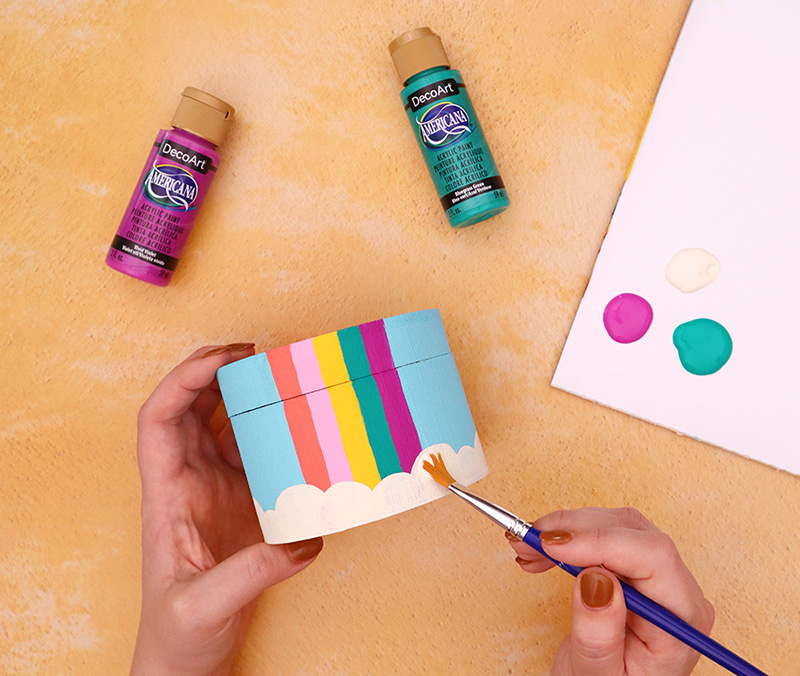
Step Two. Paint Rainbow Stripes on the Side of the Box.
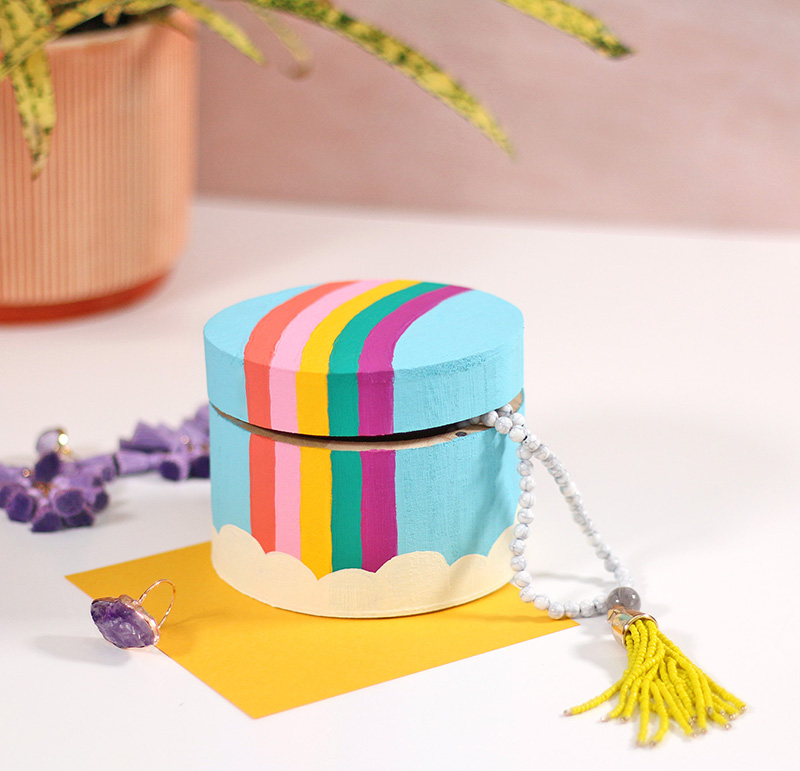
Now, it’s time to choose your rainbow colors. This box doesn’t have a full rainbow since I only chose five colors, but I think it still gives you that pastel rainbow look I was going for.
I chose a coral, a blush pink, a bright yellow, a jade green, and a vibrant purple for my rainbow colors. I recommend painting some practice rainbows on a scrap paper to make sure you are happy with your rainbow color combination before painting on your box.
Once you have your colors chosen, paint in the vertical stripes you marked off in step one.
If you are right handed like me, I recommend starting with the leftmost stripe and moving to the right. If you are left handed, then I would recommend starting on the opposite side.
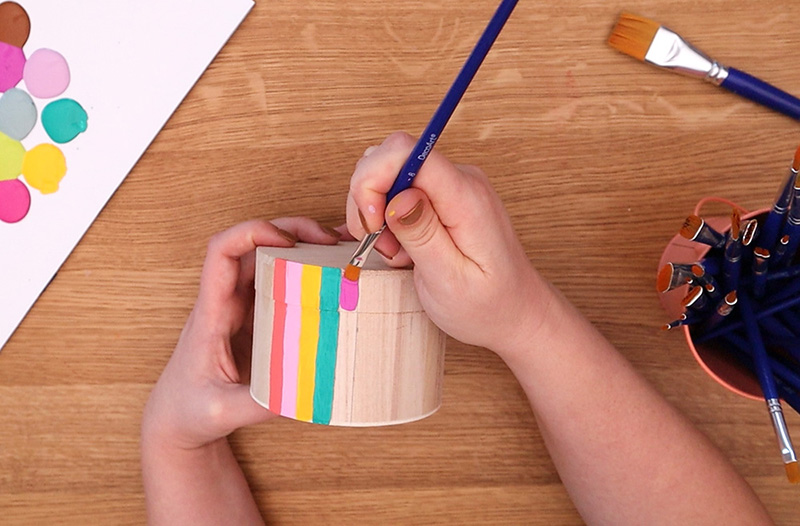
After you have finished one group of stripes, it’s time to paint the group on the other side of the box. For the second group, paint your strips in reverse color order so the two striped sections mirror each other.
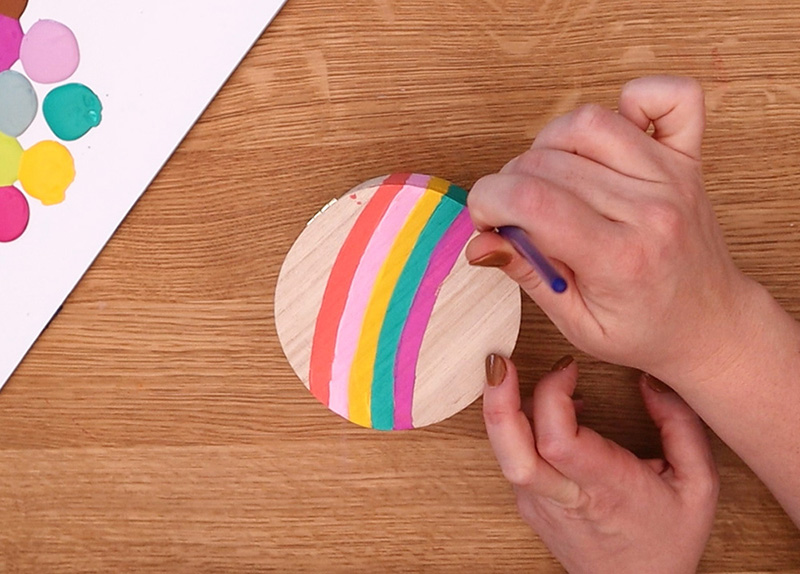
Step Three. Paint the Rainbow on Top of the Box.
Next, it’s time to connect those two groups of vertical stripes!
Using a small flat brush, paint a gently arcing line across the top of the box to connect the matching color side stripes.
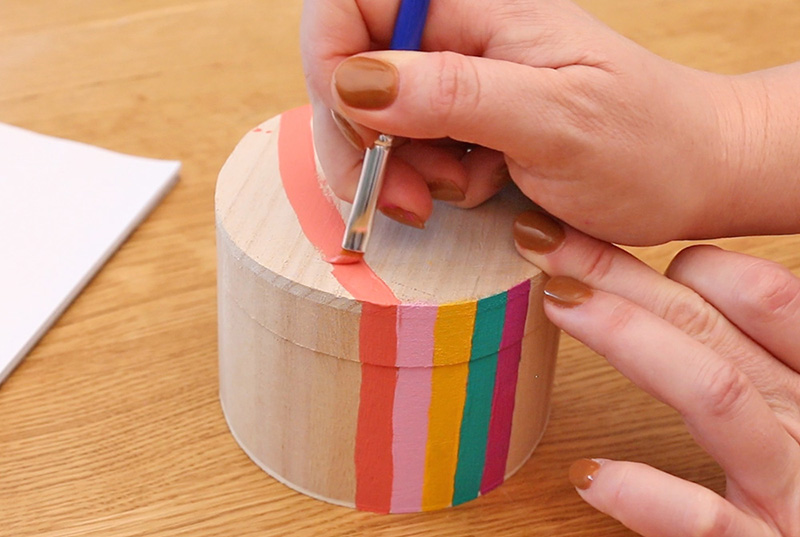
Start with one of the outside colors and repeat this step for each color.
Step Four. Paint Around the Rainbow.
After giving the rainbow stripes some time to dry, you are ready to paint the rest of the box. I chose a pretty pale blue color.
Step Five. Paint Cloud Scallop Border.
After the blue paint has dried, you are ready to finish off your box with a cloud border along the bottom of the box.
For this step, use a flat or filbert brush to create overlapping round shapes of varying sizes around the bottom edge of the box.
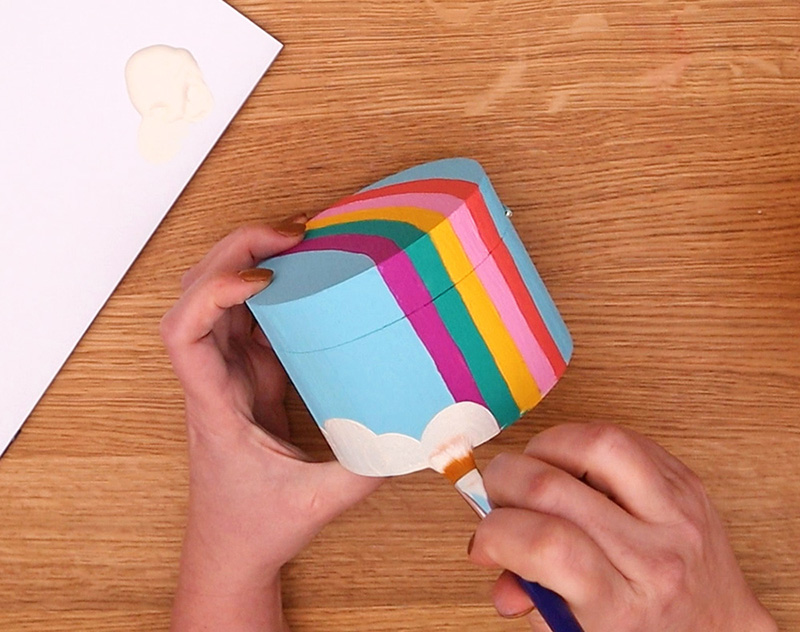
This creates an irregular scalloped edge that resembles clouds and finishes off the design.
Once your cloud scalloped border has dried, your box is all done! (If you like, you could also paint the interior your favorite color from your rainbow.)
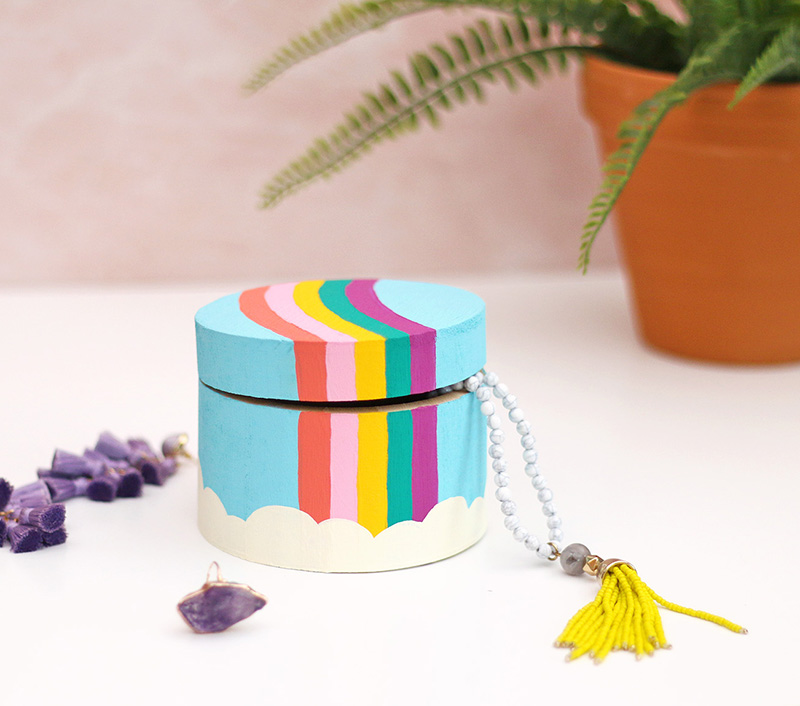
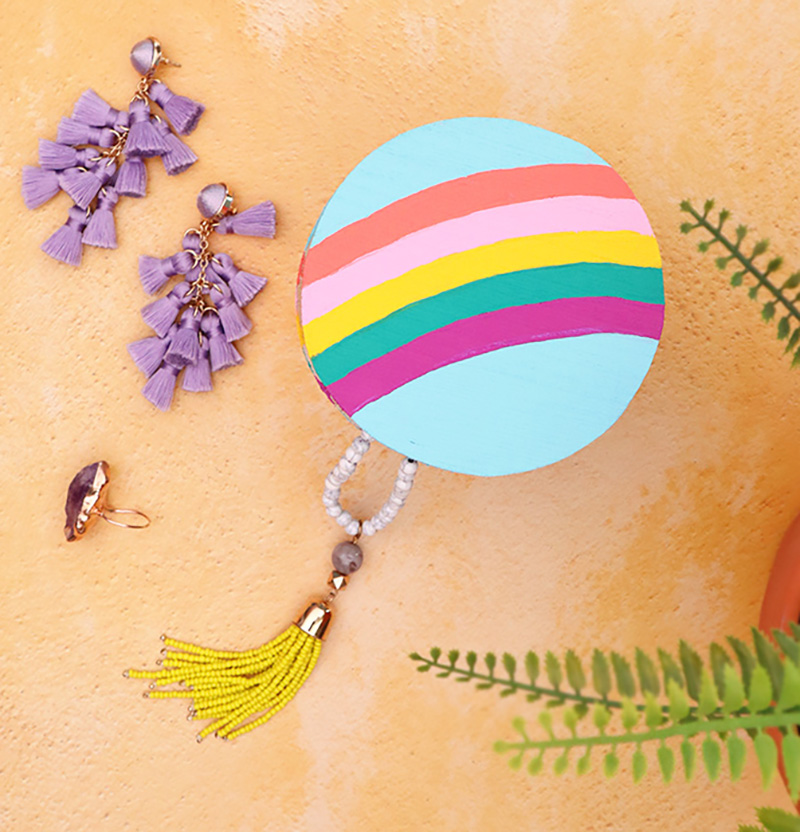
I’m using my cute pastel rainbow box to hold some of my favorite colorful jewelry pieces, but I think it could also be a super cute place to store small craft supplies, like washi tape, or really any other small treasures!
What do you think? Would you give this painting project a try? If you do, I would love to see it!
Until next time, Happy Making!


Let's Chit Chat!