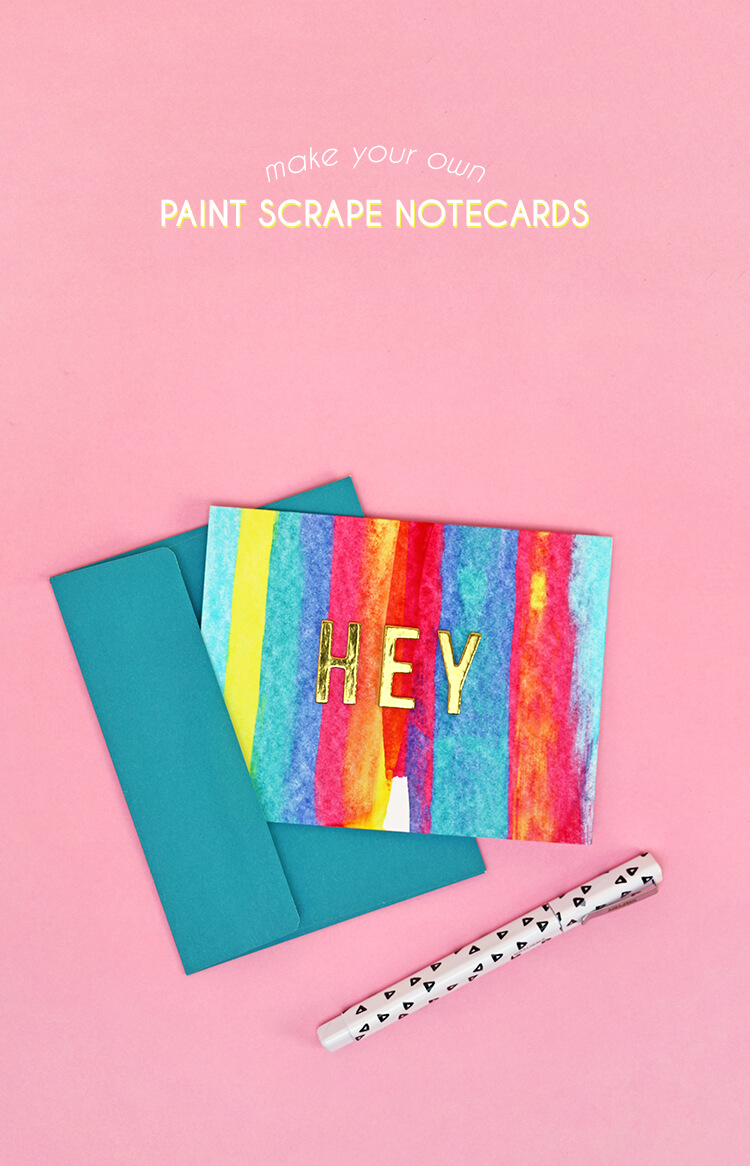
This DIY art project idea is really easy, so much fun, and makes beautifully colored notecards for every occasion. You just need a few simple supplies you may already have at home to create these fun cards. Let’s make some! A big thanks to The Clorox Company for sponsoring this post. This post also contains affiliate links, which help to support this site.
I am really excited to share today’s DIY art project idea with you all! This technique is something I have been wanting to play around with for a while, and I am really happy with how my little notecards turned out. And I thought you guys would really enjoy making some for yourself, so I’m sharing the (few) simple steps with you all today.

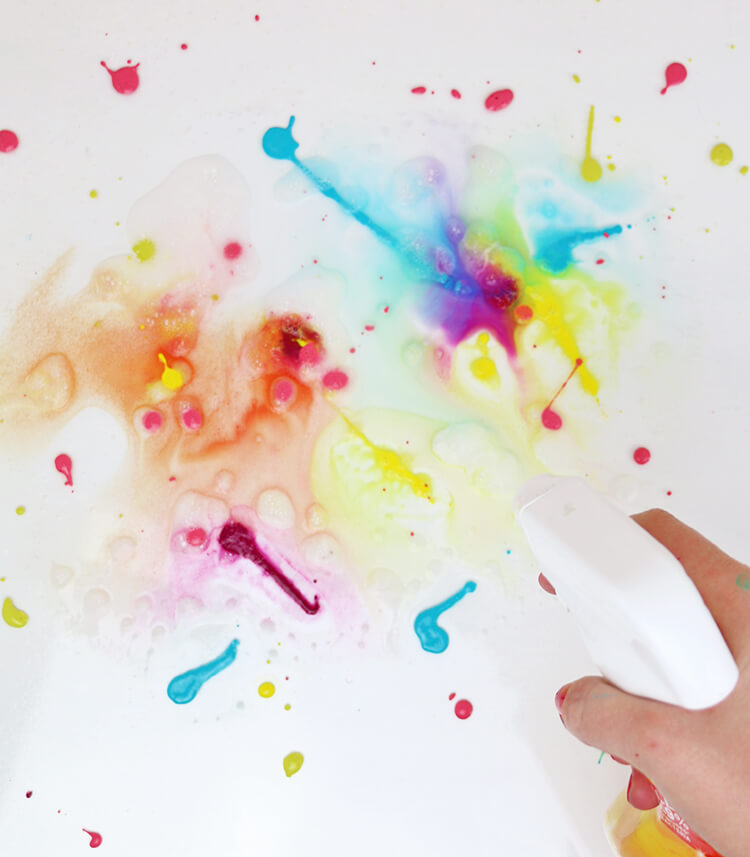
This is one of those DIY art project ideas where the process is just as good as the finished project. It is just so much fun! Each piece you do will be completely different and unique. Make sure you have plenty of paper and paint on hand because you are going to want to try it out again and again. You are also going to want to make sure you have some good cleaner on hand because this. project. is. MESSY. Okay, ready? Let’s make a mess!
DIY Art Project Idea – Paint Scrape Notecard Supplies:
- Heavyweight paper, such as cardstock or watercolor paper trimmed to 8.5″ x 5.5″
- A2 sized envelopes
- Acrylic Paints (I used and recommend DecoArt Media Fluid Acrylics, which are highly pigmented and flow like a dream. Thicker paints may need to be thinned with water.)
- Masking Tape or Washi Tape
- Old Credit Card or Rewards Card
- Paper Towel and Cleaner or Wipes – you will be making a mess!
- Metallic Gold Letter Stickers (or whatever stickers you like)
There are many different ways to create art using this paint scrape technique, but I wanted to walk you through the process I used to get this exact look. Feel free to play around with the technique to create your own looks! Here’s what I did:
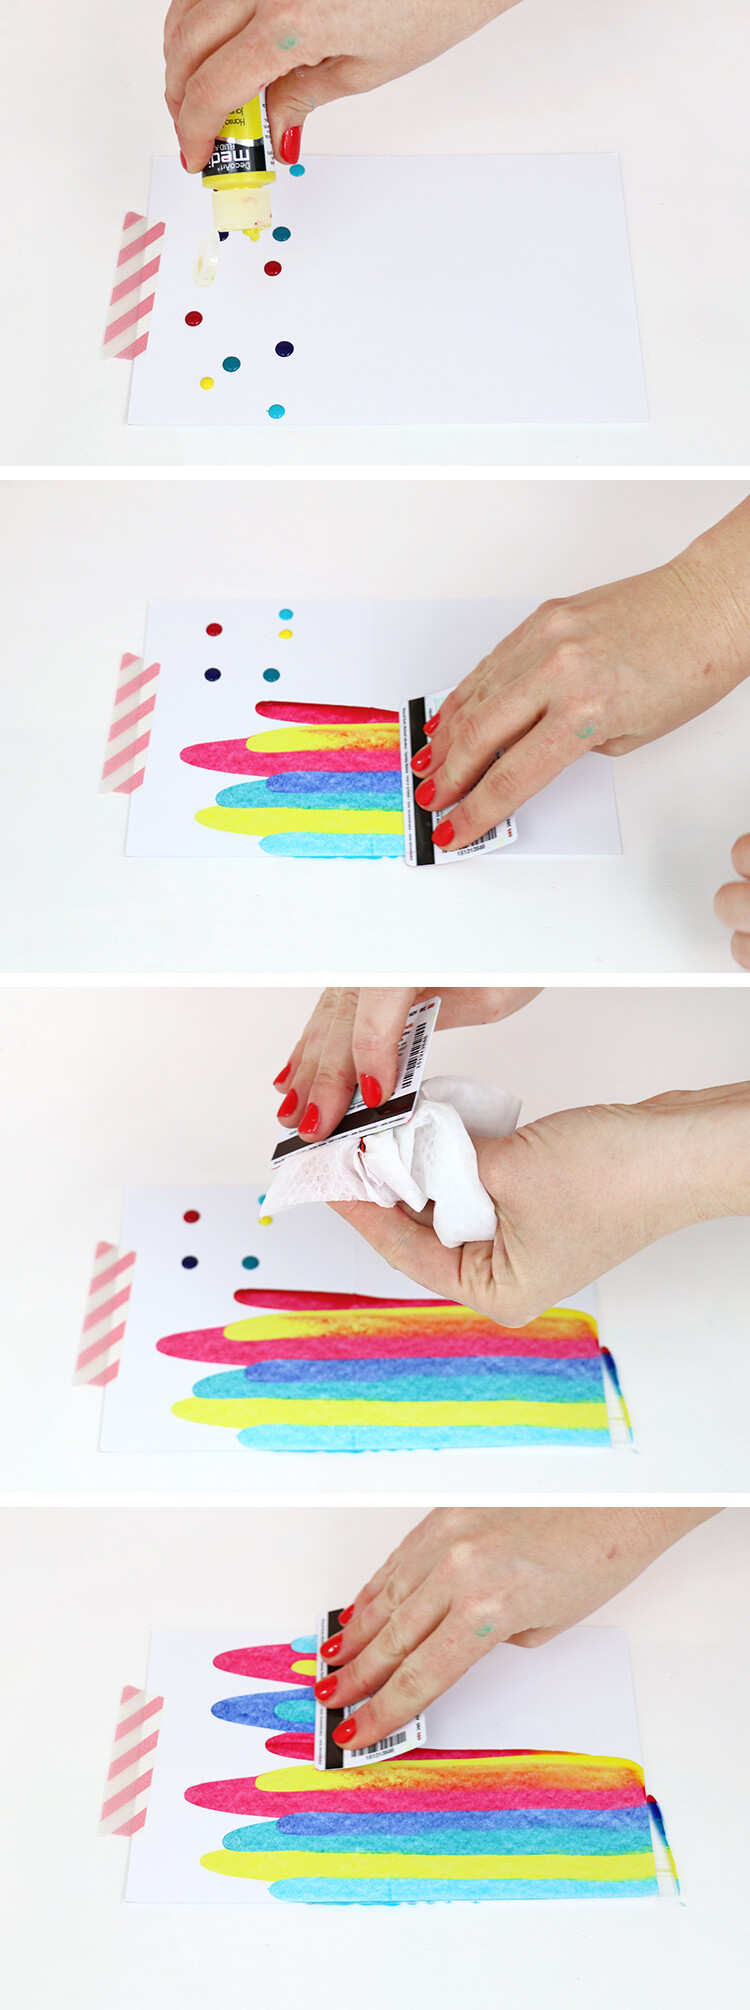
- Start by taping your paper down to your work surface. Since I was making notecards, I had my paper cut to 8.5″ x 5.5″. Your work surface will be getting paint on it, so please don’t do it on your expensive marble countertops or your heirloom chest. Have cleaner on hand to clean up quickly after each piece. I used Clorox Scentiva, which worked great and smells amazing.
- Drip drops of paint along one side of your paper. Stagger the drops and vary the colors. Have fun experimenting with drop placements and color combinations.
- Place an old credit card or gift card above the drops on one side of the card and scrape down pulling the card off the edge of the paper on the other side.
- Wipe off the card and remove all the paint before moving to the other side. This will keep both sides looking the same and keep your colors from mixing too much.
- Repeat step 3, scraping the paint down off the edge of the paper again.
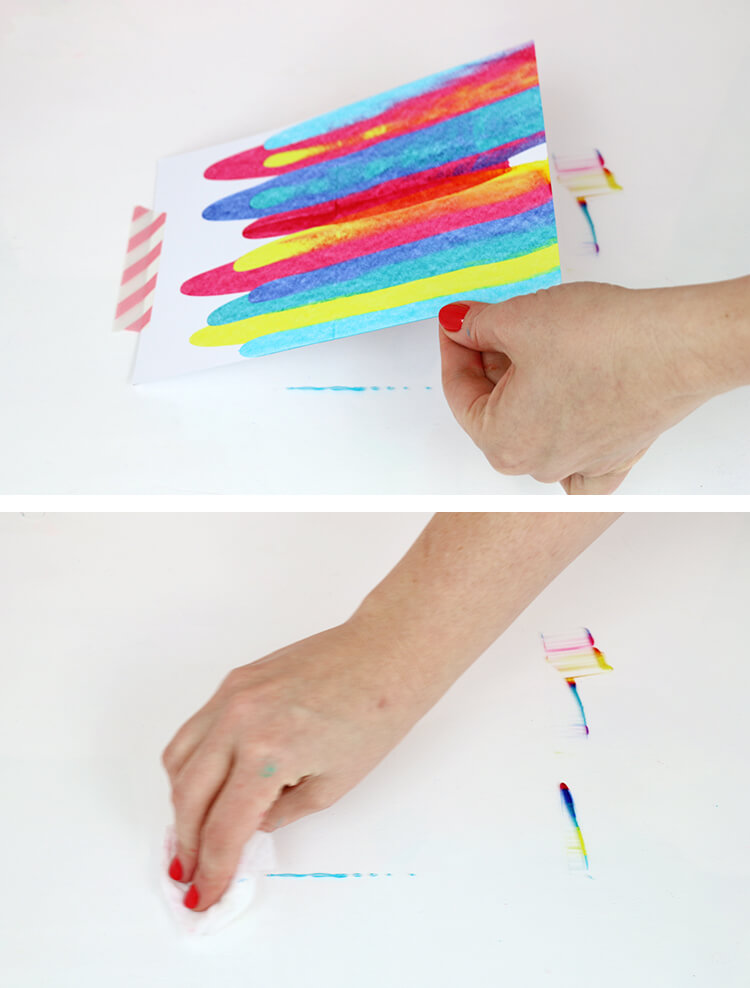
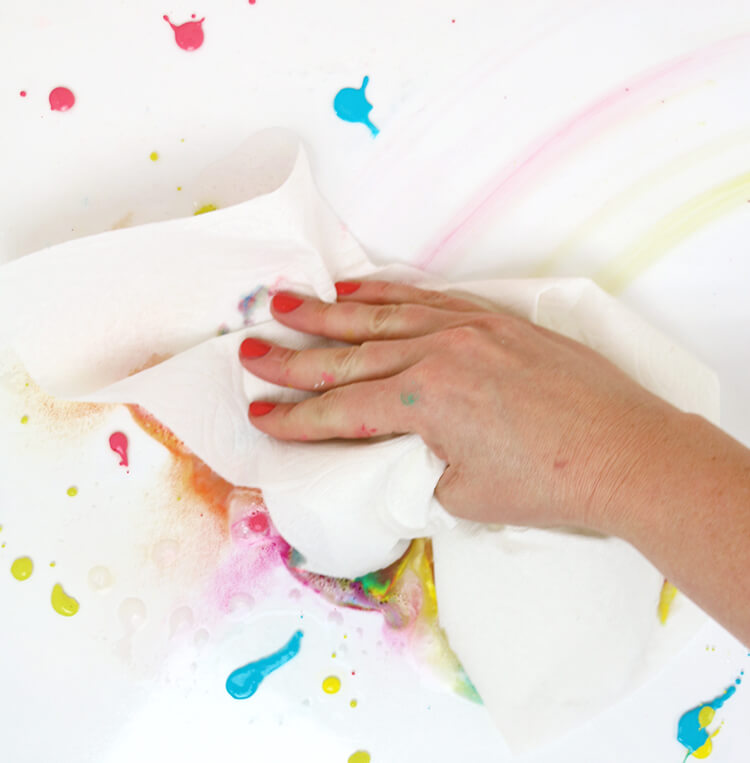
Finally, peel up your piece from the work surface and wipe away any paint that went off the edge of the card.
I used Clorox Scentiva to help me clean up my mess, and I love how it combines a powerful clean with a great scent!

Just like other Clorox products, it cleans and disinfects (kills 99.9% of bacteria and viruses), but it also leaves your home smelling wonderfully. It comes in two scents – Tuscan Lavender and Jasmine & Hawaiian Sunshine – but I am pretty partial to the Hawaiian Sunshine scent. It’s such a bright, happy scent!
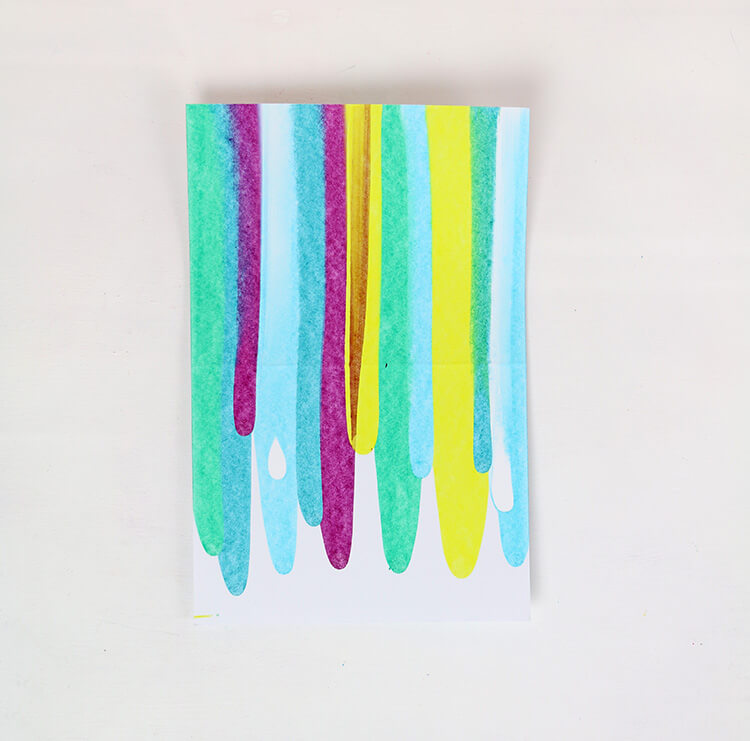
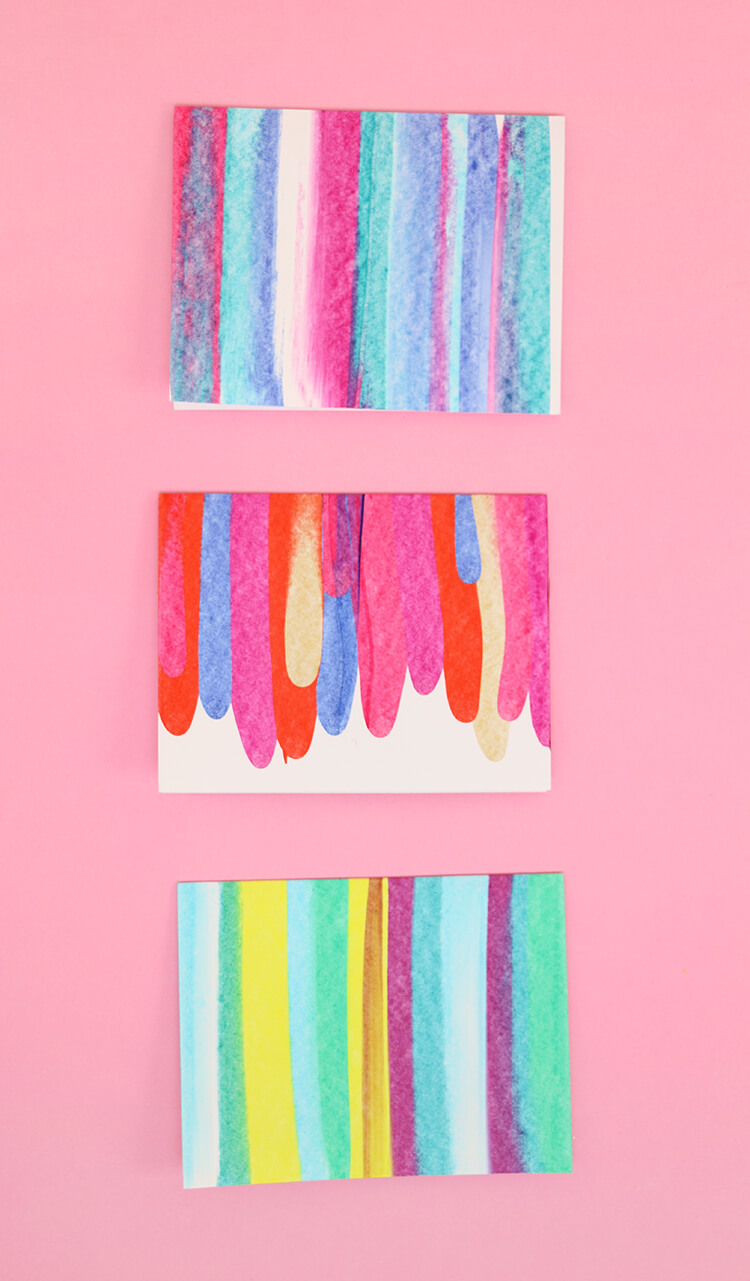
Okay, so after you have scraped your paint, cleaned up your mess, and let your beautiful artwork dry, you are ready to finish up your cards. At this point, your pieces will look something like this:
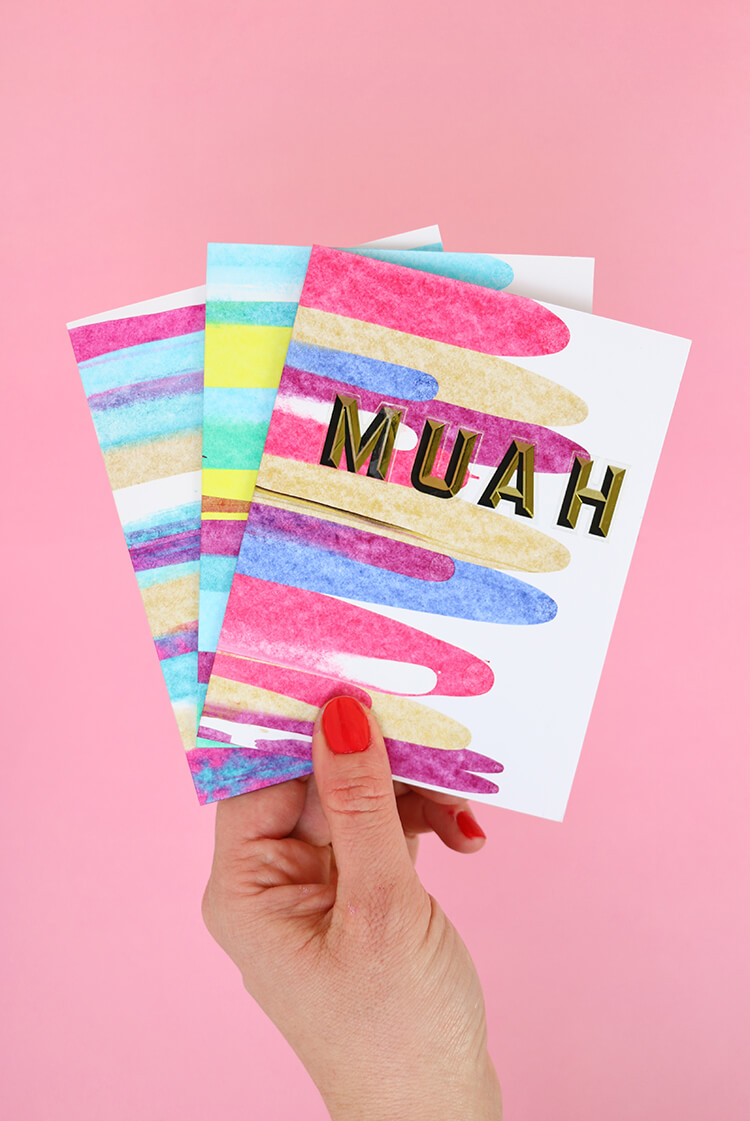
All that’s left to do is fold them in half and add a greeting to the front (if you like). To get a perfect fold in your cards, I recommend scoring them first using a straight edge and a bone folder or embossing tool (or I have even been know to use a knitting needle in a pinch). When your cards are folded, you can call them done if you like a simple abstract look, or you can add greetings to the front with letter stickers. I used a variety of metallic gold stickers for my cards.
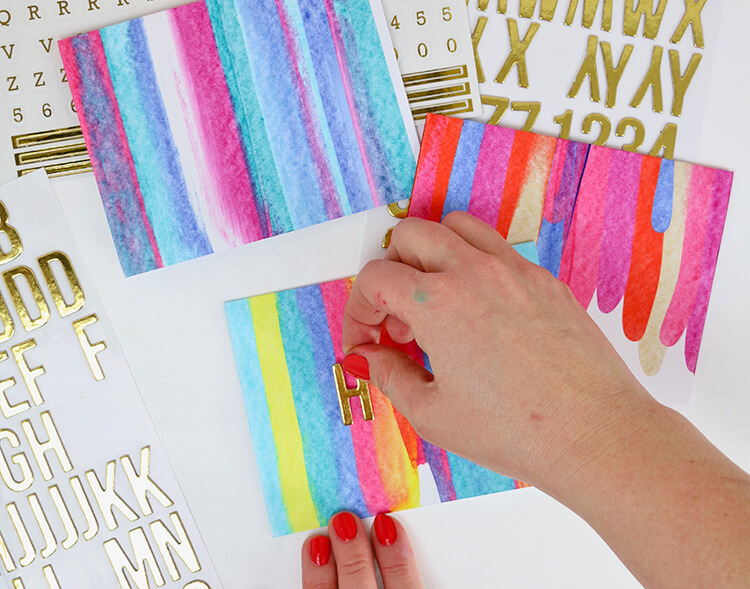
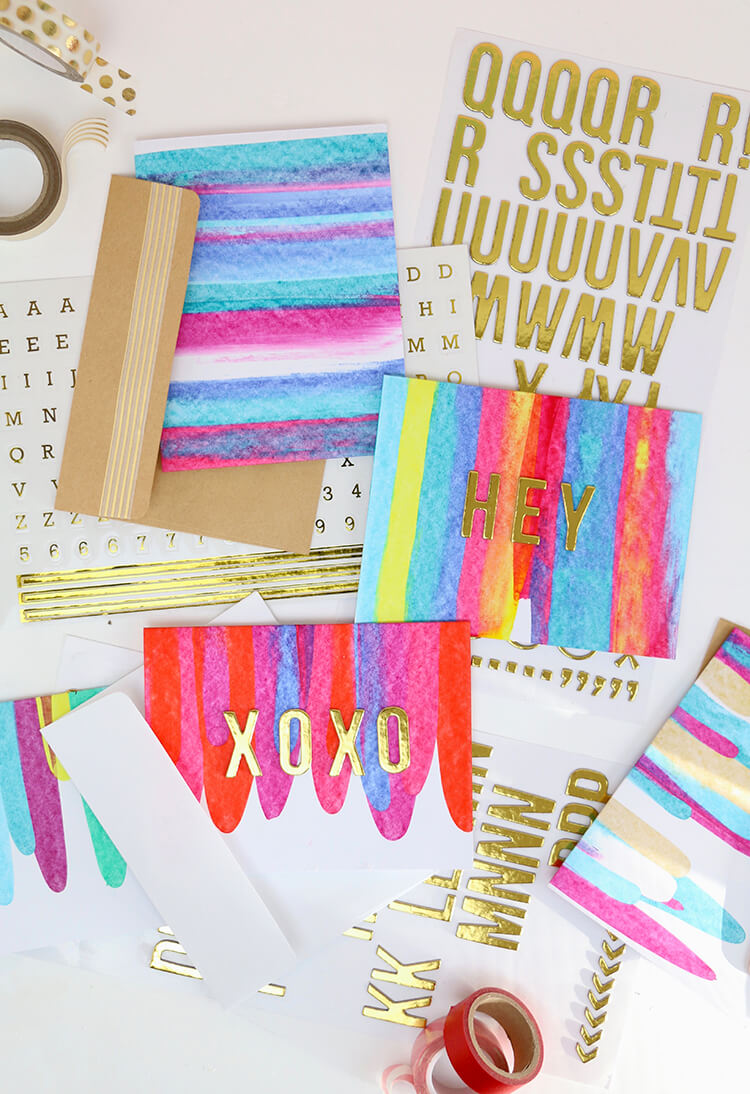
I really like the way that both sides of these cards look, so I used both as the fronts of my cards. One side has a more fully covered, watercolor style, while the other has a pretty scalloped look. I think they are both pretty great.


I hope you all like this DIY art project idea and will give it a try! I had so much fun with it, and I think it creates such pretty pieces. These would look great framed too, so don’t feel limited to notecards!
That’s it for today’s DIY art project idea! I hope you all can find some time for a little creative mess-making. 😉
Happy (Mess) Making!

If you like this post, don’t miss these:
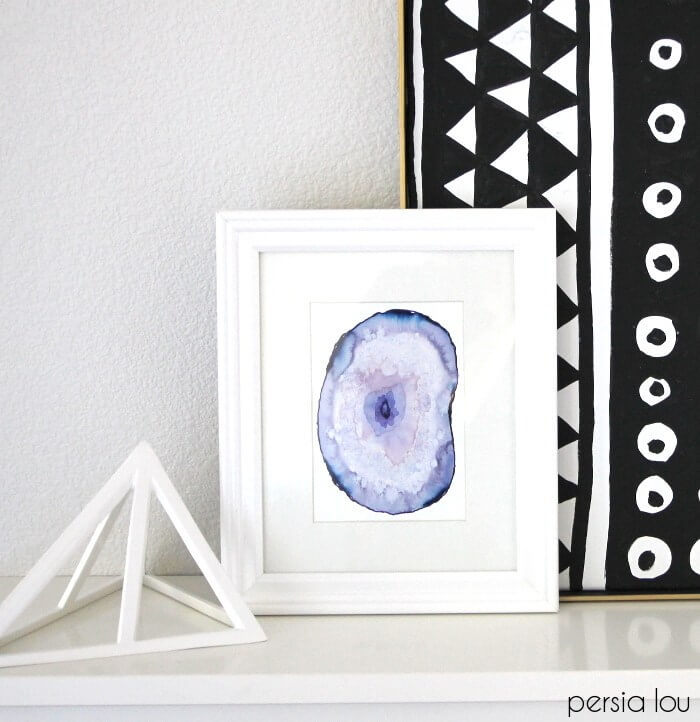
How to Paint Watercolor Agate Slices


Comments + Project Love
Amy | Delineate Your Dwelling says
These cards are incredible! The colors are so vibrant. Pinning for sure.
Alexis says
Thanks so much, Amy! Those paints are great for vibrant colors. They are my faves. 🙂
Christine says
Is it possible to use cards that are already folded OR can a painted card be used as a flat card and written on top of the paint? I have 100 blank white pre-folded white cards awaiting paint, adornment, etc. thus my curiosity. Thanks
Alexis says
Yes, I think that should work. You will just want to try to really flatten them out as much as possible before you paint to avoid getting the paint stuck on the fold in the middle. Let me know how it turns out! 🙂
Ileana martin says
ME GUSTARON MUCHO TUS TARJETAS
Faye says
I’m always looking for unique greeting card projects. This definitely is a great idea. Thanks for sharing
Alexis says
You are so welcome! I hope you give it a try! Thanks for stopping by and leaving a comment. 🙂
Shubha says
These are such brilliant cards. They are gorgeous! I’m going to try this for sure.
Alexis says
Thank you! I would love to see them if you try it out! 🙂
Jo Smith says
Hi is there a video for this tutorial by any chance? Thanks!
Alexis says
I don’t have one yet, but I will add it to my list!
Rika says
Hi there.
Thank you so much for sharing this. My sister lives in an independent old age home and she gives craft classes to the dearest people and always looking for something different to do for them.
I am sure they will enjoy this.
Thank you
Rika
Alexis says
Oh that sounds like a perfect fit. I hope they love it!
Cheetarah says
I absolutely LOVE this idea and will definitely try it! Thanks so much for sharing 🙂 xo Cheetarah
Pandoraflora says
This is soooo cute. Absolutely makes me wanna feel young again. Love colorful designs. Thanks for sharing.
Jo Smith says
These look amazing! Have to try this!
Evan says
I was wondering what program or website you used to make this website I have been wanting to create one and I love yours!
Alexis says
Hi Evan! I use wordpress for my site. Good luck!
Elicia says
Thats so cool luv
Emmanuelle says
That’s a very cool idea! Just made some enveloppes for my penpals! 🙂
On the other side, I would make my paint more liquid next time for a better spread because it’s more difficult than I thought! ^^
Jen says
I love this!!! Definitely going to give it a try! How well do you think it would work on wood or canvas?
Alexis says
Hi Jen! I think it should work pretty well on canvas and wood as long as the wood is smooth. I would love to see it if you give it a try! 🙂
car buyers says
I love this!!! Definitely going to give it a try! How well do you think it would work on wood or canvas?