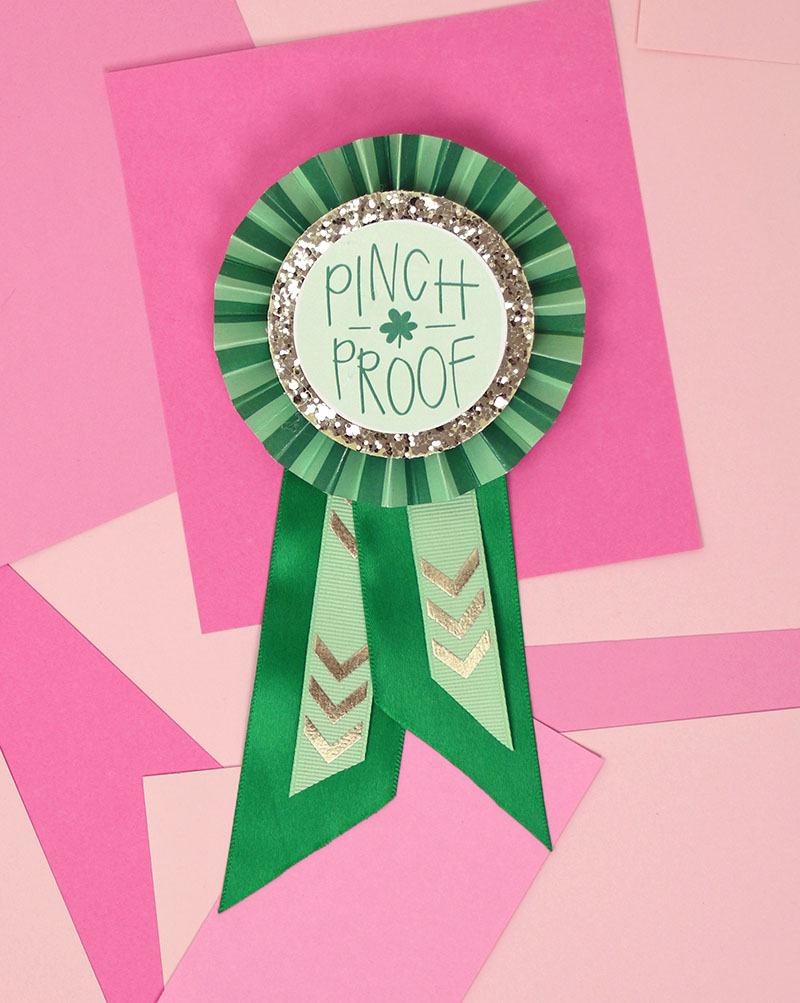
Learn how to make DIY paper award ribbons for St. Patrick’s Day. These cute ribbons are the perfect thing to wear this St. Patrick’s Day to keep pinchers away! Or you can gift them to friends to keep them safe as well! This St. Patrick’s Day craft is simple to make with my free printables. This post contains affiliate links, which help to support this site.

It’s March, and that means that St. Patrick’s Day is just around the corner! This simple little project gives you something fun to wear to prevent any pinches from coming your way. 🙂
I have free printables to make it extra easy for your to make your own St. Paddy’s Day ribbons. Ready to get crafting? Here’s everything you will need:
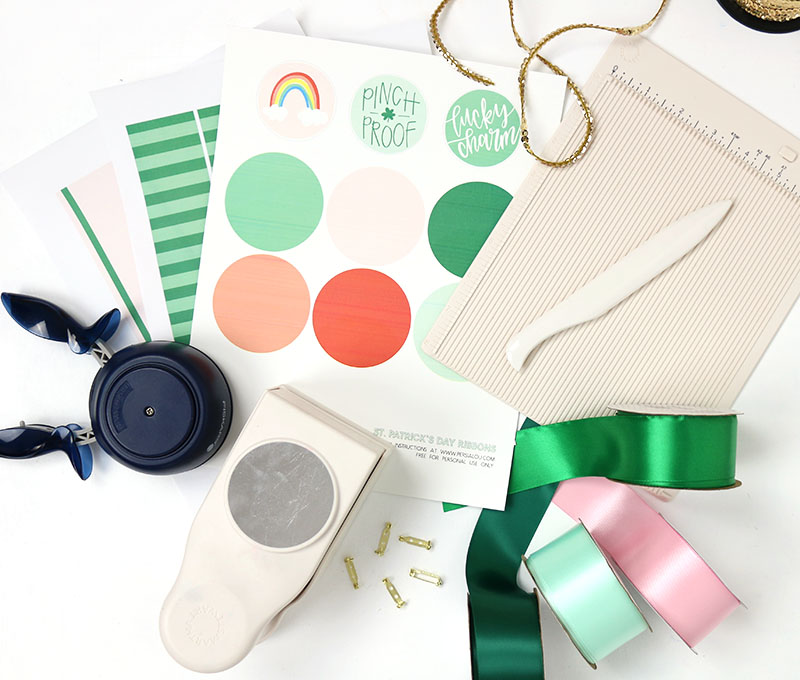
St. Patrick’s Day Ribbon Supplies:
- My St. Patrick’s Day Ribbon Printables – I recommend printing the first page on card stock and the second two pages on regular printer paper. (For personal use only please.)
- Paper Trimmer or Scissors
- 2.5″ Circle Punch
- 2″ Circle Punch
- Scoring Board
- Hot Glue Gun
- Pin Backs
- Ribbon – I used 1.5″ wide satin ribbon plus other thinner ribbons and trims like sequins
- Colored or Glitter Cardstock (optional)
How to Make DIY Paper Award Ribbons for St. Patrick’s Day
Step One. Print and Cut Out Designs.
Start off by printing out the designs found in the supply list above. I recommend printing the ribbon centers (the first page of the pdf) on cardstock and the ribbon rosette (pages 2-3) on plain printer paper. Then, cut out the strips for the rosettes and the circles for the ribbon centers. A paper trimmer and circle punches makes this super quick and precise.
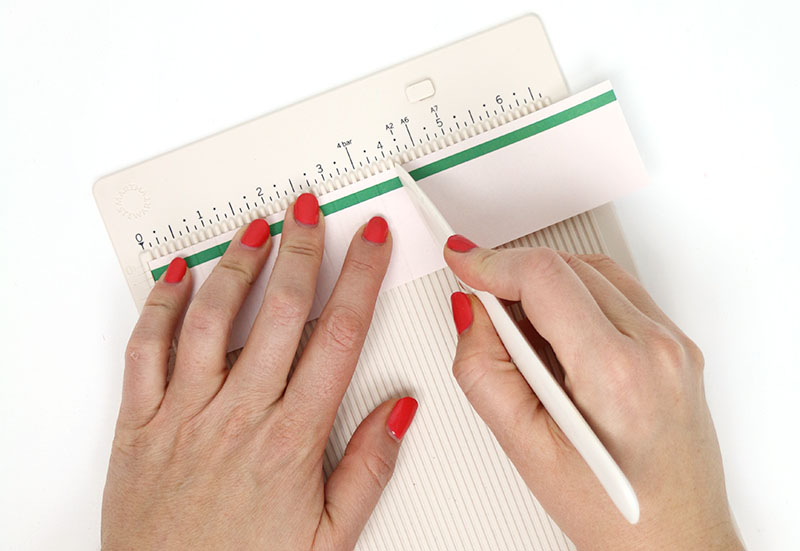
Step Two. Form Rosettes.
Each rosette will use two strips. I have three different designs included in the printables – rainbow, green stripe, and pink with green stripe. You will need to fold each of these strips using an accordion fold. Using a scoring board will help you to get your folds even. I scored my strips at every 3/8″.
After your strips are scored, fold each one back and forth to create an accordion fold.
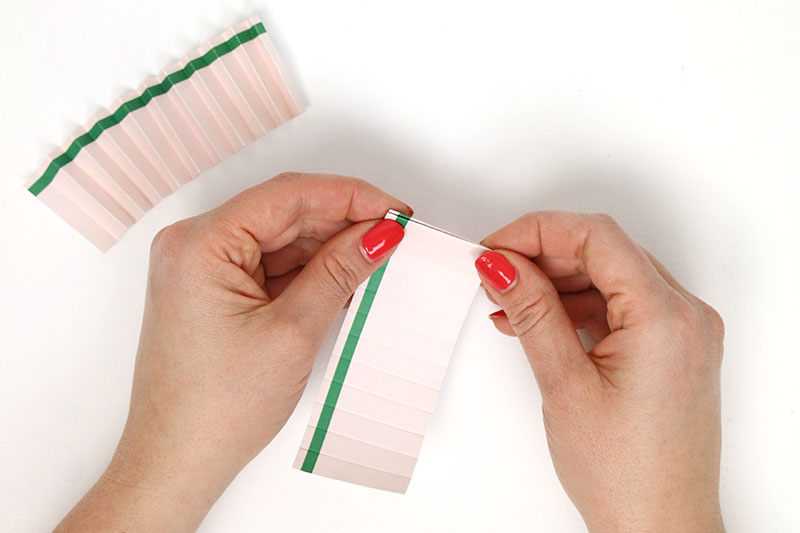
Now, we will take these two folded strips and turn them into a pretty little paper rosette.

Start by using your hot glue gun to glue the two strips together. Then glue the two ends together to form a loop. Finally, push the center of the rosette down to form a flat rosette. Glue the center of the rosette onto a small piece of cardstock on the backside to hold it in place.
Step Three. Apply Ribbon Center.

Next, simply glue on the two layers of ribbon centers. There are three designs for the ribbon centers included in the printable as well as six different color circles for the layer behind that. If you like, you can also use specialty cardstocks behind the ribbon centers.
Step Four. Add Ribbons and Pin Back.
Finally, choose ribbons to match your paper rosette and cut them to the desired length. I really liked the look of slightly staggering the length of the two ribbons. Use hot glue to attach them to the back of the paper rosette, and then cover the ribbons by gluing on another circle of cardstock.

Finally, finish off your paper award ribbon by gluing on a pin back.

And that’s it! Your St. Patrick’s Day ribbon is all ready to gift or wear.

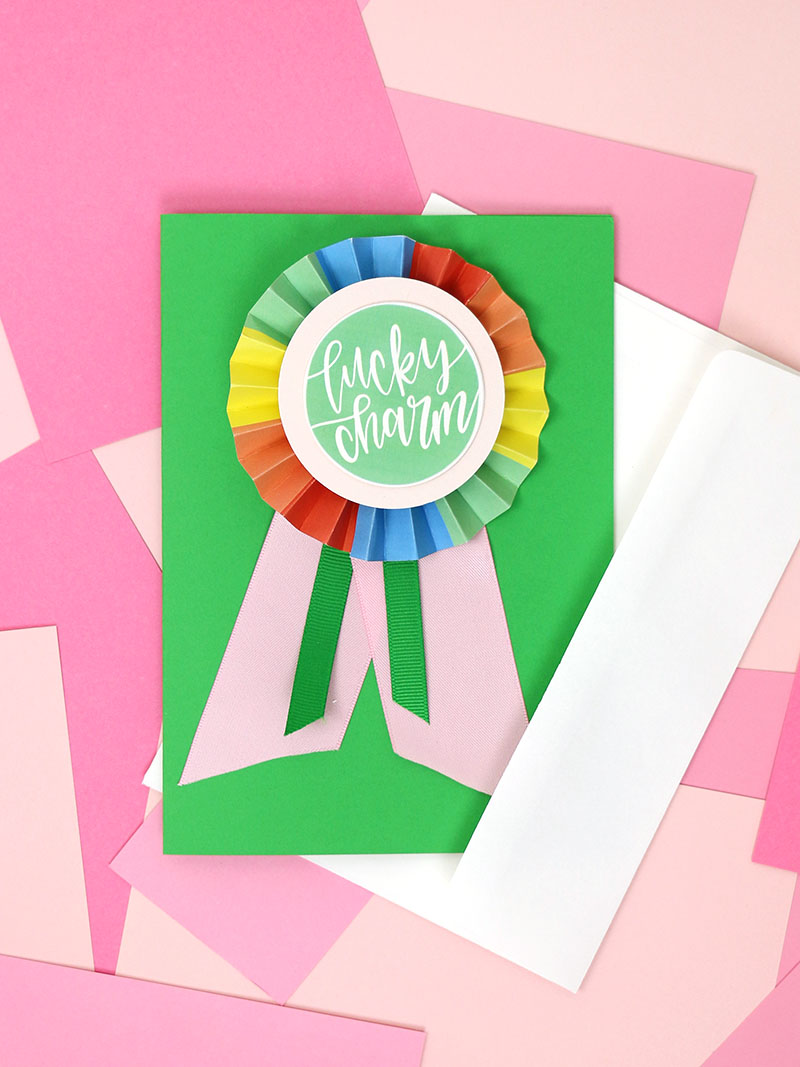
You can also easily turn this ribbon into a card and send it to a friend through the mail! Just cut a piece of cardstock to 10″ x 7″, fold it in half, and punch holes on the front. Then you can fasten a St. Patrick’s Day ribbon to the front of the card and send it off to a friend!
I had so much fun mixing and matching the different designs with different ribbons and trims. I’m having a hard time picking my favorite.


If you’d like to see a video tutorial for these, check out this week’s Friday Craft Club where I made a ribbon live! You can watch it below. (Psst… You can join in Friday Craft club most Fridays over on the Persia Lou facebook page.)
Happy St. Patrick’s Day and Happy Making!

Check out more free printables:
[the_grid name=”Free Printables Footer”]


Comments + Project Love
Lynette Farnum says
The first page of the printables will not print. I tried twice and both times it spit out a blank page . So now I have two pages of page #2 and #3 and no page #1. How am I supposed to make the ribbons now?