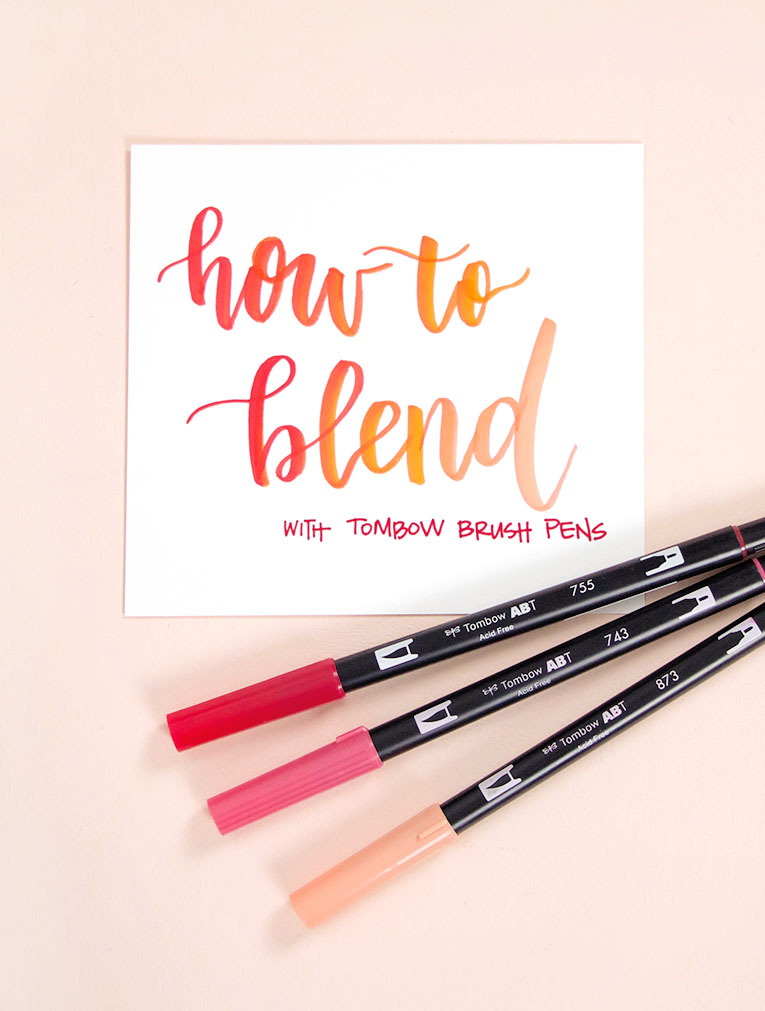
Learn how to blend your brush lettering for a beautiful ombre look using Tombow Dual Brush Pens and a simple DIY blending palette. I have step by step instructions plus a tutorial video to help you make your own blended brush lettering! I originally shared this post at Crafts Unleashed, and it may contain affiliate links, which help to support to site at no extra cost to you.
Brush lettering is one of my favorite hobbies, and while I share lots of printables and cut files I have made with my hand lettering, I haven’t done too many hand lettering tutorials here on the blog yet. But since quite a few of you indicated you would like to see more hand lettering on the blog in my reader survey (P.S. If you haven’t filled it out yet, I would still love to hear from you!), I am going to try to get more hand lettering tutorial posts up here on the blog. BUT, if you have no interest in learning hand lettering and just want the free printables, I’ve also turned these designs into free printables you can snag at the end of this post. 😉
Today, I wanted to start off with a Tombow brush pen tutorial because Tombow Dual Brush Pens are a favorite of hand letterers and are probably some of the pens you have seen your favorite letterers using on instagram. They come in a whole bunch of fun colors, so you won’t have any trouble finding the perfect shade, and they are also water-based, which means you can create fun watercolor effects. I also am a big fan of the quality of their brush tips, which are durable but also very flexible, making it easy to get crisp thin upstrokes and nice, thick down strokes.
Another great feature of these pens is that they are blendable! And that’s where today’s tutorial comes in! Today we are going to talk about using a blending palette to make fun ombre brush lettering pieces.
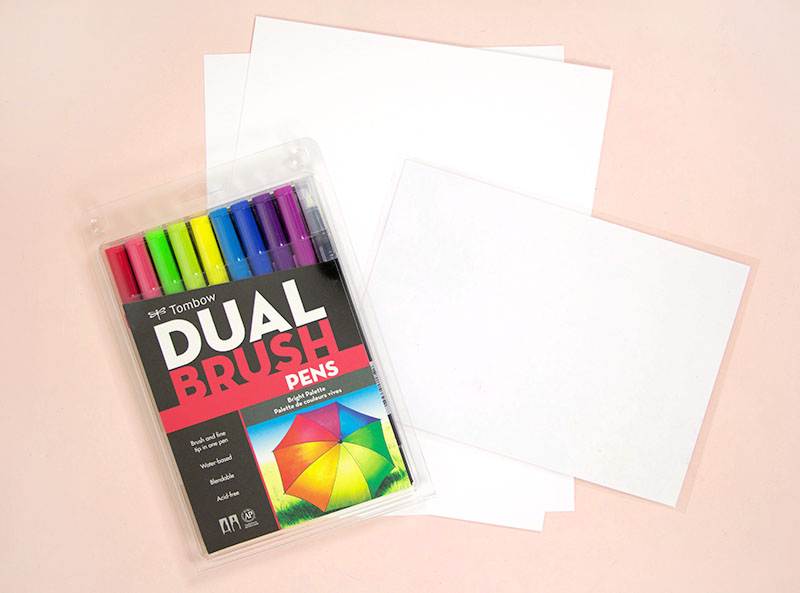
Blended Brush Lettering Supplies:
- Tombow Dual Brush Pens (Consumer Crafts has a great price on their sets)
- High Quality Smooth Paper like Ultra Smooth Cardstock
- Blending Palette (You can buy or DIY – see more on this below)
- Gelly Roll Pen for details (optional)
How to Blend Tombow Markers
What is a Tombow Blending Palette?
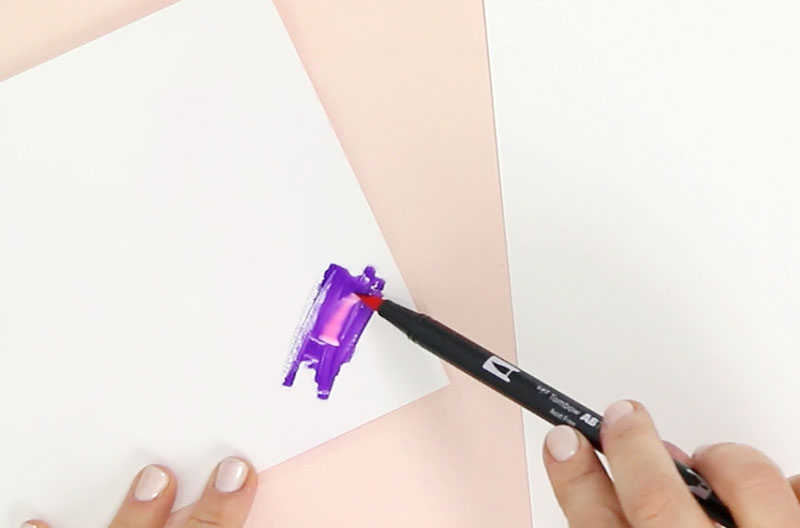
Let’s start off by talking about using blending palettes with Tombow markers. What is a blending palette anyway? Basically, a blending palette is a smooth non-porous surface that you can use to lay down ink and blend colors. Tombow sells a blending palette, which is basically a piece of laminated cardstock. It also has a color chart with all of the Tombow colors on one side, which may be helpful for picking colors. However, if you aren’t interested in the color chart, you might as well save yourself a few dollars and try a DIY option.
DIY Tombow Blending Palette
If you have a laminator and some laminating pouches on hand then making your own blending palette is easy peasy. (Psst… If you have a Minc for foiling, then that works as a laminator too!) To make my blending palette, I simply cut a piece of cardstock in half, ran in through my laminator, and trimmed off the excess. That’s it! Ready to blend!
If you don’t have a laminator, no worries, you have other options that will work! Probably the easiest one is to just grab a plastic baggie. If you want, you can tape it down to your work surface or a piece of cardstock to keep it from wrinkling or slipping.
How to Create Ombre Lettering with Brush Pens
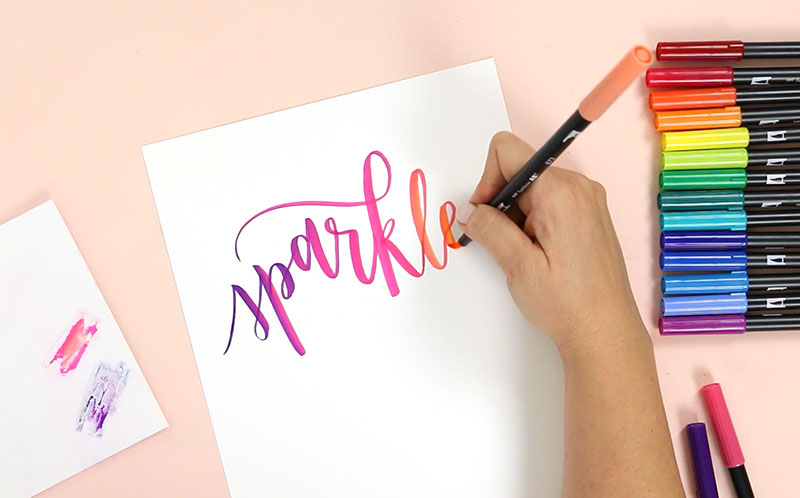
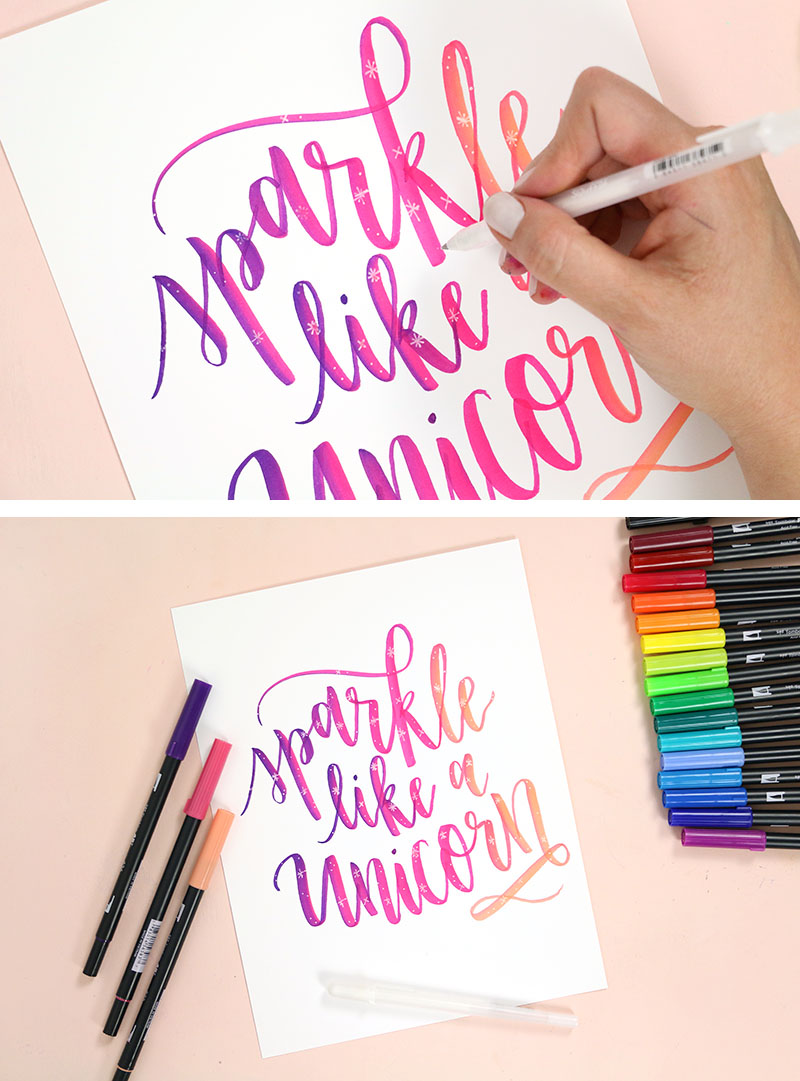
When you have your blending palette or DIY option ready, it’s time to get lettering. First, you will want to pick out a few complimentary colors. For my first design, I used Imperial Purple (636), Hot Pink (743), and Coral (873).
Start by rubbing your darkest color on your blending palette. Because of the palette’s slick surface, the ink will sit on top of the palette, which allows you to pick it up and blend it with another pen. Then, take your next color (for me this was the pink pen), and pick up some of the first color onto the brush tip. (Don’t worry – these pens are self-cleaning, which means the darker color will come off as you color, so you don’t have to worry about ruining your marker!) Next, begin your lettering piece. As you draw, the color will gradually shift from the darker color you picked up, to the lighter color of the pen.

Next, continue the ombre effect by putting some of the second color (pink for me) down on your palette, then pick that color up with the lightest marker (coral for me) to continue your lettering. I repeated this process for each line of the design so the entire piece shifted from purple, to pink, to coral.

For this design, I decided to finish it off with some sparkle details using a white Gelly Roll Souffle pen.
Sometimes it’s just easier to watch a video of this kind of thing, so I put together a quick little video tutorial of the process you can watch here:
And that’s pretty much it! The basics of blending your brush lettering with Tombow brush pens. I created one more simple design using this method that I wanted to share with you guys. For this one, I used the same basic blending technique, but rather than moving from one color to another for that ombre look, I just used two colors to create more a varied, watercolor type effect. I simply continued to go back and pick up more of the dark color as I did my lettering. For this piece, I used Deep Blue (565) and Sea Blue (373).
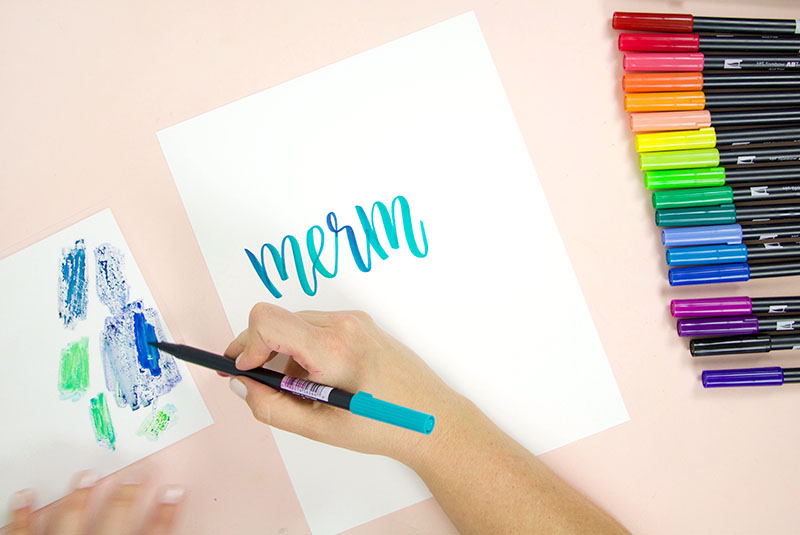
When I was done lettering my phrase, I used the fine tip end of the darker blue pen to draw little scale details onto the bottoms of my letters. I’m really happy with the way this one came out.

If you guys like these designs, you can grab free printable versions of them below. Printables are free for personal use only. Thanks! 🙂

Actually a Mermaid Printable | Sparkle like a Unicorn Printable
That’s it for today, friends! Happy Lettering and Happy Making!

Check out more free printables here:
[the_grid name=”Free Printables Footer”]


Comments + Project Love
Erika says
Actually a Mermaid printable is link to purchase art item on Amazon.
Would love Mermaid printable for my daughter’s room if possible. Thank you!
Alexis says
Oh no! Oops! I just fixed that link for you, Erika. Thanks for letting me know about that. I hope you like the printable! 🙂
alicia says
How about using the blending brush?
Casey says
I love all of it! It’s so hard to use the brush end without making any mistakes. Any tips on that?