Woven wall hangings full of color and texture are still a big trend, but DIY weaving projects make more than just beautiful wall decor! Why not make a beautiful woven bag? This post walks you through all the steps of making your own simple yet pretty woven bag. I originally shared this project at Crafts Unleashed, and this post contains affiliate links, which help to support this site at no extra cost to you.

Have you guys tried weaving yet?? If you have been around here much, you probably know that I am a big fan of fiber crafts. I love crochet, of course, but I also am a fan of embroidery, macrame, pom poms, and basically anything you can do with yarn and thread. So, it is about time that I get a weaving project up here, right??
I have done a few small weaving projects before, but this is my first time sharing one here on the blog. I love the look of the gorgeous woven wall hanging that have been all over instagram and pinterest for the past couple years, and this project definitely takes a lot of inspiration from those beautiful pieces.
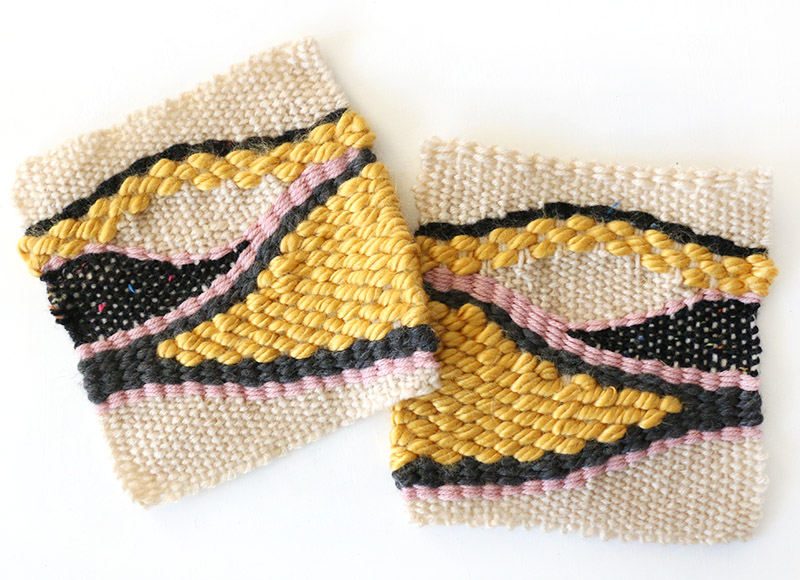
This project was my attempt to get the look of the wall hangings I love, but to give them a little twist by making a functional item. I ended up with this super simple little DIY woven bag, and I love how it turned out!
If you want to make your own, I will walk you through the basic steps below.
How to make a Woven Bag
To make this bag, you will basically make two woven pieces in the same size and then sew them together. Alternatively, you could make one longer piece, fold it in half, and then stitch the sides together. Because I was using a smaller loom, I made two separate pieces.
First, start off by gathering your supplies. Here’s what you will need:

DIY Woven Bag Supplies:
- Yarn in different weights and colors. This is a great project for using up that stash. I used the following:
- Darice Essentials Jumbo Acrylic Yarn in Beige
- Bernat Mega Bulky in Gold
- All Things You Essential Acrylic Yarn
- All Things You Super Bulky Wool Blend in Granite
- Weaving Loom (also available on Amazon or this is a great option too)
- Scissors
- Crochet Hook
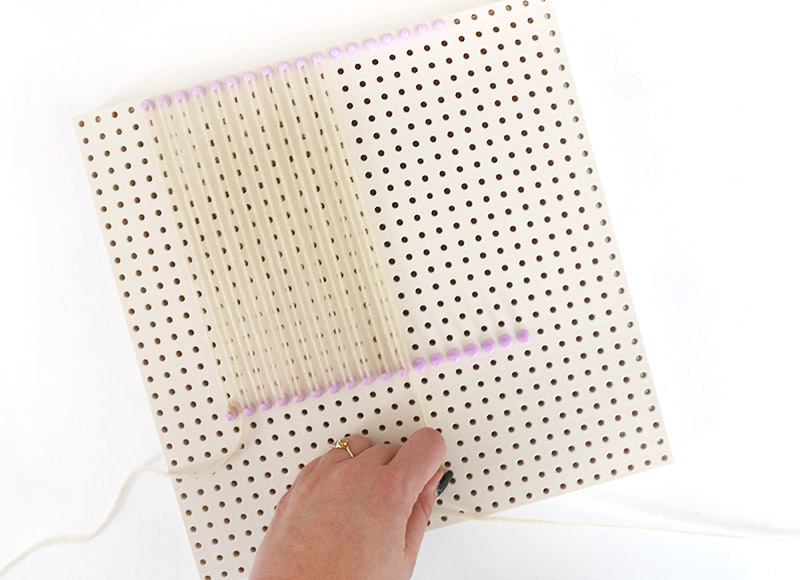
Step One. Warp the Loom.
First, you will need to wind the vertical strands (called the warp) onto to your loom. With my loom, I placed the pegs to create a piece about 6.5″ square.
To create the warp, I tied off the yarn on the bottom left peg with a slip knot, and then, keeping the yarn taut, I wrapped it around the top left peg and zig zagged the yarn around each peg. Finally, I cut off the yarn leaving a 6 inch tail and tied it onto the last peg.
Step Two. Weave.
When the warp is done, then it’s time to get weaving!
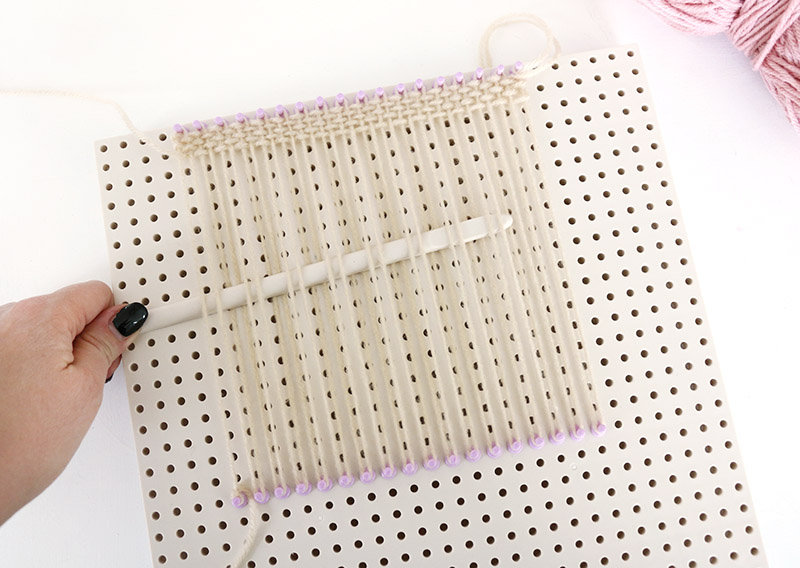
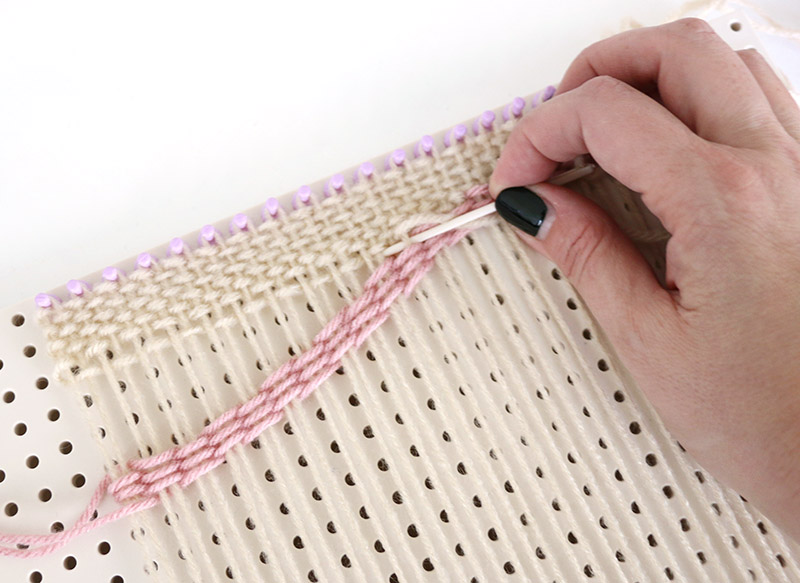
To start, I cut off a piece of yarn about 3 yards long and threaded it onto the shuttle that came with my loom. For the first few rows, I used a basic weaving pattern: simply threading the working yarn over and then under the warp strands, alternating with each strand (see image below).
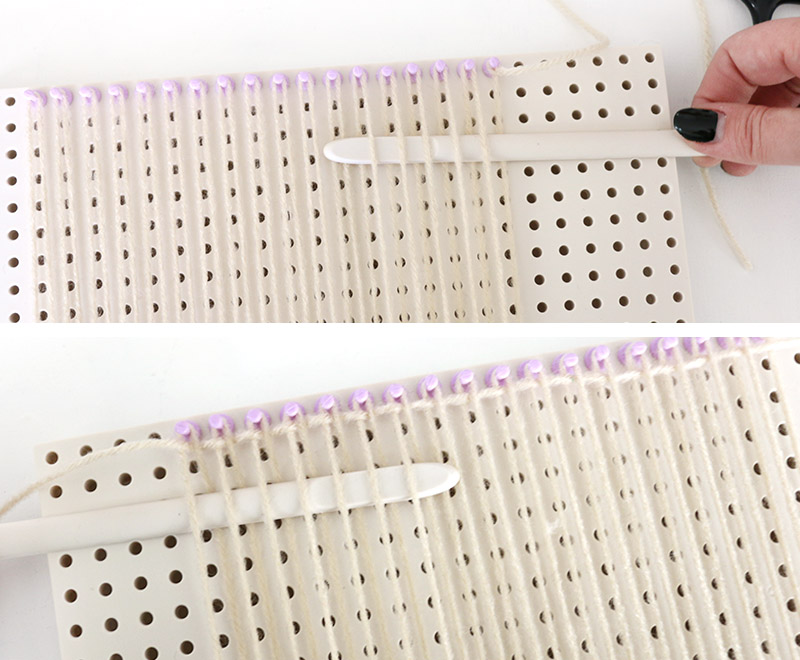
For the second row, we will go back the way we came weaving under then over, going the opposite way from the previous row (see image above).
At the end of each row, be careful not to pull the yarn too tight to avoid changing the width of your piece. Continue in this pattern for a few rows or until that section is as long as you want it to be.
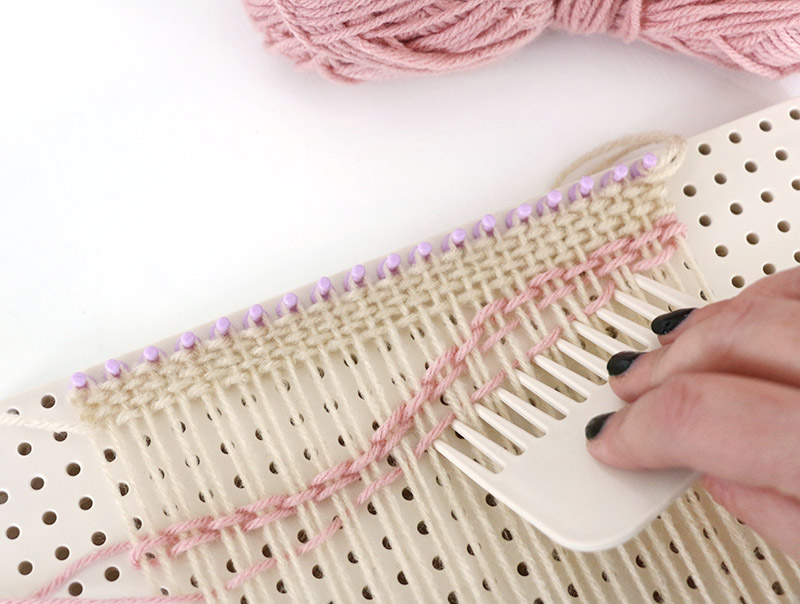
For the next section, I cut a length of pink yarn and worked a few rows using a 2 x 2 weaving pattern. This technique gives you longer yarn loops on the surface of your work. When you’re 2 x 2 weaving, you simply go under the first two strands, then over then next two, and repeat this pattern across the row (see image below). For the next row, you will go the opposite way of the previous row (over if you went under before).
To get a fun wavy look, all you need to do is push those rows with a comb to create that curved shape.
When you are happy with the curve, go back and fill in the space above with your first color. You may need to use a smaller needle to weave this section.
Then, just continue to repeat this process of adding curving rows of weaving and filling in the spaces between. When you are done with a particular section, be sure to leave at least a six inch tail to weave in at the end.
Step Three. Remove from Loom and Weave in Ends.
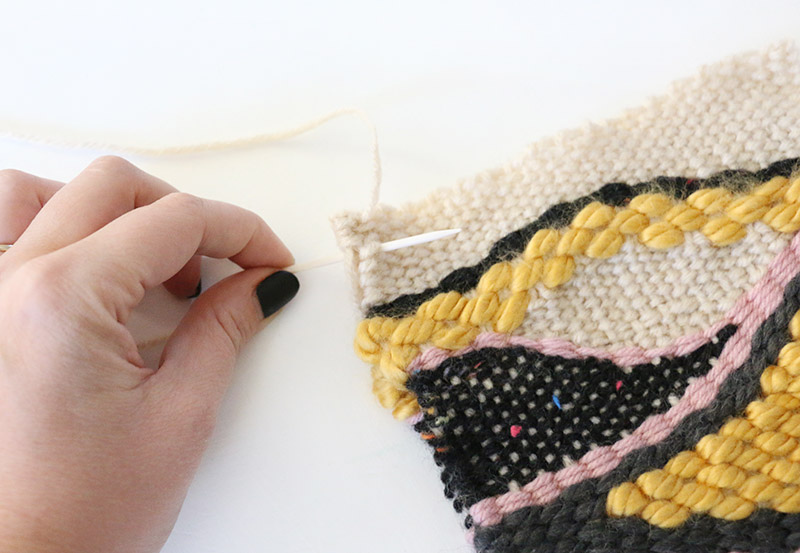
When you are happy with your design, it is time to finish it off and remove it from your loom. To do so, start by untying the first knot you attached to the bottom left peg and tie it to the adjacent loop. Do the same for the knot on the opposite corner, and then, finally pull each loop off of its peg.
At this point you will have a beautiful little woven piece with a bunch of tail ends hanging off. Simply use a yarn needle to weave in those ends on the backside.
Step Four. Repeat.
Now that you have your first piece done, it’s time to do it all again and make another! Use your first piece as a guide to create another weaving in the same size that is a mirror image of the first. But don’t worry, your two pieces don’t have to be exactly identical, just try to get them close.
Step Five. Sew Together Bag.
With your two woven pieces done, it’s time to assemble that DIY woven bag! Thread your yarn needle with a piece of yarn (I recommend using the yarn used for most of the body of your bag. Then, holding the two pieces with right sides facing out, sew them together along the sides and bottom leaving the top side open.
Step Six. Add Tassels and Handle.
Next, it’s time to add tassels to the bottom of the bag. I think the tassels are really key in getting that fun wall hanging look.
Start off by cutting several lengths of yarn to a little more than double the desired length of the finished tassels. To make my tassels, I used 5 strands of yarn about 14″ long for each tassel.
Fold the lengths of yarn in half and then use a crochet hook to pull the loop through the bottom of the bag (see image below). Thread the tails of the yarn through the loop and pull to tighten.
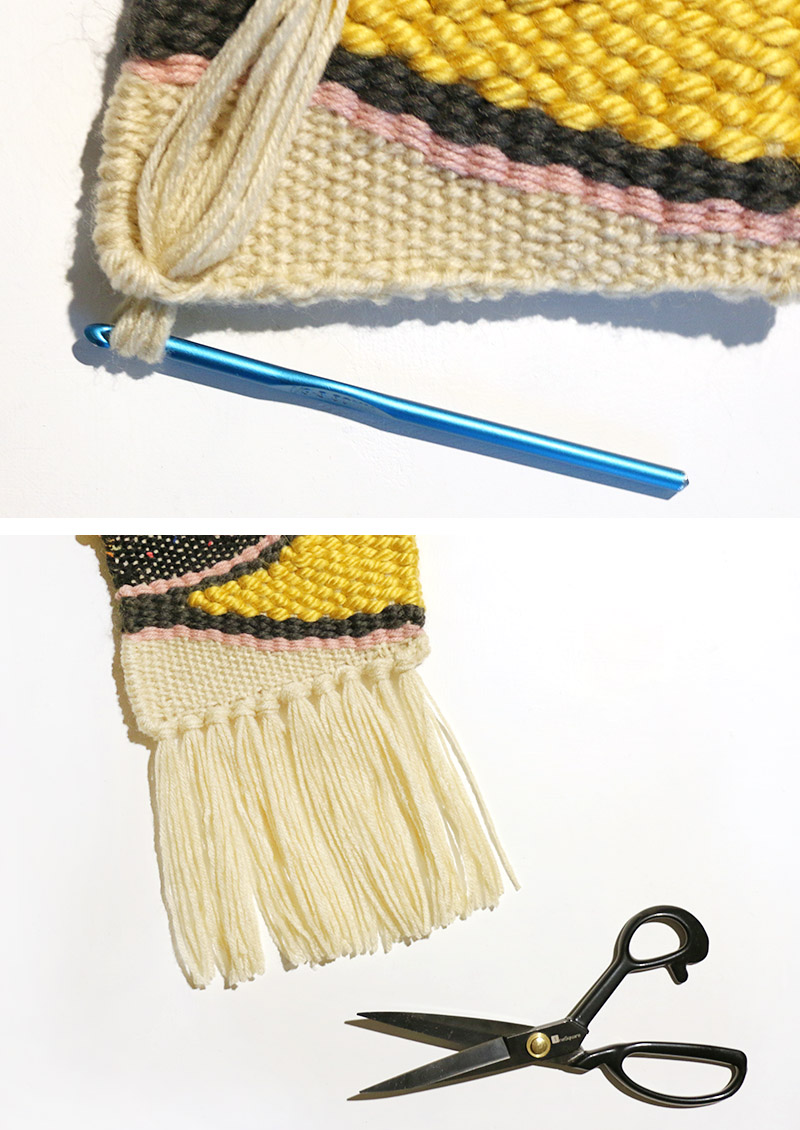
Just continue to add tassels until the bottom of the bag is covered, then use your scissors to trim them up and make them all even.
Your bag is almost done! All that is left to do is add a strap.
To create my strap, I braided together six long pieces of yarn about two yards long and then tied knots at each end. Finally, I sewed the ends of my braided straps to the sides of the bag. I left a few inches of yarn past the knotted ends of the straps to keep with that tassel look.

Voila! Your DIY woven bag is all done! I love that wall-hanging look and how customizable this project is. Would you give it a try? If you do, I want to see your bag! Share your photos to my facebook page or tag me on instagram so I can see what you made. 🙂
Until next time, Happy Making!


Comments + Project Love
Allison Murrray says
Oh, my stars. I LOVE THIS! What a clever way to weave!!!