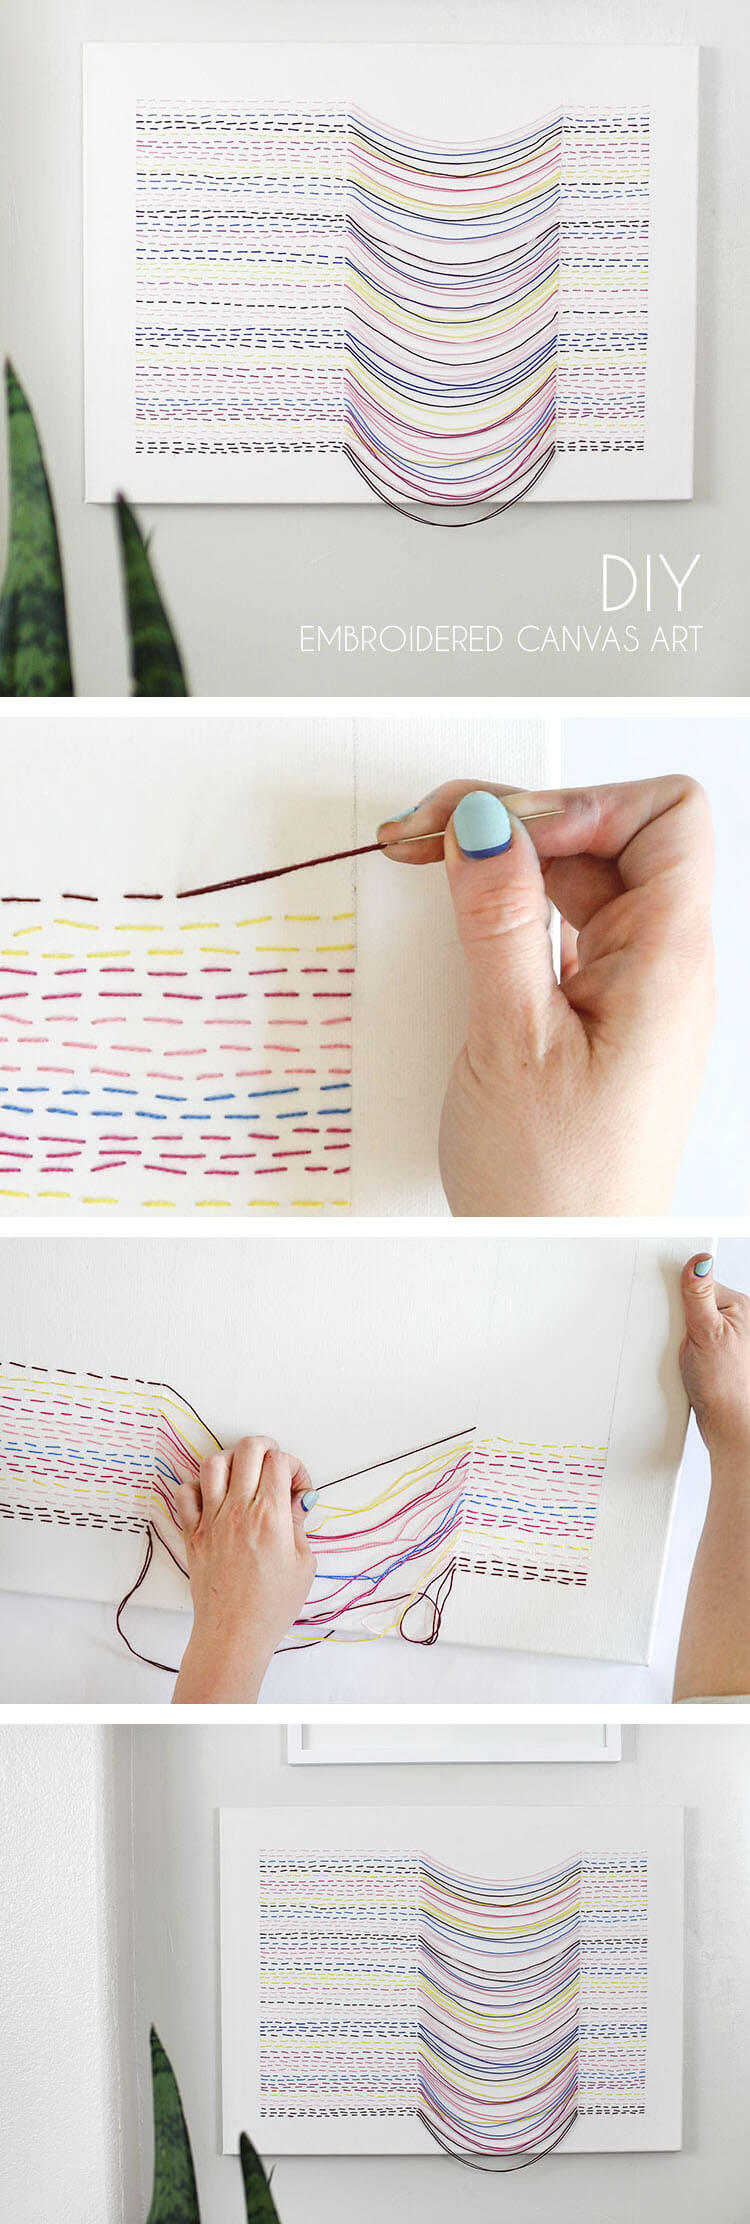
Make your own unique DIY embroidered canvas wall art. This DIY art piece is easy to make and adds lots of interest, color, and movement to your room. I originally shared this project at Crafts Unleashed. This post contains affiliate links for your convenience, see my full disclosure policy here.
I’m big on DIY art. I mean, I also love to buy pieces, but that means money plus there are just so many walls! We have been in our house for nearly two years now, and I’m still working on filling them all up. That means lots of DIY art projects (you know, like this one, this one, and this one). Today’s project is probably one of my favorite things I have made in a long time.
Crafts Unleashed challenged me to create a project with one of their art canvases, and I really wanted to do some kind of woven piece using yarn or thread. I was super inspired by the amazing string sculptures of Nike Schroeder, and tried to get a similar type of feeling, although my project was much simpler. I really love the way it turned out.

I have so many ideas for putting this embroidered canvas technique to work, so you might see some more similar projects in the future. All you need to create a piece art with a lot of color, movement, and visual interest is just a few basic supplies and bit of patience. Ready to make one for your home? Let’s do it!
DIY Embroidered Canvas Wall Art Supplies:
- Blank Prestretched Artist Canvas (I used 18″x 24″)
- Craft Thread or Embroidery Floss
- Needle
- Scissors
- Ruler
- Pencil and Eraser
Step One – Pick colors.

You can either pick out individual colors at the craft store or buy a big value pack of thread. The pack I got came with a wide variety of colors, but I decided to limit my color palette. I chose to work with maroon, the pinks, the two darker blues, and the bright yellow. I used one to two skeins of each color for the entire project.
Step Two – Mark off canvas.

Using your ruler and pencil, lightly mark off the sections of the canvas that you want to embroider. I left a two inch border all the way around the canvas. Next, I marked off a line eight inches over from the left side and three and a half inches over from the right side. Remember to make your marks lightly, you will be erasing them later on! When you have your canvas marked off, you are ready to start embroidering.
Step Three – Embroider your DIY canvas wall art.
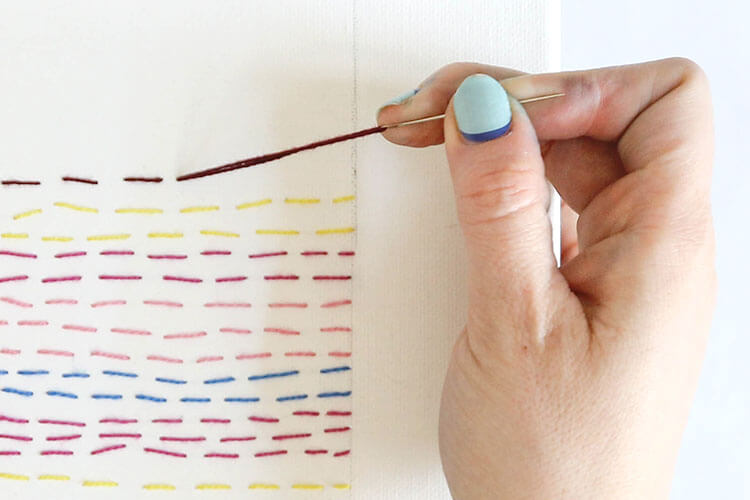
Thread your needle with a piece of long thread (it needs to be long enough to go across the canvas at least once). Pull the needle up through the canvas on the line you marked on the left side of the canvas. Tie a double knot in the end of your thread to keep it from pulling all the way through the canvas.

Then pull the needle down through the canvas and back up until you get to the next line. Don’t worry too much about getting your stitches perfect. I liked the look of staggering the length and space between each stitch.
When you get to the next marked line, you will create that cool draped effect. Pull the needle up through the canvas on the line. Then insert the needle back down through the canvas on the next line. Pull on the thread to loosen it until you get the drape that you like. Then just keep stitching across until you get to the next line.

Try to keep the drape length around the same for each line of stitches. Don’t worry about the thread being a bit kinky or twisted. We will deal with that later.
When you get to the end of the row, finish off with a double knot on the backside of the canvas and move onto the next row. I just made up the color pattern as I went along adding in more of whatever color I felt should come next. Be creative and have fun with it!
This project takes a bit of time to complete, but it’s a good one to keep your hands busy while watching TV.
Step Four – Finishing.
At this point, there are just a few final steps to finish off your piece. First, use a good eraser to very carefully remove your pencil lines from the canvas. Second, straighten out those draped threads.
When you are finished embroidering, your draped threads will probably look something like this:
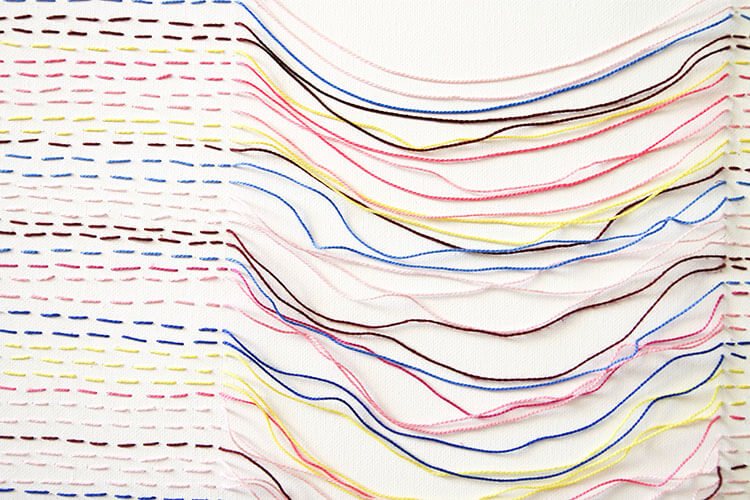
You can see I already straightened out the top couple of drapes – a big difference, right? Getting rid of the kinks in your thread is simple. Just get your fingers wet and slide them along the draped sections, pulling gently.

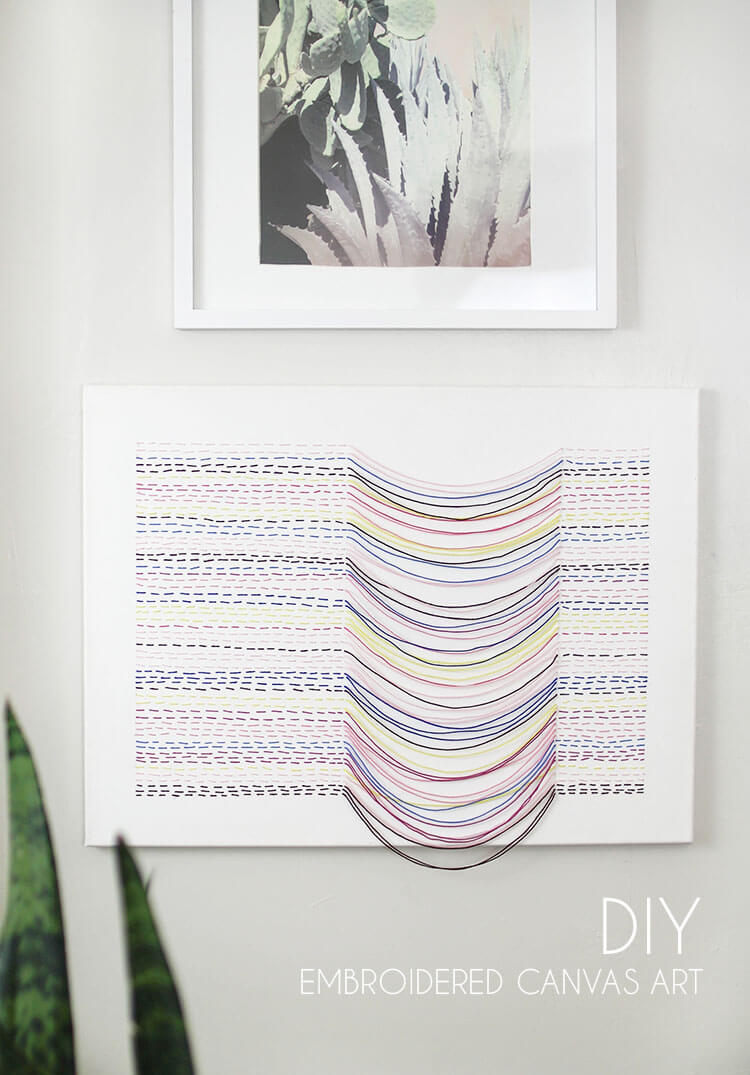
Finally, hang the piece to dry. And that’s it! Your new embroidered DIY canvas wall art is all ready to display.

I hung my piece in our living room, and I love the color and texture it brings to the room. It is really such a unique piece!

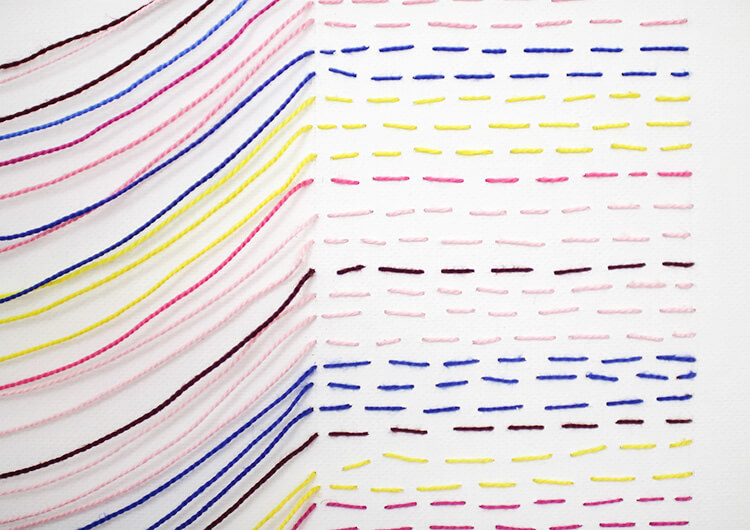
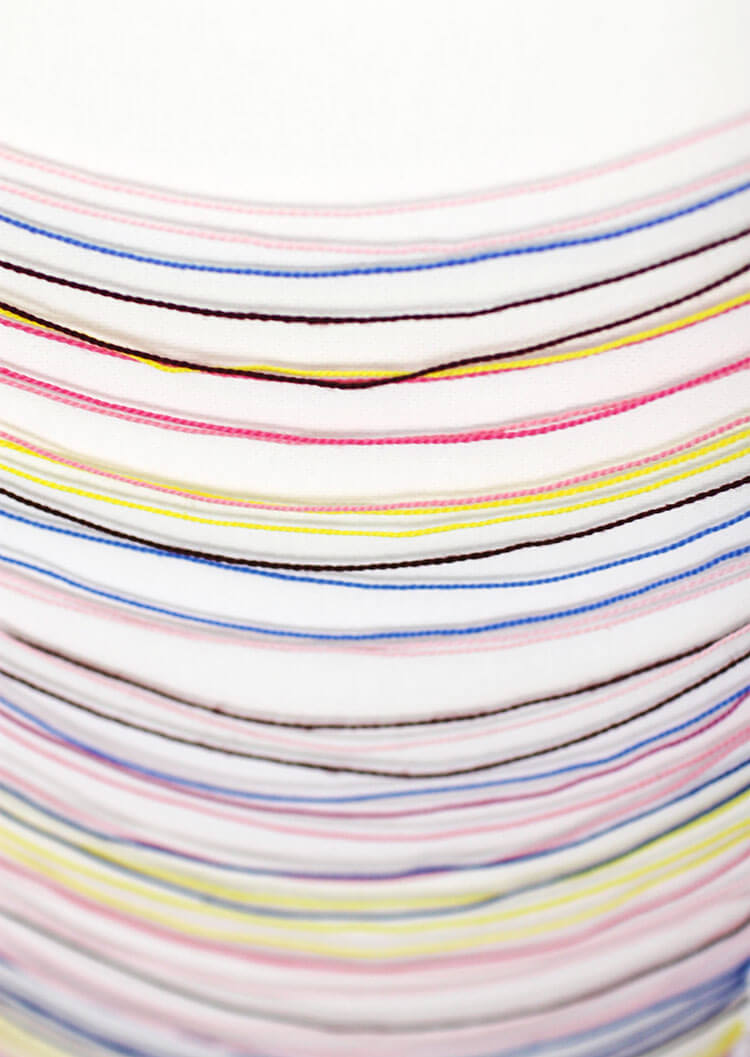
I especially love the details up close.

If you make your own DIY Embroidered Canvas Wall Art, I would love to see it! Share it with my on my facebook page or tag me on instagram or twitter (@persialou), and don’t forget to use the hashtag #persialou so I can regram you!
Happy Making!

Check out some of my other DIY art projects:


Comments + Project Love
Ama says
Nice texture and beautiful colors! This is a genius idea!
Peg MacDougall says
fun and different. Like it.
Haeley @ Design Improvised says
This turned out beautifully and unlike anything I’ve seen before. I love it!
Alexis says
Thanks so much, Haeley!
tachul says
i love it and inspiring me 🙂
Zoe Hollington says
Amazing work and has been Inspiring for a new project. Im and art student from London and this little blod post has really sparked some new developments. Great work!
Alexis says
Thanks so much, Zoe! Just looked at some of your work. It’s beautiful!
Diana says
Loved the many ideas you’ve shared. Hope to use the birch tree or the stitched canvas with a girls get together. Again many thanks will post pictures.
Natasha says
Can you paint the canvas prior to embroidering it?
Emerald says
How to choose a needle size for canvas?
My thread always getting stuck.
And sometimes it leave noticeable holes on the canvas