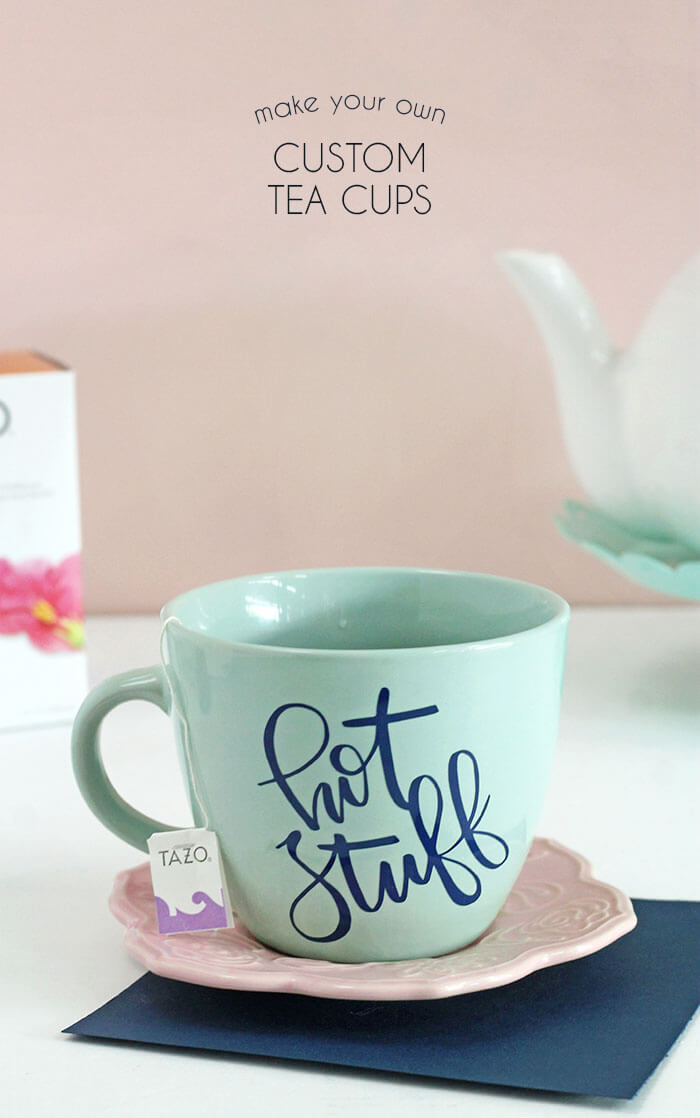
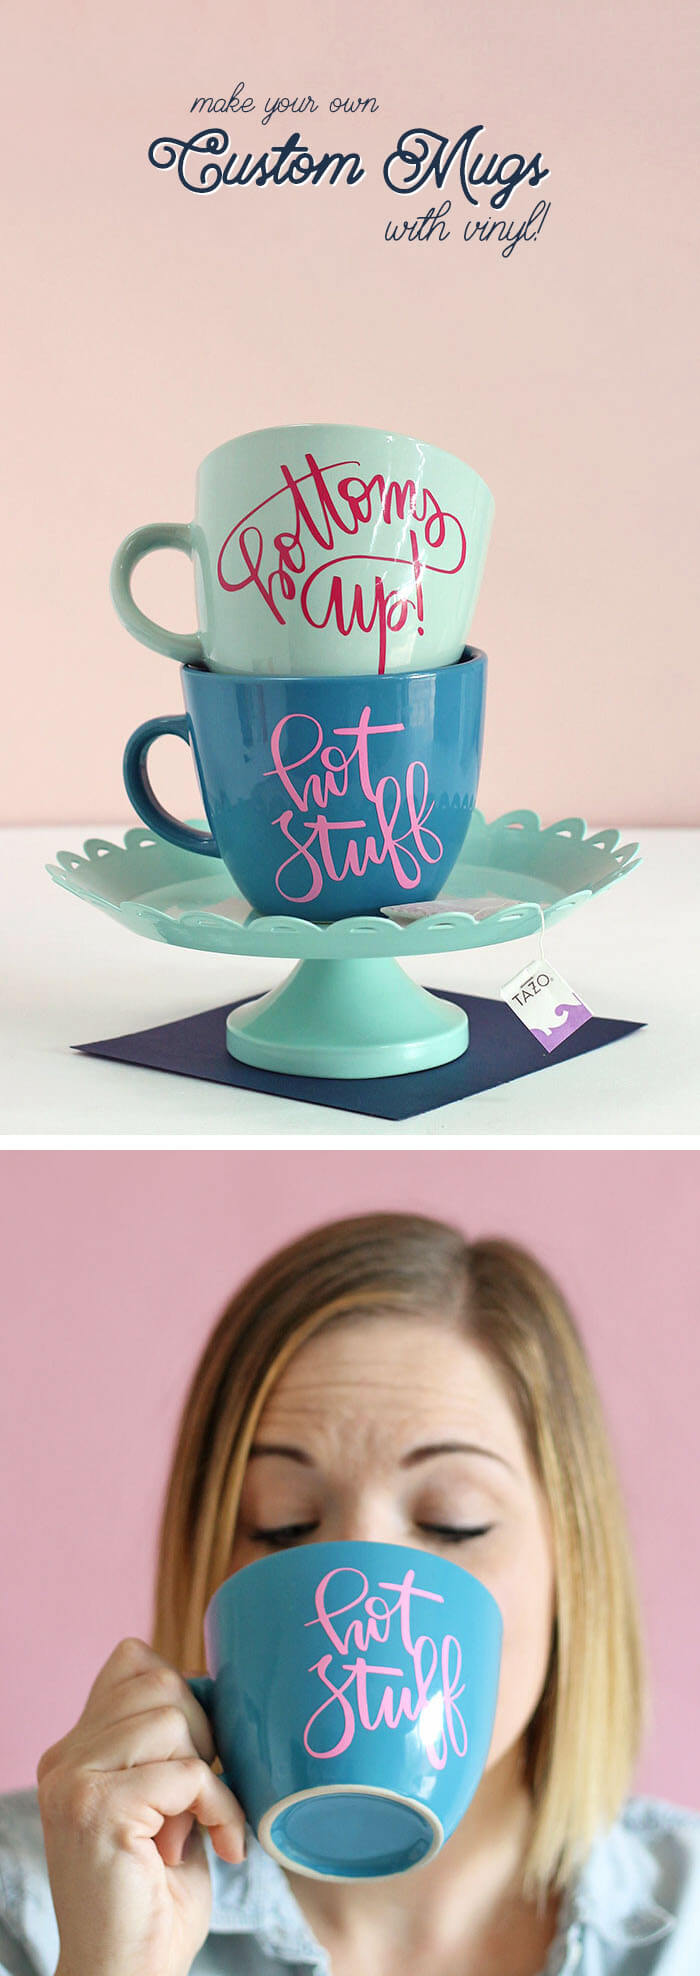
Learn how to DIY personalized mugs and tea cups with vinyl – it’s easy to do with professional results! You can make these adorable cups easily with my free cut files and be sipping your favorite drink in no time. Thanks to Tazo Tea for sponsoring this post, which also contains affiliate links that help to support this blog.
Life has been busy lately, and I have been trying to find ways to get everything done (or at least most of it – does anyone ever finish their to-do list??) while maintaining my sanity. It is no easy task, but I have found that adding in little breaks throughout the day to be really helpful.
I mean, we all need a little happy in our day, right? Spending some time playing with my son, doing some stretching, taking a dance break (totally recommend!), or making myself a little cup of tea helps me to find the energy to keep checking items off my list.
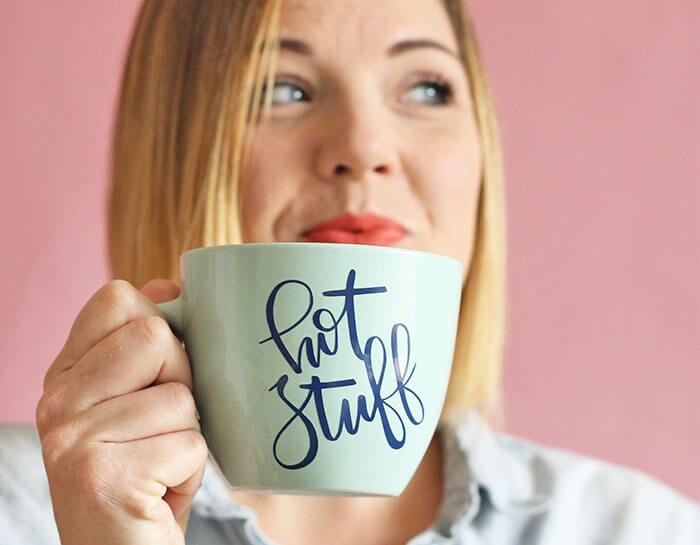

And the only thing to make this whole situation better are some cute DIY personalized mugs, right? I definitely think they up the happy factor. Those little “hot stuff” mugs make me smile every time I see them.
These mugs are easy to make if you have an electronic cutting machine like my Silhouette. Even if you don’t, you can absolutely cut designs from vinyl with scissors or a craft knife and apply it the same way. I will walk you through all the steps to making your own custom, professional-looking mugs. Ready? Let’s do this!
DIY Personalized Mugs and Tea Cups Supplies:
- Blank Mugs (I picked mine up at Target)
- Permanent Adhesive Vinyl (I used Oracal 651)
- Silhouette Cameo (or other electronic cutter)
- Transfer Tape
- Masking Tape
- Weeding Hook (<- this one is highly recommended) or Straight Pin
- Applicator Tool (an old credit card works well too)
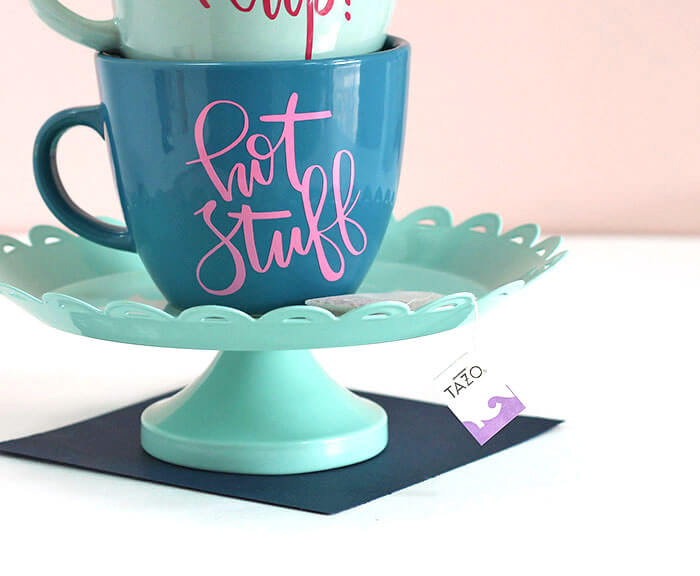
- My “Hot Stuff” or “Bottoms Up” Designs (Click to download the SVG files)
How to Personalize Mugs with Vinyl
Of course there are different ways to personalize mugs or tea cups, but I am going with vinyl for this project because it makes it really easy to get professional-looking results.
Adhesive vinyl may be a bit intimidating or scary if you haven’t ever used it before, but it really is not that difficult to work with. Just think of it as a sheet of sticker paper! Stickers aren’t scary right? Haha… okay, let’s make some awesome DIY personalized mugs!
For a full, step-by-step guide to working with adhesive vinyl, check out my beginner’s guide to adhesive vinyl HERE.
The first step to decorating your cups is to cutting out the design from the vinyl. Download the SVG file of your choice from the supply list above and open it in your software. Then send it to the machine and let it cut for you. If you don’t have a Silhouette or Cricut, this design might be a bit too complicated to cut by hand, but you can absolutely cut out other designs using scissors or a craft knife.
When your design is done cutting, it’s time to remove the excess vinyl (the stuff around your design that you don’t want transferred to the mug). This process is often referred to as weeding.
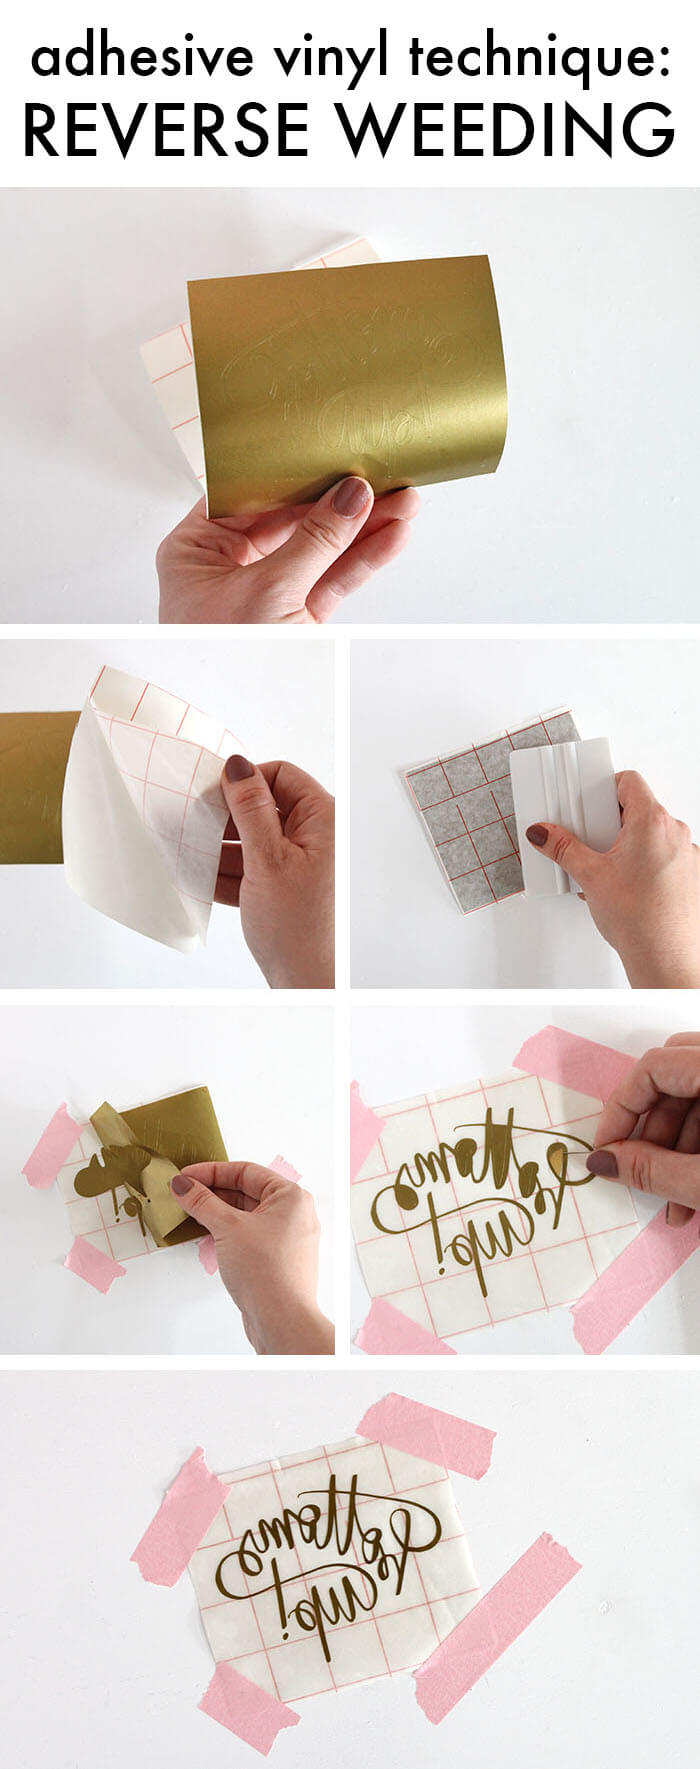
How to Reverse Weed Vinyl
Because this design is a delicate (some of those lines are a little thin), I decided to do reverse weeding, which makes things a bit easier. Don’t worry! I will walk you through each step!
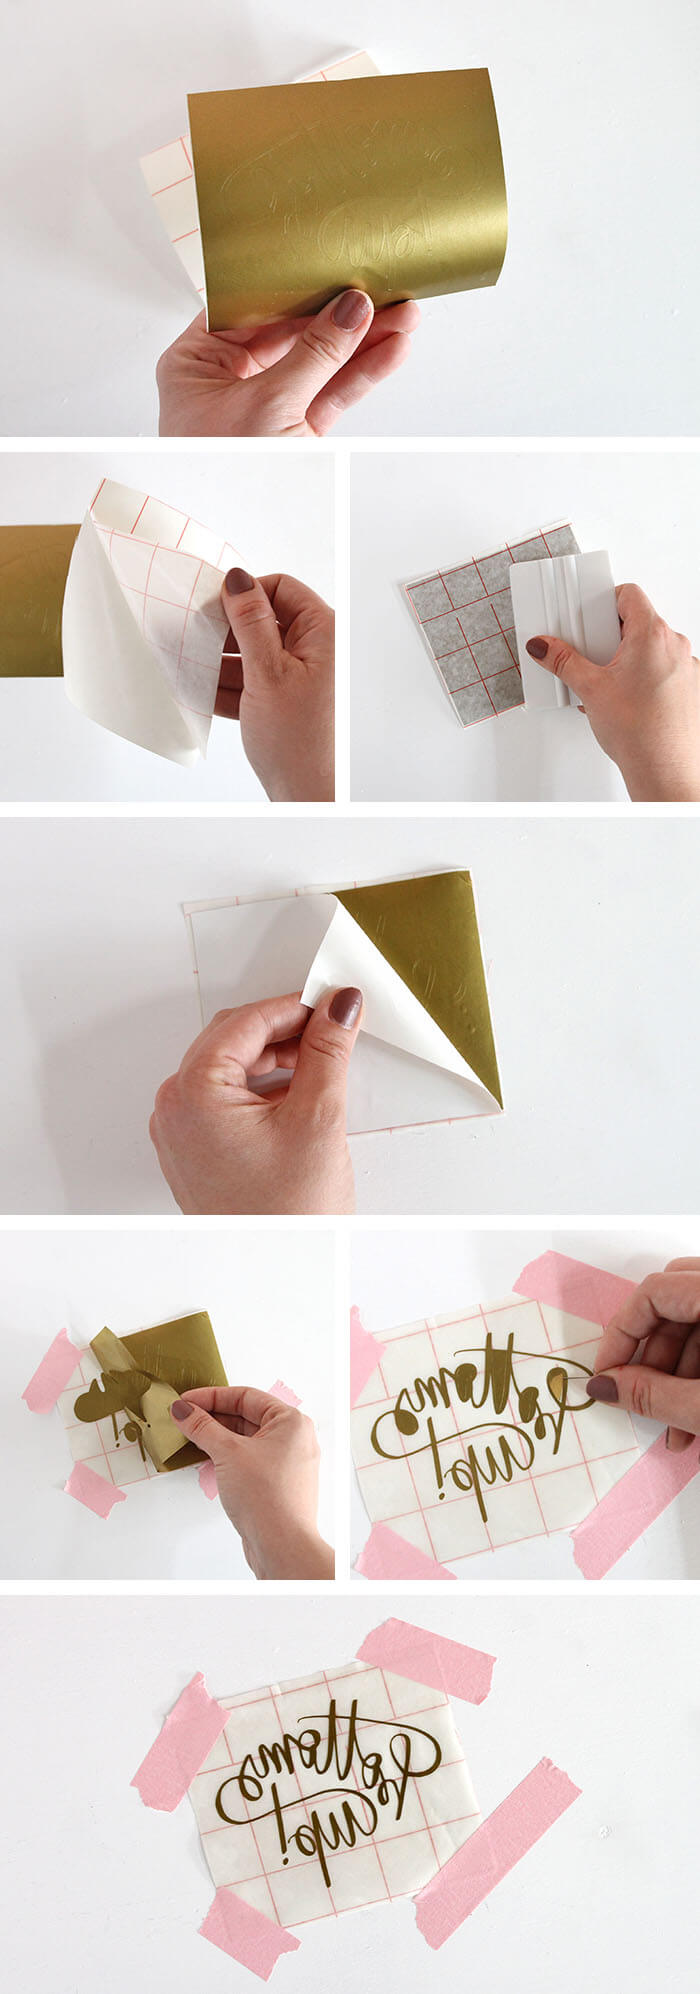
- Start by cutting a piece of transfer tape (clear contact paper also works) slightly bigger than your piece of vinyl.
- Peel the transfer tape from its backing and adhere it to the front of the cut vinyl. Use an application tool or an old credit card to rub the transfer tape onto the vinyl.
- Peel the backing off of the vinyl so the sticky side of the vinyl is facing up. (Keep the backing handy though – we will be using it again!) I find it helpful to use some masking tape to secure the transfer tape to your work surface at this point.
- Carefully peel the excess vinyl up from the transfer tape. Cut away excess vinyl with scissors as you go. Try to avoid letting the excess vinyl stick to your design – that can cause some problems.
- Use you straight pin to pick up the little pieces from inside your letters.
All done with the weeding! Not too bad right? Now we are ready to move that vinyl design over to our cup.
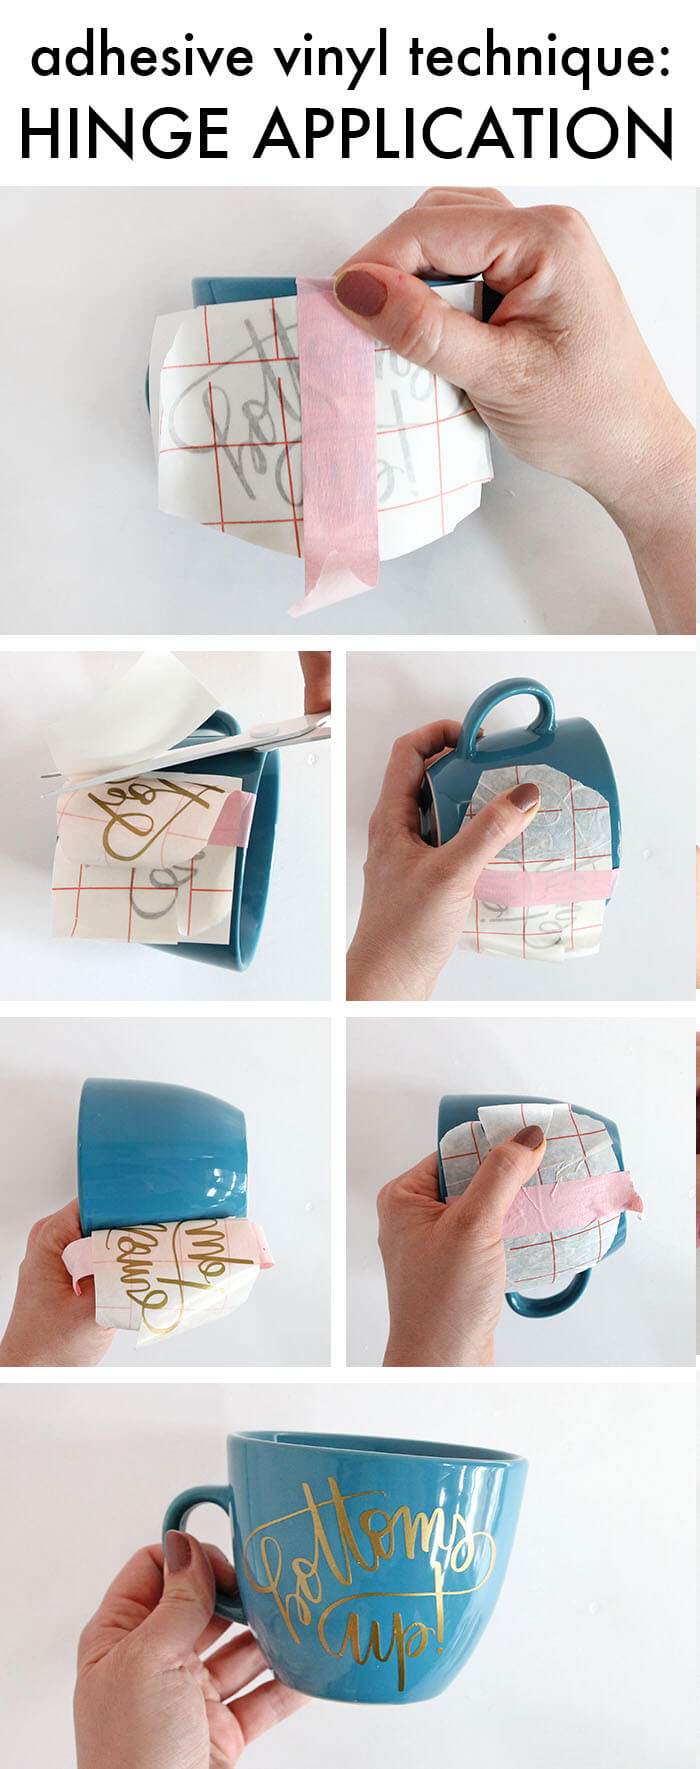
How to Use the Vinyl Hinge Method
You could just peel up your design at this point and stick it straight on your mug, but it is pretty difficult to get it on straight and wrinkle free that way. Instead, I recommend using the “hinge method,” which has a few more steps but usually gets you a really great application.
Start by putting the vinyl backing back onto your design, shiny side down. This will make it easier to carefully position the design on the mug.
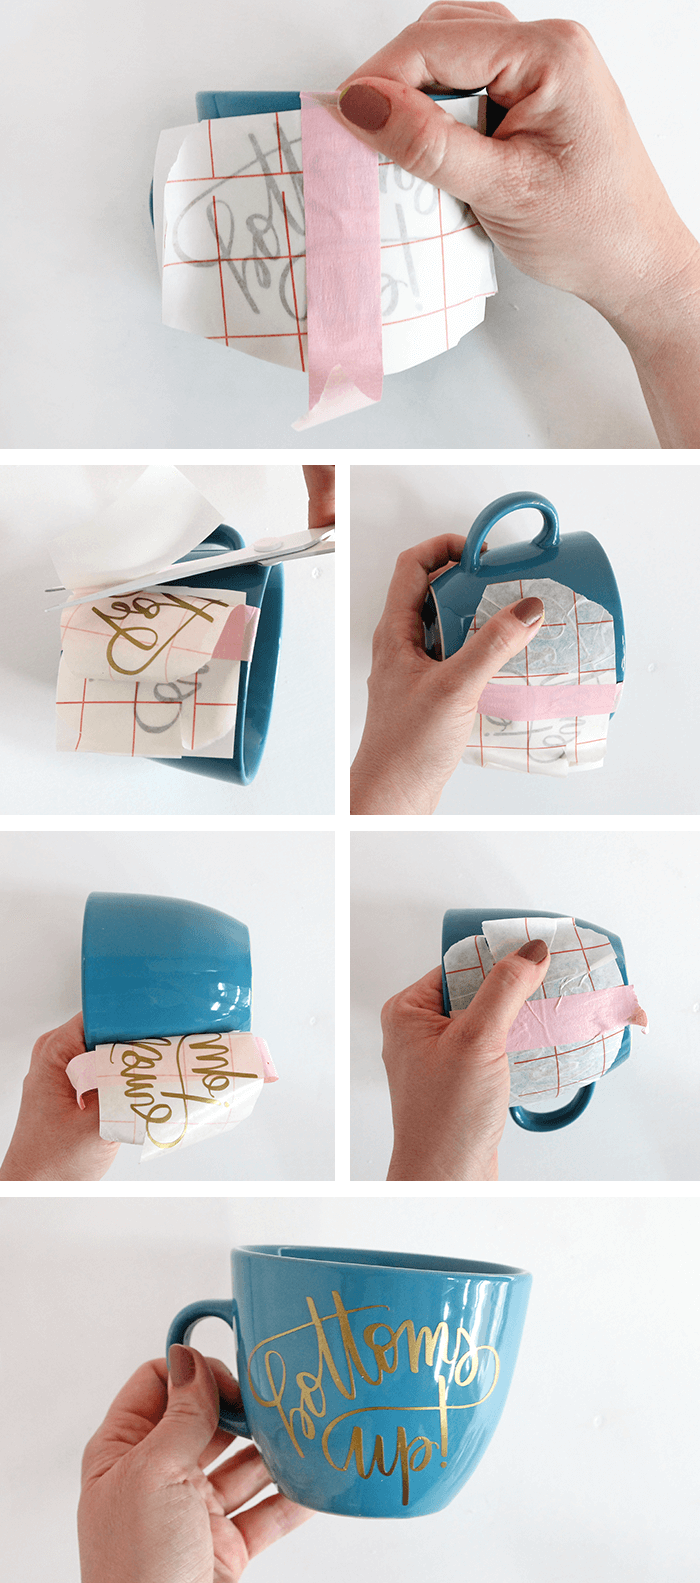
- With your vinyl design sandwiched between the backing and the transfer tape, position your design on your cup. Secure it in place with a strip of masking tape across the middle.
- Peel the design up from the backing to the left of your masking tape (that’s the “hinge”). Cut away the backing with a pair of scissors.
- Use your fingers to smooth the design down onto the mug to the left of your tape hinge. Start from the middle and work outwards. Go slowly to avoid bubbles and wrinkles in the vinyl.
- Peel the backing off of the design on the other side of your hinge.
- Smooth the vinyl on to the mug on the other side using the same method you used before.
- Use your application tool/old credit card to burnish the vinyl onto the mug.
- Peel off the transfer tape. Use your fingers or application tool to smooth out any little bubbles.
Let the adhesive cure for at least 24 hours before washing. I recommend hand washing to keep your cups looking pretty as long as possible.
And that’s it! Your cup is all done! Pretty simple for such a professional look, right?

Finally, fill your cute cup with your favorite tea, coffee or hot cocoa, and sip joyfully, hot stuff! You deserve it! ?

I hope this post has showed you that vinyl projects don’t have to be intimidating! If you want to learn more tips and techniques for working with vinyl, I have a great new resource! My new Craftsy course, Silhouette Saavy: Venture into Vinyl. It’s an online video course that will teach you everything you need to know to make vinyl projects with your Silhouette. We make everything from large wall decals to t-shirts to an etched mirror, and I walk you through each step.
That’s it for today! Happy Making!

Check out more Vinyl Projects here:
[the_grid name=”Vinyl Projects”]


Comments + Project Love
Amy | Delineate Your Dwelling says
Love how these mugs turned out! And cutest pics of you.
Alexis says
Aw thanks! You are the sweetest
Ursula says
Hello Alexis! These are lovely! I’m not much of a tea drinker but now I’m curious about the “awake” tea. I rely on caffeine so much! Ha! Must. Get. A Silouette…
Ursula
Alexis says
Thanks, Ursula! You really need one! You would make the most beautiful things!
Danijela says
These are so cute!
Christy says
Is permanent adhesive vinyl dishwasher safe?
Alexis says
Hi Christy! It kind of depends on your design. If the design is really delicate or intricate, it won’t likely survive the dishwasher. If it is pretty thick and solid, then it will probably be fine. I recommend hand washing just to be on the safe side.
Nancy Miller says
I am planning to do this but I am concerned about the heat from the tea or coffee causing the vinyl to peel off. Have you ever had this problem? Or do you use a sealer over the vinyl?
Alexis says
Hi Nancy! As long as you use permanent vinyl, I don’t think you will have any problems with that. I have used my vinyl mugs with hot drinks and put them in the microwave without problem. I would, however, recommend hand washing as more delicate designs can get damaged in the dishwasher. Good luck!
Jill says
I read on a different thread that you can bake a ceramic mug with permanent vinyl at 175 for 1 hour to make it dishwasher safe. I’ve tried it very successfully and washed my mug many times. The mug I tried this on had an intricate design with lots of individual letters and thin lines.
Just last night I tried baking one of those stainless steel tumblers with vinyl and it looks good so far!
Alexis says
Thanks so much for sharing that, Jill! I am definitely going to give it a try! Thank you!
Beth says
Hi, I received a mug as a gift (I’m a teacher and received this a few years ago and don’t remember who gave it to me so I can’t ask. ) with a design that appears to be vinyl. I’ve used it several times for coffee and hand washed it. Now the lettering is beginning to peel away from the mug. I read about baking it in the oven but since I don’t know the material I’m a bit nervous. I don’t want to ruin the mug. Is there a type of vinyl that would NOT hold up in the oven? How big of a risk is there in baking it without knowing?
Alida Dickens says
Hi is that 175 C or Farenheit? Thanks
Alexis says
Hi Alida. That would be Farenheit. 🙂
Rene Heiser says
Hello! I see you left this comment about baking permanent vinyl about a year ago. I haven’t been able to find this information anywhere else. Has this continued to work for you? If you bake the mug does the vinyl stay on better?
Nichole says
I just tried this and it seems to have worked on the mug, but I plan to test this on other things and put the mug through some more tests. I will try to post back with my results.
Nancy Miller says
Thank you so much! They turned out great!
Alexis says
Yay! So glad to hear it!
Ruth Gauss says
This is a wonderful post! I love the designs, I love tea and I love that you shared your tips for how to apply the vinyl to a curved surface!!! Thank you so much for sharing!!!!
Alexis says
You are so welcome! Thanks for stopping by and commenting, Ruth! 🙂
Laura says
will this work on a glass beer mug as well? and where did you find the vinyl
Alexis says
Hi Laura! Yes, it will work great for glass mugs. 🙂 I have included links to where I got my vinyl in the supply list above, or you can click here – http://shrsl.com/?esg7. Expressions Vinyl is my favorite place to get vinyl from (great prices and selection). Amazon also has lots of options (http://amzn.to/2eH3Psu). You can find permanent adhesive vinyl in craft stores, but the selection will be more limited. Good luck!
Leah C says
This is a great idea! If baking the vinyl doesn’t work, you could also use removable vinyl as a stencil, and then use ceramic paints (which can be baked and are then dishwasher safe).
Alexis says
Yes! I have done that too! (http://persialou.com/2016/05/diy-disneyland-mad-tea-party-tea-cups.html) I find the permanent vinyl process to be easier, but if you really want them to be dishwasher safe, then that is a great method. Thanks, Leah!
sophia says
Hi Alexis!
To-tea-lly sweet mugs! Thanks for sharing such an informative and detailed post. I’ll definitely give it a try. The font is perfect for this project. Would you mind sharing that font name.
Thanks again.
Sophia
Alexis says
Hi Sophia! Thanks so much! I actually hand lettered the designs for these mugs, so I don’t have a font to share. I’m sorry! Thanks for stopping by. 🙂
Kate says
I have been looking and looking for a font similar to your hand lettering. So if you find/know of one, please let em know!
jonathan flores says
hola donde puedo comprar el material?
Heat Press Mom says
Beautiful project and beautiful website – you’ve got a good photographer! Wish I could get some of that Tazo Tea but it’s not sold where I am…
THE WAR OF DESTINY says
Thank you so much for this!! I knew I needed to curve the text but I could never figure out the right about to curve. You are a super time saver! I’m going to try this with wine glasses also. I feel like I should sing your praises. 🙂
Alexis says
You are so sweet! Glad it was helpful for you! 🙂
Bryant Woo says
Hi Alexis,
Just to check how to print the word / artwork into vinyl paper ?
Is it using specific printer?
Alexis says
Hi Bryant, the vinyl is cut using an electronic cutting machine. I use the Silhouette Cameo (you can get one here: http://amzn.to/2wSb8IA), but you could also use a Cricut or other machine. You can also cut designs by hand using a craft knife although that is certainly more tricky. I have a whole class all about using vinyl with the Silhouette machine you can check out here: http://craftsy.me/2vCkJ0U (that link will get you 25% off the class cost.) Good luck!
Bryant Woo says
Dear Alexis,
Noted your message,
Please assist to advised how to print our artwork into vinyl paper ?
Is it by printer or we hand draw into vinyl paper ?
If using printer, Which printer ink is suitable for print on vinyl paper.
Thank you.
Alexis says
Hi Bryant, I did not use printable vinyl for these cups. The designs are cut from colored vinyl. Nothing is printed. You can use printable vinyl (you can see how I used it in a post here: https://persialou.com/2017/01/diy-laptop-skin.html), but the type of printer you use will depend on the type of vinyl you use. Some are designed for use with inkjet printers and some are designed to be used with laser printers. I have used this brand which is designed to be used with inkjet printers – http://shrsl.com/k6ul (that’s an affiliate link). I hope that helps! Good luck!
Edward says
Looks great.. Never tried transferring with vinyl on mugs..
The tutorial will be very helpful. Thanks for sharing..
Theresa says
I’m a newbie to the vinyl world and have yet to create anything. I tend to research, learning from others, then try it out. My question for you is what is the difference between the vinyl that came with my starter kit, and permanent vinyl? Does it have a stronger bonding adhesive? Or is it more like a iron on type of vinyl?
Alexis says
Hi Theresa! I’m guessing you are referring to the Silhouette Vinyl Starter Kit? The vinyl that comes in that kit is a matte vinyl, which usually has a removable adhesive. That just means the adhesive isn’t quite as strong as that on a permanent adhesive vinyl. I used Oracal 651 for this project, and would recommend it. I like to get my vinyl from Expressions Vinyl (you can get it through my affiliate link here: http://shrsl.com/po1j) or you can also find it on Amazon (http://amzn.to/2BU5ILI). Hope that helps! 🙂
Laura Beth Martin says
Thank you so much for the explanation. I’ve attached products I’ve purchased using the hinge method but I just started making my own vinyl cuts and for some reason the transfer process is more intimidating than anything else! I really appreciate the explanation.
Alexis says
You are so welcome! 🙂
Michelle says
I know this is random but where did you get those pink tea saucers??? I’m in love!
Alexis says
A thrift store find!
Ana Luiza says
You are awesome! so generous. Thank you so much.
Aby Hernandez says
I have never used what you call “ the hinge “, Inwill try next time
Wendy Atheno says
These are so amazing! I’ve been looking for a way to make some affordable and safe gifts this year, not to mention for Mother’s Day! Especially considering the pandemic, I think mugs would be the perfect personalized gift, because the gift receivers can also thoroughly wash the gift before using them.
Mari V says
Hi! Do you have any suggestion for an app where we can make our designs to print?
Thanks 🙂
PD: Very helpful information here!
Michelle says
Hi,
Thanks very much for this article, it’s awesome and best of all, I think I can do it 😛
Quick question…Can I do the same process, but using a Cricut mug press instead?
Thanks for your time and satay safe!
Marcy Vautour says
Hi Alexis, I am a little late for the party! I am not sure you still read your comments. However, I wanted you to know that you are a sensational teacher. I have read many blogs on this subject, and you are the first one I truly understand.
I will be sending many people your way. I honestly hope you are still in operation.
You do have an exceptional talent.
All the best to you, and thank you again.
~Marcy