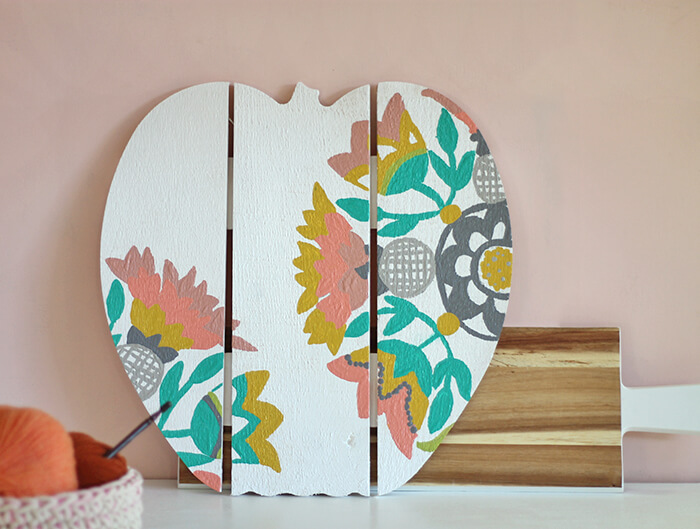
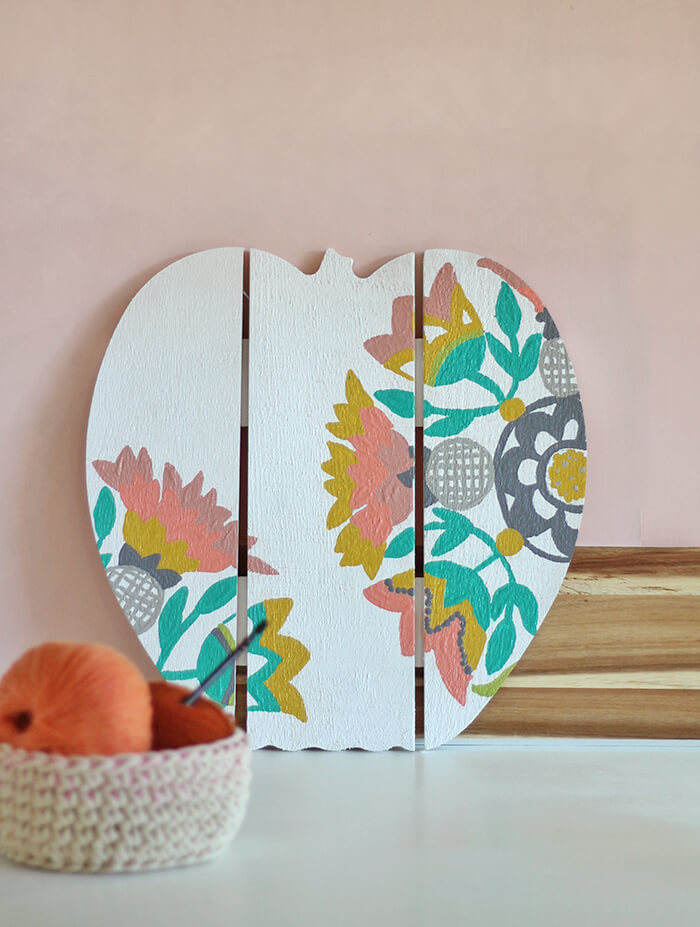
This embroidery-inspired pumpkin is a fun little non-traditional Fall decor project that doesn’t require any special painting skills to make. Why not welcome Fall this year with a pretty little floral pumpkin? A big thanks to DecoArt for sponsoring this post, which also contains affiliate links that help to support this blog. Thanks!

Hey guys! We are halfway through September, so it’s pretty much time for all the pumpkin stuff to come rolling out, right? This month, DecoArt challenged me and some of the other DecoArt bloggers to make something using one of these cute pallet pumpkins.
I’ve never been a huge fan of traditional fall colors, so this was great chance to put together some non-traditional fall decor. I found some beautiful Swedish embroidery while browsing Pinterest, and I thought the design would be the perfect way to dress up my pumpkin.
This project was made really easy using graphite paper. Seriously, anyone can do this – no special painting skills required! Here’s how it went down:
Non-Traditional Fall Decor Supplies:
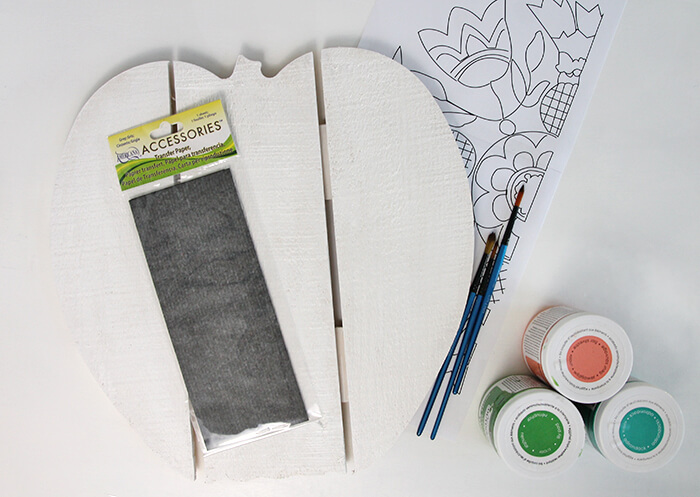
- Pumpkin Pallet (provided by Walnut Hollow)
- DecoArt Graphite Paper
- Americana Outdoor Living (in Picket Fence, Rock Garden, Patio, Adirondack, Wildflower, Harvest, and Succulent)
- Small Round Brushes
- Pencil
The pallet pumpkin was a bit rough and rustic, so I started by giving it a light sanding to remove any little splintery edges. Next, I covered the entire pumpkin in a couple of coats of white paint. Once that was dry, I was ready to transfer my design onto the pumpkin.
I found some beautiful Swedish embroidery, and that is what inspired the design for this pumpkin. I traced the design in Illustrator and printed it out to trace onto the pumpkin. I realized when I was almost down with this, that I probably could have just printed out an image of the embroidery itself and traced that directly onto the pumpkin, but I’m going to say the extra tracing helped me really get to know the design and figure out how I wanted to paint it. Ha! Yeah, that’s why I did that. 😉
I enlarged my design to the size I wanted, and then positioned it where I wanted the design. I placed a piece of the graphite paper face down onto the pumpkin and then placed the design on top. I secured both layers in place with a few pieces of tape.
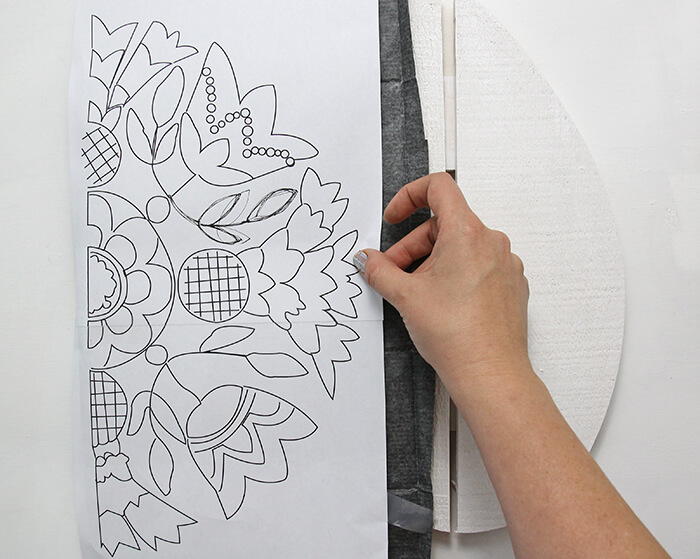
When that was all secure, I was ready to trace. I just used a pencil, but a ball point pen or anything similar would work well too. I traced over every line from my design. I was honestly a little surprised at how well the graphite paper transferred the image onto the wood. I thought I might have to press really hard or go over it a few times, but it went down easily the first pass.
I moved the graphite paper and design over to the other side and traced another part of the design there.
When I was done tracing, I peeled back my graphite paper and design to reveal this:
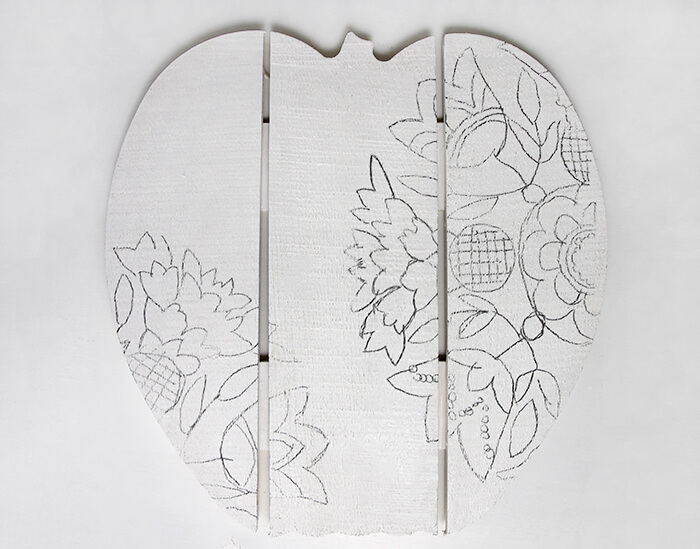
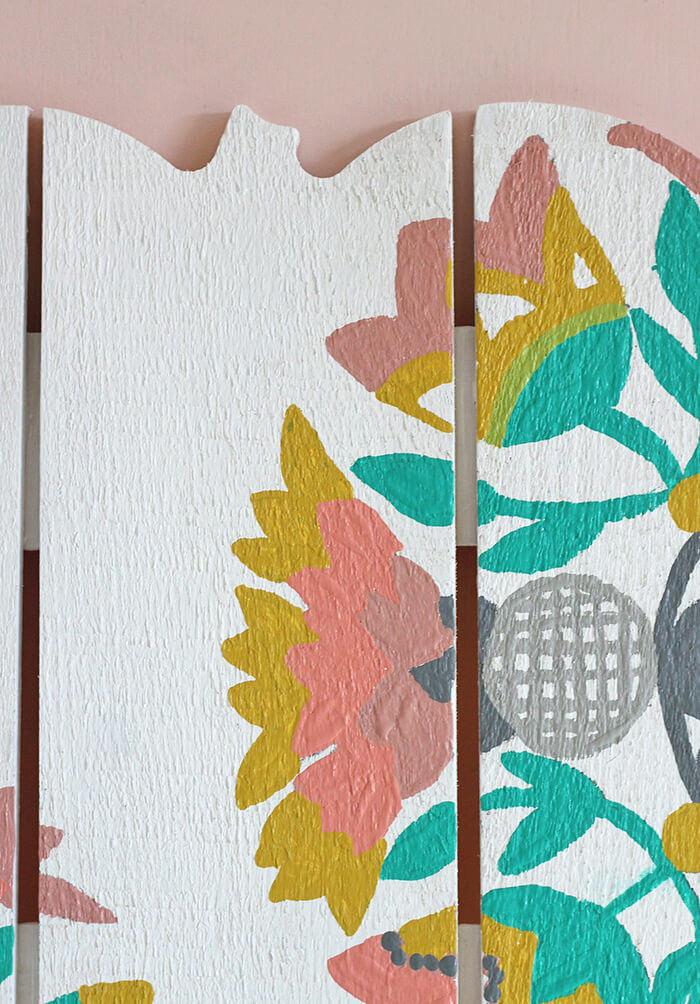
Once the image is transferred, all that is left to do is paint in the design with a small round brush. DecoArt Outdoor Living is great paint to work with because is really durable and doesn’t require a sealer.
Anyway, I painted in the design using gray, teal, mustard, and coral colors. I applied the paint really thick leaving brushstrokes to kind of mimic the texture of my embroidery inspiration.
I am pretty happy with the way this little pumpkin turned out, and I love that it adds a little bit of fall to our home without being too in your face about it. 🙂
Have you guys ever tried using graphite transfer paper? I thought it was a really fun technique, and I definitely think I will try it again.
Happy Fall and Happy Making!


Comments + Project Love
Molly says
I LOVE these! So unique and creative. Great job 🙂
Alexis says
Thank you! 🙂
Romayne Kilde says
Do you have the template available that you used for the EMBROIDERY-INSPIRED PUMPKIN: NON-TRADITIONAL FALL DECOR? I would really like to do this project, but need a template.