Learn how to make 3D printed ear savers with your Silhouette Alta! Ear Savers give your ears some relief when wearing a mask for an extended time, and they are easy to print with your Silhouette Alta 3d Printer. This step-by-step video tutorial will show you how to make your own, plus you can download my free ear saver cut files and .S3D file! Thank you to Silhouette America for partnering with me on this post. This post contains affiliate links, which help to support this site at no extra cost to you.

I have a new Silhouette Alta tutorial for you all today! If you have been wondering about how to print ear savers with your Alta, then I have got you covered with a full video tutorial!
As you know, more and more people are needing to wear face masks for extended periods of time (Thank you to all our essential workers ❤️), and elastic ear straps can quickly become painful. Ear savers help to relieve stress on the ears by holding the mask in place around the back of the head.
There are different methods for making ear savers, but today I am going to walk you through how to 3D print ear savers with the Silhouette Alta plus share some free files for creating your own ear savers!
(P.S. If you are also sewing masks like me, then you can learn more about cutting fabric with the Cameo 4 Rotary Blade here.)

3D Printed Ear Saver Supplies:
- Silhouette Alta 3D Printer (I have the original Alta, but can’t wait to get my hands on a Alta Plus!)
- 1.75 mm PLA Filament
- Alta Platform Tape
- Glue Stick
- Ear Saver Print File
How to 3D Print Ear Savers with your Silhouette Alta
If you are new to working with the Silhouette Alta 3D Printer, then be sure to check out my beginner’s guide to the Alta right HERE.

Printing ear savers with the Silhouette Alta is a pretty simple process, so let’s get started!
I have created a simple video tutorial to walk you through the process. (If the video below is not showing, it may be because of an ad blocker.) If you prefer to read or to get more details, just keep on scrolling, and don’t forget to grab the free download at the end of the post.
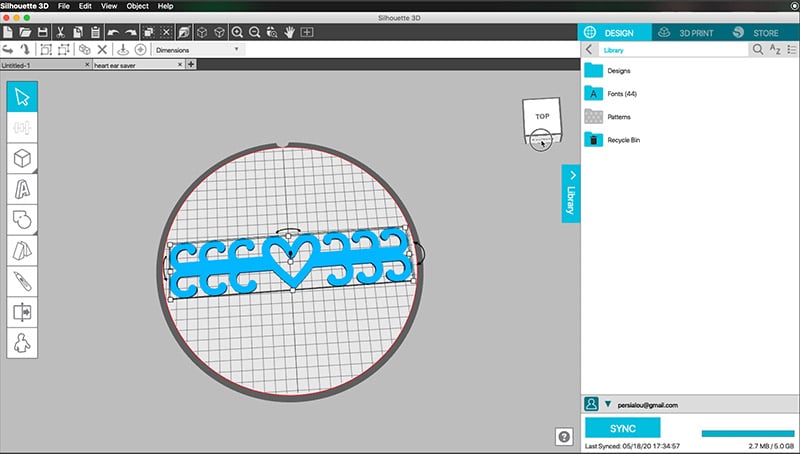
Step One. Choose Your Design.
First, choose the design you want to print. I created a few different types all of which are available as free downloads.
I started off by printing the free ear saver design that Terri Johnson has so generously offered for in the Silhouette Design Store (Design ID 318913). You can find the design by clicking on the Store Tab in the Silhouette 3D software and then searching for it in the 3D section of the Design Store.

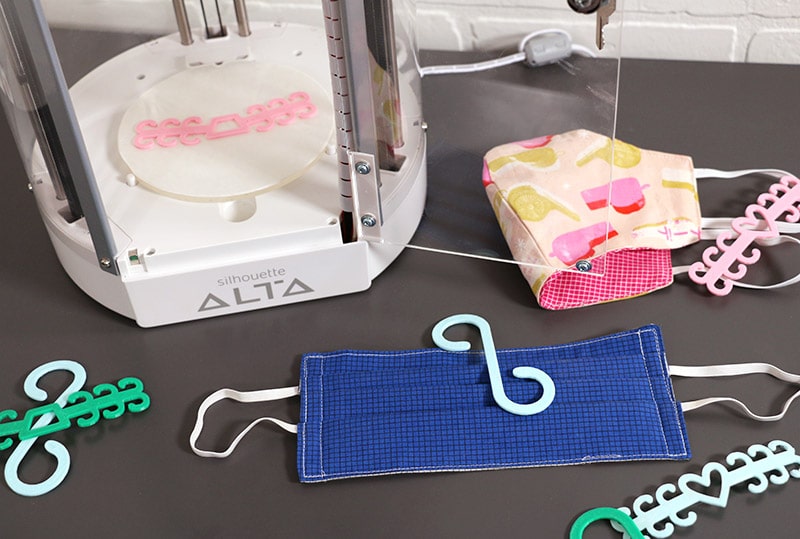
I also created my own free ear saver designs that you can download from the end of this post. I included two different designs, one with a heart in the center and another with an angled trapezoid design.
If you have downloaded a flat 2D ear saver cut files elsewhere, you can easily import them into the Silhouette 3D software using my tutorial on how to use SVG, DXF, PNG, and Studio files with your Alta.
Whatever design you decide to use, open it up in the Silhouette 3D software and scale the design to fit on the Alta’s printing platform.
Step Two. Prepare for Print.
If you haven’t printed with your Alta before, be sure to check out my post on making your first print here for lots of good beginner’s tips.
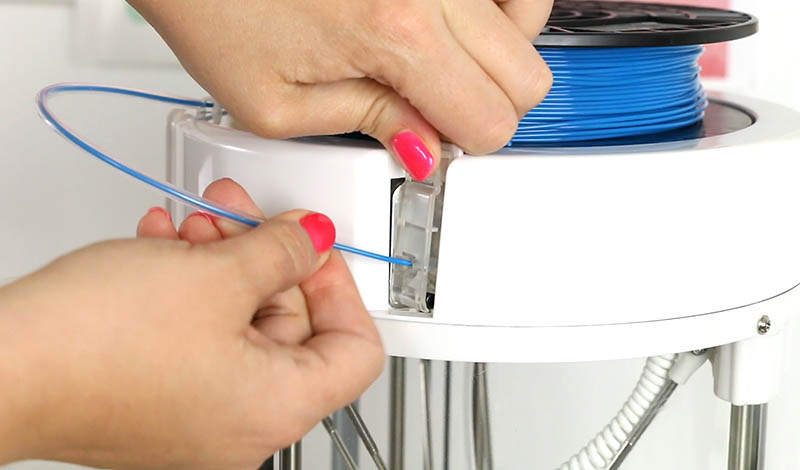
Before sending your design to the Alta to print, make sure you have the filament loaded into your machine.
Next, I recommend putting down a thin layer of glue stick on top of your platform tape to help the first print layer stick. Then load the platform into the printer.
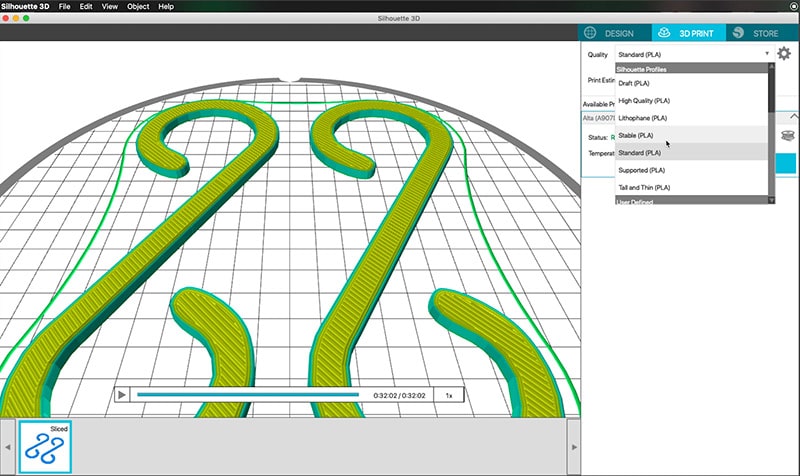
Click on “3D Print” to open up the Print Settings Tab. You can use the Quality drop down menu to adjust the quality of the print. I used the Standard print settings for a little more polished finished look, but you could also use the Draft settings for a quicker print.
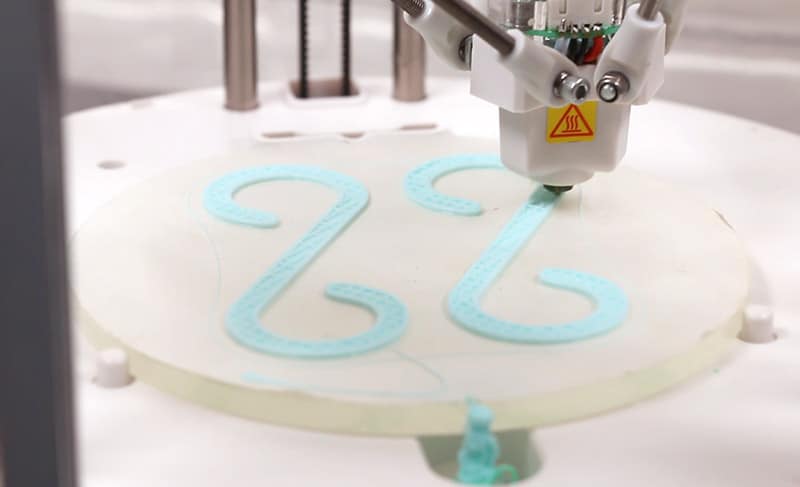
Step Three. Print!
When everything is loaded and you have your chosen settings selected, you are ready to click on “Print” and let your Alta do its work!
When the print is finished, give it a minute or two to cool down before handling. Use your handy dandy little Alta spatula to help remove the ear savers from the print platform.
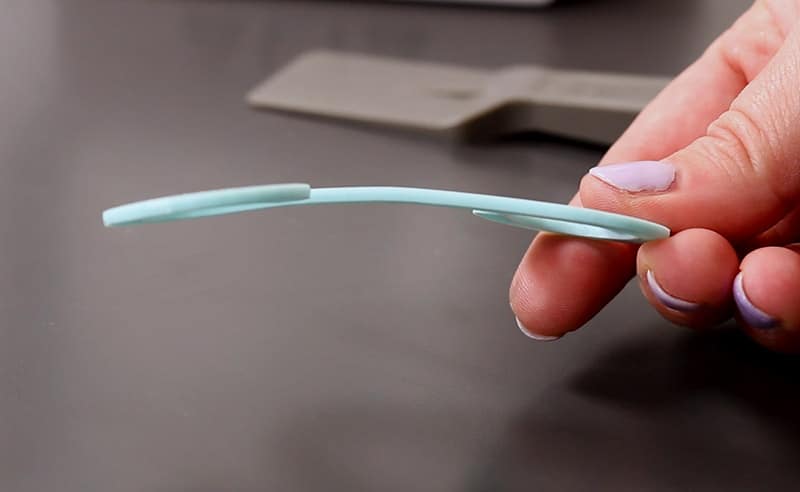
Finally, if you like, while the ear saver is still slightly warm, you can VERY gently bend the print into a curved shape. Be careful or else it can definitely snap in two!
That’s it! I was able to print up a whole bunch of ear savers as I was working last week. So easy!
Free Ear Saver Files
You can find the download link for my free ear saver files below. In addition to the Silhouette .S3D file, I have also included SVG, PNG, and DXF files which you could use with your Cameo 4 cutting machine to cut ear savers from plastic folders, cutting boards, or other thin, strong, and flexible materials.
QUICK NOTE: You need the Designer Edition of Silhouette Studio (or higher) to open SVG files. I love all of the features of Silhouette Studio Designer Edition and definitely recommend upgrading. You can read more about using different file types with Silhouette Studio right HERE.

Before downloading, I would love it if you pinned the image above! Spreading the word about our free downloads helps to keep them free! 🙂
When you click the link below, a ZIP file containing the S3D, Studio, SVG, DXF, and PNG versions of the cut files will download. (The folder contains both the heart and trapezoid versions of the design). You will need to unzip the file before opening the cut files in the Silhouette 3D software or your cutting machine software.
Download Free Ear Saver Files
Until next time, Happy Making!

Check out more Silhouette projects:
[the_grid name=”Silhouette Crafts Footer”]


Let's Chit Chat!