Learn how to convert your 2D cut files (SVG, DXF, and PNG files) into 3D files to use with the Silhouette Alta 3D Printer. The Alta makes it so easy! This video tutorial will walk you through the steps of using different 2D file types with the Alta and we will make a cute piñata keychain too! Silhouette provided me with my Alta machine, and this post may contain affiliate links which help to support this site at no extra cost to you.

If you are new to the Silhouette Alta, check out my Silhouette Alta Guide right HERE.
Last week I shared my beginner’s guide to setting up your Silhouette Alta 3D Printer and making your first project. In that post, I just showed you how to create projects using the 3D designs available from the Silhouette Design Store. They have some fun designs there, but we all really want to make our own designs, right??
One of the things I was most excited about with the Alta is it’s software. The Silhouette 3D software makes it super easy to convert 2D designs into 3D objects. I am so excited to show you how this works! Let’s get making.

How to Use SVG, DXF & PNG Files with Silhouette Alta
First off, let’s talk just a minute about what kinds of files the Silhouette 3D software.
What file types work with Silhouette 3D Software?
The software can open four file types:
- S3D
- STUDIO
- OBJ
- STL
OBJ and STL files are common 3D printing files that you can find in different places online. S3D is the proprietary Silhouette 3D software file type. STUDIO files are the file types used by Silhouette Studio, the software used by Silhouette’s cutting machines.
Silhouette 3D’s ability to open STUDIO files is what make it possible for us to convert ALL of those awesome cut files and designs we have been hoarding collecting into 3D objects.
I walk you through the step by step process of using your SVG, DXF, and PNG files in the video below. (If the video isn’t showing for you below, it may be because of an ad blocker. You can watch it on my youtube channel HERE.)
How to open SVG, DXF & PNG Files in Silhouette 3D
1. Download Silhouette Studio
The trick for using SVG, DXF, and PNG files with the Silhouette Alta is to first use Silhouette Studio (the software that comes with Silhouette’s cutting machines).
You do NOT have to have a Silhouette cutting machine (Cameo, Curio, or Portrait) for this to work.
The free, basic edition of the software will open DXF, PNG, and JPEG files. To work with SVG files, you will need at least the Designer Edition of the software. You can purchase a software upgrade from Silhouette or from Amazon. Download Silhouette Studio HERE.
2. Open and Prep SVG, DXF, or PNG File

In this post, I am focusing specifically on using SVG, DXF, and PNG files with the Silhouette Alta because those seem to be the most common types of cut files. For more information on using different file types with Silhouette Studio, refer to this post.
With the basic version of Silhouette Studio (the free version), you can open DXF and PNG files. Both need a just a bit of work to prepare them to be imported into Silhouette 3D.
DXF files already contain cut lines, which is nice, but you may need to make them into compound paths in Studio. PNG files need to be traced to create the cut line information. You can see step by step instructions for both in the video above or read more about tracing images in Silhouette Studio HERE.
SVG files are pretty much ready right away, but you do need to have the Designer Edition of Studio or higher to use them.
3. Save as STUDIO File
After you have your design how you like it (watch the video above for more information on how to edit and modify designs in Studio), you will need to save it to your computer as a STUDIO file.
4. Open in Silhouette 3D
Next, in the Silhouette 3D software, go to File > Open and then find the STUDIO file you just created. When you click “Open,” a window will pop up with six options for how to import the 2D STUDIO design. I am working on more posts about each of these options, but for now, we will just use the “Extrusion” option.

Next, the software will automatically convert your design into a 3D object. So cool, right? Here’s what it looks like in the software:

And that’s it for software, time to print! (If you are new to printing with the Silhouette Alta, check out my beginner’s guide to setting up your machine and making your first project HERE.)
Here’s what I made with this cute little piñata cut file.

Isn’t it cute? My kids have been really into keychains for their backpacks lately, and my daughter was pretty excited about this fun little piñata.
This keychain was made using my piñata SVG cut file design, which you can get over in my cut file shop.
How to Make a 3D Printed Piñata Keychain
You need a few supplies to make your own piñata keychain.
3D Printed Piñata Keychain Supplies:
- Silhouette Alta 3D printer
- White PLA Filament (I used Hatchbox for this project.)
- Small Round Brush
- Acrylic Craft Paints
- Keychain
- Silhouette Cameo or other Electronic Cutting Machine (optional)
- Permanent Vinyl (optional)
- Piñata Design
Step One. Print Keychain Design.
First, you will need to print the piñata design following the basic instructions outlined above.
I started by opening the piñata cut file in my Silhouette Studio software and added the circle piece to the piñata shape so I could easily attach it to a keychain. I saved the design as a STUDIO file, and then imported it into the Silhouette 3D software using the extrude option.
Step Two. Paint.
Once the design has printed, carefully remove it from the printing platform using the scraper tool.
To finish the keychain, after my design printed, I simply used a small round brush and acrylic craft paint to fill in each section. The raised design makes it easy.
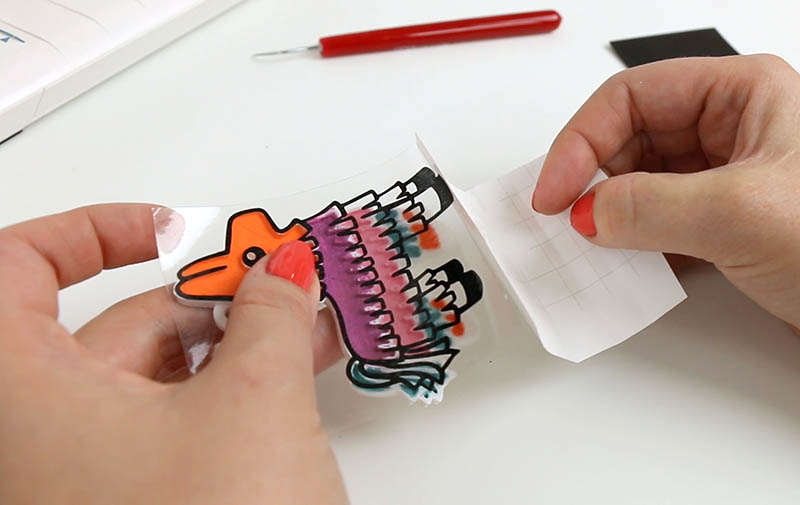
Step Three. Add Vinyl.
Next, I cut a decal from permanent adhesive vinyl to match the raised part of the design. Since we already prepped the design in the Silhouette Studio software, this is SUPER easy. Just make sure not to resize the design and cut the top layer from vinyl.
I love how it gives the piece a polished, finished look.
Step Four. Add Keychain.
Finally, thread a keychain through the hole, and your cute piñata keychain is all finished! I added a little leather tassel to it too. I love how it turned out!

So, what do you think? What would you use this technique to make? If you have any questions, drop them in the comments below and I will do my best to help!
Happy Making!

[the_grid name=”Silhouette Crafts Footer”]


Comments + Project Love
bettijo @PagingSupermom says
OMG!!! This is soooo cute. Love it! XOXO –bettijo
Amber says
Ain’t gonna lie… it’s adorbs, buuuttt, I did the exact same end product with my 6-13 year old niece and nephews with blank acetate plasticsheets: aka – Shrinky dinks and sharpies – and they look identical. The designs the kids printed were similar and other than them coloring details if they wanted – it took $3 Max for us to make almost 30 various keychains for their backpacks and some there charms for a bracelet ? I guess I need to learn more about this machines capabilities.
Alexis says
I love shrinky dinks too and have used them for earrings, pins, etc, so I totally get your point, and you could absolutely make something really similar for a lot cheaper. I think the difference of making it with the 3D printer is that you get the dimension. The design is raised, and I do think it has a more professional finished look. Really, I wanted this post to explain how to use flat 2D designs with the Alta, so I kept the project pretty basic. There is a lot more that you can do with this process and I will definitely have more tutorials and ideas coming. 🙂
Shonarie Urbanoski says
Help I am trying to print the skull that came with the free software print with my Alta and it stops part of the way through the print saying it’s done, I’m sure it’s something simple but how do I get it to start printing again. It only printed for 2 hours and stopped?
Shellana says
Can you save files created in 3d in a different format- OBJ or STL (not s3d)??
Thanks