Add a punch of color and texture to your home decor with this fun and simple DIY art project! This photo tutorial will teach you how to easily transform canvas letters into vibrant brushstroke monograms. I originally shared this project at Crafts Unleashed, and it may contain affiliate links, which help to support this site at no extra cost to you.

Guys. I love me some paper. And I love me some yarn. But… there is just something about paint. Especially when it comes in big, thick brushstrokes and globs. Oh, baby. It just makes my heart happy. Know what I mean?
This little DIY art project embraces that love of paint and is all about showing off those strokes. I really tried to capture that thick, impasto painting feeling on some canvas letters to create some colorful home decor. Who is ready to get painting? ?

DIY Brushstroke Monogram Supplies:
- Canvas Letters (Wooden or Paper Mache Letters could work too)
- Acrylic Paints
- Palette Paper Pad
- Brushes
- Palette Knives
How to Make DIY Brushstroke Monograms
1. Paint Base Layer of Brushstrokes.
First, start by creating your color palette. You can use ready made colors or mix your own, but it’s a good idea to pick colors you like together before you start painting. (I love using a paper palette pad with acrylic paints.)
Next, use a flat brush to lay down a base layer of strokes all over your canvas letter. Be sure to allow individual colors to dry before layering another color over them to avoid mixing on the canvas. I found it easiest to add similar colors at the same time and then allow them to dry a bit before moving on to contrasting colors.
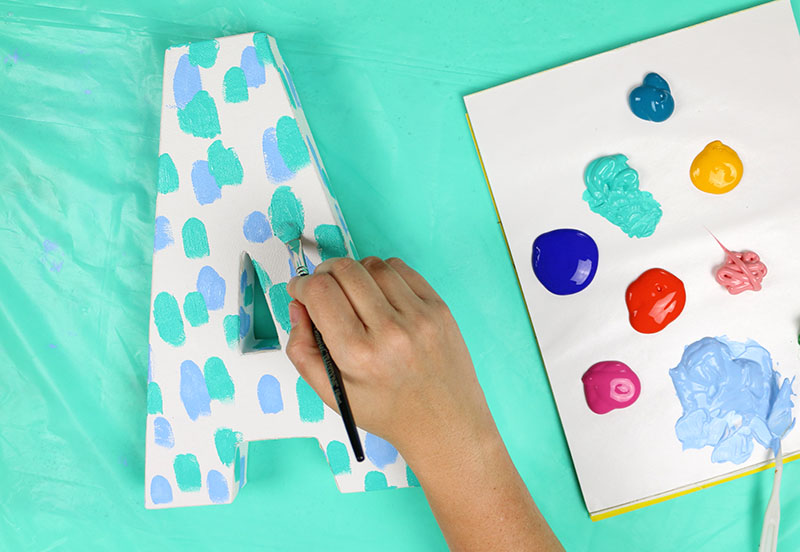
This base layer helps to cover up the white canvas and ensure color shows through behind the thick strokes that we will add next.
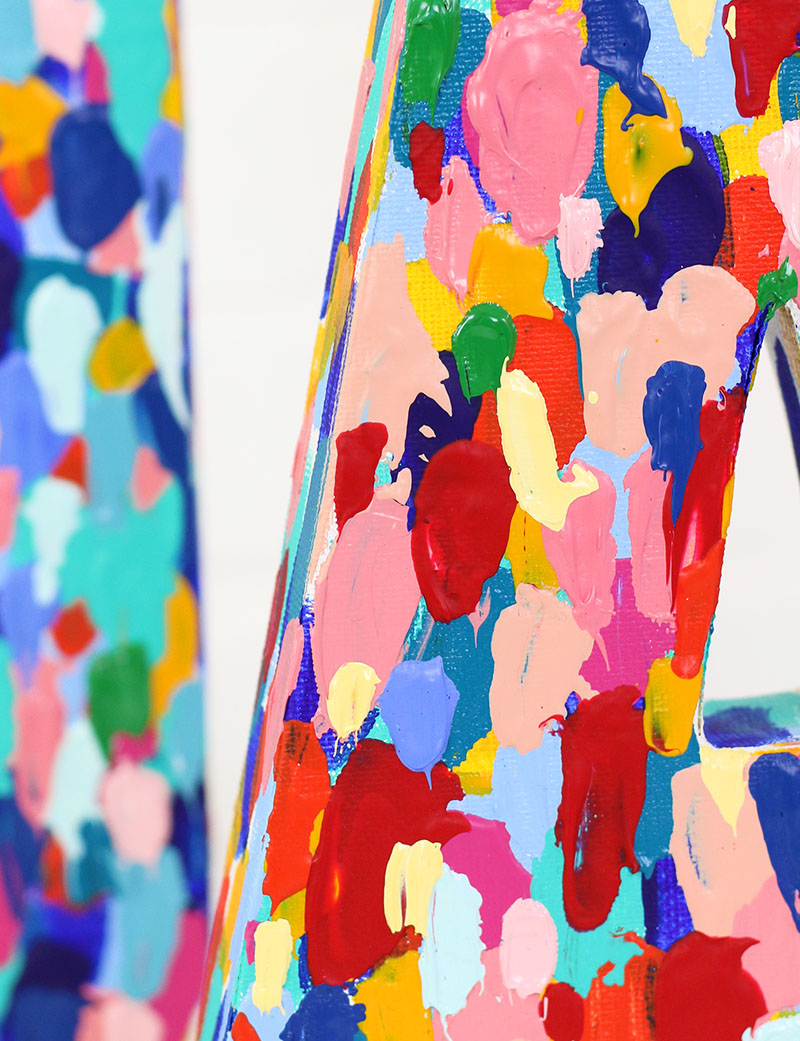
2. Layer on Thick Strokes with Palette Knife.

After your base layer of strokes has dried, use your palette knife to scoop some paint off of the palette, and then scrape it down onto the canvas. If you love those thick brushstrokes like I do, you will need to use quite a bit of paint with each stroke. The palette knife makes it easier to scoop up some paint and get that thick, textural stroke.
This step will take a bit of time because you will need to allow for drying time between layers. I recommend allowing layers to dry for several hours before layering on more paint. Keep applying thick strokes of paint until you get the look you want.
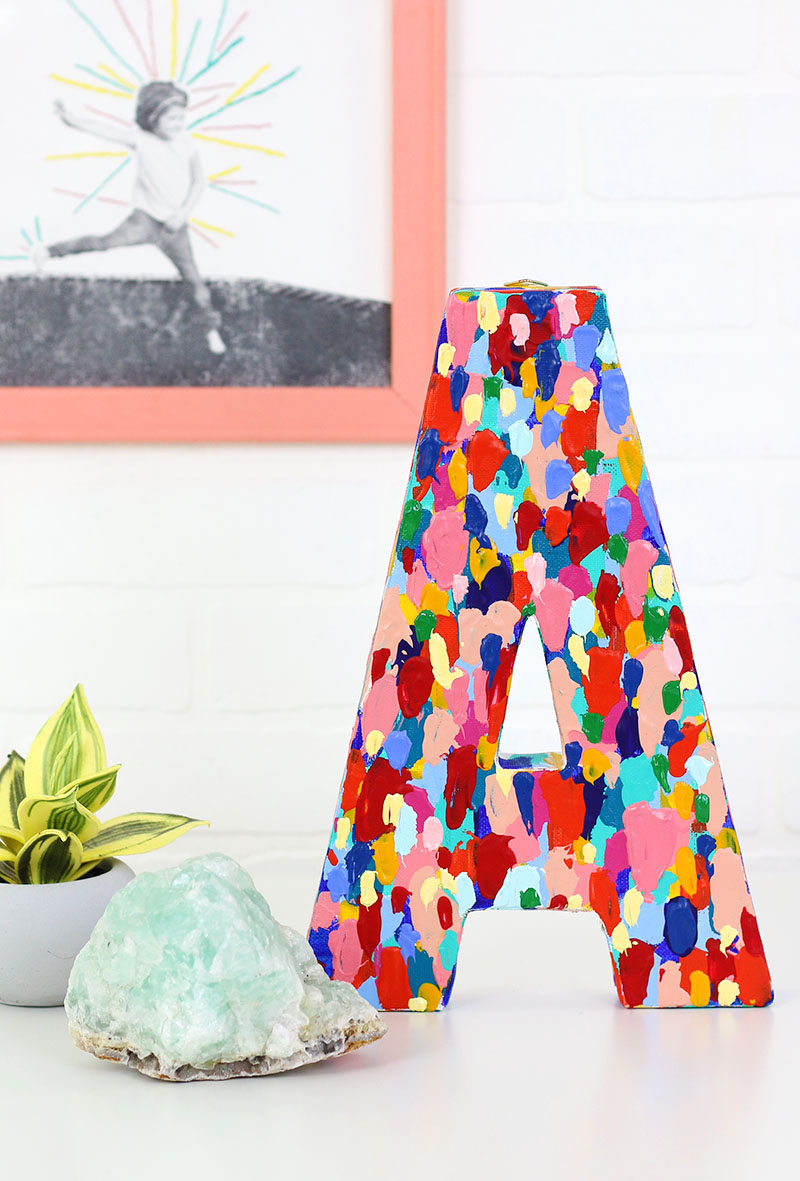
Once your letters have dried, you are done!
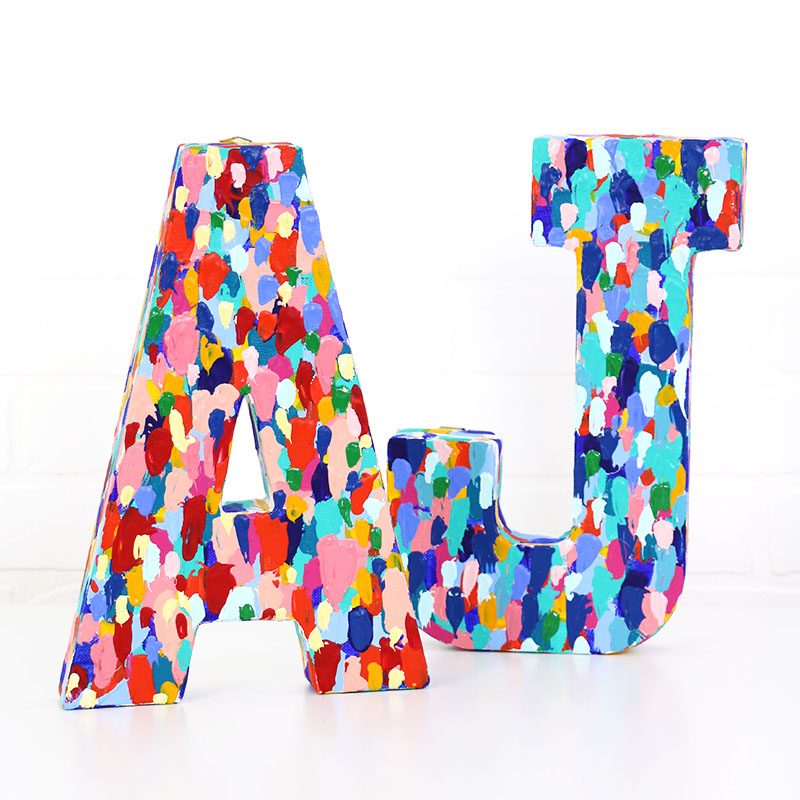
I just love the texture and dimension on these babies.
Isn’t it fun? You can create whole words using these brushstroke letters or just make stand alone monograms like I did. They add instant color and vibrancy to any gallery wall or shelf!
The J is in my daughter’s room, and I’m keeping the A in my craft room, where it fits in just perfectly.
What do you think? Would you give this project a try?
Until next time, Happy Making!

Check out more DIY art projects here:
[the_grid name=”Art Projects Footer “]


Comments + Project Love
Sam says
Can I ask what colour printer you use?
Alexis says
Hi Sam! I use a mostly use my Brother laser color printer (this is the one I have – https://amzn.to/2PAqxD2) I love laser printers because the toner lasts so long. When I have used inkjets in the past, I find that I spend a ton of money on ink cartridges. 🙂