Learn how to make your own adorable DIY paper treat boxes for packaging up baked goods and sweet treats in style! These paper box SVG cut files work with your Silhouette or Cricut cutting machines to make custom gift boxes in a snap. This post may contain affiliate links, which help to support this site at no extra cost to you.
We are running full speed ahead into the holiday season, and for me, that means there is a whole lot of baking and gifting coming up. One of my very favorite parts of giving gifts is wrapping and packaging. Are you the same way? There is just something about a pretty package that makes my heart skip a beat.
Looking forward to all of that wrapping, my newest cut files are designed to help make packing up those baked goods extra cute and extra easy!
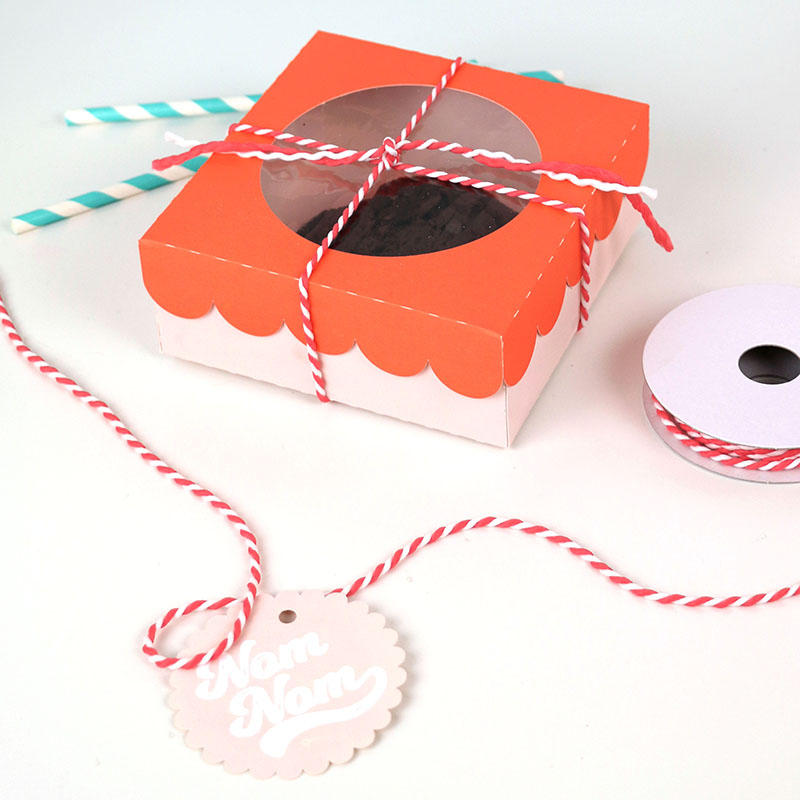
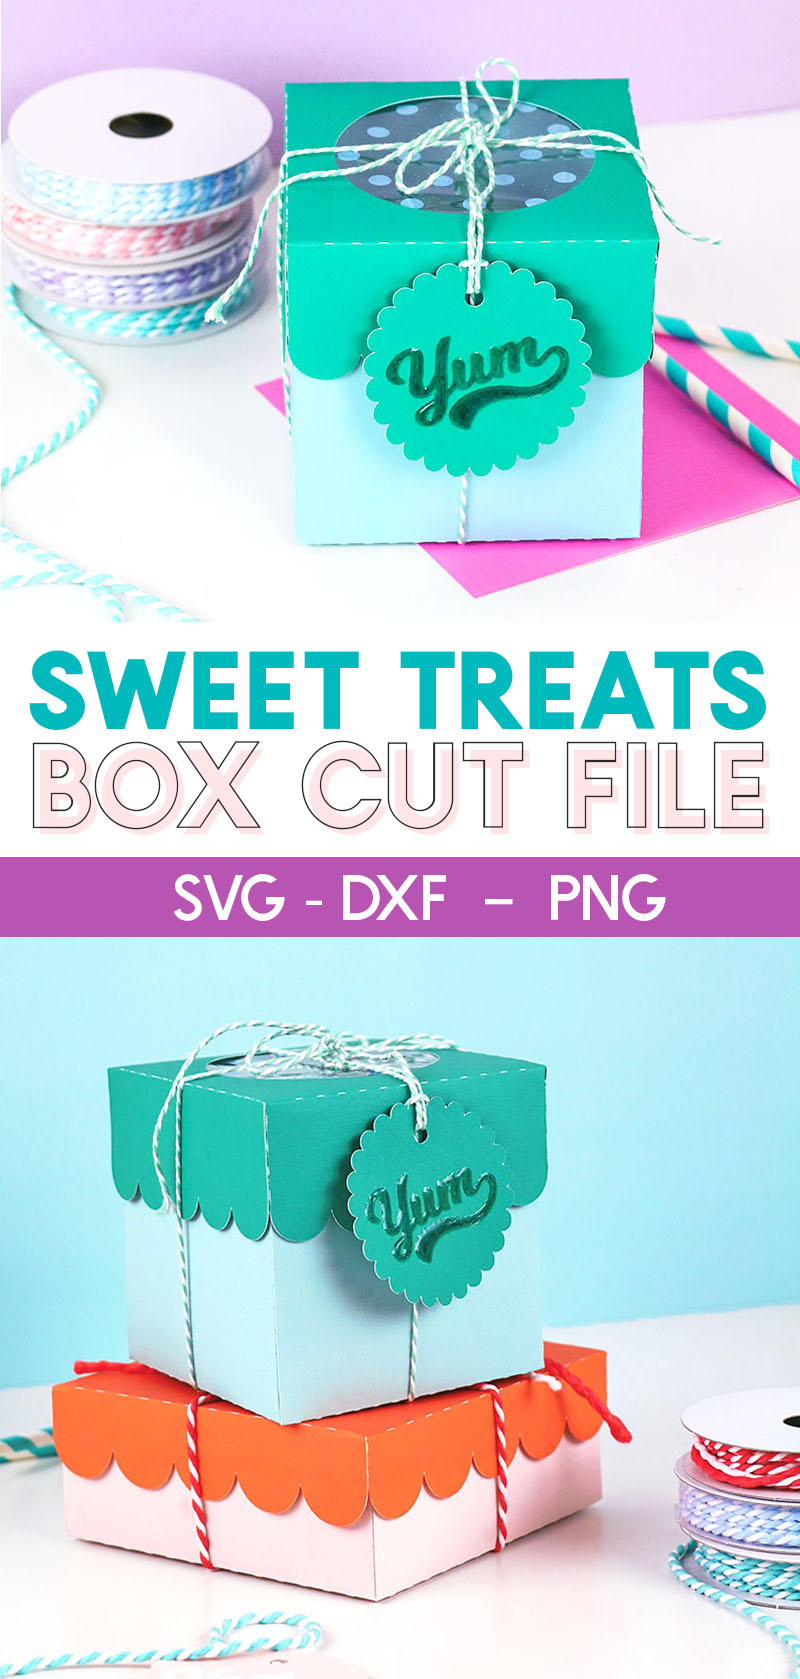
I have 3 different paper treat box cut files available plus 3 different gift tag styles for packaging up all those goodies with a custom look in no time at all! This little SVG cut file bundle contains 3 different box styles as well as 3 different tag styles and works perfectly with your Silhouette, Cricut, or other electronic cutting machine.
Okay, let’s talk about these cute treat boxes, and how to put them together!
DIY Paper Treat Box Supplies:
- Silhouette Cameo, Cricut, or other cutting machine
- Quality 12″ x 12″ Cardstock
- Cellophane (Printed Cello Bags work great and add a cute touch!)
- Permanent Adhesive (I used this super glue with a built in brush)
- My Treat Box Cut Files
How to Make Your Own Paper Treat Boxes
Step One – Cut Pieces.
First, open the cut files in your cutting machine software. You may have to ungroup the individual pieces to move them around and position them on your cutting mat.
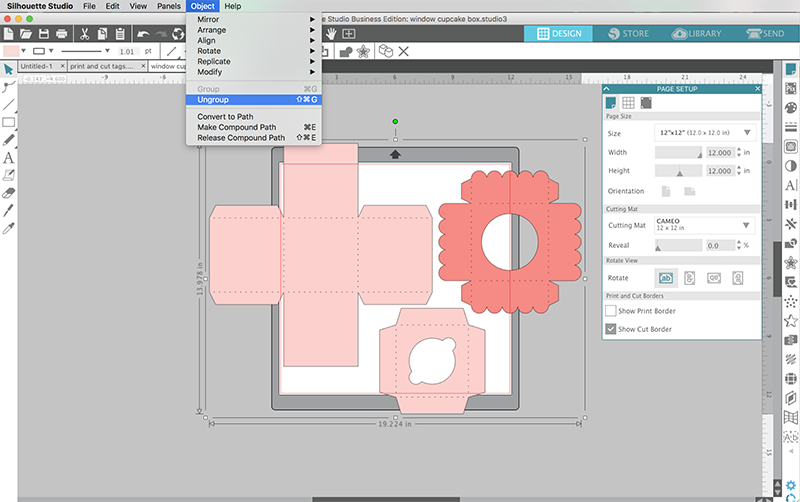
(Refer to this post for more information on using different file types in Silhouette Studio.)
The cut files are already sized to fit treats. The cupcake box is sized to just under 4″ square and the cookie box is about 5″ x 5″ x 2″. If you want to change the size of the boxes, be sure to scale all of the pieces together to make sure they will still fit. You will need to cut the pieces from high quality 12″ x 12″ cardstock, and it will take 2-3 pieces for each box.
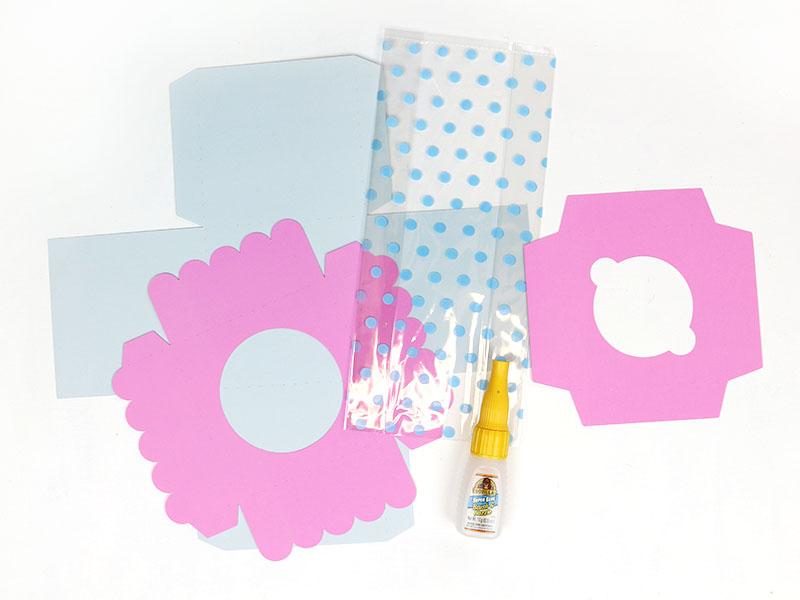
Above you can see the three pieces of the cupcake box all cut out. Now we are ready to assemble!
Step Two – Assemble Cupcake Box.
The cut files have perforation lines built into the design, so assembling the boxes is super easy. Start by simply folding along each of the perforated lines.

Next, apply permanent adhesive on the tabs and glue the box bottom together. For the cupcake insert, simply fold the tabs down and tuck it into the box bottom.
To add cellophane to the window in the box lid, cut a piece of cellophane to fit in the top of the lid, apply a thin line of glue around the edge of the circular window on the inside of the box lid, and finally place the cellophane.


Once the tabs are glued in place for the lid, your box is all done!
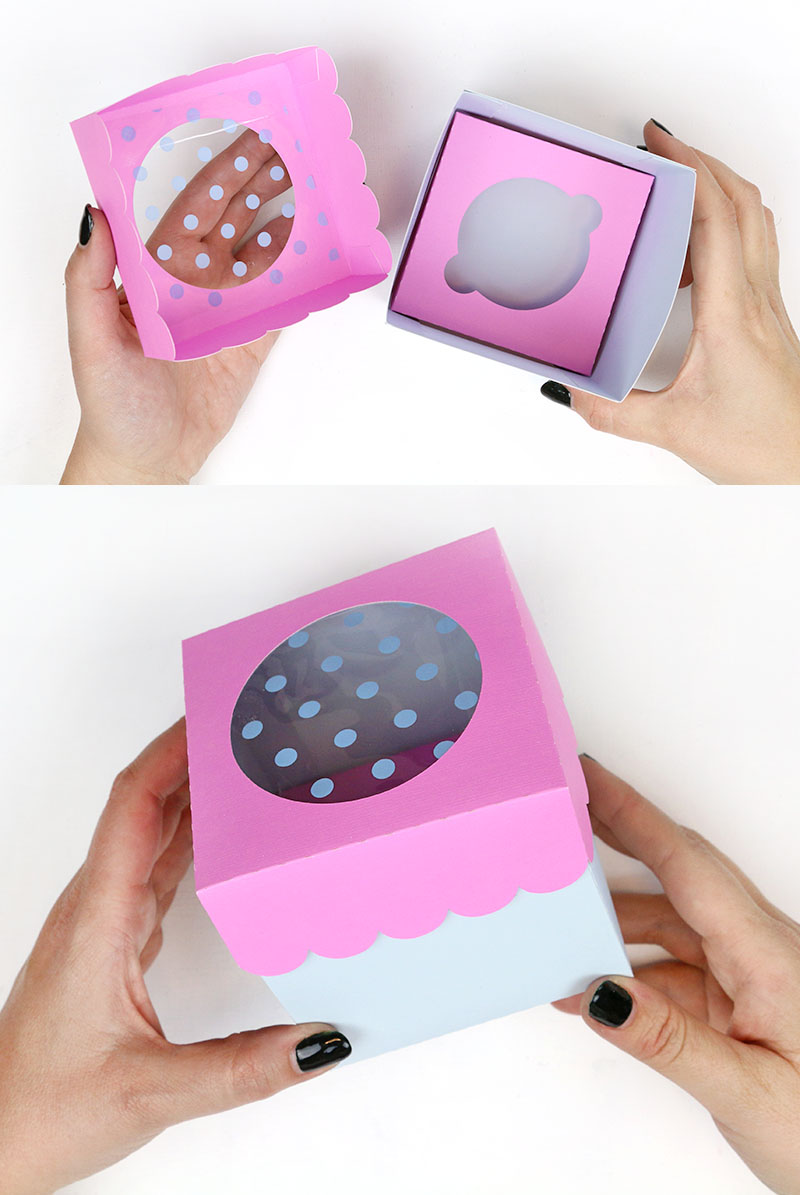
The process is the same for the cookie box, just without the insert.
I did a little facebook live making these boxes, that you can check out below to see them in action. (P.S. When I did the live below, these cut files were part of a limited time bundle that is no longer available. I’m sorry! Also, if you can’t see the video below, it may be because of an ad blocker.)
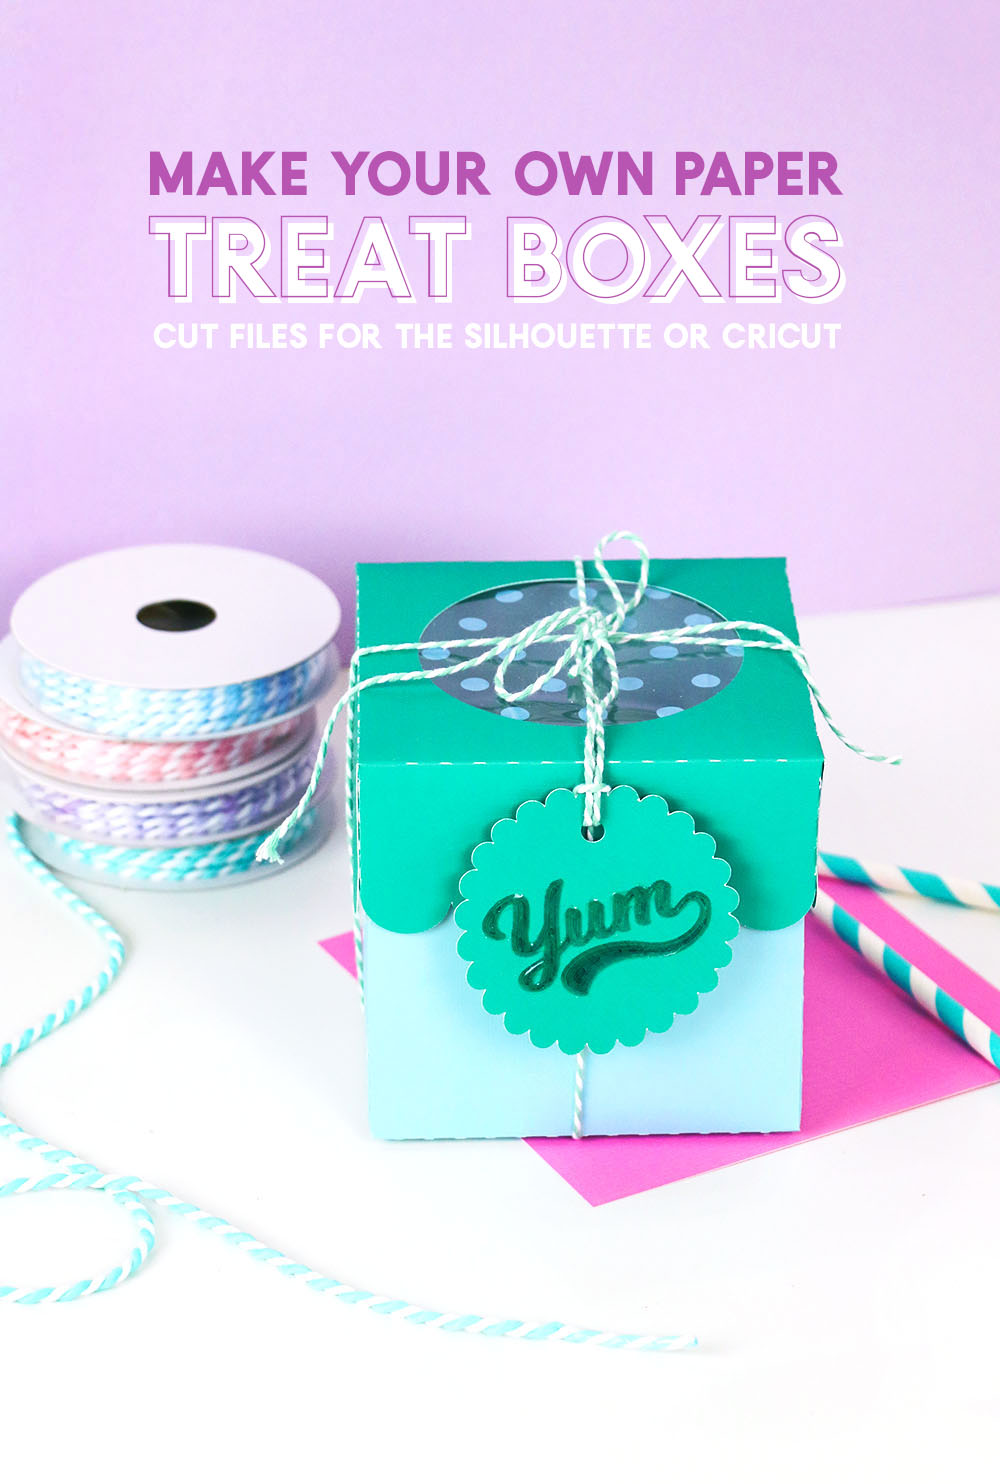
These little boxes are just the cutest! I am seriously so excited for all the cute baked gifts I’m going to use them for.

Love that dimensional look on that “yum” tag? Me too! I achieved it with embossing powder, and I need to get a tutorial up on how to get that fun look soon.
Until next time, Happy Making!

Check out more paper crafts here:
[the_grid name=”Paper Crafts Footer”]


Comments + Project Love
Sophia Elsie says
Very unique and stylish boxes for any purpose. Really stylish boxes, i want to get them
Erika Green says
Wow! The boxes in the images are so amazing and I really like it. I appreciate your work and wish you the best for more good work in the future.