Did you know you can apply heat transfer vinyl to leather? It’s true! This simple technique is a fun way to customize all kinds of leather projects.
Hello hello hello! I have a fun crafting technique to share with you today that opens up a whole new world of crafting possibilities.
Today, we are diving into the wonderful world of heat transfer vinyl on leather, and trust me, we are going to have some fun. First, I will walk you through the step-by-step application process and then we will get the inspiration train rolling with a whole bunch of ideas for amazing diy projects.
First Things, First, Can You Use Heat Transfer Vinyl on Leather?
Absolutely! So exciting, right?
Many types of heat transfer vinyl are rated for use on leather, but it is important to check the application instructions for the brand you are using because not all varieties of iron on vinyl will give you great results.
Let’s chat a little bit about choosing the right vinyl for your leather project.
The Best Iron On Vinyl for Leather Crafts
I definitely recommend using good quality HTV with leather, and Siser heat transfer is my go-to brand for this kind of project and it is usually easy to find at the craft store or online.
All of the following iron on vinyls can be applied to leather:
- Siser Easyweed
- Easyweed Electric
- Easyweed Glow
- Easyweed Extra
- Easyweed Stretch
- EasyPatterns Plus
- EasyReflective
- Siser Glitter
- Siser Sparkle
- Siser Holographic
- Stripflock Pro
Okay, so we know that we can use lots of amazing heat transfer vinyls on genuine leather, but what about the fake stuff?
Can You Use Heat Transfer Vinyl on Faux Leather?
The short answer is yes, but it requires more careful application than natural leather.
Faux leather (also know as vegan leather, synthetic leather, pu leather, and polyurethane leather) is made from a plastic base, which means it is more susceptible to high temperatures and has a lower range of safe temperatures compared to genuine leather, which is made from animal skin or hides.
When working with faux leather you will want to use a lower temperature and make sure the entire piece is covered with parchment paper or a piece of cotton fabric when applying heat. Because the substrate is heat sensitive, you want to project your iron or heat press metal plates from any melting.
For more tips on successfully applying HTV to faux leather, check out this helpful tutorial from the Siser blog.
Okay, so now that we know we CAN put HTV on leather, how do we do this? Let’s get crafting!
How to Apply Heat Transfer Vinyl to Leather
Applying heat transfer vinyl to leather is a simple process especially if you have experience crafting with vinyl. You will use the same basic steps you use when applying heat transfer material to any other surface.
If you are brand new to working with iron on vinyl, be sure to start by reading my beginner’s guide to crafting with heat transfer vinyl for all my best tips and techniques.

For my sample project, I will be using my free floral alphabet SVGs to add a simple one letter monogram design to a leather notebook.
Free Floral Alphabet SVGs
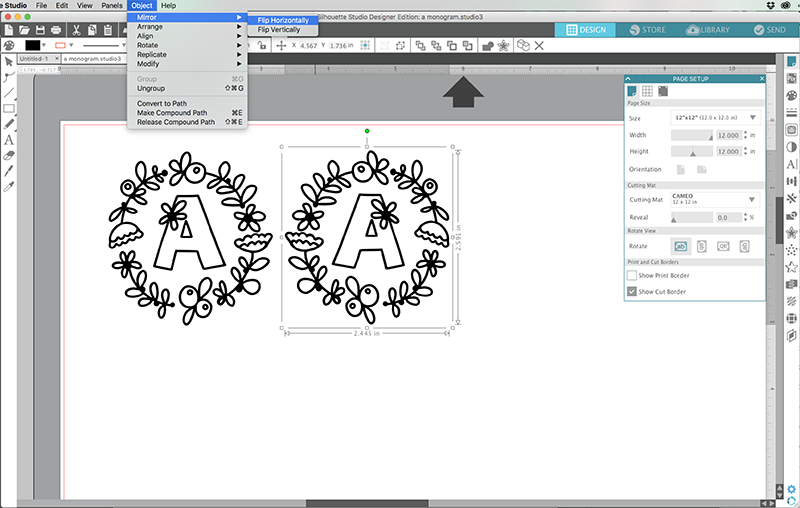
Step One. Mirror the Design.
The first step is to mirror your design in your cutting software. Because heat transfer vinyl is cut on the back side of the material, your design needs to be flipped so it reads properly when applied.
To mirror your design in Cricut Design Space, click on the design to select it, and then click Flip > Flip Horizontally. If you are using Silhouette Studio, select the design, the go to Object > Mirror > Flip Horizontally.
Step Two. Cut the Design.
When your design is properly scaled and mirrored in your design software, you are ready to cut! Start by placing your heat transfer vinyl shiny side down on your cutting mat and loading it into your cutting machine.
I always recommend starting with a test cut, especially if you are working with a new material.
Next, select the appropriate settings for the material in your software, and send it to the machine to cut.
Step Three. Weed the Design.
After your design has cut, you will need to remove the excess heat transfer vinyl from the carrier sheet. This process is called weeding.
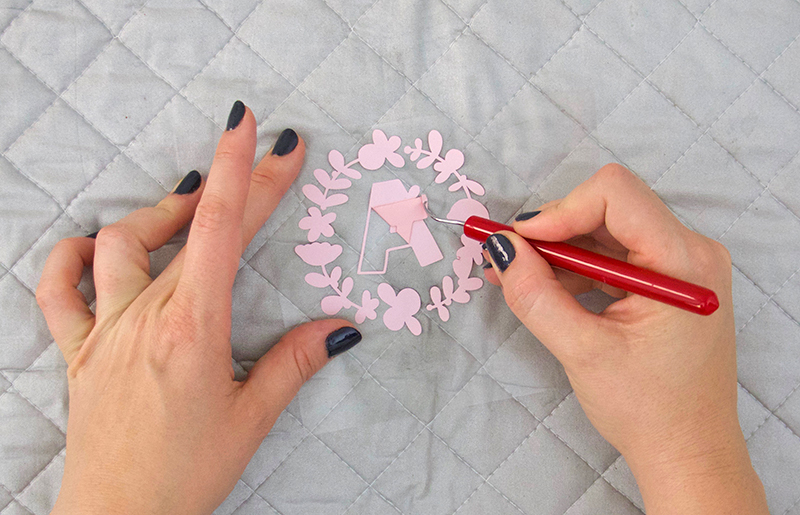
I really love and recommend this weeding tool. It has a nice sharp point, which makes it perfect for picking up all those little pieces, so it’s a great addition to your tool kit. However, tweezers, dental picks, and straight pins all make great weeding accessories that you may already have on hand.
Once you have all the excess vinyl removed, you are ready to apply your design to the leather! This is when the magic happens, friends.
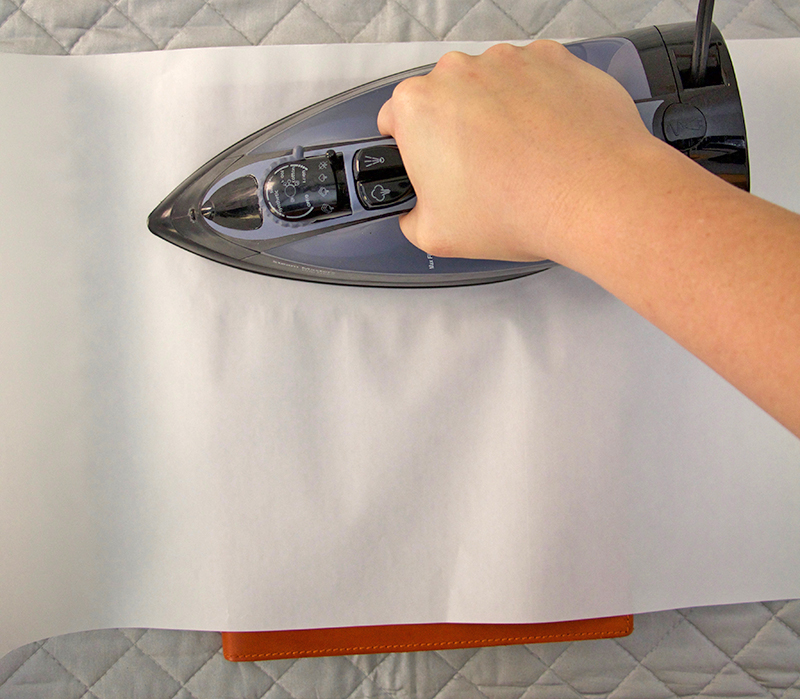
Step Four. Apply the Design.
Flip your weeded design over so the sticky side of the carrier sheet faces down and your image reads correctly. Position it where you want it on your leather surface.
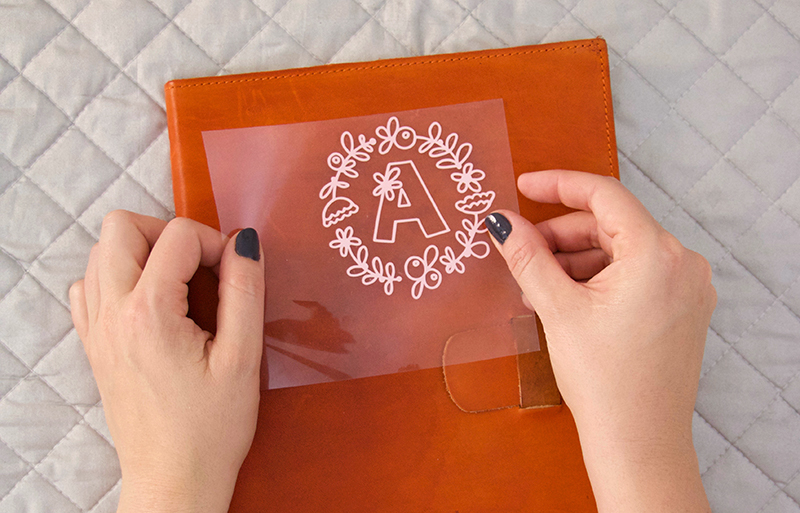
Place a cover sheet over the decal to protect the leather surface (a thin piece of cotton, piece of parchment paper, or teflon sheet are all good options).
Next, you will need a heating tool to apply the design. You can use a simple iron, a heat press or a Cricut EasyPress.
If you are using a steam iron, I highly recommend emptying the water and turning off the steam function. No steam is important, especially when working with leather. Water can stain and damage leather!
I prefer to use a dry iron (a flat iron without steam holes) or heat press when applying HTV, but it’s totally possible to get a successful application with whatever iron you have at home.
If you are using a heat press or Cricut EasyPress, adjust the temperature to the recommended settings for the HTV you are using. If you are using an iron, the cotton setting usually works well for me. It’s always a good idea to test the heat on a scrap or in an inconspicuous spot if possible.
Place the iron on top of your design over the cover sheet and press down with firm pressure for 10-15 seconds. Peel off the carrier sheet slowly making sure the vinyl has adhered.
If you cab see the texture of the leather or the grain through the vinyl, then you have a good application. If you need to give the vinyl more heat, be sure to use a cover sheet. Never apply a hot iron directly on to HTV – it will melt and you will be sad. 😉
And that’s it! Your awesome leather DIY is all done!

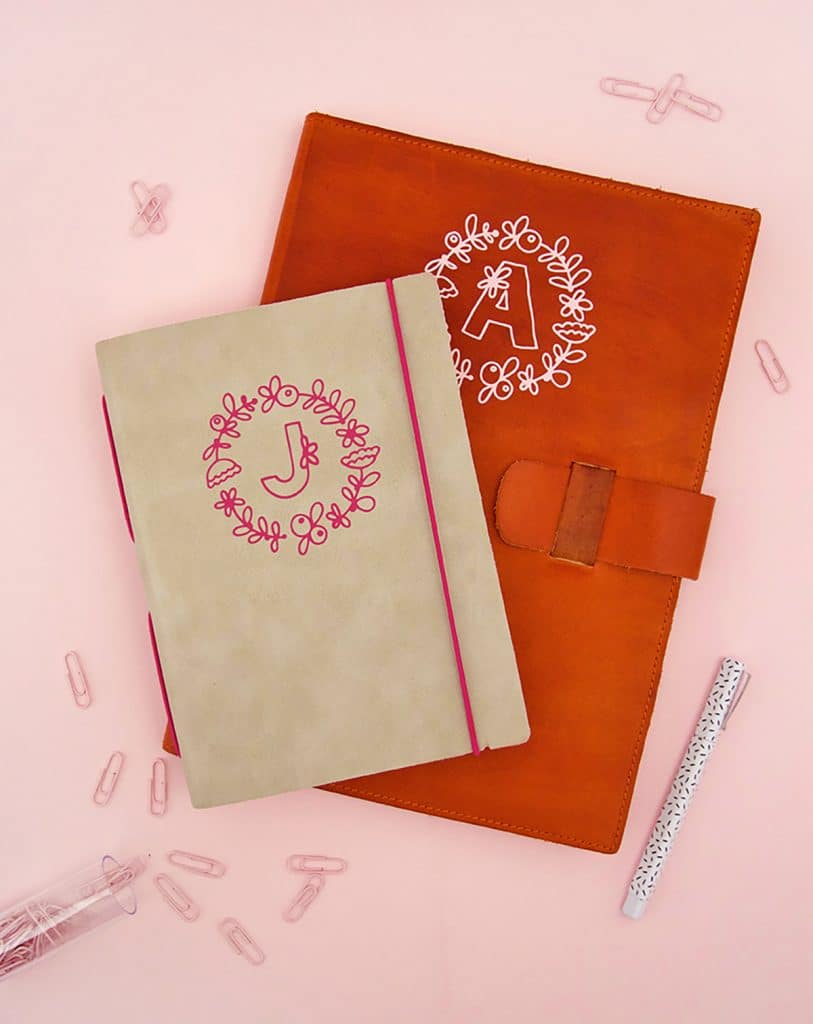
I’m so happy with how these notebooks turned out. If you want to copy my cute custom leather notebooks to store all of your deepest thoughts or for gifting to your dearest friends, then please do! You can grab the free floral alphabet SVGs right here and start monogramming all the things.
Are racking your brain for all the amazing ways you can implement your new HTV + leather knowledge?? I’ve got you covered with loads of DIY projects, leather gifts, etc. Just keep on reading.
Heat Transfer + Leather Project Ideas
- Leather Wallet Makeover. Maybe you have a plain leather wallet that’s seen better days. Instead of tossing it aside, you can give it new life with a HTV makeover. I love the idea of adding a repeating pattern to an old wallet.
- Get Crafty with some Thrifted Purses. I don’t know about you, but I’m always seeing old handbags at my local thrift store. I love the idea of adding a punch of color to a tired old bag.
- DIY Leather Bookmarks. These cute leather bookmarks are one of my favorite leather DIYs. I embossed quotes onto the bookmarks, but you could make things even easier with some iron vinyl. A metallic gold vinyl would be so pretty!
- Custom Coasters. Leather coasters decorated with a monogram or meaningful quote would make a perfect housewarming gift.
- Personalized Accessories. It’s super easy to add initials, names, or favorite characters or designs to leather keychains or luggage tags for a thoughtful gift. These little projects offer a fun way to experiment with vinyl on leather without committing to larger projects. (Don’t forget you can use faux leather items for this too!)
- Give Your Shoes and Upgrade. You can have so much fun adding color and personal flair to a pair of leather shoes. Check out this post to see how I used HTV to decorate a pair of shoes.
- Custom Leather Tags for Handmade Items. Crafters love to personalize their creations, and adding a custom tag to your handcrafted goods is the perfect final touch.
So many great ideas! Do you have one to add to the list? Let me know in the comments.
Until next time, Happy Making!

If you liked this tutorial, be sure to check out all of my HTV projects here for more crafty inspiration!
More Heat Transfer Vinyl Projects

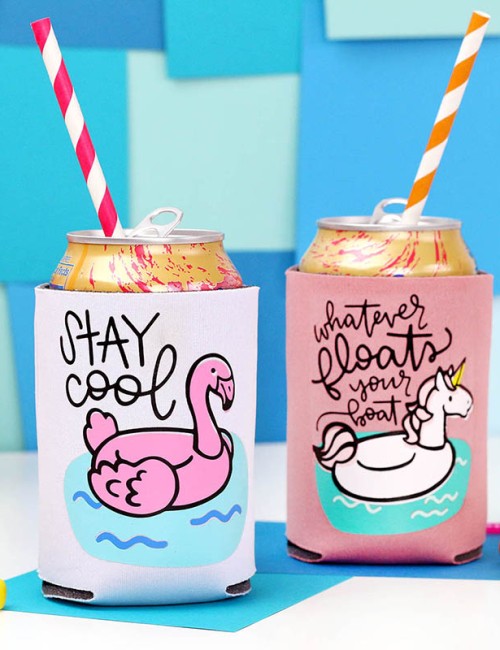
How to Make a DIY Koozie
Learn how to make DIY koozies with adorable pool float designs! It’s easy to personalize your can koozies with heat transfer vinyl,
DIY Christmas Unicorn Jacket
Make your own cute Christmas Unicorn jacket with this adorable hand drawn cut file design. This SVG cut file works with your
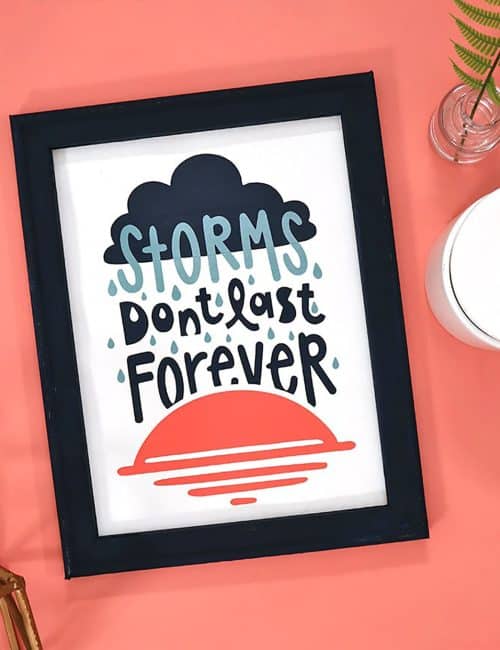
Storms Don’t Last Forever Free Cut File + More Inspirational SVG Cut Files
Download this free “Storms Don’t Last Forever” cut file and make your own inspiring home decor, apparel, and more. Plus, find 11


Comments + Project Love
Kumar says
Great
Morgan says
What if I have a heat press? Should I still use an iron? Also, can I just use my Teflon sheet between the iron and the leather? Or do I need to use cotton,?
Thanks!!!!
Dan says
Good question, and what about temperature settings of the heat press?
Alexis says
I’m sorry! I don’t have much experience with the heat press, so I’m not much help. I would do an experiment on a scrap piece of leather you don’t care about. Good luck!
Lorraine Leslie says
every think is great can’t wait to start
Sam Baker says
love your pattern and idea, looks beautiful on the leather note books! I so need one of these!!
Jeni Charron says
Was this smooth leather or suede? I was thinking of putting something on a leather tote. Thank you!
Bill Rogers says
Ypu should be very careful if you apply heat to any leather other than natural tanned leather. All the chromium leathers have neat colors but heat will give off a chloride gas which is very dangerous. Cheers
Araya says
Did you remove the transfer tape prior to ironing? I’ve never used HTV before so I’m sorry if that’s a stupid question.
Valerie Hudson says
How has this project held up? I’m a paper crafter and getting into leather work. I’m curious if this project has stood the test of time. 😀 It’s really great by the way! Thanks for the inspiration!
Paige says
Is the vinyl that you used good for leather? I’ve been told certain vinyl is not good for leather. Also, how long did the vinyl take to ship and deliver?
Shelemiah says
Can you take heat transfer vinyl off of leather once it is applied?
Carin says
Is the vinyl on leather a really permanent application? I need something that will not fall off after a lot of hard use?
Rob says
Can this be printed on with an inkjet printer and then transferred to a leather trainer tongue?
Sara says
Would this work on a faux leather jacket?