Today, I am partnering with Happy Crafters to introduce their brand new, super exciting heat transfer vinyl, HappyCut! I am loving this new HTV, and I know you will love it too. Plus, I’m sharing two free magical cut files you won’t want to miss! This post contains affiliate links, which help to support this site at no extra cost to you.

I have been looking forward to this day for a while now, and it is finally here! It’s launch day for the brand new HTV from Happy Crafters, HappyCut!
I was lucky enough to receive some of this awesome vinyl early so I could play around with it a bit and share my experience with you all, and I think you will really love it.
Are you guys ready to check it out??
HappyCut is specifically designed to be easy for crafters to use, making it easy to get fantastic results with a regular home iron! The application temperature for HappyCut is lower than other HTVs at only 275° F, and it also only takes 5 seconds to apply. Seriously, only five seconds!
Another thing I love about it is its matte finish. It just looks great when applied and it also works great for layering.
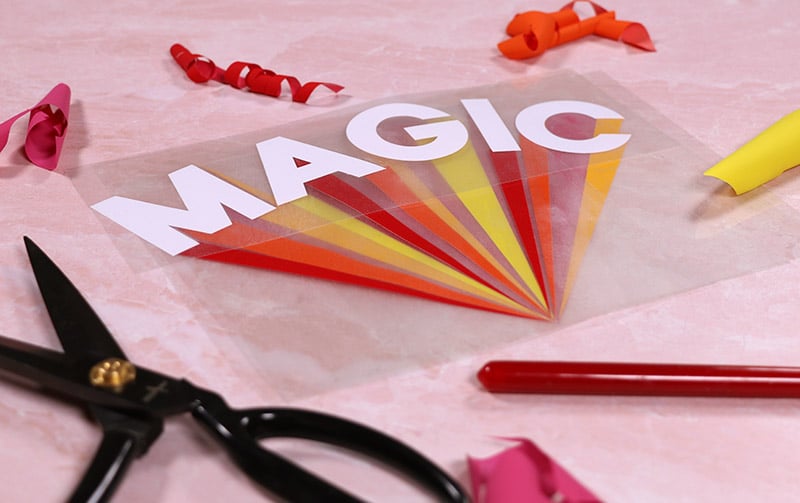
I have to say I really was impressed with how well this vinyl applied and how quick and easy it was to use. It’s honestly kind of magical. And because of those magical qualities, I decided to create a couple of magic inspired projects with HappyCut.
First, I used one of the awesome purple tie dye blank t-shirts from Happy Crafters to make a fun “make your own magic” crystal ball shirt for my daughter. I know she is going to love it! (Psst – look at the shimmer on that silver HappyCut! I am really loving the silver!)
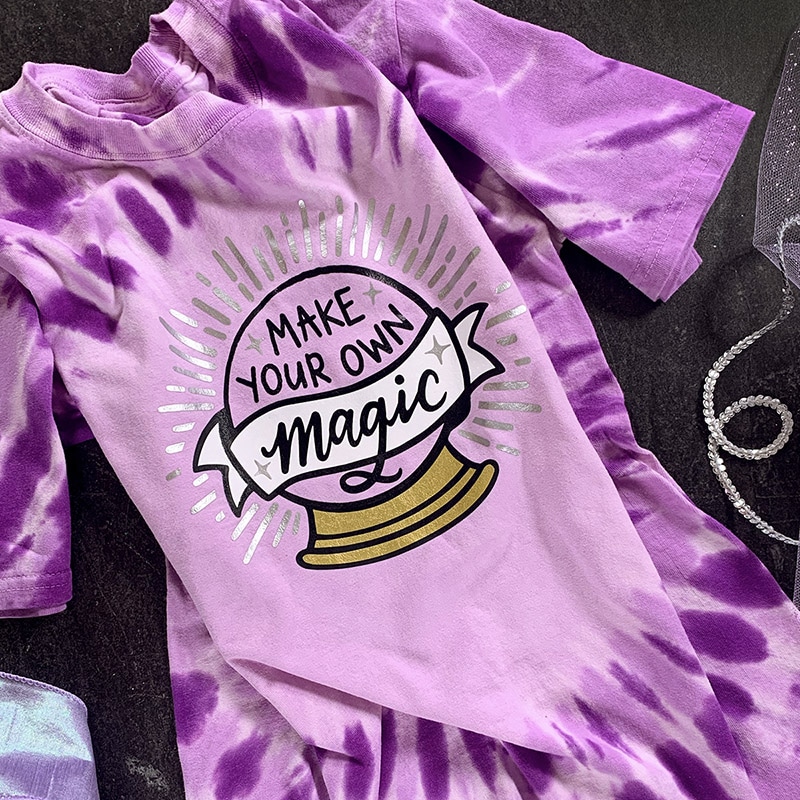
Isn’t that shirt just perfect for adding HTV to? The blank space in the center of the chest is just calling out for a design, don’t you think? I used one of my new crystal ball designs, and if you like it, you can grab the mini bundle on super sale right here:
You can actually see me assemble this shirt and see more of Happy Cut in action in the FB Live video below:
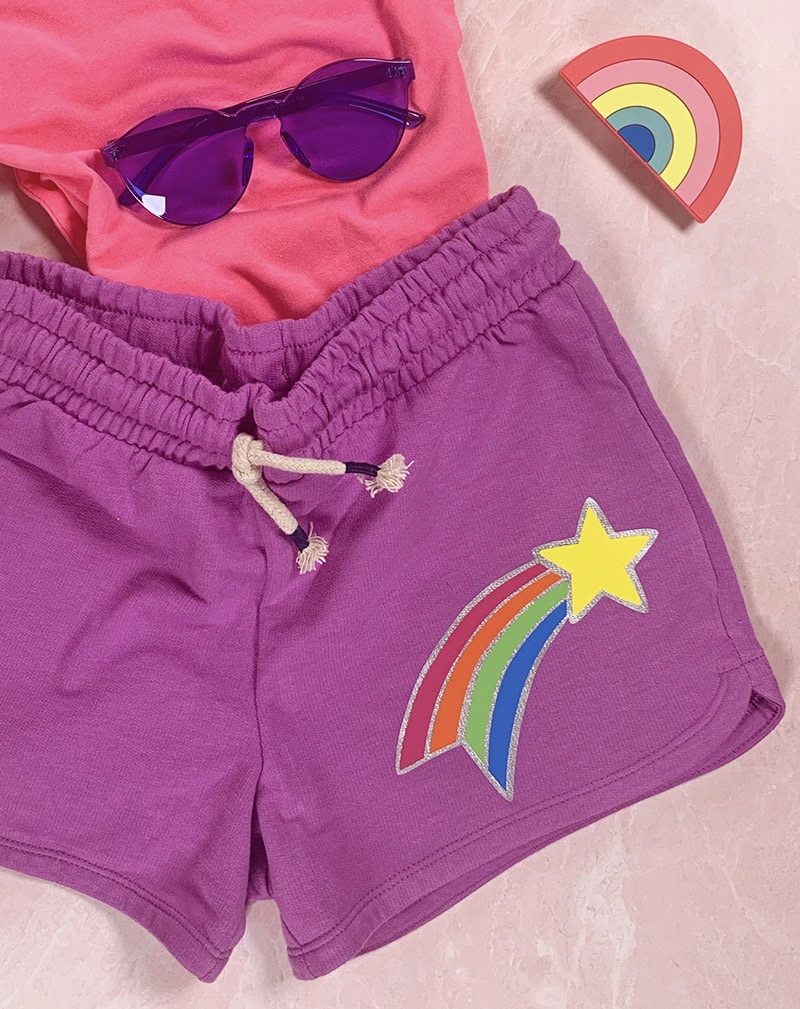
I also made some cute little shorts for my daughter and a magical rainbow shirt for myself! Keep reading to get my best tips for working with HappyCut and to snag my free cut files!
How to Craft with New HappyCut Heat Transfer Vinyl
The steps for applying HappyCut are the same basic steps you would use with any heat transfer vinyl. If you are new to working with heat transfer vinyl, you may want to check out my beginner’s guide to working with HTV right here.
Step One. Prepare Cut File Design and Cut.
The first step is to get your design ready to cut in your cutting machine software. Start by opening the designs in your software. You can download the free cut files at the end of this post. I used my Silhouette Cameo for my projects, but any cutting machine will work just fine with this vinyl.
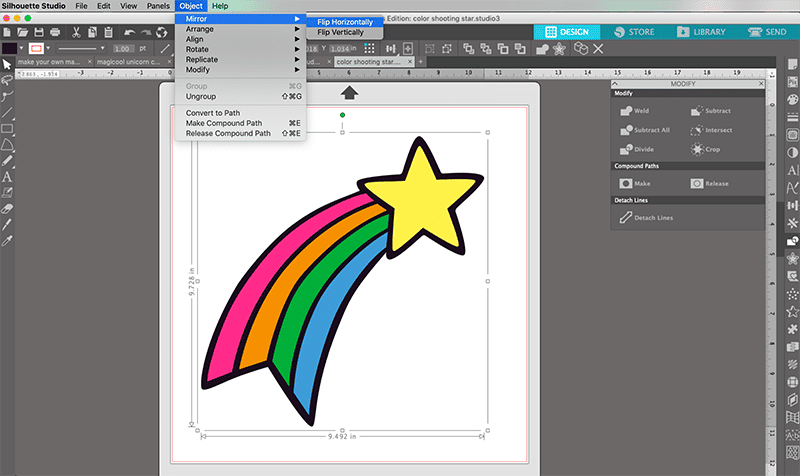
Just like other heat transfer vinyls, HappyCut is cut on the back side, so your designs need to be mirrored before sending them to the machine to cut.
Once you have sized your design to fit on your project and have mirrored the design, it’s time to send it to your machine to cut. I found that the default Silhouette cut settings for Smooth Heat Transfer worked perfectly for HappyCut (Blade 2, Speed 8, Force 4).
Step Two. Weed Excess Vinyl.
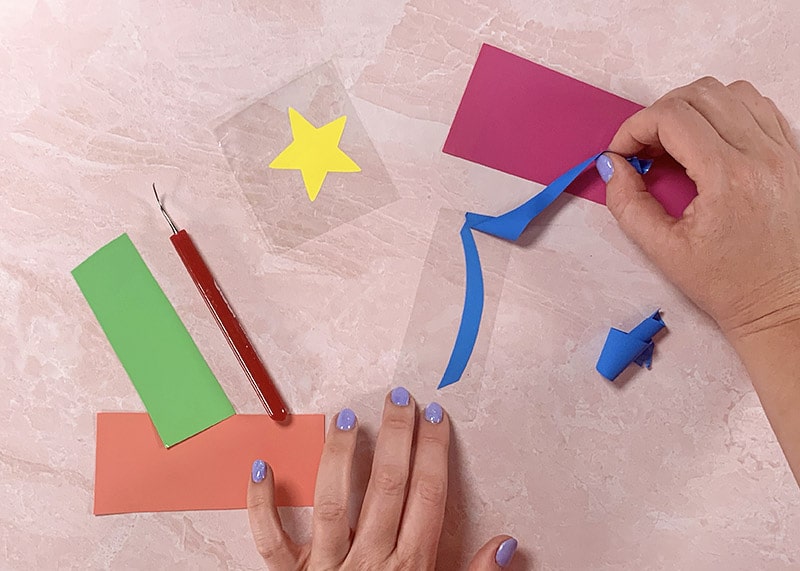
After you have cut out your design, use your weeding hook to remove all of the excess vinyl from around your design. I had no trouble weeding HappyCut and found it really easy to work with.
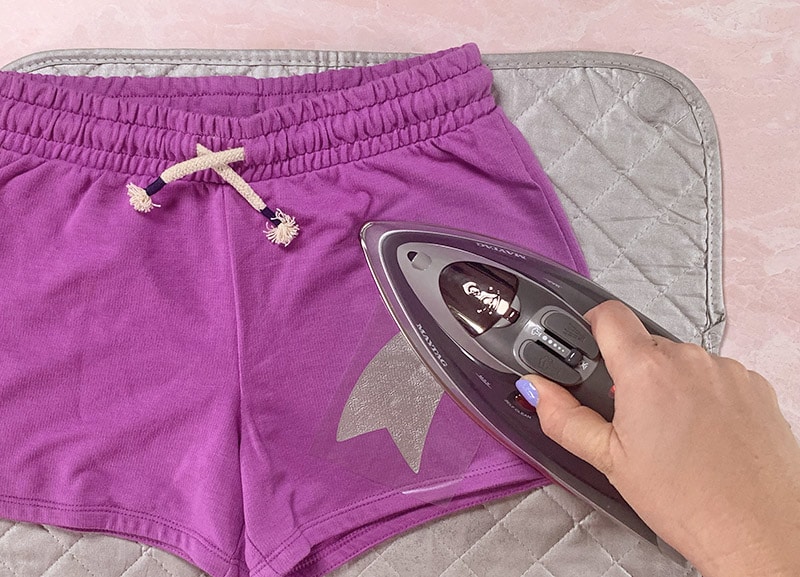
Step Three. Apply HappyCut Vinyl.
Once your design is cut and weeded, it’s application time! I used my iron on the cotton setting with the steam turned off. After allowing my iron to heat up, I simply applied heat and gentle pressure to the first layer of my design for five seconds. That’s really all the time it takes for it to adhere to the fabric!
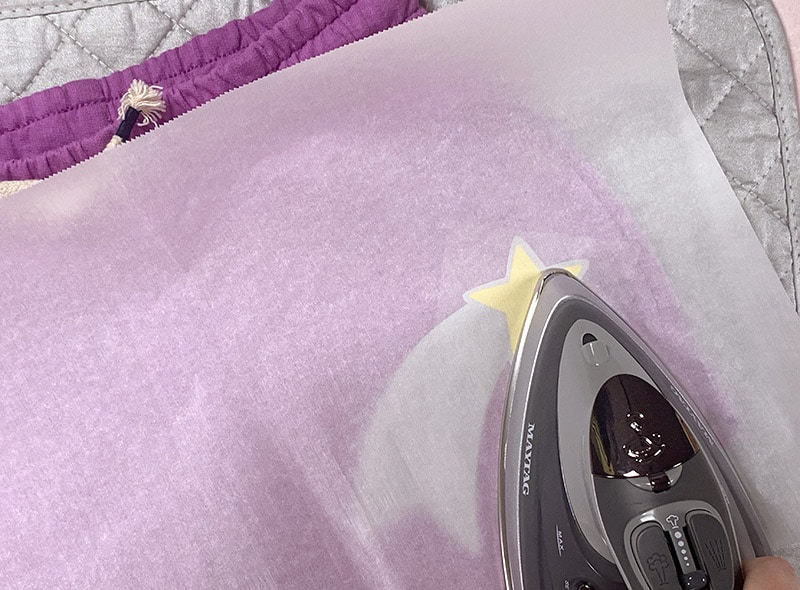
I know that five seconds goes by quickly, but especially when you are layering vinyl, you don’t want to leave the iron on for longer than necessary because that bottom layer will get more heat as you apply the other layers.
For these little shooting star shorts, I layered a star and rainbow tail on top of the silver base. After applying the first layer and peeling off the clear carrier sheet, you will need something to protect the first layer when applying the other layers on top of that. I like to just use a sheet of parchment paper.
After the layers are all applied, you are all done! It’s seriously amazing how quickly I made these cute little shorts!
If you want to make your own projects with this shooting star design or the magic rainbow design I used to make myself a shirt, you can grab those free cut files below. 🙂
Download the Free Magical Cut Files
Be sure to grab your free cut files from the links below! These designs are free for personal use only. (If you are interested in using the designs commercially, you can buy a commercial use license right here.)
By clicking the links below, you can download a zipped file containing SVG, PNG, and DXF versions of the cut files. You need to unzip the files before you will be able to open the cut files in your cutting machine software.
Download the Shooting Star Cut File
Download the Magic Rainbow Cut File
If you have any questions about HappyCut, drop them in the comments below, and I will do my best to help! And, if you try out HappyCut, I want to hear what you think!
And as always, I love seeing your projects using my free cut files. Please tag me on instagram or share to my facebook page.
Until next time, Happy Making!

Check out more of my free cut files:
[the_grid name=”Free Cut Files Footer”]


Comments + Project Love
Steven says
Very helpful information. Thank you for share with us.
Katherine says
Is their a website to make my own designs?
What cutting machine software do you use and which hardware do you use to print out the designs?
Leah says
The download of the shooting star cut file put a MASSIVE AMOUNT of junk files on my computer. Is there another place you have this download available? I would be happy to pay you for the download.