Learn how to cut and emboss clay with the Silhouette Curio to make your own amazing DIY clay earrings! A big thank you to Silhouette for sponsoring this post! This post contains affiliate links, which help to support this site at no extra cost to you.

You guys know that I love my Silhouette machines. My first Silhouette was a Cameo, and while it’s still the machine I use the most, I love all of my Silhouette babies. Today I’m focusing on the Silhouette Curio and all of it’s amazing abilities. The Curio gives you the ability to stipple, etch, and emboss, plus it has a higher clearance than the Cameo, which makes it perfect for working with thicker materials and surfaces.
All of that just means that the Curio is an excellent tool for clay crafters! Today, I’m diving into the process of cutting and embossing polymer clay with the Curio plus we will make some super cute DIY earrings along the way.
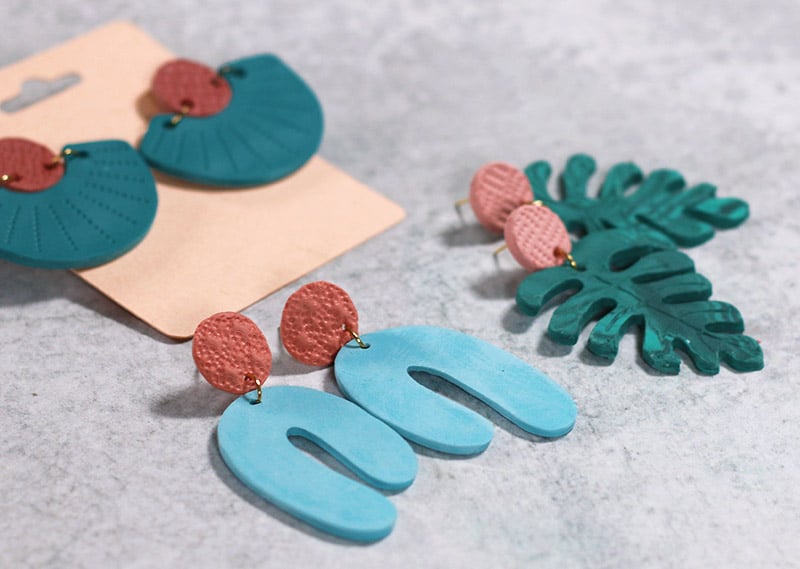
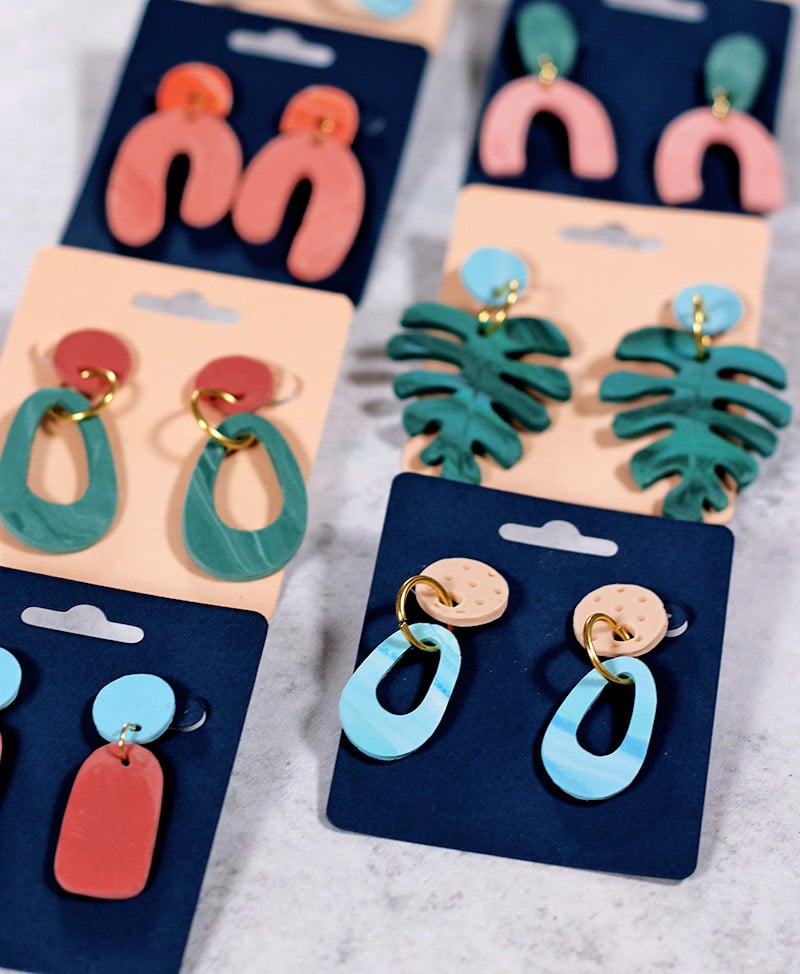
So cute, right? I am so happy with how these beauties turned out!
Ready to get making? Let’s do this!
How to Cut and Emboss Polymer Clay with the Silhouette Curio
First off, I want to say that it took mea good bit of experimenting and testing to find the settings that worked best for me with this project. I am going to do my best to pass on what I learned, but please keep in mind that you may need to do some testing yourself. 🙂
I also need to mention the queen of cutting clay with the Curio, Mags Bonham and her amazing work and Curio clay tutorials. Her work definitely helped me to get started with this project, so be sure to check her out for more instruction and inspiration.
Okay, now let’s talk supplies! Here is everything I used to make my cute DIY earrings.
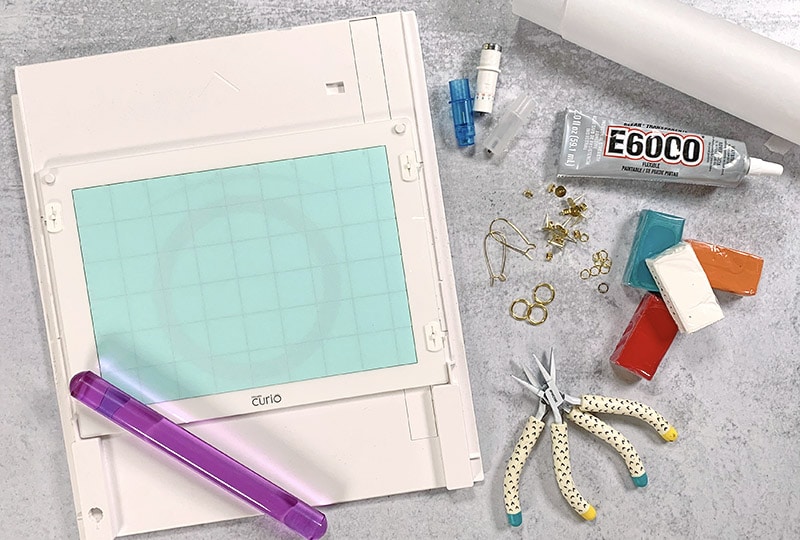
DIY Clay Earring Supplies:
- Silhouette Curio (comes with the platforms, cutting mat, and embossing tool)
- Silhouette Deep-Cut Blade
- Polymer Clay (I used and recommend Sculpey Soufflé for this project)
- Parchment Paper
- Pasta Roller or Clay Roller (not absolutely necessary, but highly recommended)
- Clay Rolling Pin or Brayer
- Clay Slicers (optional)
- Sandpaper
- Gold Jump Rings
- Earring Posts
- Jewelry Pliers
- E6000 Glue
- Oven
How to Prepare Your Clay
I used and recommend Sculpey Soufflé for this project. Soufflé is a lightweight clay that makes it perfect for jewelry. I also found that it remains a little bit flexible after curing, which makes it more durable and less likely to break with wear. However, any oven bake polymer clay should work. Just be sure to follow the instructions for the clay you use.
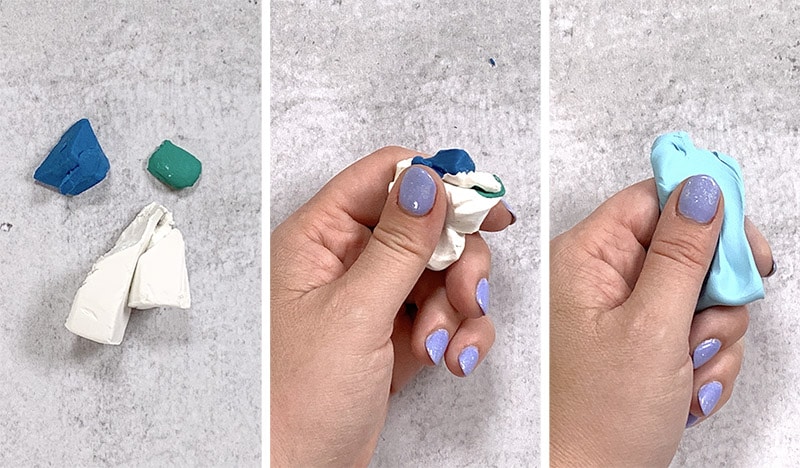
One of the great things about working with polymer clay is the ability to mix your own custom colors. To make this light blue, I just added a little bit of a darker blue and a little green to a chunk of white and then kneaded them together until the colors mixed. (The pasta/clay roller is really useful here and can save your hands some work!)
Beyond mixing colors, you can also easily create beautiful marbled looks with polymer clay. I used a couple of different methods to create the marbled looks I used in some of my earrings. The photos and instructions below explain two of the methods I used for marbling clay in this project.
Marbling Method 1:
- Roll out 2-4 colors of clay into tube/ropes and twist them together.
- Fold and twist the clay ropes together to start the marbling process.
- Flatten the clay out a bit, and then run it through your pasta/clay roller. (You can also flatten it out with a rolling pin.)
- If you like, fold the piece and run it through the clay roller again until you are happy with the marbling.
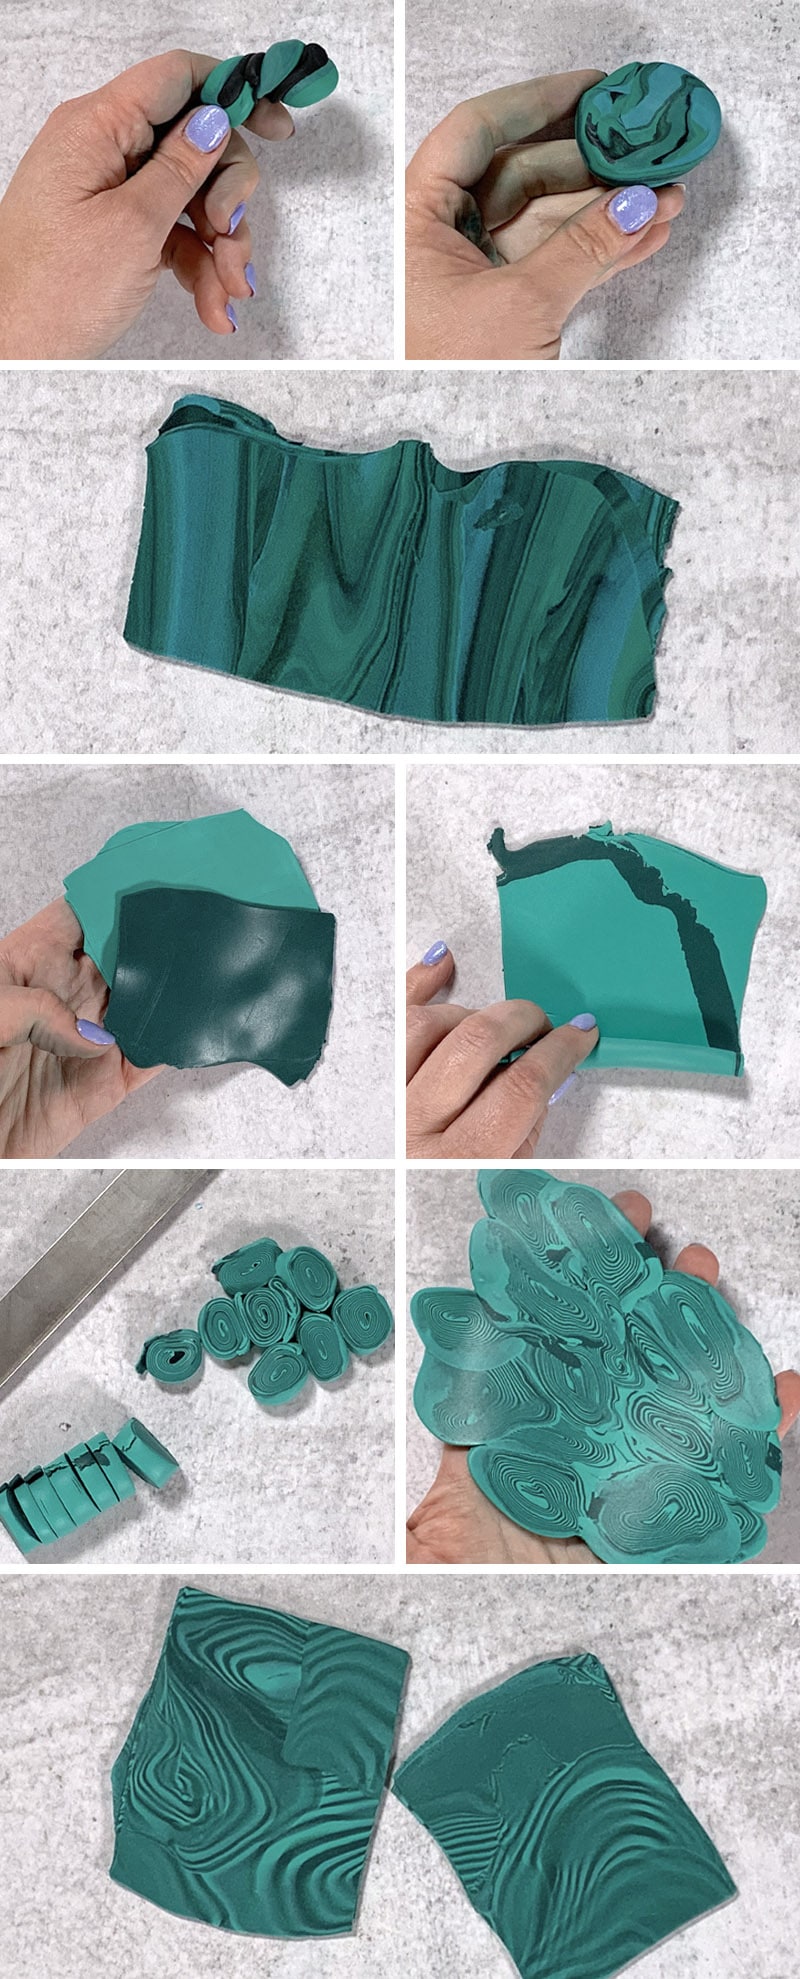
Marbling Method 2 (Malachite Look):
- Create two sheets of different colored clay using your clay roller.
- Stack the sheets of colored clay and run them through the roller to bind them together.
- Roll the sheets up to form a spiraled clay log.
- Slice through the log to create spiral discs.
- Press the spiral discs together and run them through the clay roller.
- Continue to fold the sheet in half and run it through the roller until you are happy with the marbling.
This whole process is so much fun, and there are so many different colors and looks you can get with polymer clay! You may also want to try out a trendy terrazzo look like the one I used in these DIY terrazzo clay planters.
Clay Thickness
After you are happy with your color or marbling, you need to make sure your clay is the right thickness. I tried a few different settings with my pasta roller to find what I liked best for my finished earrings. Ultimately, I ended up liking the thickest setting on my roller, which was setting #1 and which produced a sheet of clay about 1/16 inch or 1.5 mm thick.
The Curio can cut materials up to 2 mm thick, but be aware that you will need to adjust your machine’s settings for different thicknesses.
Placing the Clay on Your Curio Cutting Mat
When you have your clay mixed and rolled out to the proper thickness, it’s time to get it on the Curio cutting mat.
Be sure that you don’t put clay directly onto the cutting mat adhesive as that will just make a mess! Instead, protect the surface of your cutting mat with some kind of paper or carrier sheet first.
I used both parchment paper and freezer paper for this, and both worked well. Parchment paper has the added bonus that you can simply pull the sheet off of the cutting mat and place it directly onto your baking sheet if you like.
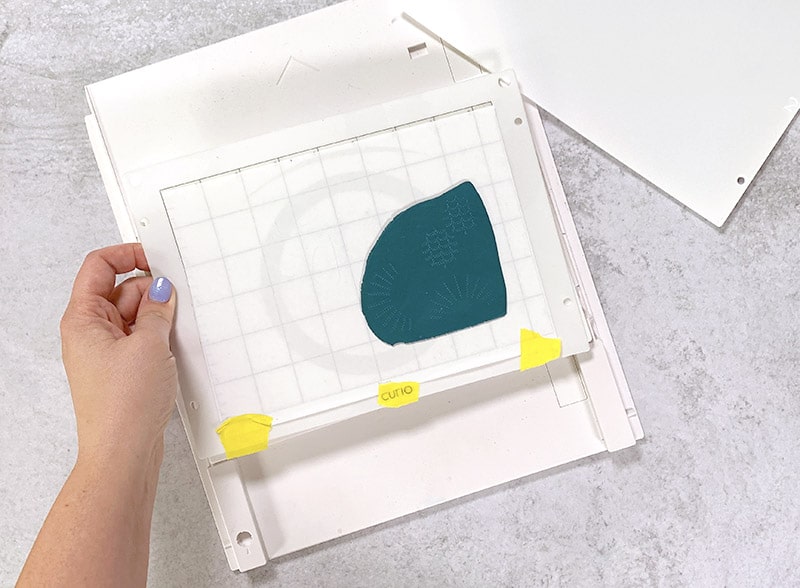
I just cut a piece of parchment paper to the size of my cutting mat (8.5″ x 6″) and stuck it down onto the adhesive surface of my cutting mat. If your cutting mat has been used a lot and is less sticky, you may need to secure the paper in place with some tape.
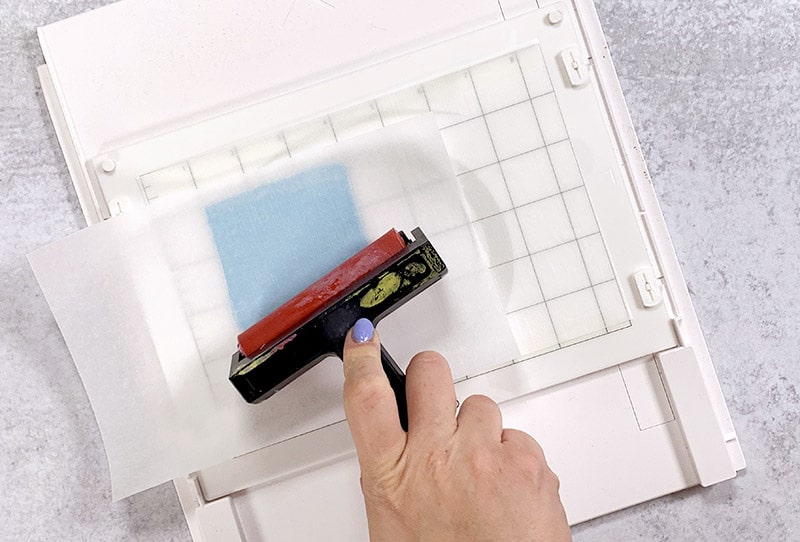
Then, place the clay onto the cutting mat and layer a piece of parchment paper on top. Use your brayer or rolling pin to smooth the clay down onto the cutting mat. This will keep it in place and make sure the surface of your clay is smooth.
How to Cut Clay with the Silhouette Curio
Once your clay is all prepped and on your cutting mat, it’s time to get cutting! The first thing you need to do is remove the cap from your deep cut blade. Just carefully grab the red cap around the blade with your fingers and unscrew it.
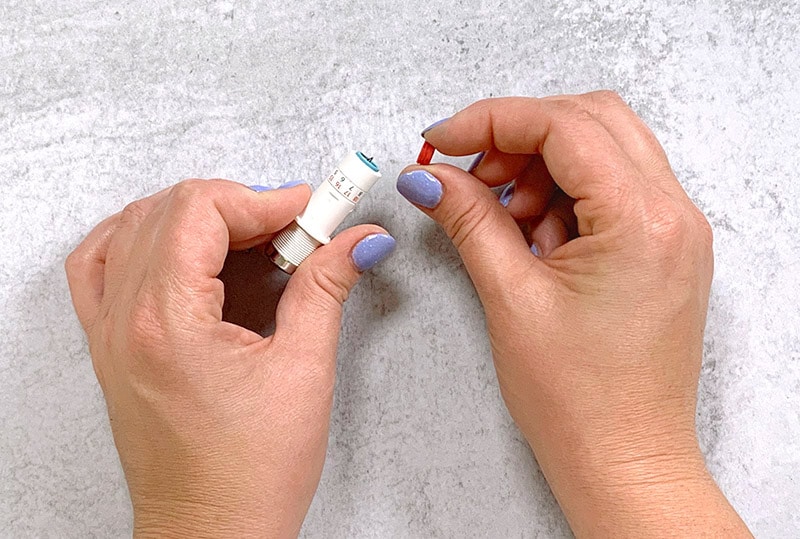
Taking the cap off will allow you to get deeper cuts without smashing the surface of the clay as you cut.
Preparing Your Design
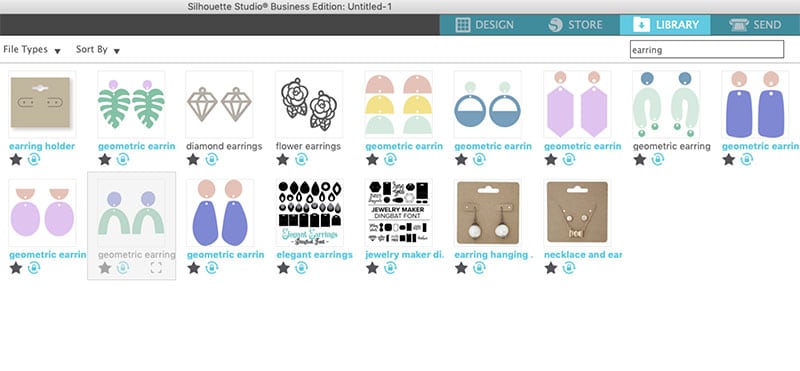
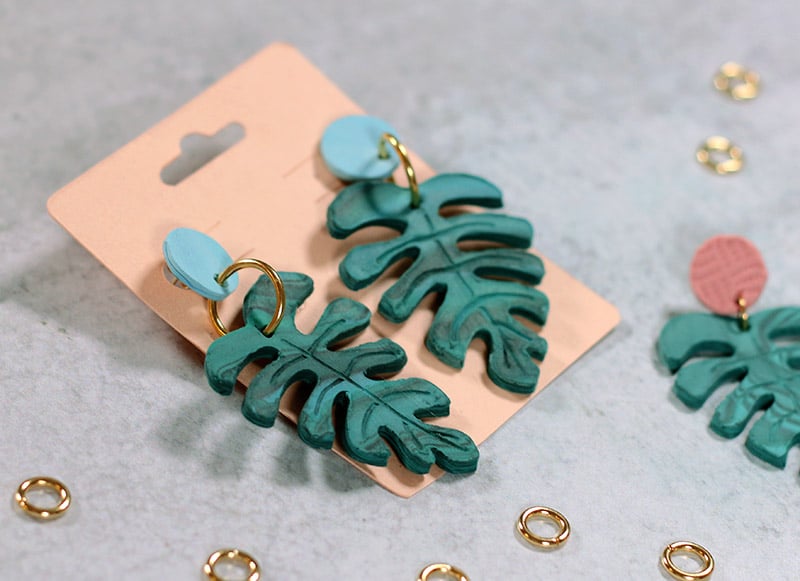
Next, it’s time to prepare your design and set your cut settings in the Silhouette Studio software. For my earrings, I used several earring designs created by Sweet Elsie and available in the Design Store. My favorite geometric earring designs were Design ID 295161, 295167, and 295168. I also loved her tropical leaf earring design (Design ID 295169).
Another option is to create your own designs. You can do this really easily with the new flexishapes tool available in Silhouette Studio version 4.2 and later, Designer Edition and higher. This was my first time really playing around with flexishapes, and I was really impressed with how easy it was to create some fun earring designs with these tools.
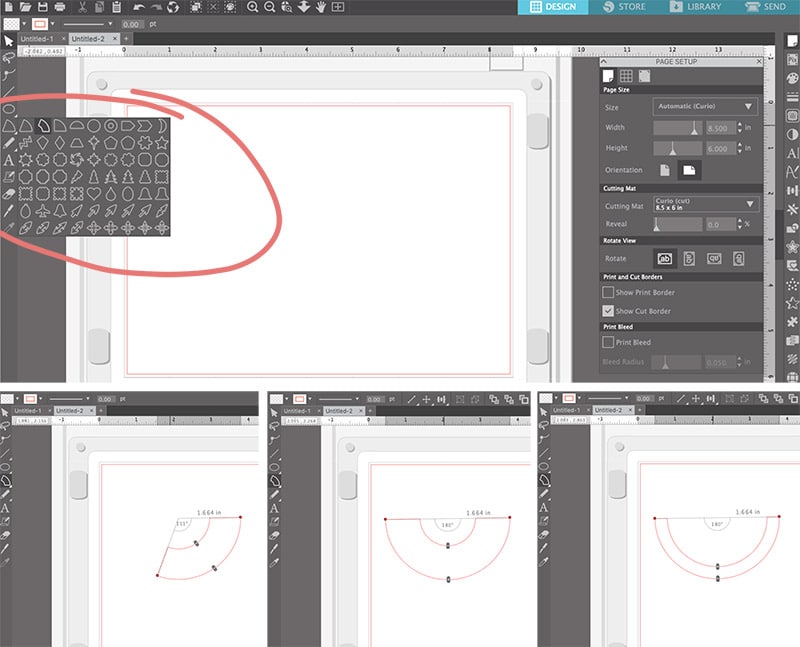
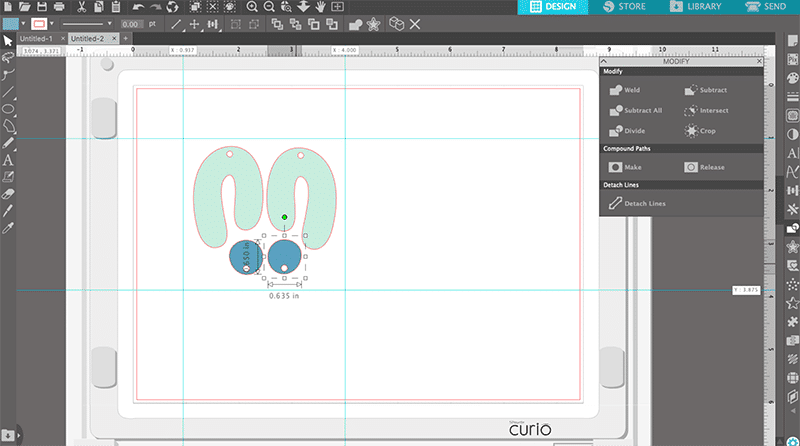
Once you have your design chosen, you need to scale and position it within the portion of your cutting mat where you have placed your clay. It might be useful to use guides in the Studio software to help you see where your clay is positioned.
Adjusting Your Cut Settings
Finally, it’s time to adjust your cut settings. I created a custom material type for cutting clay with the following settings: Blade – 12, Speed – 3, Force – 1, and Platform – 4. You may have to start with a thick material like Craft Foam to get access to the Deep Cut Blade. Click on the three dots next to the cut settings open the Advanced Material Panel to adjust all of your settings.
When you have your settings ready in the software, make sure your cutting mat is on top of the right number of platforms. I got the cleanest cuts with platform level 4, which is one 2 platform, one 1 platform, and the cutting mat on top (2+1+1).
Make sure your deep-cut blade is adjusted to the correct setting, insert it into the correct tool holder (blue or red), load your platforms into the machine, and send it to cut.

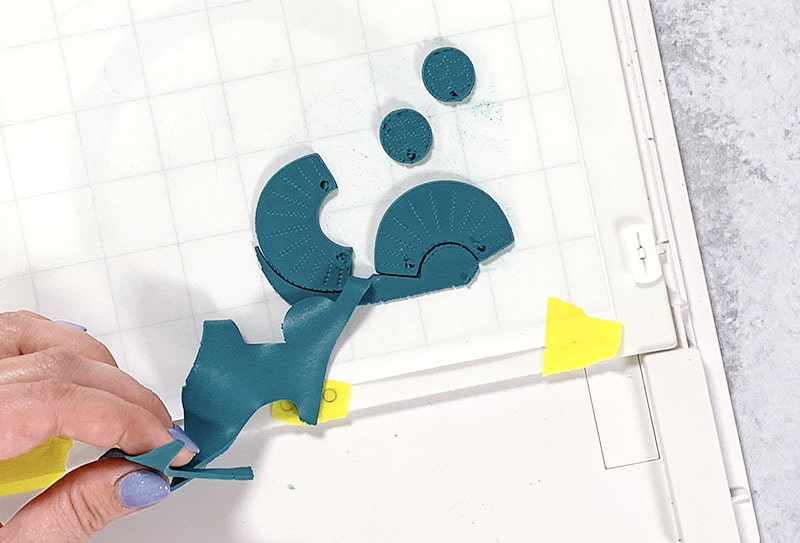
With these cut settings, I found that I got pretty clean cuts and could easily pull away the excess clay from around my design. If these settings don’t work for you, you can adjust the depth of your blade, the force, and your platforms to get the perfect cut. The good news is that you can always just re-roll clay that doesn’t cut correctly and try it again!
How to Emboss Clay with the Silhouette Curio
One of my favorite things that the Curio does is embossing, and I knew I had to try it out with clay! I tried using a few different tools, but I liked the look I got with the fine embossing tool best because of its rounded shape.
Preparing Your Embossing Design
I think my favorite embossing technique was using the stippling options in the Studio software paired with the fine embossing tool. The software makes it so easy to add awesome stippled designs!
To add some stippled embossing to your design, first create a shape slightly larger than the clay shape you will be cutting. (I just used the ellipse tool draw a circle slightly larger than the piece I was cutting.) Then, open the stipple panel and choose one of the many stipple fill designs to fill your shape with.
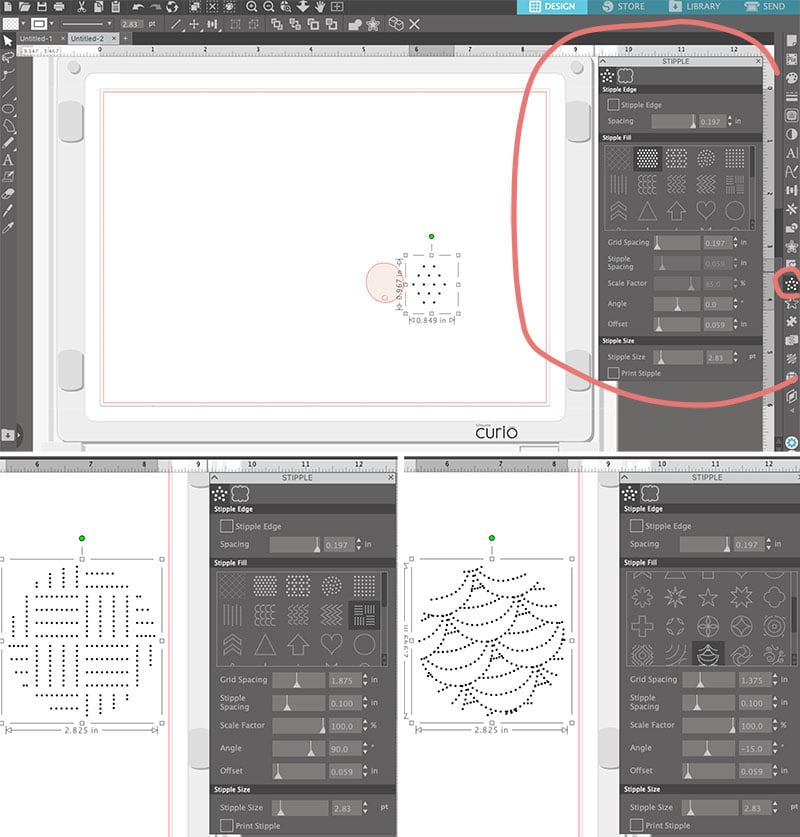
You can adjust the settings in the stipple window to change the look of your stippled design. These cool stippled designs were the perfect way to add texture to my earrings. I used this technique to add the dotted basketweave design to the pink pieces in the image below, and I just love them!

In addition to using stipple fills, you can add stippling along a line or emboss solid lines (like the lines in the leaves above) as well.
Adjusting Your Embossing Settings
When you have your design ready to go in the software, you will need to make sure you have the stippled and embossed parts of your design assigned to the appropriate tool in the Send Panel.

For example, in the image above, I had my fine embossing tool loaded into the red tool slot, so I made sure I had all of my stippling and embossing elements assigned to the red tool. Likewise, my cut lines, are assigned to the blue tool where I had my Deep-Cut Blade loaded.
Next, you will need to adjust your embossing/stippling settings. Again, I created a custom material type just for embossing clay, and I used the following settings: Speed – 1, Force – 2, and Platform – 2. I did find that I had to play with these settings a bit depending on the design, whether I was stippling or embossing, and how deep I wanted the embossing to be. For deeper embossing, increase the force, or move up to platform 3.
I found it worked best to emboss/stipple first and then cut second. Because I was adjusting my platform between embossing and cutting, I would turn off the cut lines before sending the design to the Curio to emboss.
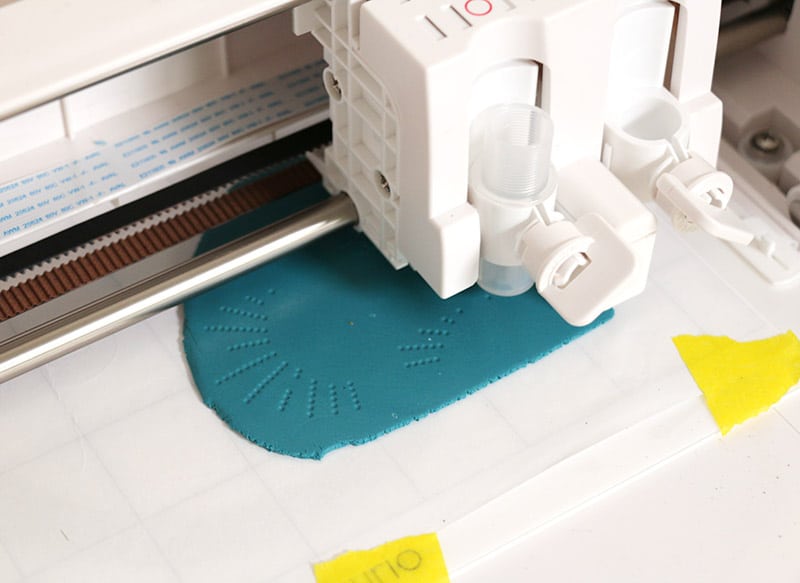
When the embossing and stippling was done, I adjusted my platforms, loaded the cutting mat back into the Curio, and sent it to cut. Because the cutting mat is attached to the top platform and the platforms are locked in place, you don’t have to worry about your embossing and cut lines lining up.
How to Bake The Polymer Clay Earring Pieces
Once all of your pieces are cut, it’s time to get them in the oven to bake!
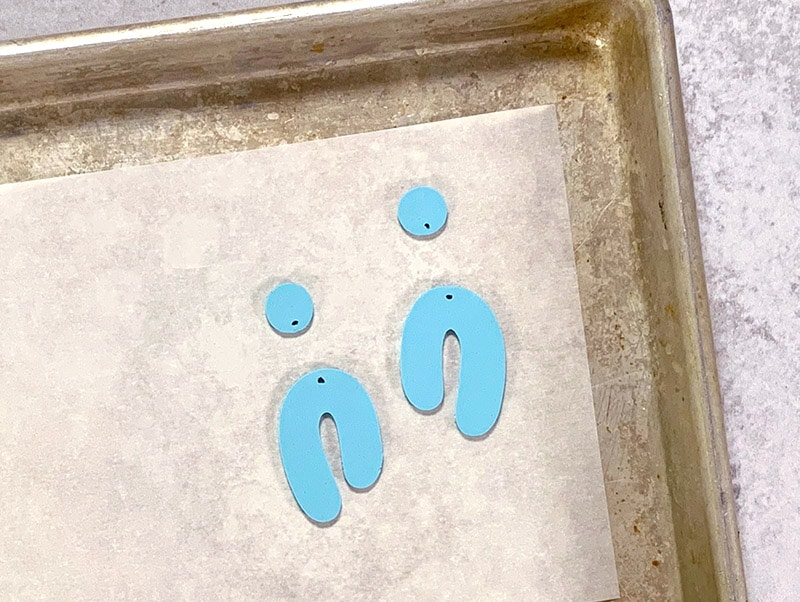
Start by either peeling the piece of parchment off of your cutting mat and moving it over to a baking sheet, or by carefully peeling the cut pieces up off the cutting mat and moving them to a parchment lined baking sheet.
Then, you may want to take a few minutes to clean up your pieces. I used a few different tools and techniques for this. First, I used a soft brush to gently brush away excess bits of clay. Then I would gently press along the edges of my pieces to smooth down any bumps or lips. Finally, I used a dental pick (a weeding hook would work well for this as well) to pull clay from the holes and shape them up.
Finally, bake your pieces according to the instructions for your clay. For Soufflé, the instructions are to bake at 275° for 30 minutes per 1/4 inch of thickness.
After the pieces have baked and cooled, you can smooth out any bumps or unevenness around the cut edges using sandpaper.
How to Assemble and Finish Your DIY Clay Earrings
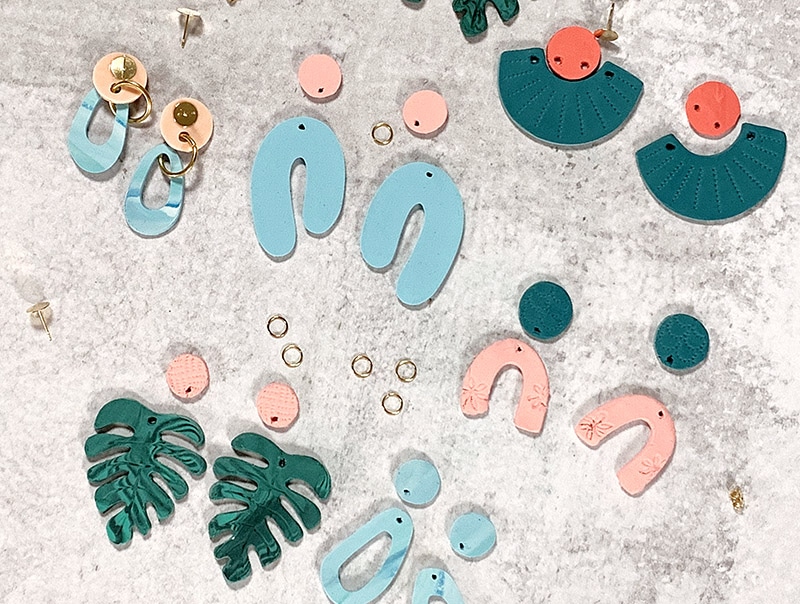
Finally, it’s time to assemble those earrings! I started off by laying out all of the pieces I had cut (it was a lot!) so I could see which pieces I liked together. Once I had all of my designs planned out, I started to put them all together. Using my pliers, I opened up jump ring to join the clay pieces together and then closed the jump ring.
When the clay pieces are joined with jump rings, it’s time to finish off the earrings by gluing earring posts onto the top pieces.
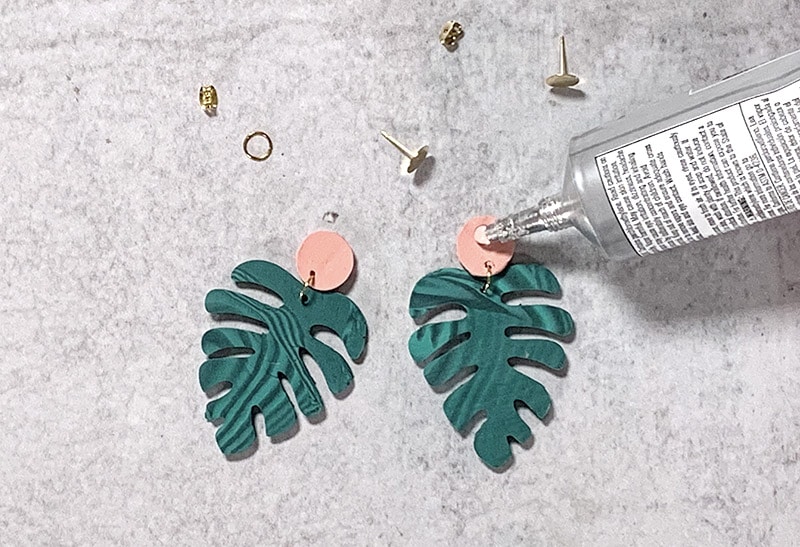
E6000 glue is super strong and works well for this, but it does need a five-ten minutes to cure. Once the glue has completely dried, your earrings are all done are ready to wear!
I can’t get over how great these earrings turned out! They are super cute, and I love how lightweight they are! I totally forget I’m wearing them all the time.
What do you think? Do you want to make your own clay earrings? Have you tried cutting clay with your Curio yet? Tell me all about it in the comments. 🙂
Until next time, Happy Making!


Comments + Project Love
Mags Bonham says
Wow Alexis! You did a fabulous job. And I love the earrings you made. It makes me so happy when I see someone taking what they learned from my experience and be inspired to add their own creative voice to it.
Just a couple of tips to help anyone inspired by your post:
1. Buy an oven thermometer and check the temperature of your oven before you bake your pieces. Most ovens keep their temperature by spiking up above the temperature and then cooling down. Check the FILES section of my PC SILie Lovers Facebook Group and find instructions on how to calibrate your oven to make sure your pieces bake fully without burning. And always preheat your oven for 30 mins. before baking.
2. In my experience I have found that Loctite Super Glue works better with polymer clay than E6000. E6000 is a great glue for many projects, but for some reason it tends to fail over time when used with polymer and metal. I like the gel version of Loctite and I find that the container is easier to dispense the glue and lasts longer.
Keep on clayin’
Meriel Henson says
WOW looks like I will have to use my curio thanks wonderful
Janet ardis says
Thank you so much for the tutorial. I love to have the written tutorial so I can print them or read them while my husband is asleep 😴. I can’t wait to try this, I think my teenage girls will love it. I think I will try my hand at making some appliqués to add to my furniture rehabs. Thanks again.
Heidi Jackson says
Hey, lovely idea. I’m going to try this. Is the oven temp Fahrenheit or Celsius? Sorry I’ve never worked with clay before!