Learn everything you need to know about how to use transfer tape! Whether you are using a Cricut, Silhouette, or other cutting machine, I will walk you through the process of using transfer tape (or transfer paper) with your adhesive vinyl decals and vinyl lettering in this written tutorial and video! This post contains affiliate links, which help to support this site at no extra cost to you. Thanks!
Hey hey hey! I’m excited to share today’s post with you all. This post is all about transfer tape (sometimes called transfer paper) and how to use it.
If you have no idea what I’m talking about, transfer tape is basically a sticky carrier sheet that allows you to carefully place and position adhesive vinyl decals. It is an essential item in your vinyl crafting toolbox, and I’m going to walk you through all the basics of working with it as well as share where to get my favorite tapes and my best application tips and tricks.
Beginner’s Guide to Transfer Tape
If you are new to working with vinyl, then you may want to start off by check out my beginner’s guide to vinyl right here. Now, let’s talk transfer tape!
So, What is Transfer Tape?
Transfer tape is a material with a removable adhesive on one side. It can come in rolls or sheets and can be made from paper or plastic film. Some transfer materials come with paper backing and some do not. Although the size, appearance, and tackiness of transfer tape may vary, the all perform the same function: they allow you to easily move your vinyl design from it’s paper backing to your final project.

How do you use Transfer Tape?
First, you will need to cut your design from adhesive vinyl and weed out the excess vinyl. To get the best application, you really need to get a nice “kiss cut,” which means that the blade of your cutting machine just goes through the vinyl without cutting into or through the paper backing. If the blade has cut into the paper backing, it may be a bit more difficult to remove the decal from the backing.
When your design is cut and weeded, you just need to cut a piece off a piece of transfer tape to fit your project and smooth it down on top of the design. You can then peel the transfer tape up, bringing the decal with it and off of the backing. Your decal has now moved to the transfer paper and is ready to be carried to your project surface.

What can I use instead of transfer tape?
Honestly, I have pretty much always used transfer tape with my vinyl craft projects. You can get my favorite transfer tape (which I share below) for a really great price, so I don’t think there’s a good reason to not use it. However, if you are in a pinch, you can use try using contact paper or masking tape as a replacement.
Are Certain Transfer Tapes Better for Certain Materials or Projects?
The short answer to this is yes, but I will also say that I use the same transfer tape for nearly all of my vinyl projects.
Both Silhouette and Cricut offer strong tack or strong grip transfer tapes (here is the Silhouette Strong Tack and here is the Cricut Strong Grip). These products are designed to move glitter vinyls or other textured vinyls that regular transfer tape may have a hard time adhering to.
I do not recommend using a strong grip or strong tack transfer tape with regular vinyl as you will have a difficult time getting the decal to release from the transfer material.
My Favorite Clear Transfer Tapes
I personally find clear, plastic transfer tapes to be the easiest to work with. In general, I find plastic tapes to be more flexible and less likely to wrinkle when applying a decal. Clear tapes also make it easier for you to see your decal as you position it on your project. These are my favorite transfer tapes, and the ones that I repeatedly reach for:
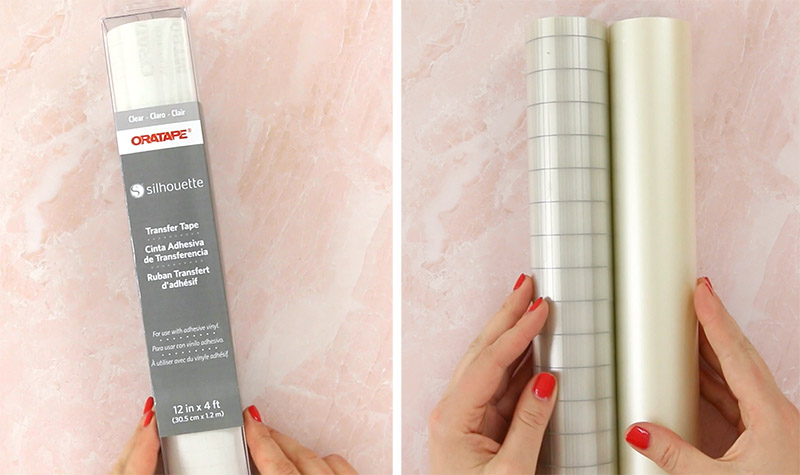
- First, my very favorites are the clear transfer tapes from Expressions Vinyl. I use both the regular clear and the grid transfer tape, and both work wonderfully. I like that these rolls do not have a paper backing, so I can just peel it off the roll and straight onto my project. These clear tapes are also a great option because of their incredible value. You can get a thirty foot roll for only $10-$15, and that will last you FOREVER. (P.S. If you are looking for great deals on vinyl and supplies, check out the list of my favorite online vinyl shops here.)
- My second place choice is my Silhouette and Oracal co-branded Oratape Transfer Tape. It is crystal clear and works beautifully. The only reason it only made second place on my list is that it does come with a paper backing, which feels a little unnecessary to me.
Where to Buy Transfer Tape
For the most part, you can buy transfer tape any where that you can buy vinyl. All of the big box craft stores that sell vinyl will also sell transfer tape, although they may only carry one or two brands (usually Cricut and Silhouette). In general, I think you can get a better value by buying a large roll from an online vinyl shop, such as Expressions Vinyl, Swing Design, or even Amazon. (Check out my favorite vinyl shops right here.)
My Best Tips for Using Transfer Tape
I have put together a little video explaining the basic idea behind transfer tape and sharing a few of my best tips. You can check out the video below, but I will also write out a few of these tips for those who prefer to read. (P.S. if you don’t see a video below, it may have been blocked by an ad blocker. You can also watch it here on my youtube channel.)
This video is part of the Silhouette vs. Cricut series I have put together with my friend, Colleen from Lemon Thistle. You can check out Colleen’s video and post on using Cricut transfer tape right here.
Transfer Tip #1: Try Folding the Backing instead of Removing It
This is a simple little trick, but one that I think really helps with getting good placement and application. Rather than just peeling the transfer tape and decal off of the paper backing immediately, try just folding back one edge of the paper backing (see the image below for an example) so that only a portion of the adhesive side of the decal is uncovered. This allows you to carefully position the decal without it getting stuck down prematurely.

Then, when you are happy with the positioning, press down on the edge of the decal that is revealed and peel off the remaining backing while smoothing out the decal. This simple little trick really makes application so much easier!
Transfer Tip #2: Reuse your transfer tape!
Did you know you can reuse the same piece of transfer tape multiple times? It’s true! I can use pieces of my favorite clear transfer material three or four times each. So, when you peel off a piece of transfer tape, don’t throw it away! Keep it on hand for your next project.
Transfer Tip #3: Try Snipping Transfer Tape When Applying to Curved Surfaces
This is a neat little trick for when you are working with curved surfaces such as mugs or vases. When you are moving a design from a flat surface to a curved one, you have lots of opportunities to end up with a wrinkled vinyl decal. Using scissors to clip through your transfer tape (but not your vinyl!) can help you to avoid bubbles and folds.
You can see how I used this technique when making this mug for Father’s Day in the image below. Snipping through the transfer tape between the pieces of vinyl allowed me to more easily curve the decal around the mug.

Okay! That’s everything I have for you guys today. If you have any questions about transfer tape, please leave them in the comments, and I will do my best to help. 🙂
Happy Making!


Comments + Project Love
Susan says
Do you still mirror the initial cut out that’s to be applied with the transfer tape.
Alexis says
Hi Susan! You only need to mirror cut with heat transfer vinyl or iron on vinyl. For adhesive vinyl, no need to mirror the design. Hope that answers your question!
Gail says
My fav transfer tapes too. Love that letter A.
Mercides Roland says
I am having a hard time getting my vinyl to stick to the transfer tape! Any suggestions
lucy hynes says
Hi,
do you have any tips of transferring vinyl to paper bags? Whenever I try the transfer tape sticks to the bag and tears the paper away. I’ve tried snipping the transfer paper so that it just covers the vinyl but it still sticks between the letters
Shana says
Hi Alexis! Just watched your videos about vinyl labels and using transfer tape – both super helpful! I’m just getting started making my own vinyl labels for my home organizing business (which I’m also just getting off the ground), and I’m running into an issue that I’m hoping you might be able to help me with. I’m using the Cricut Explore Air 2, along with the Cricut vinyl and transfer tapes. The issue I’m having is, when I don’t immediately apply my vinyl label to the intended surface and instead wait some indefinite amount of time – hours or days, I have a heck of a time getting the label to first stick to the transfer tape and then an equally difficult time pulling off the transfer tape and getting the label to stick to the intended surface. Now, if I immediately apply the label after printing, the process goes much quicker and smoother. However, it works much better for my business if I can print these vinyl labels way ahead of time, so I need to come up with a solution – whether it be using different products – like the Expressions Transfer Tape that you say is your favorite – or applying a different technique. I’d love to get your expertise on this, if possible. Thanks Alexis!!
Sandy Wootten says
Thanks never thought to bend the backing. While try it next time
Adrienne says
Thank you!! I am new to this whole vinyl decal making world and learning so much! Your videos are very comprehensive and great for learning!
Lisa O'Driscoll says
Its the transfer tape heat resistant? Wondering if it will melt in my heat press…
Angela says
Can u use the transfer tape with the htv too or no? And how do u keep the htv on your shirt without it peeling back off once it cools off
Alexis says
Hi Angela! Most HTV that I use comes with it’s own carrier sheet built in, so you don’t need transfer tape (See my beginner’s guide to working with Heat Transfer Vinyl here – https://persialou.com/how-to-use-heat-transfer-vinyl/). Some HTV (like Happy Crafter’s pattern HTV – http://shrsl.com/12ex4) needs a Heat Transfer Mask (http://shrsl.com/27kg5) that is specifically designed for working with heat transfer. Hope that helps!
Sandy Mendez says
How long can transfer tape be left on a project. Can it be made and set in advance and left ready For a later time? Or will it not work as well?
Alexis says
ooh… good question! I have put transfer tape on a few days in advance and it has worked just fine. I would have to test anything longer than that. I think at a regular room temperature it should last for a good amount of time, but heat or cold could possibly affect it.
Candace says
Can you use transfer tape on cardstock
Lisa Wills says
This was the best video I have found that explains exactly how to use transfer tape. Thank you!!!
JaNaya Dixon says
Can transfer tape be used on transfer paper?
Selina McArdle says
Hi, I’m having a really hard time using transfer tape. I lay it flat and I use the scraper tool to smooth the tape and get out any air bubbles that might be there, but my vinyl either won’t stick to it or else when I finally get my vinyl on the tape, it won’t come off properly onto my project. Do you have some tricks I can do to help fix this problem, or is it just lack of practice?
Michelle Furuseth says
Can transfer tape ve used on paper cut out also?
Sarah S. says
I feel like I’m using the wrong kind of stickers. I can’t get them to the transfer tape to save my life!