Learn how to make clay hoop earrings with this step-by-step video tutorial. This simple technique makes it easy to create beautiful, unique earrings you will love to wear! Thank you to Sculpey for sponsoring this project!

I have some new DIY earrings to share with you all today! I have shared quite a few different earring projects here on the blog in the past, but I think this is actually my first DIY hoop earring, which is pretty exciting.
Today, we are making our own beautiful clay hoop earrings!
I always enjoy making clay jewelry, but I have to say these clay earrings were especially fun. This technique is just so easy! (Spoiler Alert: If you can roll out a clay rope, you can make these earrings!)
More Clay Projects
Okay! Let’s get crafting!
DIY Clay Hoop Earrings
You only need a few supplies to make your own clay hoops. For this project, I worked with Sculpey Soufflé clay, which is a favorite of mine.
Sculpey Soufflé is lightweight (a requirement when you are making big statement earrings like these) and it has a lovely soft, velvet finish after baking.
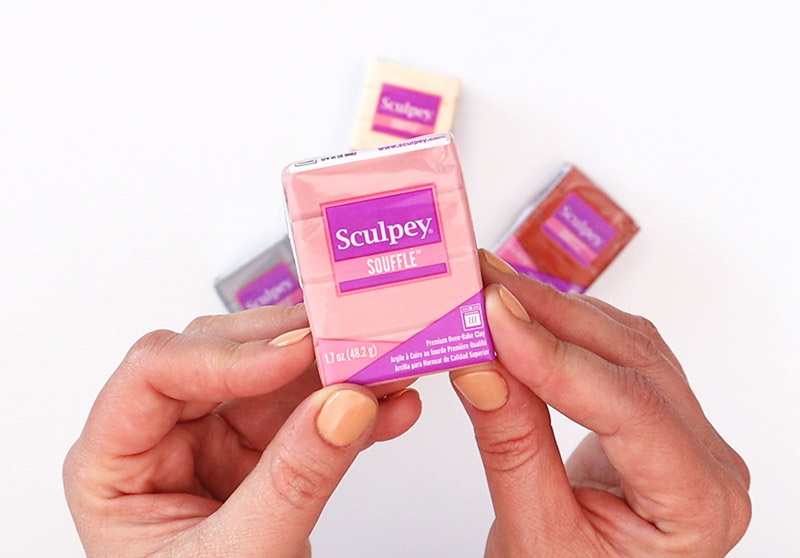
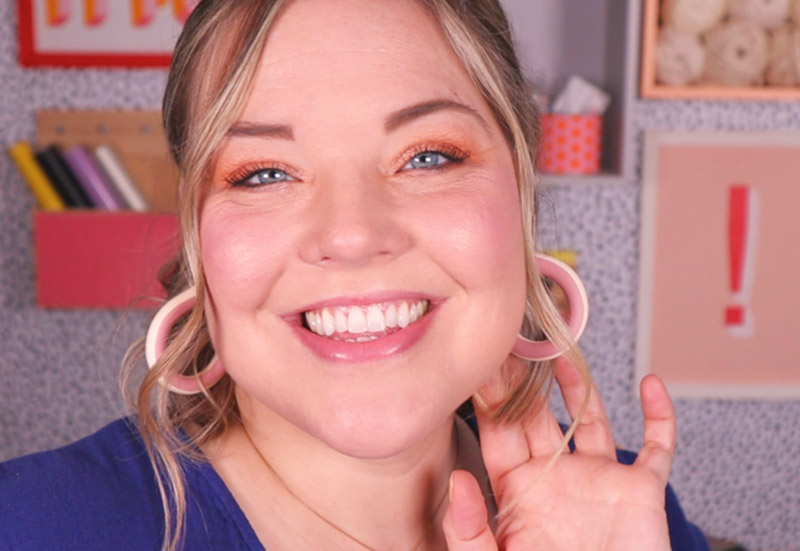
For my earrings, I was excited to work with the brand new Sculpey Soufflé color, French Pink! It is a gorgeous light pink shade that pairs beautifully with pretty much every color I put it up against.
CLAY HOOP EARRING SUPPLIES:
- Sculpey Soufflé Oven Bake Clay (Get the new French Pink color here!)
- Conditioning Machine or Rolling Pin (optional)
- Circle Cutters
- Craft Knife
- Clear Liquid Sculpey
- Small Flat Back Earring Posts
HOW TO MAKE CLAY HOOP EARRINGS
Ready to get making? The video tutorial below will walk you through all of the steps for making your own cute hoop earrings, but if you are more of a reader, just keep scrolling for the written instructions.
How to Make Clay Hoop Earrings
Make your own hoop earrings out of oven bake clay!
Materials
- Sculpey Soufflé Clay
- Clear Liquid Sculpey
- Flat Back Earring Posts
- Aluminum Foil
Tools
- Clay Conditioning Machine or Rolling Pin (optional)
- Circle Clay Cutters
- Craft Knife
- Oven
Instructions
- Start by kneading or rolling your clay to condition or soften it. This makes the clay more pliable and easier to work with.
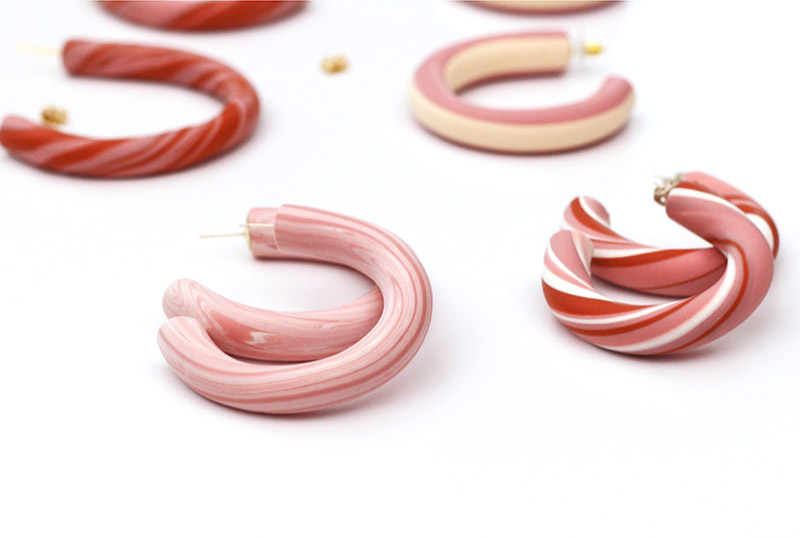
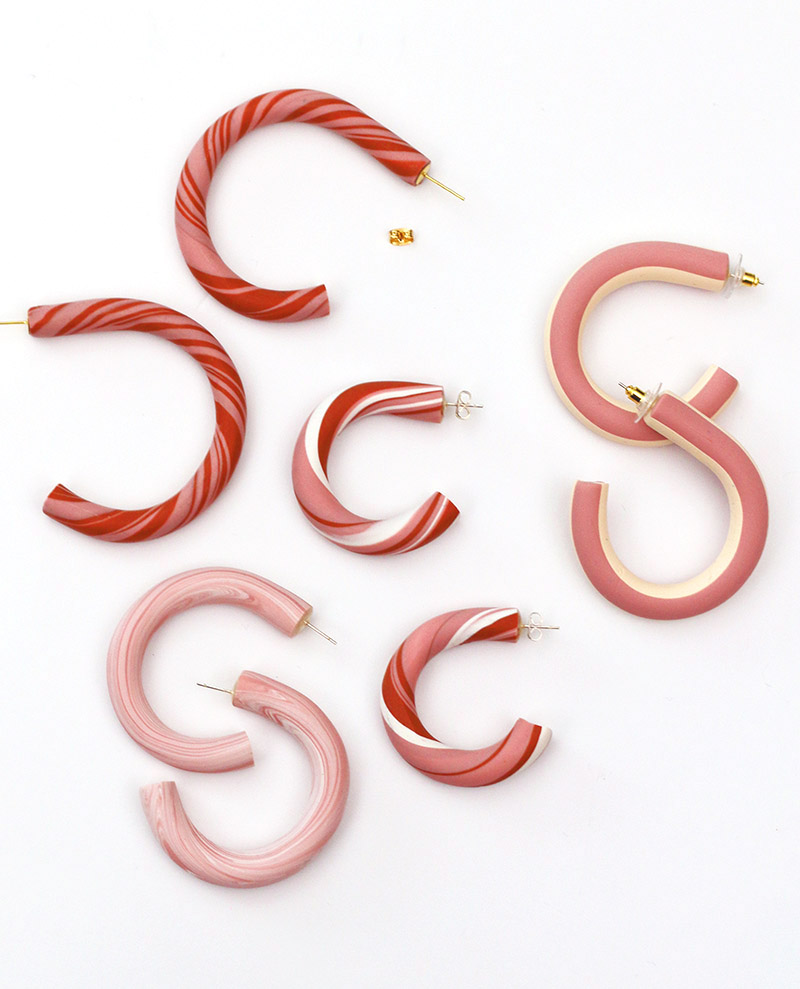
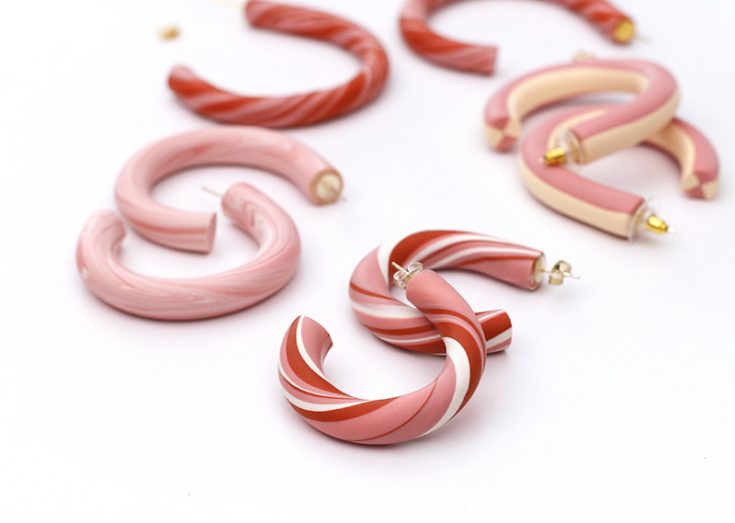
- Next, we will roll out a long, even rope of clay that we will cut and shape into our hoops. The finished rope should be about the thickness of a pencil at at least 8 inches long. I used three different techniques to get three different looks. For Marbled or Swirled Hoops: Twist together two or three colors of clay and then gently roll them out into a rope. For Speckled Hoops: Strat with a thicker solid color rope. Place tiny bits or specks of coordinating colors of clay on the rope and roll them into the rope. Twist and add in more dots of coordinating color as you like. For Striped Hoops: Create four ropes of two colors each. Stack these ropes into a two-by two-checkerboard square formation and press them together. Then, gently roll out the rope being careful not to twist the rope as you roll.
- When you have an even rope, cut off a length 3-4 inches long to wrap around your circle cutter to form the hoop. Trim off excess rope to create the hoop shape around the circle cutter.
- Bake your hoops according to your clay's baking instructions.
- After your hoops are done baking and cooling, it's time to attach the posts using Liquid Sculpey. Use a piece of crumpled aluminum foil to position the hoops so the end of the hoop (where the earring post will be attached) is flat and parallel with the floor. This will prevent the earring backs from sliding off during baking. Attach the post to the end of the hoop with a drop of Liquid Sculpey and cover the base of the post with one more drop of Liquid Sculpey.
- Bake the hoops with the posts attached according to the Liquid Sculpey baking instructions. Once your earrings are done baking and cooling, they are ready to wear!


I really love all of the earrings I made, but I think my favorite pair might be the French Pink and Ivory striped hoops.
And that’s it! What do you think? Will you be making your own pair of clay hoops??
Until next time, Happy Making!


Comments + Project Love
Cathy Royal says
These are great and I would love to make them but have so many craft supplies I’ve sworn off buying or starting anything new.
Alexis Middleton says
Haha… I get that! Well, when you work through your stash a bit, maybe you can come back to these. 🙂
Zadok Jewelers says
Excellent share Alescis!! These earrings look beautiful on you!!