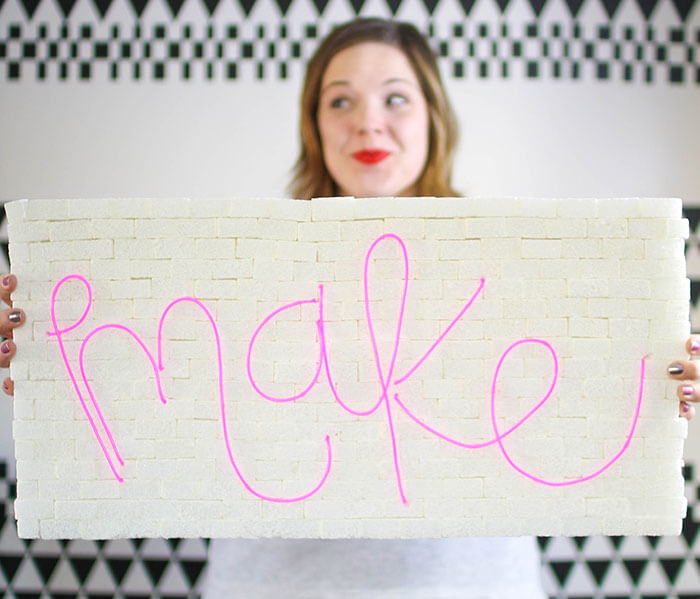
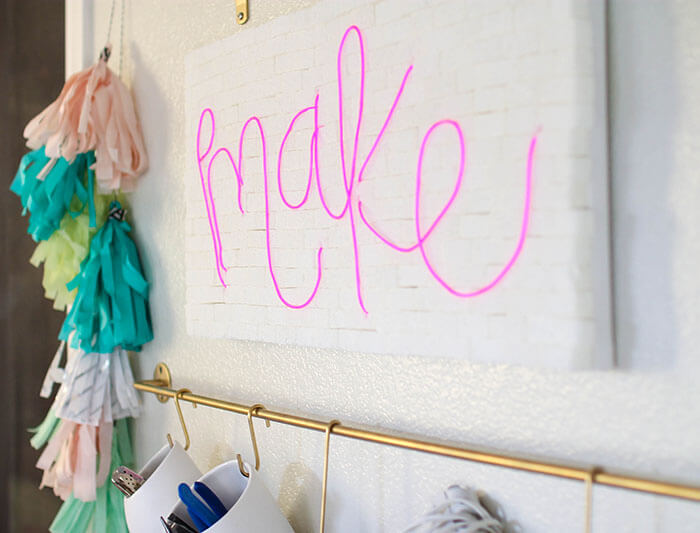
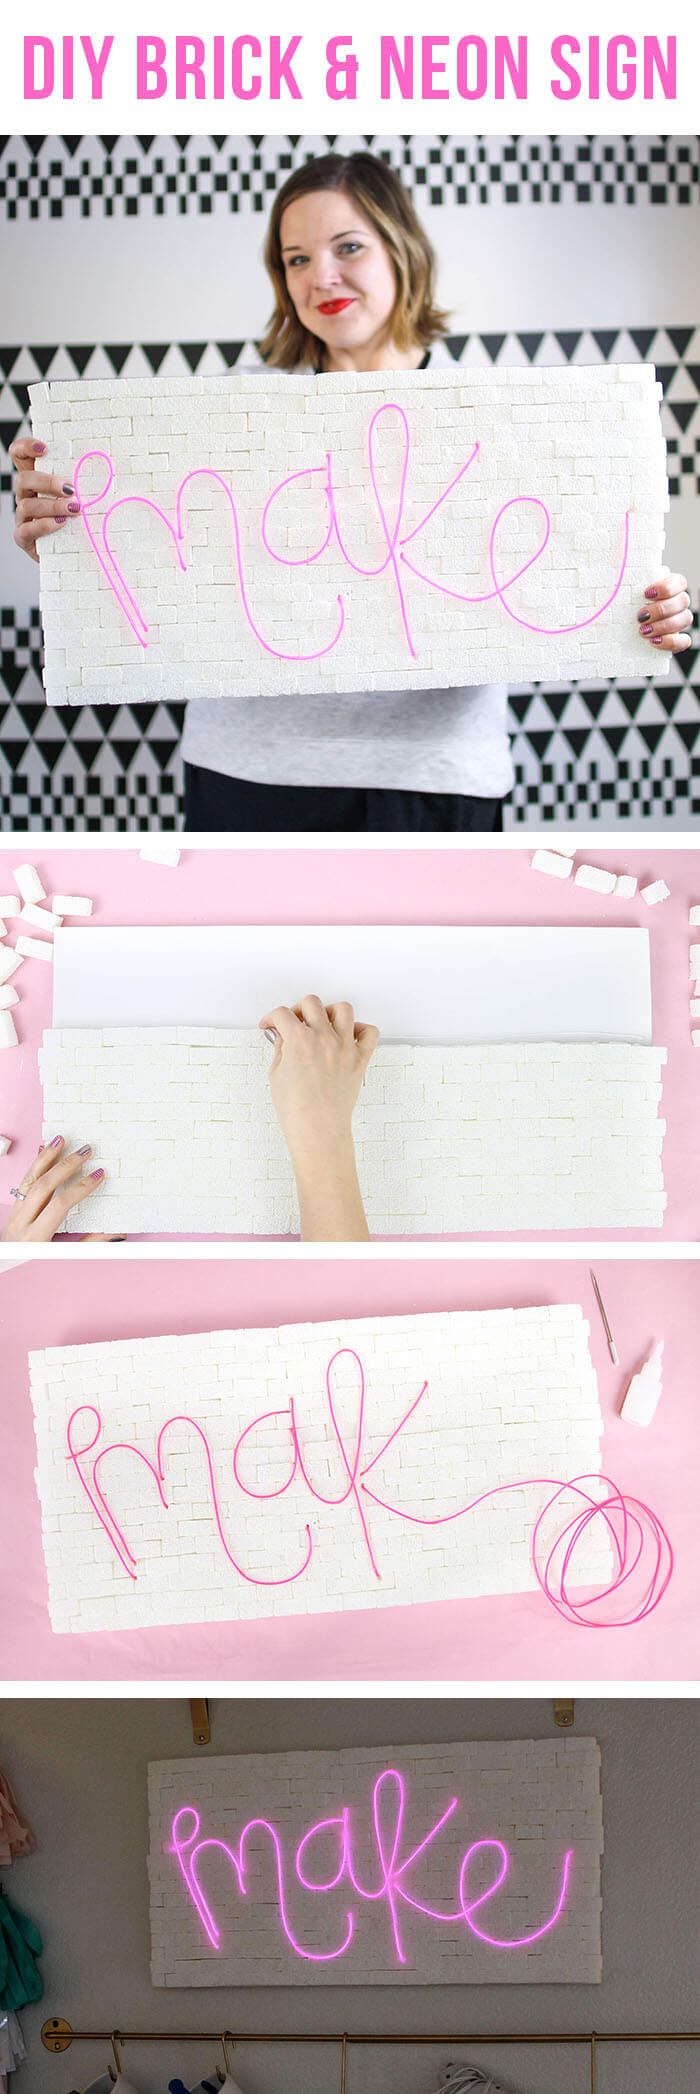
Get the look of a custom neon sign easily at home with this DIY Brick & Neon Sign. It’s easy and inexpensive to make – no power tools required! A big thanks to Make It: Fun Crafts for sponsoring this post! This post contains affiliate links, which help to support this blog. Thanks!

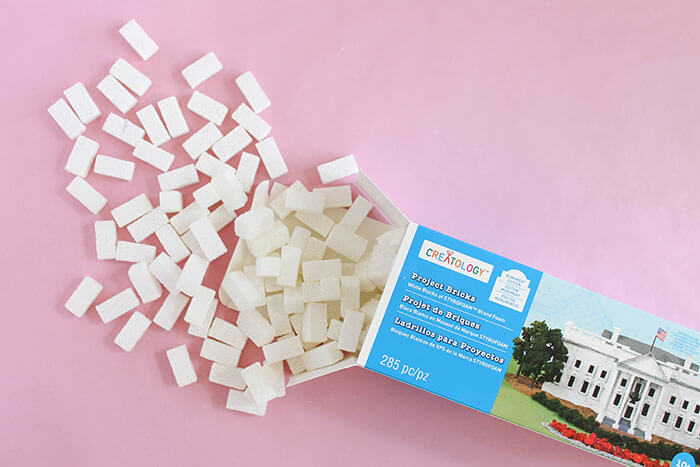
For this month’s Make It Fun Crafts Team Challenge, all the bloggers received boxes of these fun Make It: Fun® Foam Project Bricks. They are little painted bricks that have so much possibility! They are pretty much perfect for school projects and making little buildings, and you can pick up a box at Michaels.

I have been wanting to make a neon sign for my new craft room for a while now, and I thought these bricks would make kind of an amazing background for it. I have learned from some great tutorials out there (like this one, this one, and this one) that the easy way to get that neon look is EL wire, which is flexible, inexpensive, and super easy to work with. I had so much fun with this project that you can definitely expect more EL wire projects in the future.
Okay – let’s do this! Here’s how I put this fun little sign together. To make your own you’ll need:
- Make It: Fun ® Foam Project Bricks
- 12″ x 24″ Canvas
- EL Wire – I used this one
- Tacky Glue
- Foam Cutter or Serrated Knife
- Stab and Grab Tool or a Large Needle
- Super Glue
- Yarn
Step One – Glue on the bricks!
I started off by gluing bricks onto the canvas in a staggered pattern. For the staggered pattern to work, you will need to cut a few bricks in half. I used my foam cutter for that, but a serrated knife would work great too.

Start by laying a line of glue down along the bottom of the canvas, then place the bricks on top of the glue. For the next row, put glue on top of the previous line of bricks and on the canvas so the bricks are all glued together and attached to the canvas. You will need a half brick at one end of each row. Just keep gluing and placing until the whole canvas is filled up.
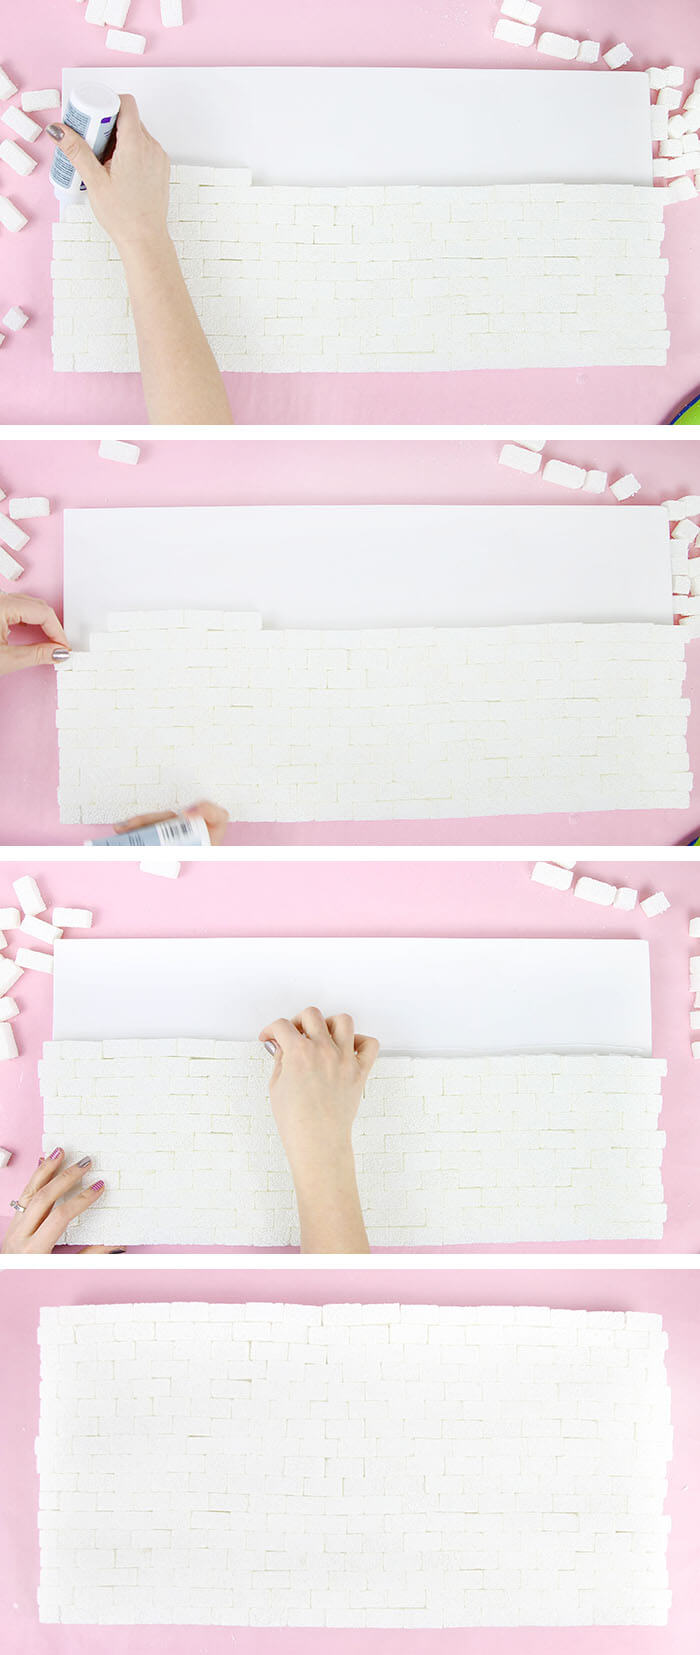
Ta-DA! Now you just need to let that glue dry so the bricks are firmly attached to the canvas. I used quick dry tacky glue and thought it worked pretty well. I also flipped the canvas over so the bricks were lightly pressed between the table and the canvas while it dried.
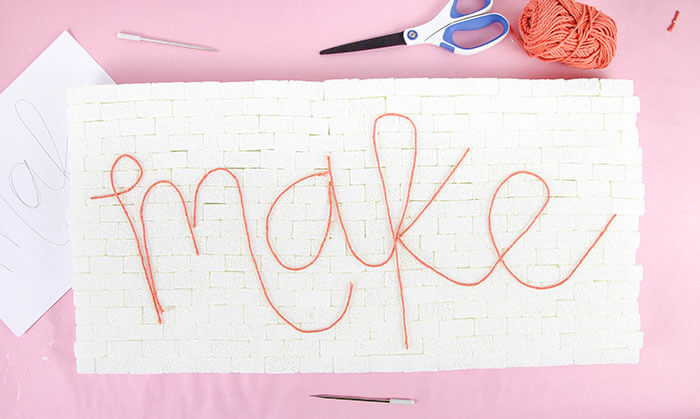
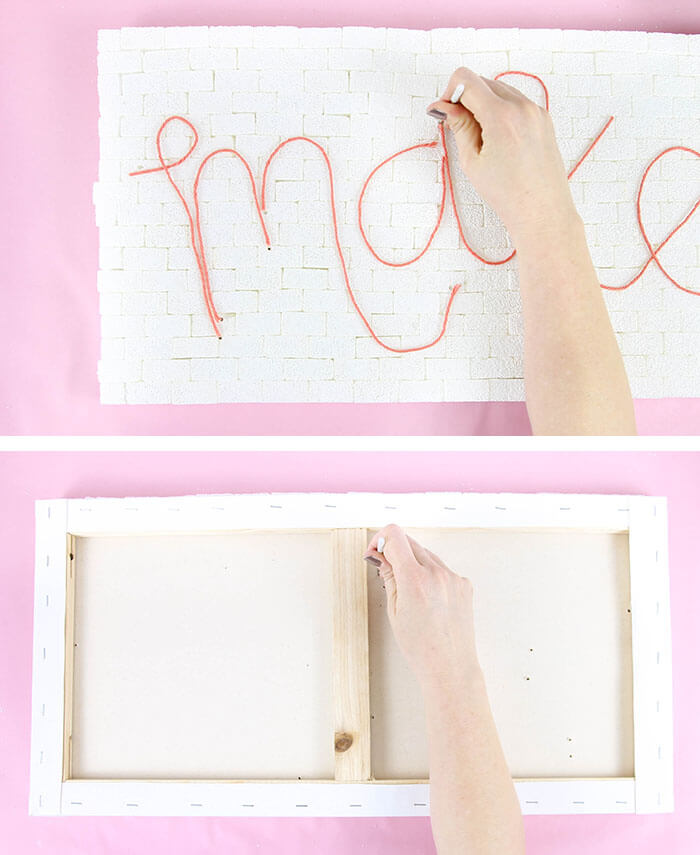
Step Two – Plot out Word or Phrase
I started by sketching out the word on a piece of paper. I chose “make” – short, simple, to the point. Next, I used yarn to lay the word out on the brick canvas. I used yarn because it gave me a feel of how I would be forming the letters with the wire and I didn’t have to work about leaving any pencil marks on the bricks.
In every place where the letters doubled back on themselves, I cut the yarn and laid down a new piece of yarn instead of folding the yarn over itself. I decided I would pull the wire in and out of the canvas at these points rather than bending it in half at those points. I played with the layout until I liked the way it looked.
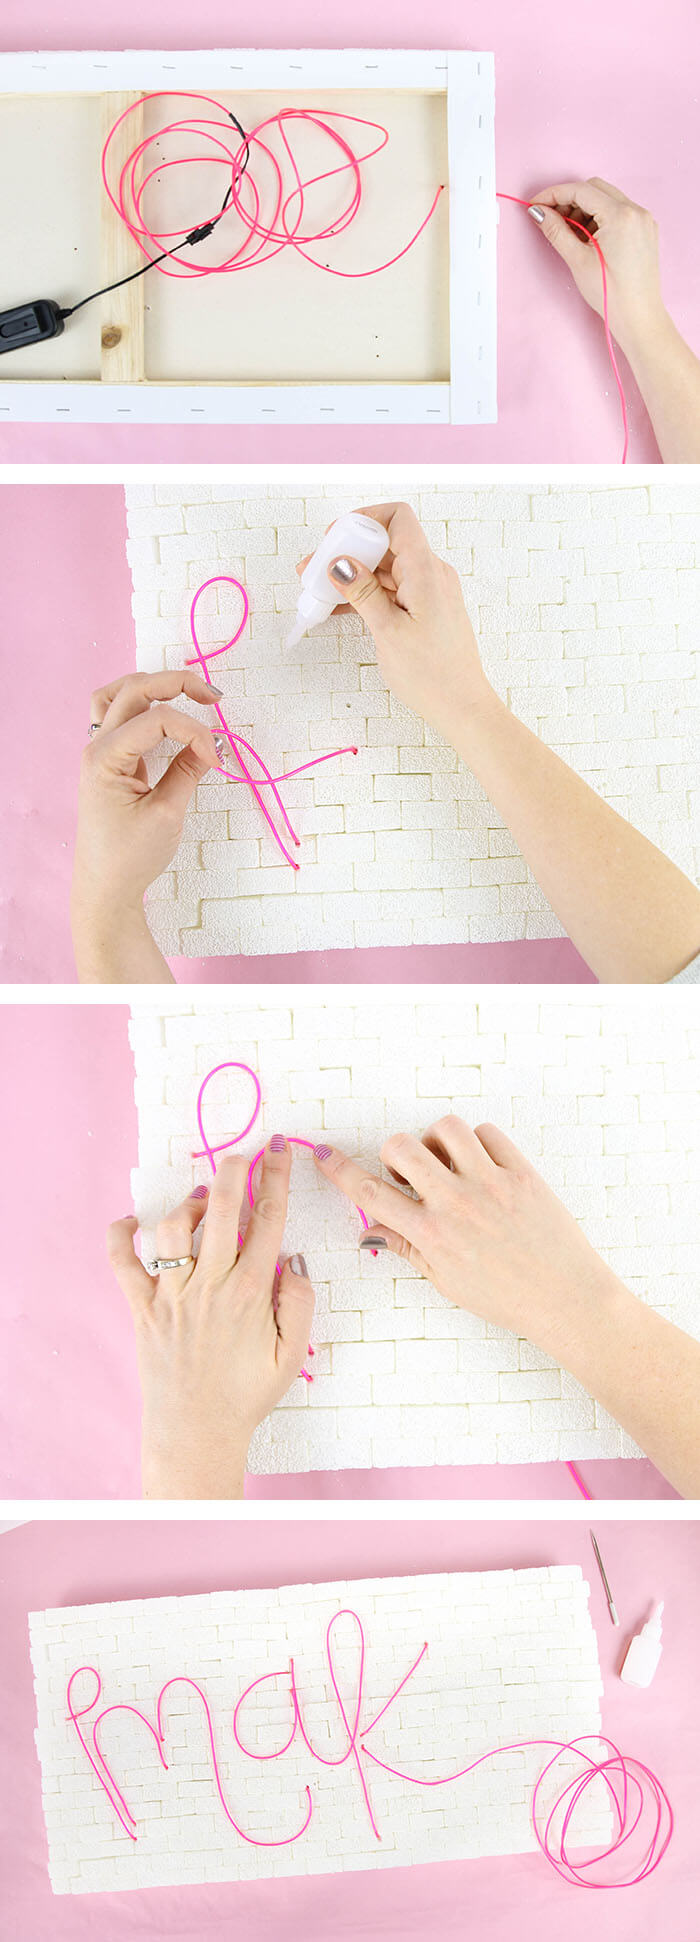
Every spot where a new piece of yarn started or ended was a spot where the EL wire would need to go through the canvas. I used my stab and grab tool (this thing is kind of perfect for this job, but a large needle should work well too) to poke holes through the bricks and the canvas at these points. You will need to stab a couple times and wiggle the tool or needle around to make the hole big enough for the wire to pass through. Stab through both the front and back. (P.S. Pay attention to the wood frame on the back of the canvas and plan your holes around the pieces of wood. You can’t poke a needle through wood!)
Step Three – Form Letters with EL Wire
Once the holes are in place, you are ready to form the letters with the wire. I moved the yarn off the canvas at this point and just used the holes and my sketch for reference to help me form the word at this point.
Start by pushing the end of the wire through the first hole on the left at the beginning of the word and pull the wire all the way through. Glue the batter pack onto the frame of the canvas with the battery cover and button facing out.
With the wire on the front of the canvas, it’s time to start shaping those letters! Loop the wire into shape and use super glue to attach it to the canvas and hold it in place.
Pull the wire back to the backside of the canvas at the end of that portion of the letter and bring it back to the front of the canvas through the next hole. Keep forming the letters in this manner, by weaving the wire in and out of the holes you laid out and by gluing the wire into place on the front of the canvas.
Step Four – Finish Off!
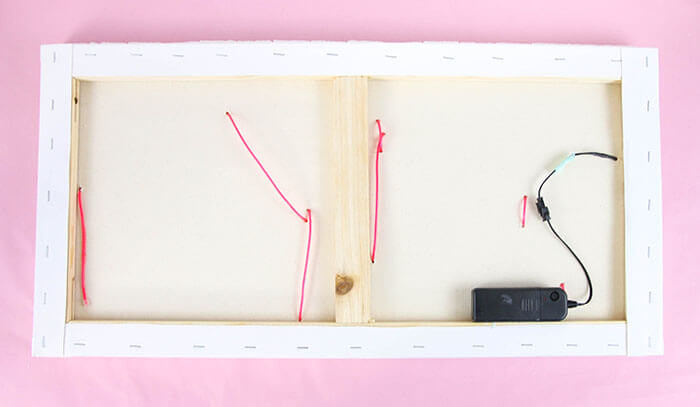
When you are done forming your letters, it’s time to finish off the wire. I had a couple feet of wire left when I was done with my word. You could just secure this excess to the back of the canvas, but the cool thing about EL wire is that you can just clip it to shorten it! So cool, right? I just clipped off the excess with a pair of scissors and replaced the end cap on the new end. Glue the new shortened end to the canvas. Here’s what the back of my canvas looked like when it was all done:
And the front!

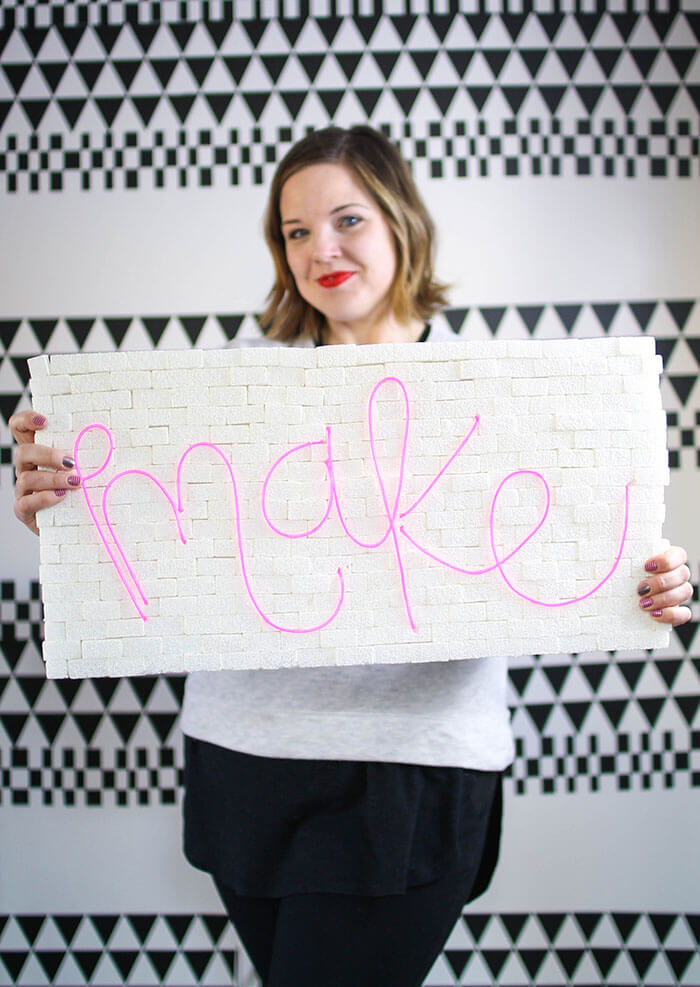
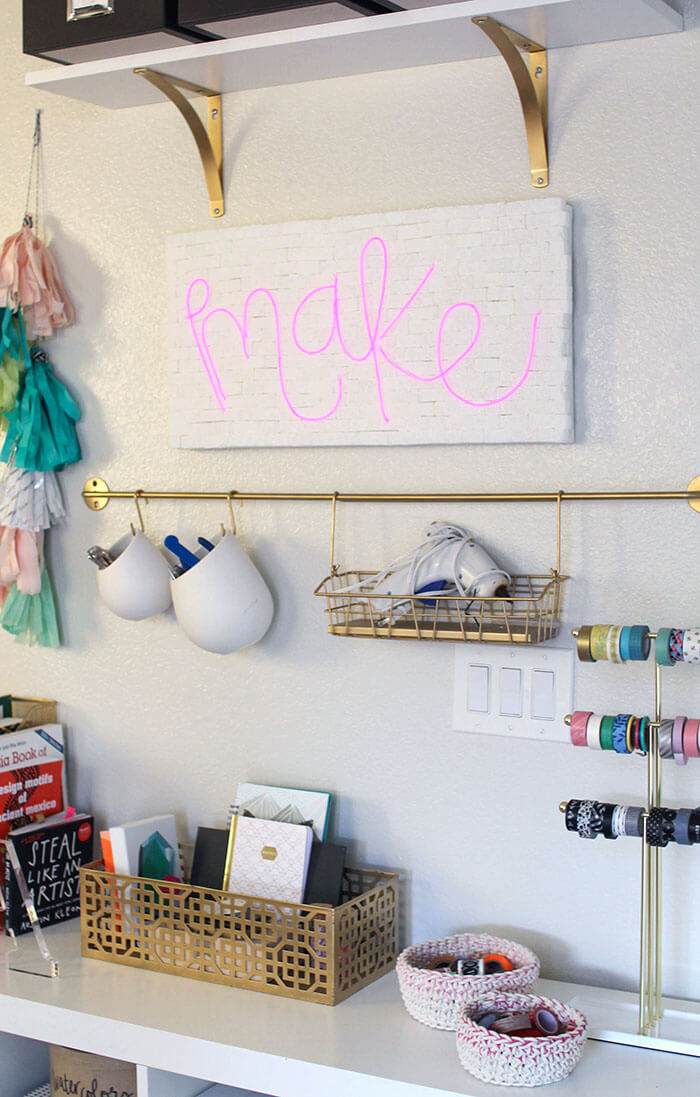
I really love this little light! I hung it up in my newly organized and prettied-up craft room, which I will be sharing with you all soon!

If you make your own sign, I would love to see it! Tag me on instagram and hashtag it #persialou or share to my facebook page!
Happy Making!

Some other posts you might like:


Comments + Project Love
Rachel Rockwell says
Wow! I love this idea. So neat!
Amy says
It’s so cute!! So insanely creative as always, Alexis <3.
Alexis says
Thanks, Amy!
Krista says
Super cute Alexis- love it!!
Alexis says
Thanks so much, Krista!
Amy | Delineate Your Dwelling says
This is so cool and I love the picture with the lights off!
Alexis says
Thanks, friend!
Peg says
Very cool!
Evone says
Where did you buy the El Wire? I saw they had some at Walmart, but someone had tried it and said that it wasn’t flexible at all so are there different types of El Wire?
Evone says
What size wire did you use? oh and in case you didn’t know it I love this idea very clever 🙂
Alexis says
Thanks Evone! I got my wire from Amazon (love me some Amazon Prime). I ordered this one – http://amzn.to/2iUWRDg It is 2 mm wide and 15 ft long. I hope that helps! This stuff is a lot of fun to play with. Good luck! 🙂