Learn how to make your own DIY adult Cookie Monster costume! This Cookie Monster costume is so cute and easy to put together! This post may contain affiliate links, and I may make a small commission if you decide to make a purchase. Thanks!
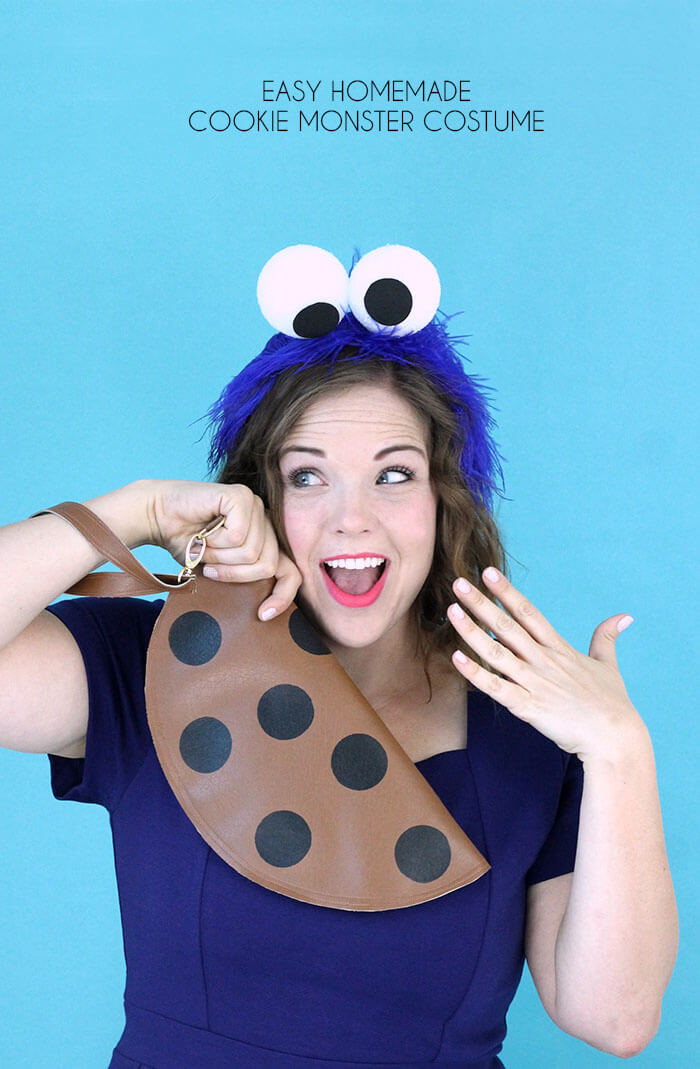
Raise your hand if you know what you are going to be for Halloween this year! Anyone? Our family is still in the negotiation stages, but I am excited I at least have a cute and easy option for myself with this Easy DIY Cookie Monster Costume.
In my ideal world, my whole family would do a big group costume, but my kids keep growing up and having opinions, which makes it harder to get a theme everyone agrees on. Dang kids! A couple’s costume like last last year’s Inspector Gadget and Penny costume is a good consolation prize, but I’m still holding out hope that I can convince my kids on the group costume. Wish me luck!
This year I decided to make myself a simple Cookie Monster costume because who doesn’t love Cookie Monster? I’m so happy with how it turned out! If you want to make your own Cookie Monster costume, I will walk you through it below.
DIY Adult Cookie Monster Costume

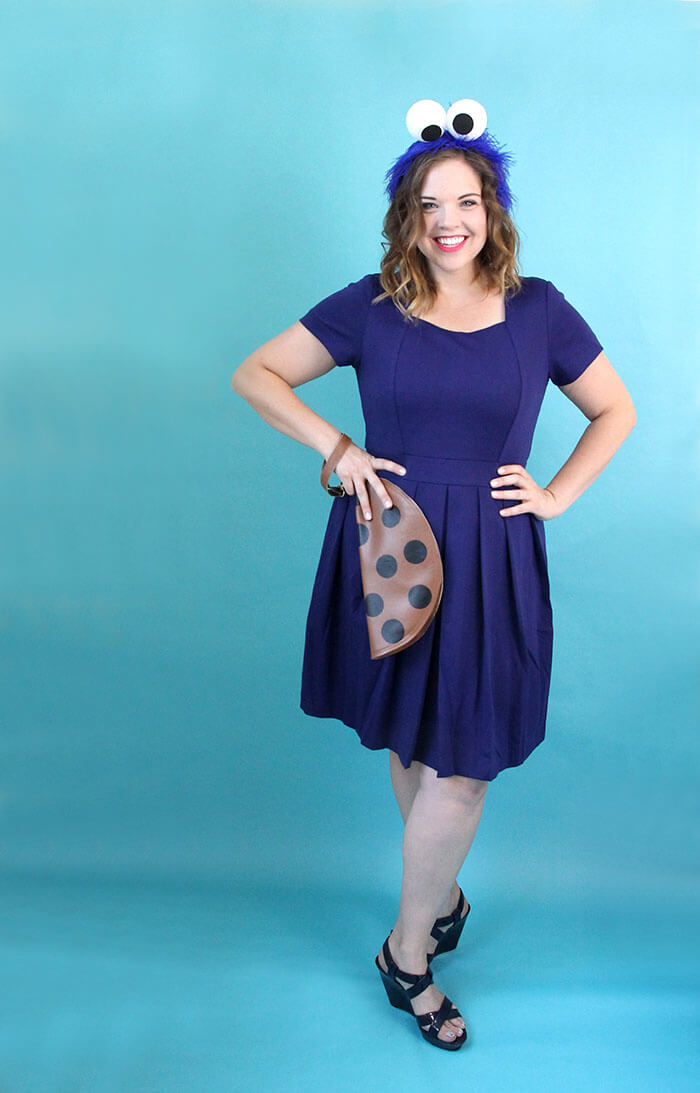
What do you think? I like it, and the best part is it was so easy to throw together! I really like costumes that are made up of real clothes – you know, like stuff you would wear even if it weren’t your Halloween costume. That’s what I love about this Easy Cookie Monster Costume – it’s just a blue dress and a couple easy DIY accessories!
 How to Create a DIY Cookie Monster Costume

Step One: Start with Blue Clothing.
My favorite kind of DIY costumes are costumes that start with simple clothing and then add on easy DIY elements. For this costume, I started with a blue dress, but you could choose any kind of blue clothes you like (shirt, skirt, leggings – whatever).
The dress I wore is no longer available, but this one is similar or I think this one would be super cute too. Here are some more great blue dress options to give you a great foundation for your Cookie Monster costume.
Next up, accessories!
Step Two: Make a DIY Cookie Monster Headband.
Supplies:
- Headband
- 2 Three Inch Foam Balls
- Two Blue Ostrich Feathers
- Black Craft Foam
- One Inch Circle Punch
- Hot Glue Gun
How to Make Your Cookie Monster Headband

- Start by clipping off the bottom few inches of each ostrich feather to remove the stiffest part of the feather. Then glue the ostrich feathers onto the headband so they overlap a bit in the center.
- Use the punch to cut circles from the craft foam (you could also use black felt and scissors). Glue the black circles onto the foam balls so they are a bit crooked like Cookie Monster’s pupils.
- Finally, glue the foam balls onto the top of the headband. That’s it!
The next little DIY was my favorite part of this costume!
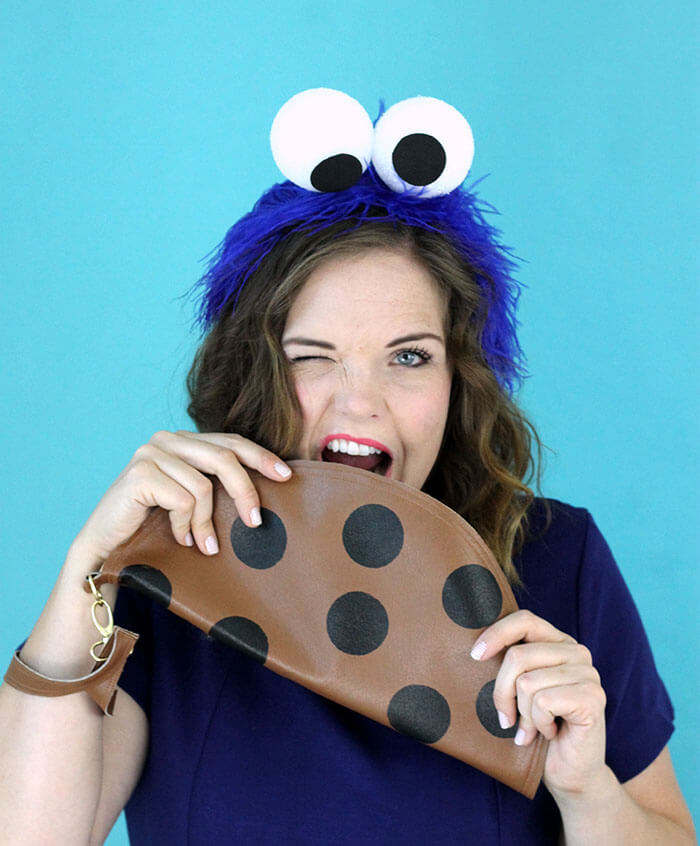
Step Two: Make a DIY Cookie Monster Clutch.
Supplies:
- 1/2 yard Faux Leather (or the real stuff would work too!)
- 9″ Zipper (I used this one because I liked the gold)
- 3/4″ D Ring
- Gold Swivel Clasp
- Black Craft Paint (find one that works on fabric!)
- Round Foam Pouncers
- Magnetic Purse Closure or Velcro Fasteners
- Sewing Machine fitted with Leather Needle
How to Make Your Cookie Monster Clutch
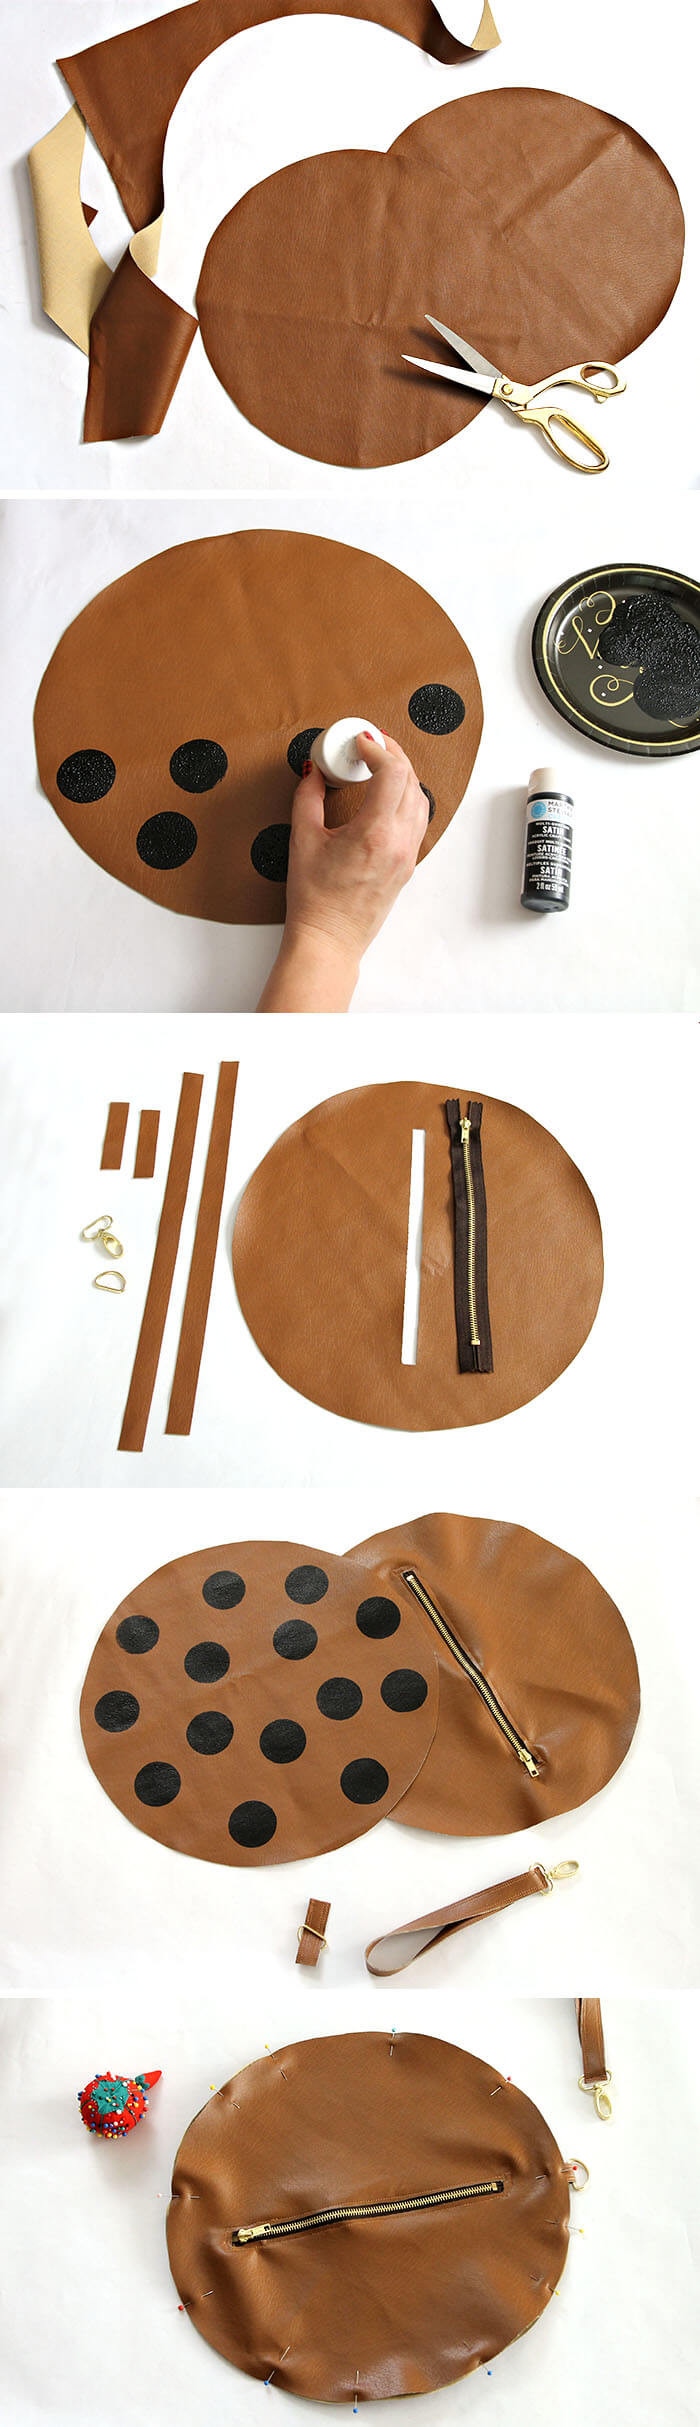
- Cut two 13.5″ circles from the faux leather. Also cut two 3/4″ x 14″ strips and two 3/4″ x 3″ strips.
- Add your “chocolate chips” to one circle using the paint and foam pouncer.
- Cut a 1/4″ slit in the center of the other circle just slightly longer than the opening of your zipper.
- Sew the zipper into the slit.
- Sew the two 14″ strips together right sides facing out, and then thread the gold swivel clasp onto this double sided strip. Sew the two ends together to create a handle with the gold swivel clasp attached.
- Sew the two 3″ strips together with right sides facing out. Thread the D ring onto the strip.
- Add the magnetic purse closures about an inch from the edge on opposite sides of the zipper circle. (This is not pictured in the image below – sorry!)
- Pin the two circles together, right sides facing out. Fold the 3″ strip in half, with D ring threaded onto it. Pin between the two circles with D ring sticking out of circles and in line with the zipper.
- Sew the circles together around the outside edge of the circle.
- Clip the handle onto the D ring using the attached clasp. And that’s it!
I love that this clutch is totally functional! You can zip it open and stick your lipstick and keys in it and be all ready for your party! If you don’t feel up to sewing your own little clutch, you could totally buy one in a similar shape and just add some chocolate chip detail! Any brown circle or half moon bag would work perfectly! (This one would be cute!)
BUT – this DIY one was really fun to put together. Plus, it’s yummy. 😉
If you make your own cookie monster costume, I would love, love, LOVE to see it! Please share it to my facebook page or tag me on instagram!
Happy Making!

Check out more Halloween ideas:
[the_grid name=”Halloween Projects Footer”]


Comments + Project Love
Sharon says
You are so dang cute, and so is this costume! So fun! Thank you!
persialou says
Thanks so much, Sharon! 🙂
Rachel (Lines Across) says
I love this costume! So so cute! and the pictures are adorable!
persialou says
Thanks so much, Rachel! I always get nervous getting in front of the camera! Haha…
Gilly @ Colour Saturated Life says
This is just too cute!
Amy W says
Too much fun, Alexis!!
Amy W says
Hey! I just noticed I am linked in this post. Thanks lady!!
bo says
i love COOKIE MONSTER…. ♥♥♥
Erica g says
This just saved my “hiney”. Mine didn’t turn out as great but i got so many compliments on how simple and “genius” and cute this is. I used royal blue tissue paper and made it crumply like his fur around one of my kid’s old headbands. Used one white paper plate for the eyes (Sharpie for the pupils). And i actually re-used a brown paper whole goods bag to cut out a circle cookie – glue stick the handle on the inside and glue stick up the sides so it would close. Then i cut out little curcles from the leftover bag and Sharpied those for choco chips. The bag fit perfectly around my wrist all day. Thank you again!!!!
Alexis says
Ah! Good job! Way to work with what you have! I love the idea of using a brown paper bag for the cookie purse. So smart!