Get the free crochet pattern to make your own adorable ghost bag inspired by the emoji ghost! This cute Halloween crochet pattern makes a sweet Trick or Treat bag or tote for any occasion. This post was originally shared on the Crafts Unleashed blog and may contain affiliate links, which help to support this site at no extra cost to you. Thanks!

Welcome to October! It’s officially time to bust out all the pumpkins, spiders, monsters, and ghosts! It’s Halloween Time, friends! I’m really excited to kick off Halloween season here on the blog with this cute little crochet bag with you all today!
This fun project is my latest free crochet pattern, and it’s inspired by one of my favorite emojis, which just happens to be perfect for Halloween. 👻Isn’t it cute??

It’s a pretty simple pattern, but I really like how it turned out. And so did my daughter who is fairly emoji obsessed, and she quickly snagged it for herself. I designed it to be a good Trick or Treat bag size (the finished bag is about 8.5 inches wide and 7 inches tall not including the handle), but it can totally work as a fun everyday tote bag too.
Ready to get crocheting?
Cute Ghost Emoji Crochet Bag
I chose to use a simple cotton worsted weight yarn for this bag because it’s inexpensive and sturdy. The bag works up fairly quickly, so you have plenty of time to make one before Halloween! Here’s everything you will need to make your own:
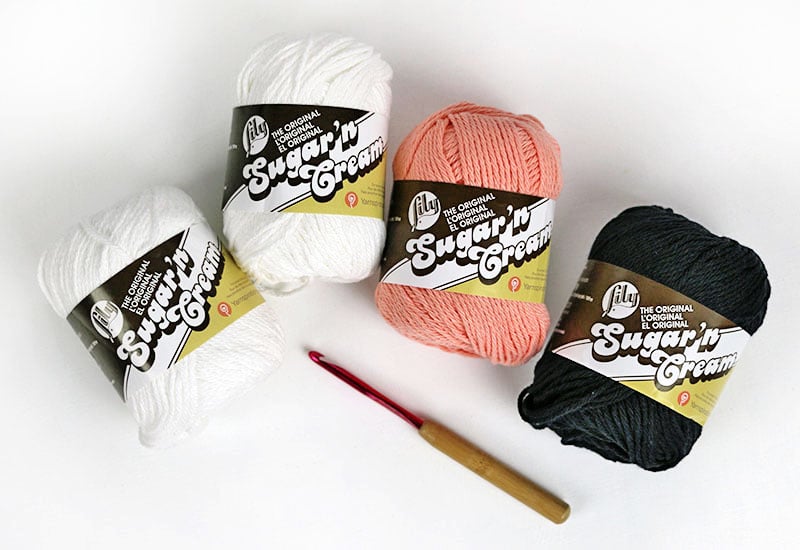
Cute Ghost Bag Supplies:
- No. 4 Worsted Weight Cotton Yarn (I used 2 balls of white, and 1 each of black and tea rose, but any white, black, and pink should work)
- Size I (5.50 mm) Crochet Hook
- Scissors
- Yarn Needle
Cute Ghost Bag Crochet Pattern

Please Note: This pattern uses American crochet terms and is free for personal use only. Thank you!
Finished bag is about 8.5 inches wide and 7 inches tall (not including handle).
Stitches Used:
- Chain (ch)
- Slip Stitch (sl st)
- Single Crochet (sc)
- Half Double Crochet (hdc)
Special Stitches Used:
Single Crochet Two Together (sc2tog) – Insert hook into next stitch and draw up loop, insert hook into next stitch after that and draw up another loop (3 loops on hook), yarn over and draw loop through all three hooks. Sc2tog formed.
Single Crochet Spike Stitch (sc spike): The single crochet spike stitch is basically just an elongated single crochet that is worked into a lower row instead of the previous row. For this pattern, insert your hook into the stitch 2 rounds below the current working round, draw up a loop and pull the yarn up to the height of the working yarn. Yarn over, and pull the yarn through both loops to finish the sc spike.
Note: The body of the bag, face pieces, and handle are all crocheted separately and then sewn together. You will find all of the piece patterns below followed by assembly instructions.
Ghost Bag Body Pattern
Round 1: With white yarn, begin with a magic circle or magic loop and work 6 sc stitches in magic loop, sl st to join (6 sc).
Round 2: Ch 1, 2 sc in same st, 2 sc in each st around, sl st to join (12 sc).
Round 3: Ch 1, sc in same st, 2 sc in next st, *sc, 2 sc, repeat from * around, sl st to join (18 sc).
Round 4: Ch 1, sc in same st, sc in next st, 2 sc, *sc in next 2 sts, 2 sc, repeat from * around, sl st to join (24 sc).
Round 5: Ch 1, sc in same st, sc in next 2 sts, 2 sc, *sc in next 3 sts, 2 sc, repeat from * around, sl st to join (30 sc).
Round 6: Ch 1, sc in same st, sc in next 3 sts, 2 sc, *sc in next 4 sts, 2 sc, repeat from * around, sl st to join (36 sc).
Round 7: Ch 1, sc in same st, sc in next 4 sts, 2 sc, *sc in next 5 sts, 2 sc, repeat from * around, sl st to join (42 sc).
Round 8: Ch 1, sc in same st, sc in next 5 sts, 2 sc, *sc in next 6 sts, 2 sc, repeat from * around, sl st to join (48 sc).
Round 9: Ch 1, sc in same st, sc in next 6 sts, 2 sc, *sc in next 7 sts, 2 sc, repeat from * around, sl st to join (54 sc).
Round 10: Ch 1, sc in same st, sc in next 7 sts, 2 sc, *sc in next 8 sts, 2 sc, repeat from * around, sl st to join (60 sc).
Round 11: Ch 1, sc in same st, sc in next 8 sts, 2 sc, *sc in next 9 sts, 2 sc, repeat from * around, sl st to join (66 sc).
Round 12: Ch 1, sc in same st, sc in next 9 sts, 2 sc, *sc in next 10 sts, 2 sc, repeat from * around, sl st to join (72 sc).
Round 13: Ch 1, sc in same st, sc in next 10 sts, 2 sc, *sc in next 11 sts, 2 sc, repeat from * around, sl st to join (78 sc).
Round 14: Ch 1, sc in same st, sc in next 11 sts, 2 sc, *sc in next 12 sts, 2 sc, repeat from * around, sl st to join (84 sc).
Round 15: Ch 1, sc in same st, sc in next 12 sts, 2 sc, *sc in next 13 sts, 2 sc, repeat from * around, sl st to join (90 sc).
Round 16: Ch 1, sc in same st, sc in next 13 sts, 2 sc, *sc in next 14 sts, 2 sc, repeat from * around, sl st to join (96 sc).
Round 17: Ch 1, working in back loops only, sc in same st and in each st around, sl st to join (96 sc).
Rounds 18-34: Ch 1, sc in same st, sc in each st around, sl st to join (96 sc).
Round 35: Ch 1, sc in same st, sc in next 9 sts, sc2tog, *sc in next 10 sts, sc2tog, repeat from * around, sl st to join (88 sts).
Round 36: Ch 1, sc in same st, sc in each st around, sl st to join (88 sc).
Round 37: Ch 1, sc in same st, sc in next 5 sts, sc2tog, *sc in next 6 sts, sc2tog, repeat from * around, sl st to join (77 sts).
Round 38: Ch 1, sc in same st, sc in each st around, sl st to join (77 sc).
Round 39: Ch 1, sc in same st, sc in next 8 sts, sc2tog, *sc in next 9 sts, sc2tog, repeat from * around, sl st to join (70 sts).
Round 40: Ch 1, sc in same st, sc in each st around, sl st to join (70 sc).
Round 41: Ch 1, sc in same st, 7 sc in next sts, sc2tog, *sc in next 8 sts, sc2tog, repeat from * around, sl st to join (63 sts).
Round 42: Ch 1, sc in same st, sc in each st around, sl st to join (63 sc).
Round 43: Ch 1, sc in same st, 6 sc in next sts, sc2tog, *sc in next 7 sts, sc2tog, repeat from * around, sl st to join (56 sts).
Round 44: Ch 1, sc in same st, sc in each st around, sl st to join (56 sc). Finish off. Weave in ends.
Bag Scalloped Edge Pattern
Round 1: With bag upside down, join white yarn into one of the edge stitches (These are the front loops that weren’t crocheted in round 17. See image below.) Sc in each st around, sl st to join (96 sc).
Round 2: Ch 1, sc in same st, sc in each st around, sl st to join (96 sc).
Round 3: Ch 1, *sc spike, sc, hdc, dc in next 3 sts, hdc, sc, *repeat from around, sl st to beg sc spike to join (12 scallops).
Round 4: Sl st to next sc, *sc in next hdc, hdc in each of the next 3 dc, sc in next hdc, sl st in next 3 sts, repeat from * around, sl st to join. Finish off. Weave in Ends.
Large Eye Pattern:
Round 1: With black yarn, work 6 sc into magic loop. Pull to tighten. Place stitch marker in last stitch (a scrap piece of yarn works well for this). (6 sc)
Round 2: 2 sc in each st of previous round. Move stitch marker up (12 sc).
Round 3: *Sc, 2 sc, repeat from * around. Move stitch marker up (18 sc).
Round 4: *Sc, sc, 2 sc, repeat from * around. Move stitch marker up (24 sc). Finish Off. Leave long tail for sewing onto bag.
Small Eye Pattern:
Round 1: With black yarn, work 6 sc into magic loop. Pull to tighten. Place stitch marker in last stitch (a scrap piece of yarn works well for this). (6 sc)
Round 2: 2 sc in each st of previous round. Move stitch marker up (12 sc). Finish Off. Leave long tail for sewing onto bag.
Mouth Pattern:
Row 1: With black yarn, ch 15, sc in 2nd ch from hook and each remaining ch (14 sc).
Row 2: Turn. Ch 1, sc2tog, sc in next 10 sts, sc2tog (12 sc).
Row 3: Turn. Ch 1, sc2tog, sc in next 8 sts, sc2tog (10 sc). Finish off. Leave long tail for sewing onto bag.
Tongue Pattern:
Row 1: With pink yarn, ch 7, sc in 2nd ch from hook and each remaining ch (6 sc).
Rows 2-4: Turn. Ch 1, sc in same st and each st across (6 sc).
Row 5: Turn. Ch 1, sc2tog, sc in each of next 2 sts, sc2tog (4 sts).
Row 6: Turn. Ch 1, sc2tog, sc2tog (2 sts). Finish off. Weave in ends.
Handle Pattern:
Row 1: Ch 5, sc in 2nd ch from hook and each remaining ch (4 sc).
Rows 2-50: (or repeat this row until handle is desired length) Turn. Ch 1, sc in same st and each st across (4 sc).
Finishing: After last row, turn work 90 degrees, and work sc sts along side of handle (1 sc per row). When you reach the other end of the handle, turn by 90 degrees again, and work 1 sc in base of each st of the beginning row. Turn by 90 degrees again, and work sc sts along other side of handle. This will just give the handle a nice finished edge. Finish off and weave in ends.
Cute Ghost Bag Assembly
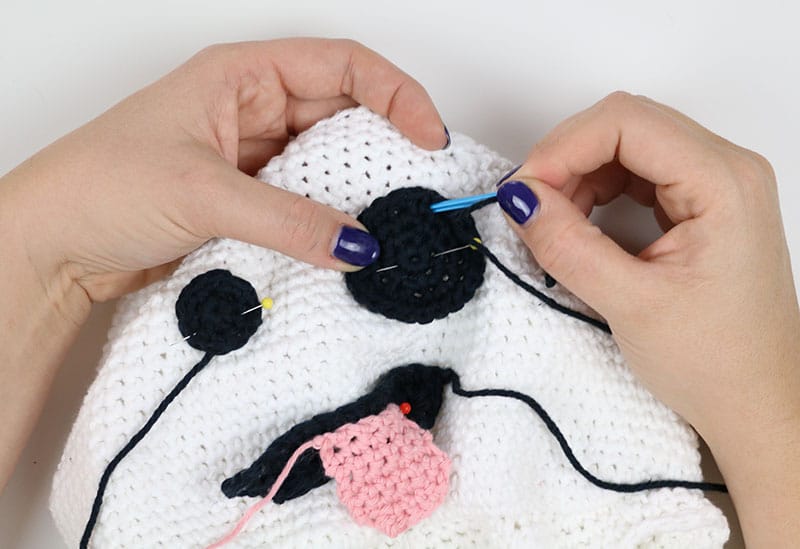
With all of the pieces crocheted, it’s time to put our cute ghost bag together! Start off by pinning the eyes, mouth, and tongue in place on the front of the bag body. Make sure the pieces are placed where you want them before you begin sewing.
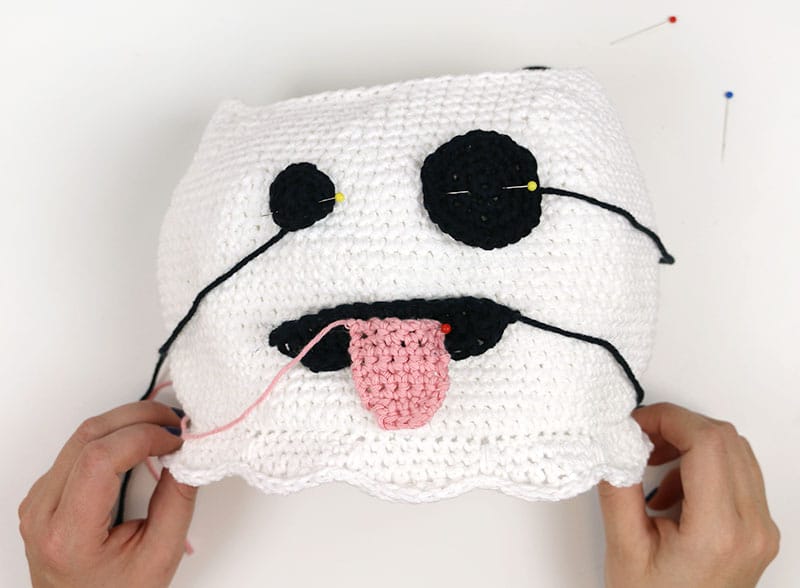
Next, use the long tails left on each piece and your yarn needle to sew the pieces directly onto the bag. Sewing the pieces on with the same yarn used to crochet them helps to hide your stitches on the front side of the bag.
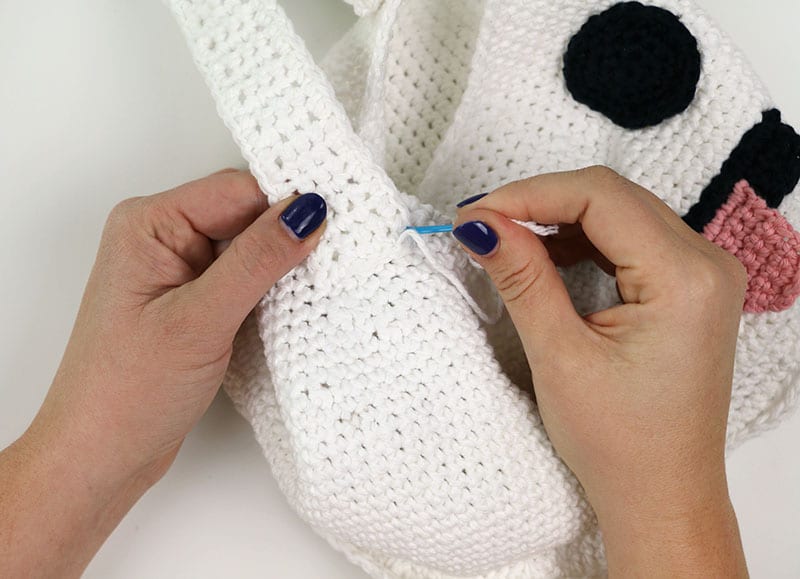
When the ghost’s face is sewn in place, the last step is to attach the handle piece. Use a length of white yarn to securely fasten each end of the handle to either side of the top of the bag (see image below).
Trick or Treat bags are some of my favorite things to crochet for Halloween. I love the cute candy corn trick or treat bag I made a few years ago, but I think I might like this little ghost even more. What do you think?

I hope you guys love it! If you make your own little emoji ghost bag, then I would love to see it! You can share your photos to my facebook page or tag me on instagram. 🙂
Happy Halloween and Happy Making!

Check out more of my free crochet patterns here:
[the_grid name=”Crochet Patterns Footer”]


Let's Chit Chat!