Thanks to Make It: Fun Crafts for sponsoring this post!
 This month’s Make It: Fun Crafts challenge was to use a FloraCraft® Make It: Fun® Foam Sheet in some kind of outdoor project. I decided to make a fun little sign that would be easy to hang up for an outdoor celebration. It is an easy way to create a backdrop for a treat table even if you don’t have a wall.
I’m thinking we will use this for my daughter’s birthday later this month. Anyway, this was super simple to make, and I love that you can use any font you like.
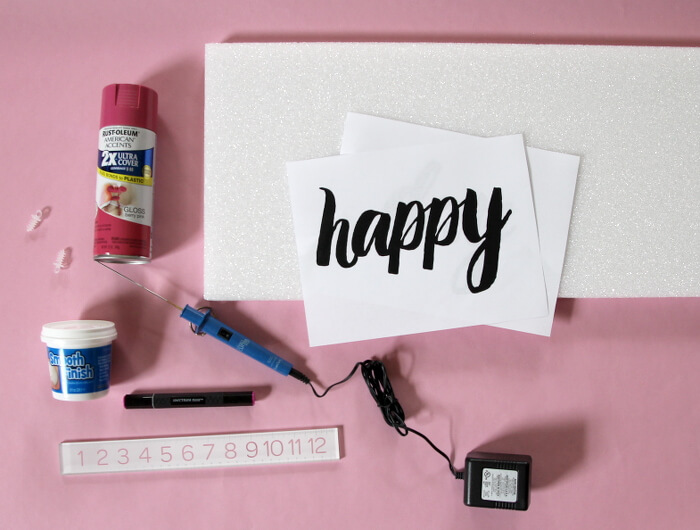
Materials (I have included affiliate links below. Thanks for supporting Persia Lou!):
- FloraCraft® Make It: Fun® Foam 1″ Sheet
- FloraCraft® StyroCutter® Plus
- Printout of your Word or Phrase
- Ruler
- Marker
- Spray paint
- Monofilament for hanging
- Floracraft® Smooth Finish is pictured but I did not actually use it – If you want a smooth finish to your piece, give this product a try.
The process for making your own sign is really pretty simple. Start by printing out your word or phrase in a font you like. Then fold the paper into even segments and create a grid on your piece of foam using the same ratios.
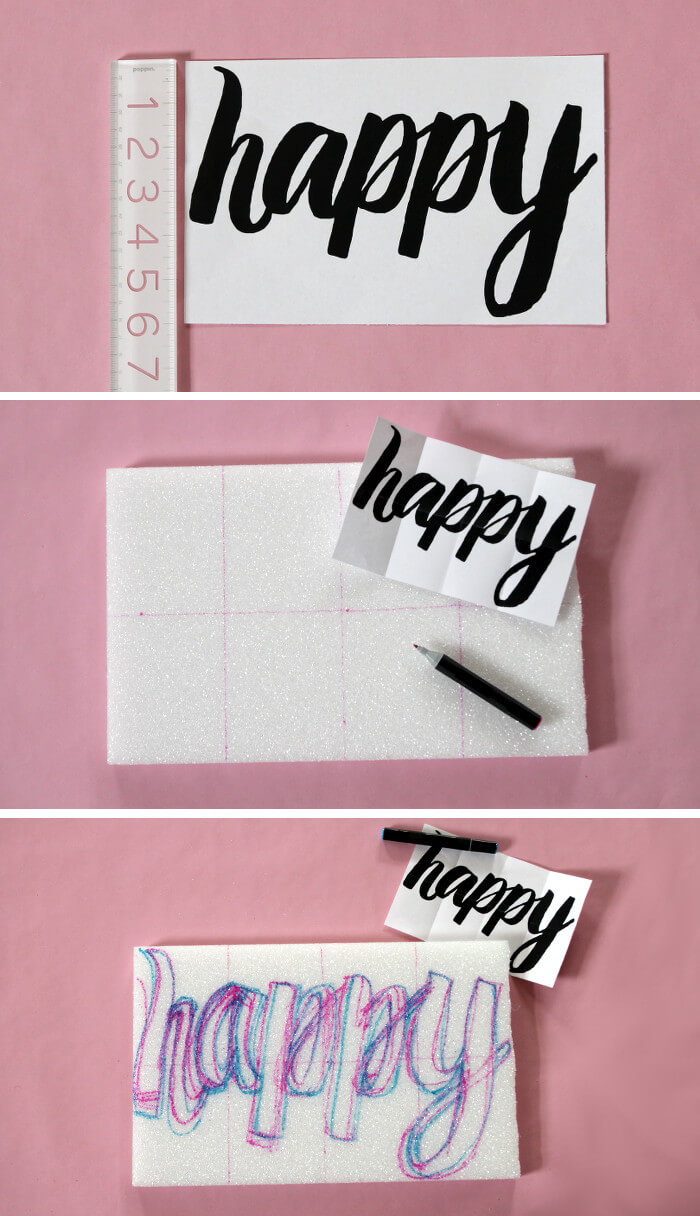 Using the grid to help you, draw the word on your piece of foam. I used a blue marker to outline the final shape, but I would recommend a lighter color because the blue was harder to cover with the spray paint.
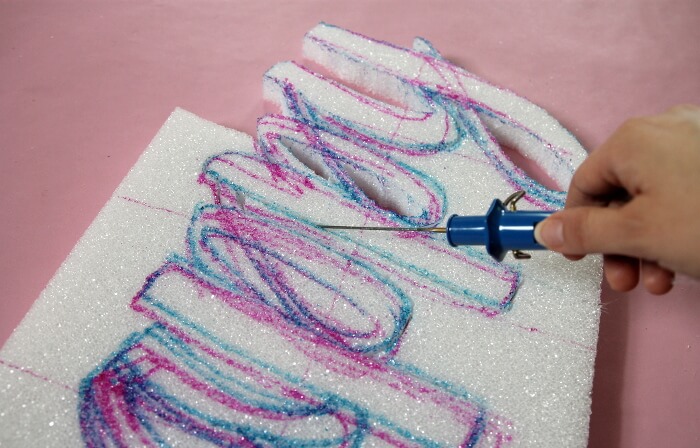
Next, use the StyroCutter® Plus to cut out the shape of the word. The cutter is a pretty cool tool – it heats up and melts through the foam, so you don’t need to saw and you won’t get a bunch of foam dust. Be careful when cutting around the thin parts of your letters. I had a few breaks at these points, but I was able to repair them with StyroGlue.
 Finally, just cover your sign with spray paint. I hung my sign by simply tying on pieces of monofilament (fishing line) and hanging it from our pergola.
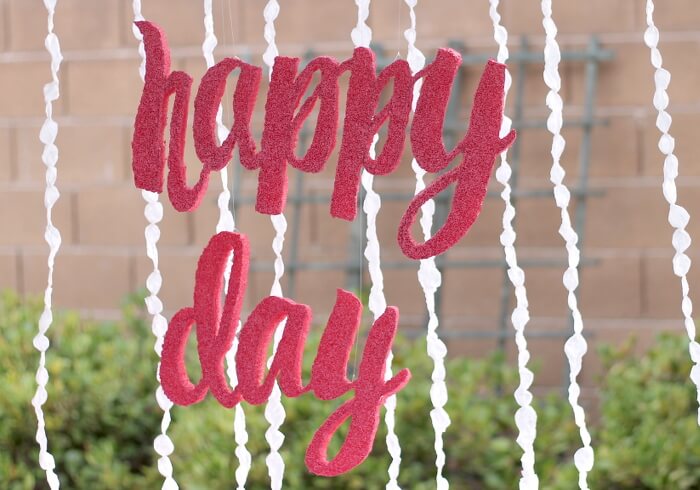
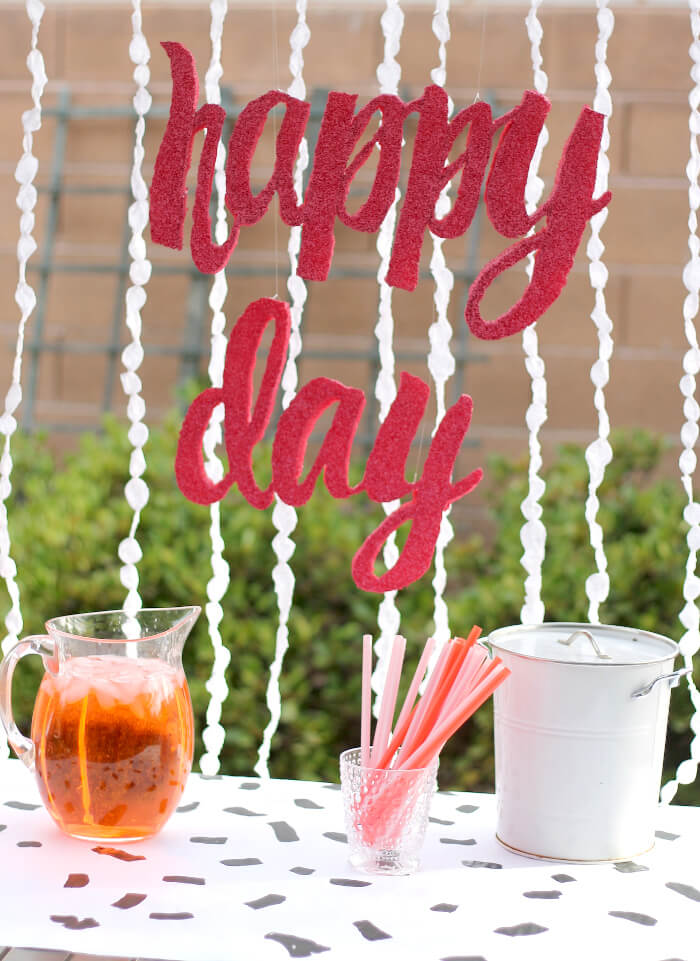 That’s it! All ready to party!
Thanks for stopping by today. I really appreciate your support, and I truly hope you are having a happy day!


Comments + Project Love
Sharon says
This makes me so happy! You did a fabulous job on this, and it’s so fun! Thank you!
Aniko says
So cool, Alexis!! Pinned!
persialou says
Thanks, Aniko!
Kara says
Totally love this idea! I think I’ll be stealing some fishing line from my son’s tackle box. LOL!
Soncie says
Alexis, first of all, I must say, I Love this project!! In fact, this would be the perfect idea for decorating my bedroom wall I covered using the Duck brand of chalkboard tape. That said, I’m a bit confused regarding steps two and three. I guess I don’t understand the purpose of printing the font on a sheet of paper,only to re-write it (free hand no less) on the Styrofoam. What happens if I choose a font I’m unable to replicate free hand? Am I over-thinking this? Did I miss something?
Many thanks!
persialou says
Hi Soncie! I printed out the words to help me recreate it at a larger scale. I folded the paper to create a grid and then copied that grid onto the foam piece. This allows you to see what part of each letter goes in each grid. You aren’t exactly free-handing this way. You are copying each square at a time rather than drawing out the whole word at once. I hope that helps! If you have access to an over head projector, you could print the image on a transparency film, project it onto your foam and trace it that way. Good luck!