
Make your own awesome DIY flower statement earrings out using shrink plastic and vinyl. These cute floral earrings can be made in any color you like and have a whole lot of personality. This post contains affiliate links, which help to support this site. Thanks!
Since I’ve shared more than a couple earring DIYs here on the blog, you may be aware that I am a fan of big, bold, colorful earrings. Today, I have a new statement earring DIY to share with you guys. These earrings are fun and simple to make and use one of my favorite jewelry crafting supplies – shrink plastic! (Psst – if you missed my other recent shrinky dink earrings DIY, you can check that out here.)
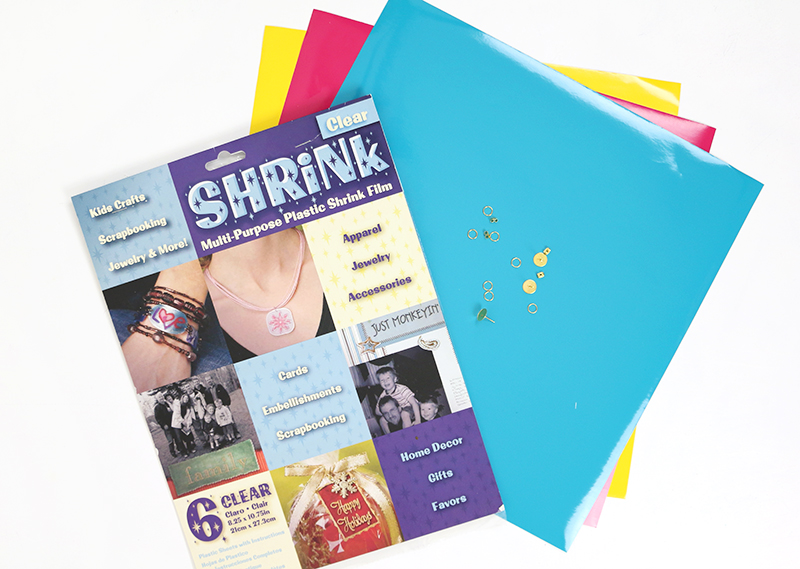
Shrink Plastic Flower Earrings Supplies:
- Clear Shrink Film
- Silhouette Cameo 3, Other Cutting Machine, or Sharp Scissors
- Glossy Permanent Adhesive Vinyl
- Transfer Tape
- Jump Rings
- Flat Pad Earring Posts
- E6000 Glue
- Jewelry Pliers
- My Flower Earring Cut Files – Large SVG, Small SVG, Large PDF, and Small PDF
How to Make DIY Flower Statement Earrings
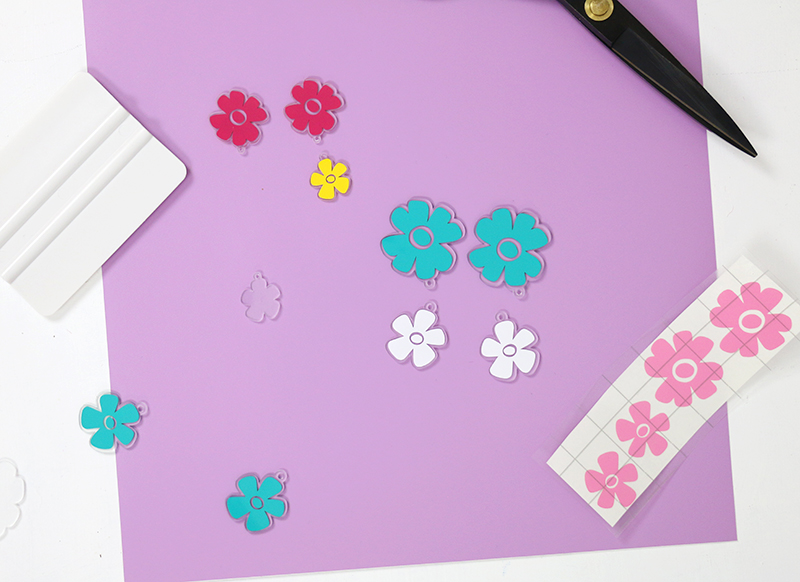
Step One – Cut Shrink Film and Bake
If you don’t have a cutting machine, you can use the PDF template from the supply list above to trace the shapes onto shrink film and cut the pieces out by hand.
Start by opening the SVG cut file (in the supply list above) in your cutting software. The file contains both the shape for cutting from the shrink film and the design to be cut from vinyl. The vinyl designs are already scaled to fit on the pieces after they have shrunk.
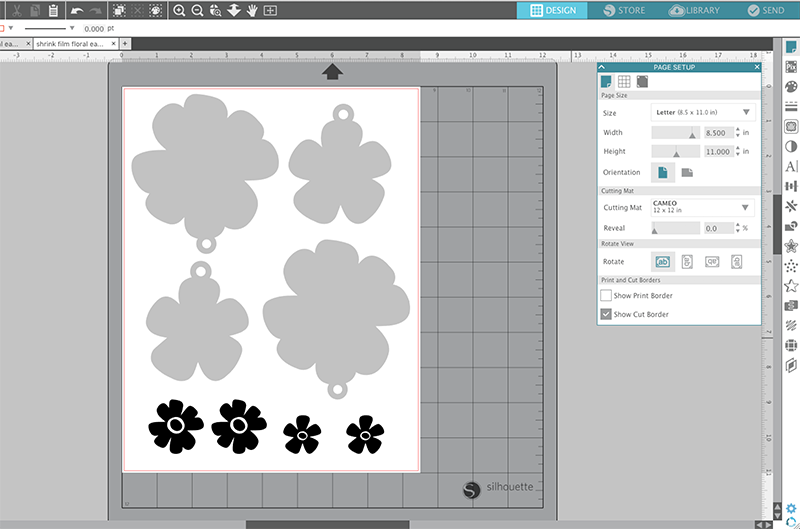
It can be a little tricky to get a good clean cut out of shrink film with the Silhouette. I found the Silhouette brand shrink plastic easier to cut, but it didn’t shrink well because I hadn’t printed anything on it. I found this post about how to cut shrink film with the Silhouette to be really helpful. I ended up cutting my pieces about 8 passes total to get a great clean cut. I started with blade 2, speed 5, and thickness 33 with a double cut. Then I repeated this with the blade moved up to a 4, then a 6, and finally, an 8.
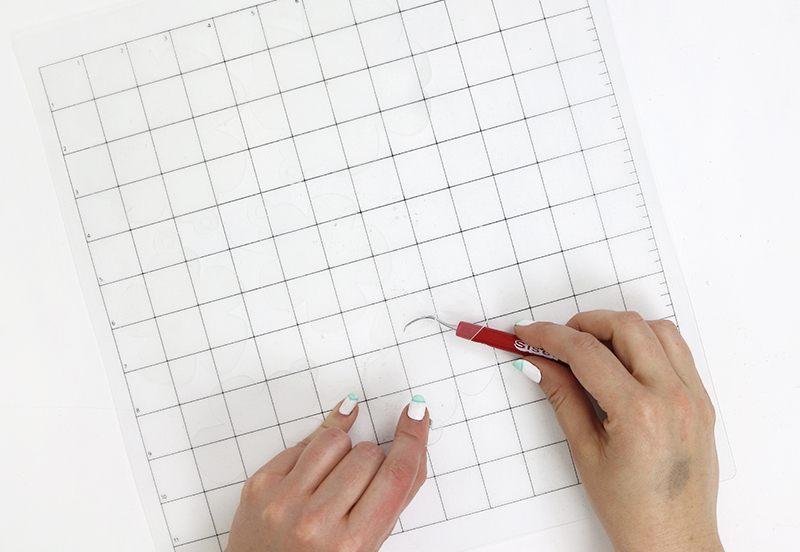
Take care when removing your cut pieces from the mat to ensure they don’t tear or crack. And don’t forget to remove the piece from inside the hole!
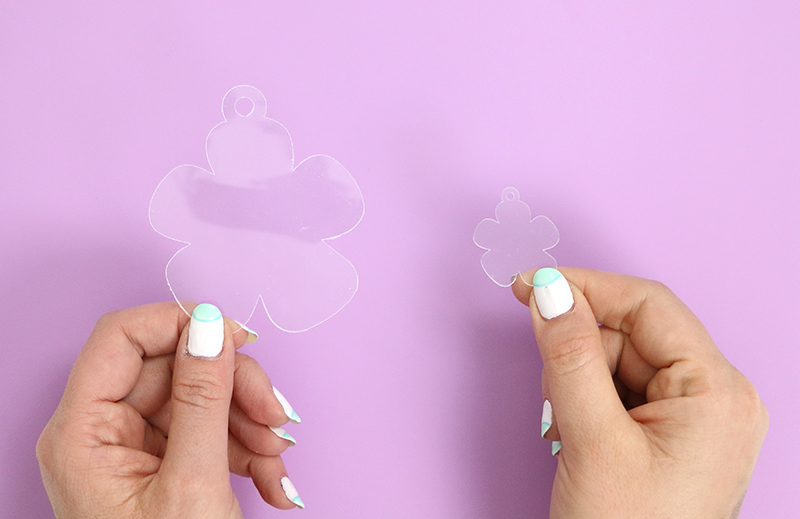
Bake the pieces on a parchment lined baking sheet and bake according to the instructions. After the pieces have baked they will be much smaller and thicker.
Step Two – Cut and Apply Vinyl
If you are new to working with vinyl, be sure to check out my Beginner’s Guide to Vinyl right HERE.
Cut the smaller pieces from glossy vinyl and weed out the excess. Apply transfer tape on top of the flower. I found it was easiest to apply the decals if I cut back just the top of the backing so I could position the vinyl without it sticking.
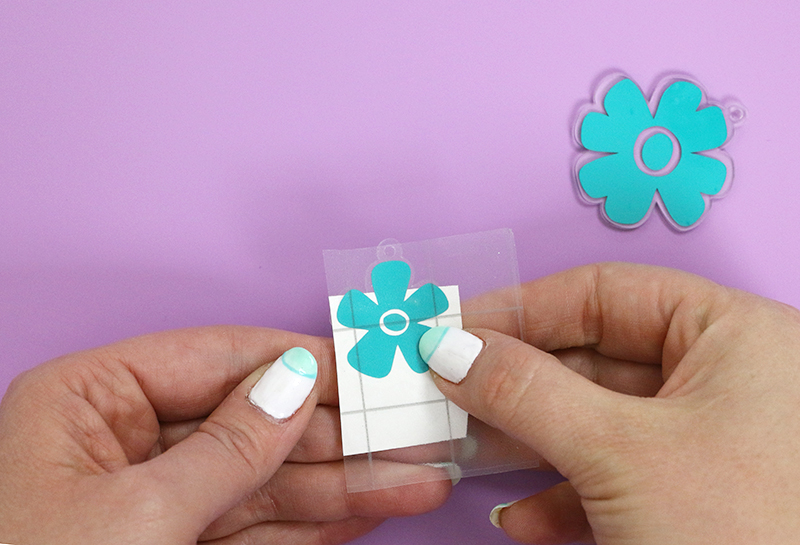
Finally, burnish down the vinyl decal and remove the transfer tape.
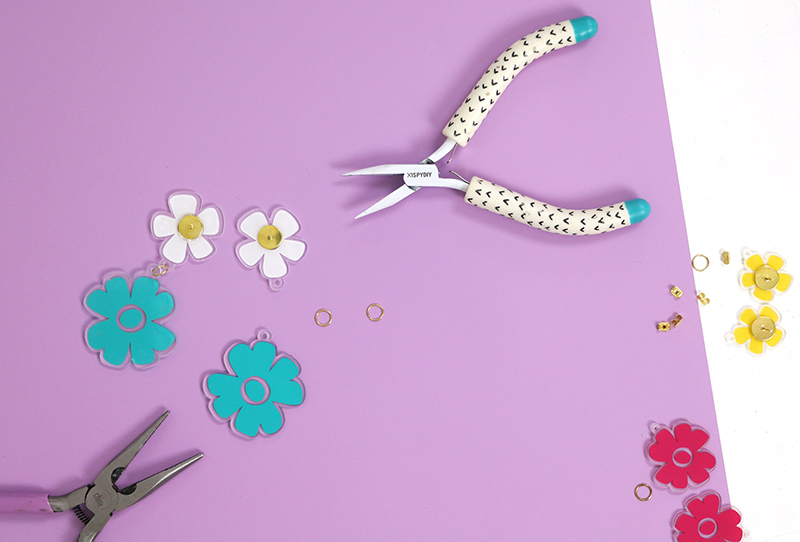
Step Three – Assemble Earrings
To assemble the earrings, simply join the two pieces with a jump ring, and then apply the earring backs to the top piece using the E6000 adhesive.
Once the adhesive has dried, your earrings are done and ready to wear!
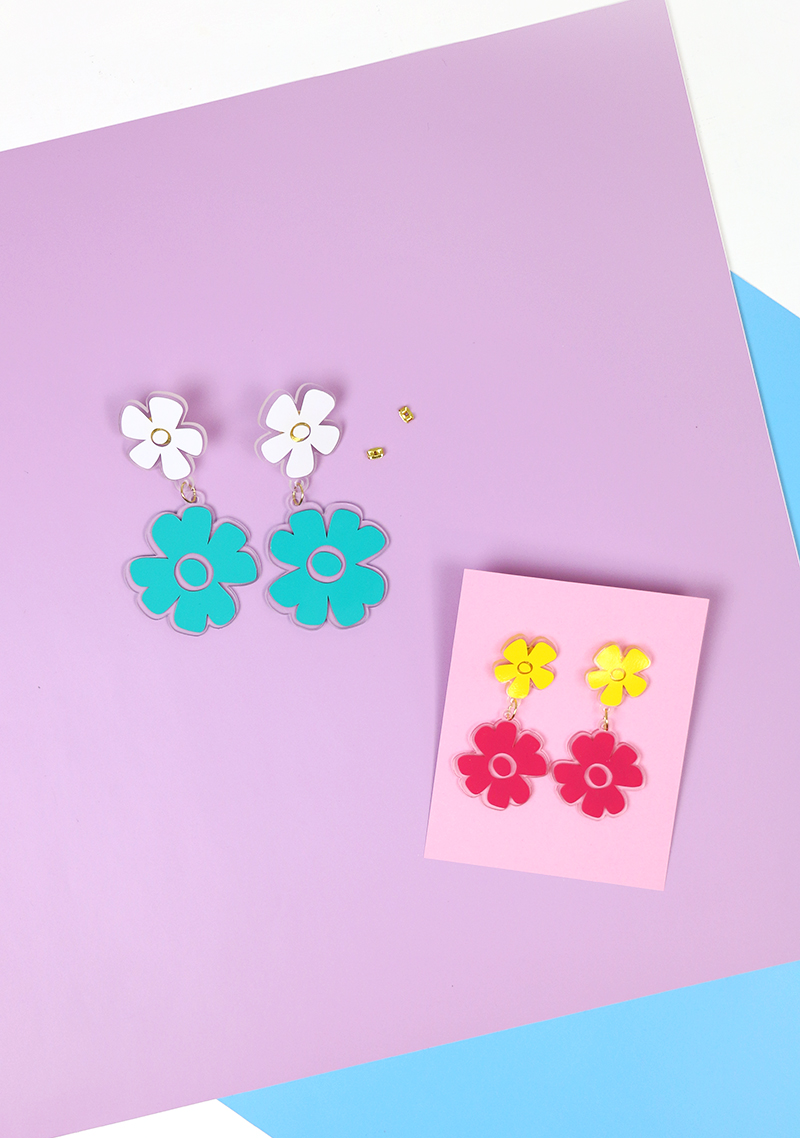
I love how these earrings turned out! The clear shrink film has the look of clear acrylic, and the glossy vinyl is a great, simple way to add lots of color.
So what do you think? Would you give these a try? If you do, I want to see them! Be sure to share to my facebook page or tag me on instagram.
Until Next Time, Happy Making!

Check out more free cut files:
[the_grid name=”Free Cut Files Footer”]


Comments + Project Love
Sam Baker says
these are just precious, I love them! the colors are beautiful