Make your own gorgeously marbled DIY statement earrings with this simple alcohol ink shrinky dink earrings tutorial. These earrings are bold, colorful, and super lightweight! This post was originally shared at Crafts Unleashed and may contain affiliate links, which allow me to earn a small commission at no extra cost to you.

I have ALWAYS loved earrings. All kinds of earrings. Delicate studs, edgy ear crawlers, and big, dangly, swingy earrings. My slight obsession may stem from the fact that my dad refused to let me get my ears pierced until I was a teenager, and I had to resort to stick on earrings back in my elementary school days and longingly admire my friends’ beautiful pierced earrings from afar. Ha! But whatever the reason for my earring love, I am super stoked about the big statement earring trend that’s happening right now.
Of course, I buy my fair share of ear baubles (speaking of baubles, have you checked out Bauble Bar’s line at Target? It’s a good one.), but of course, I also have to make some DIY statement earrings too! And today, I am really excited to share my latest experiment in DIY jewelry.

These fun earrings are really kind of blend three of my previous projects – the look and shape are similar to my clay and crochet necklaces, the alcohol ink technique is really similar to what I used for my alcohol ink vinyl decals, and finally the idea of lightweight shrinky dink earrings definitely comes straight from the success I have had with shrinky dink pins. It was definitely time to expand into more shrink film jewelry.
Ready to make your own? Let’s do this!
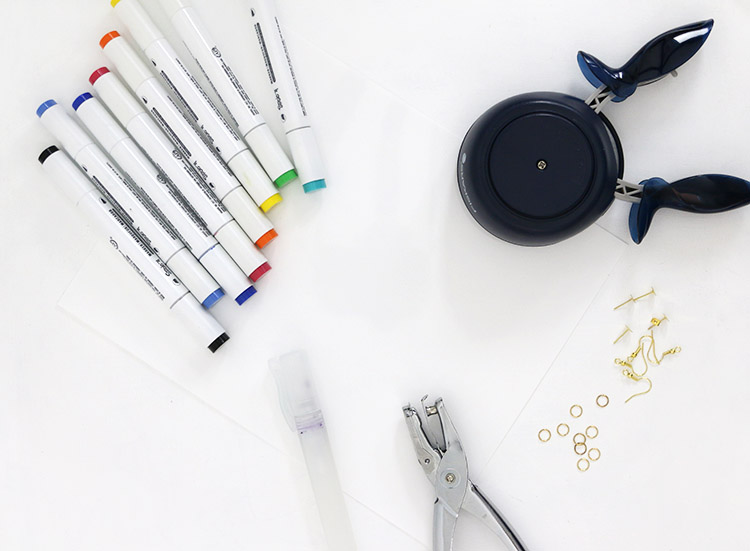
Marbled Shrinky Dink Earrings Supplies:
- Alcohol Markers (I used Studio 71 Markers, but Copics or Spectrum Noirs would work great too)
- White Shrink Film (you do NOT want pre-sanded shrink film for this project)
- Ultra Fine Mist Spray Bottle filled with rubbing alcohol (these would work too)
- Large Circle Punches
- 1/8″ Hole Punch
- Scissors
- Gloss Acrylic Spray Sealer
- Jewelry Pliers
- Jump Rings
- Fish Hook Earring Wires or Flat Pad Earring Posts
- E6000 Adhesive
How to Make DIY Statement Earrings with Shrinky Dinks:
Step One – Create Alcohol Ink Design.
The first step is to create your watercolor or marble look designs on the shrink film. Because of it’s slick, non-porous surface, shrink film is a great surface work working with alcohol inks. This whole process is a lot of fun and really simple.
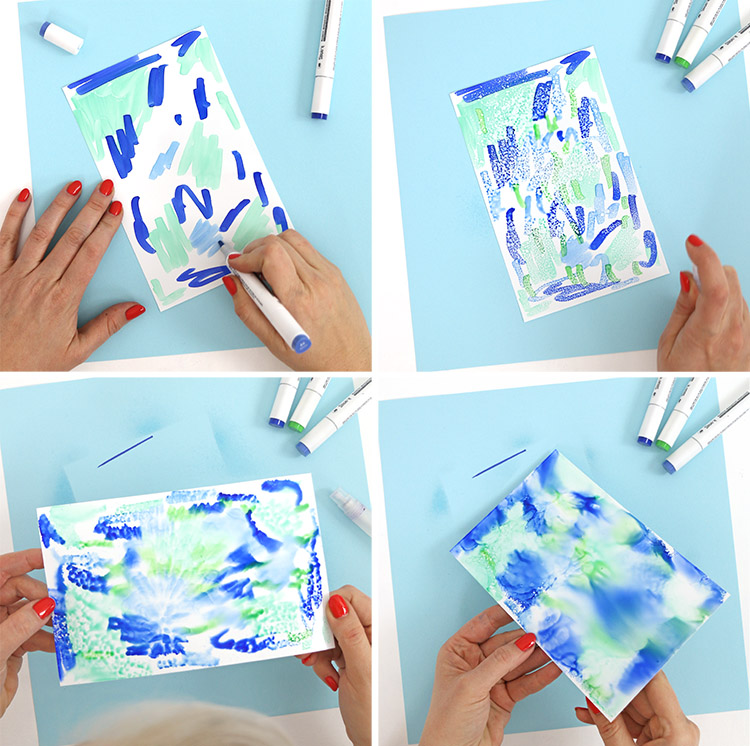
- Start by laying down patches of color on one side of your shrink film. I find that this turns out best if you stick with a monochrome or analogous color scheme (or just don’t use too many colors).
- Use your mist spray bottle filled with rubbing alcohol to cover the surface.
- You can blow on the shrink film to spread the ink and blend the colors together.
- Try tipping and rotating the surface to help move the ink along your sheet.
- When you are happy with the look, set the shrink film aside to dry.
After it has dried, you can lightly mist the top of your design to add a speckled look. In the darker colors this spritz kind of reminded me of the texture of stone.

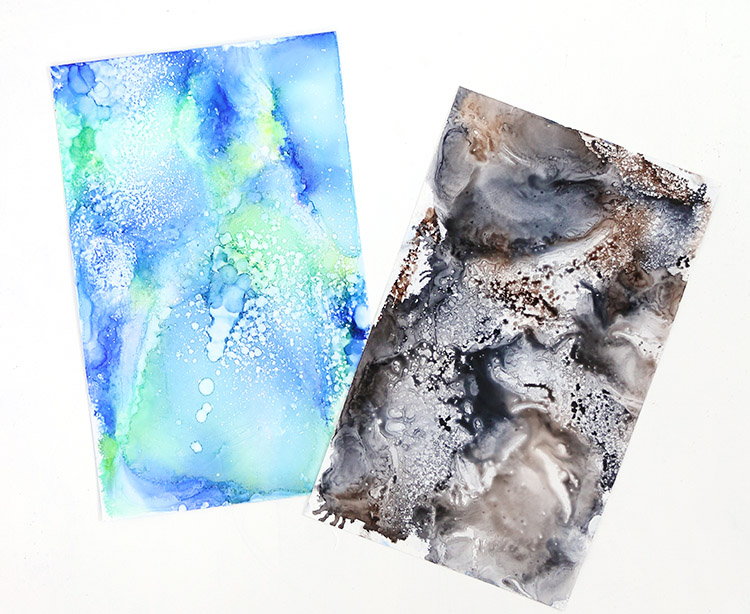
Finally, set it aside to dry, and after it is dry, flip the shrink plastic over and repeat the same process using the same colors on the other side. Keep in mind that your colors will deepen and darken after shrinking, so if you want a lighter look, use less ink. Here’s what I ended up with:
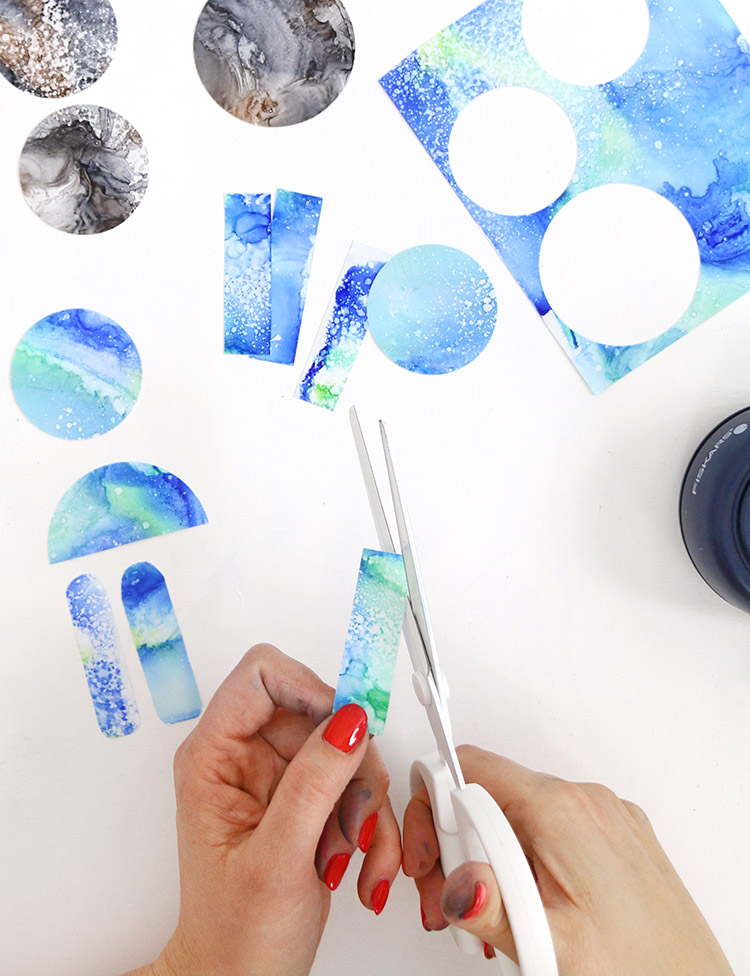
Step Two – Cut Earring Pieces.
Next, it’s time to cut out all of your earring pieces! I used a 2.5″ and 2″ circle punches and a pair of scissors to cut rounded rectangles. Your pieces will be half as big after baking, so keep that in mind as you cut your pieces out.
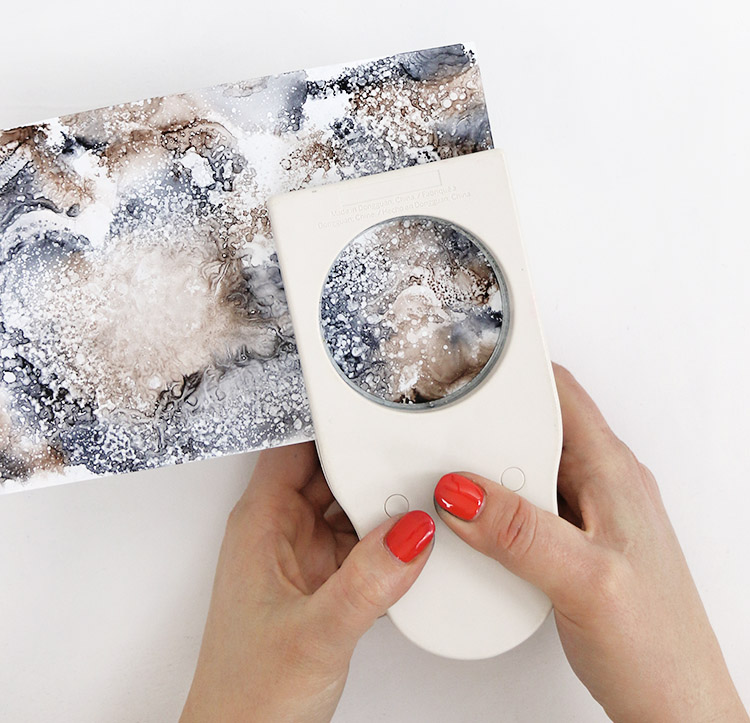
As you are cutting your shapes, plan out your design and how your pieces will fit together. When you have your design set, use a 1/8″ hole punch to punch holes where the pieces of the earring will be joined together.
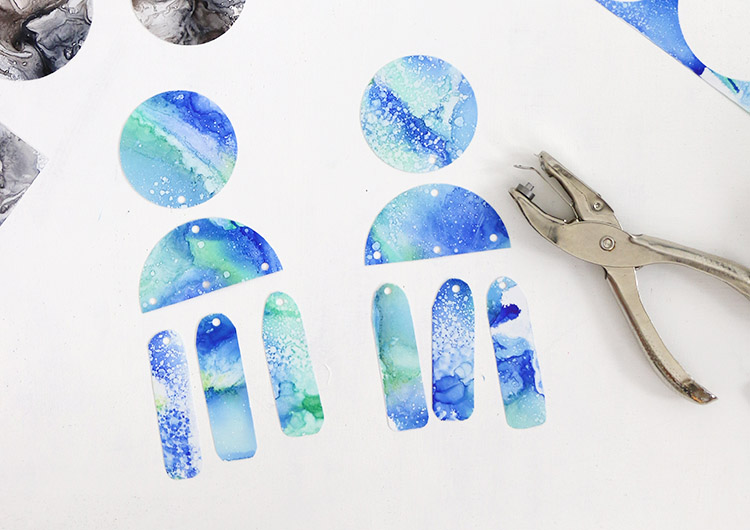
If you are planning on using a fish hook earring wire, then you will need to punch a hole in the top the top piece. If you want to use a flat pad earring post, then no hole is necessary.
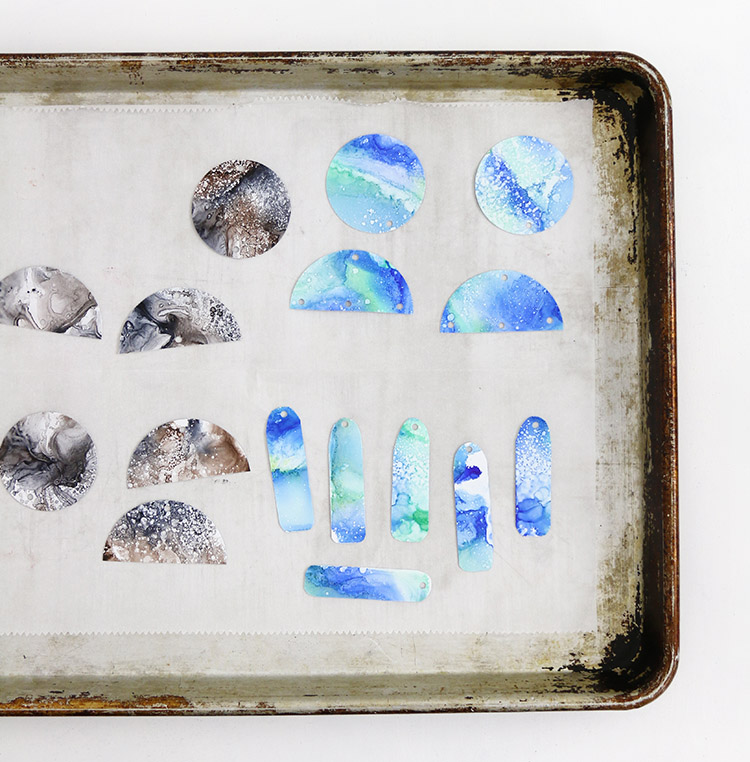
Step Three – Bake Earring Pieces.
Next, place all of your pieces on a parchment lined baking sheet and bake them according to the instructions that came with your shrink plastic.
My pieces baked at 325 degrees for 2-3 minutes. As your pieces shrink, they will curl up and may even roll around a bit. Don’t worry, they will flatten out after a few minutes. When they are all flat again, they are done baking, and you should remove them from the oven to cool.
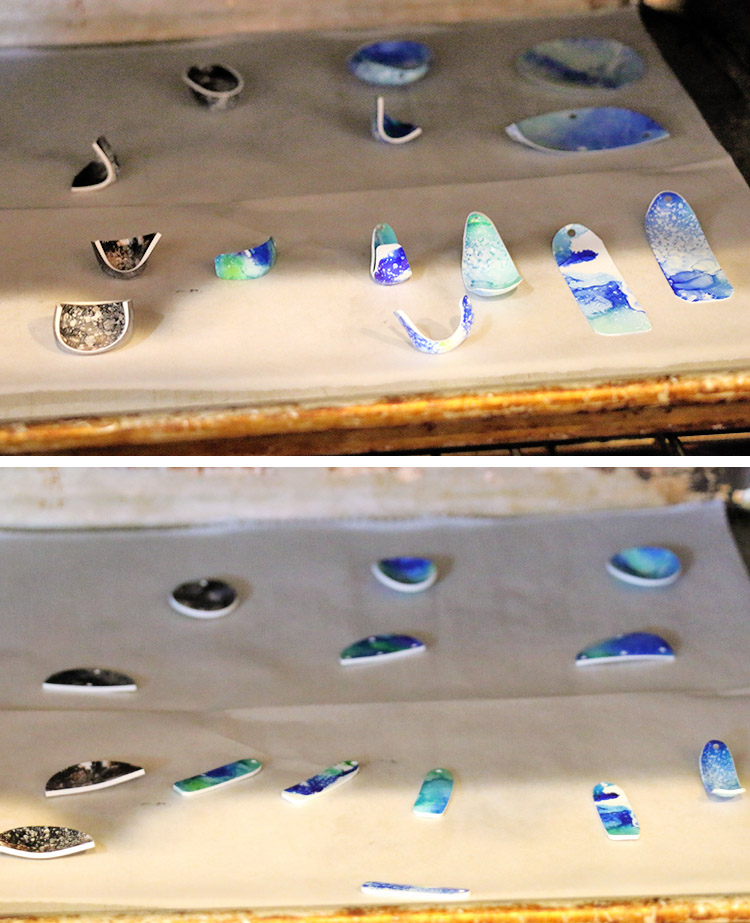
After shrinking, your pieces will have a white edge about 1/16 inch wide. If you would prefer the edge to be a different color, simply color the edge using one of your alcohol ink markers.
Step Four – Assemble Earrings.
After your earring pieces have cooled, take them outside or to a well-ventilated area to give them a quick coat of clear acrylic gloss spray on each side. This will seal and protect those pretty alcohol ink designs.
After the sealer has dried, it’s time to put those DIY statement earrings together! Use your jewelry pliers to gently open up a jump ring and connect two of the shrink film pieces. Then use the pliers to close the jump ring.
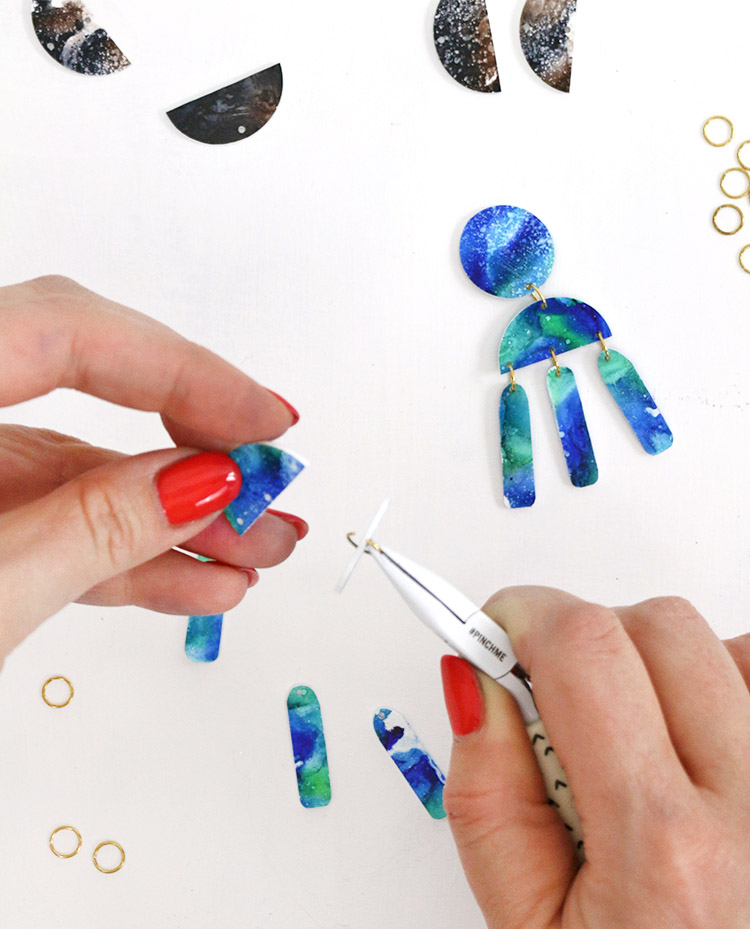
Repeat this process until all the pieces of both earrings are attached. Finally, finish off your earrings by either attaching a fish hook earring wire with a jump ring or by gluing a flat pad earring post to the back of the top piece with some E6000.
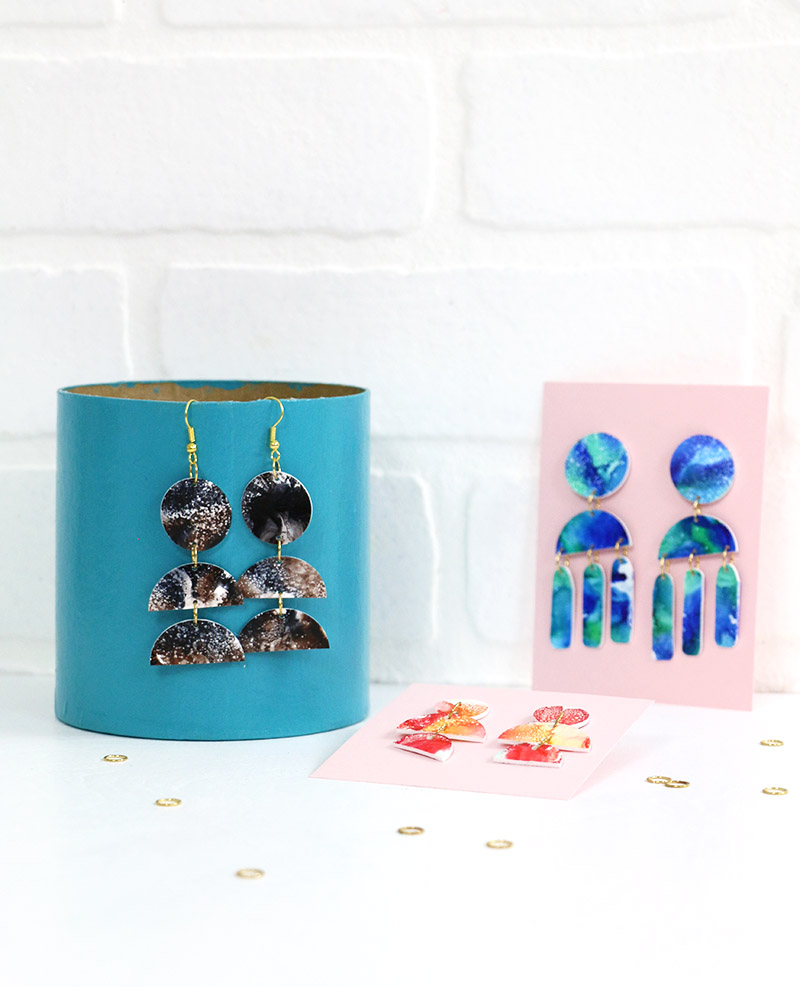
And that’s it! Your new DIY statement earrings are ready to wear! I made three pairs, and kind of love them all, but that blue pair has to be my favorite. It has such fun movement!

If you make your own DIY statement shrinky dink earrings, I need to see them! Show me your photos over on my facebook page or tag me on instagram. 🙂
Until next time, Happy Making!

Check out more craft project ideas here:
[the_grid name=”Craft Projects Footer”]


Comments + Project Love
Stephanie ReadsWell says
Whether big or small, I just love all kinds of earrings. This one looks fantastic and trendy. It has already got a place in my jewellery box, and now I just need to make one to fill that space.
Emeli says
Great idea! what size bobby pins do you recommend? I find 4.5cm too small and am deciding between getting 6cm or 6.5cm? Read more https://google.com
Amber says
Thinking of doing this as a teacher workshop after school one day….about how long did it take for your alcohol sprayed shrink plastic to dry? These look SO FUN!