Make a fun summer wreath using an old woven blanket! This summery decoration gets lots of color and texture from the Mexican falsa blanket and yarn tassels, but maintains a sleek, modern shape. This post contains affiliate links, which help to support this blog. Thanks!

I am excited to announce that I have joined the Make It Fun Crafts team! Yay! This means that every month I will be getting a box full of surprise craft supplies and making something awesome with them. This month I received a box full of foam wreaths, which couldn’t have been more perfect because – guys, don’t tell anyone, but – I was still rockin the winter wreath on the front door. Sad, true story. ?
It’s already pretty hot here in the desert, so I was definitely ready for something with a colorful punch – time for a summer wreath! I decided to introduce my foam wreath to my favorite red and pink Mexican falsa blanket (I had already used part of it to recover a chair), and basically, they were made for each other.
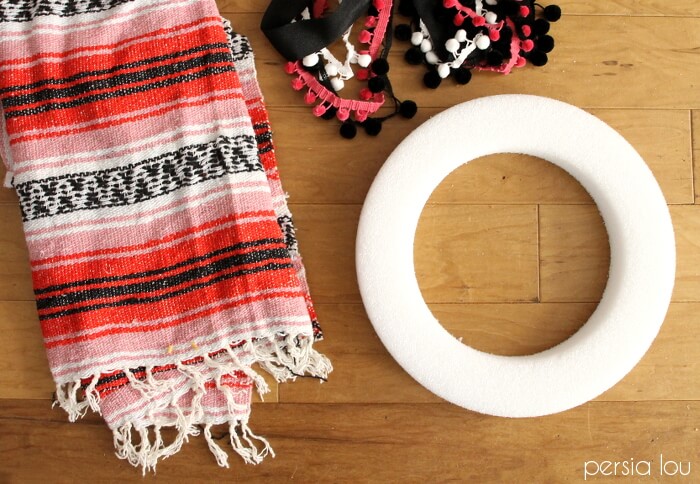
Woven Blanket Summer Wreath Supplies:
- FloraCraft® Make It: Fun®16” Foam wreath
- Mexican Falsa Blanket
- Black Twill Tape
- Hot Glue Gun
- Yarn in coordinating colors
- Plastic Yarn Needle
- Striped twill tape or ribbon for hanging
Originally I was going to add some pom-pom trim, but it was going a little too Three Amigos, so I decided to try adding some woven tassels instead, and I really like the way it turned out. I started off by laying my wreath out on top of the blanket scrap and positioning it so the blanket’s stripes went where I wanted them.
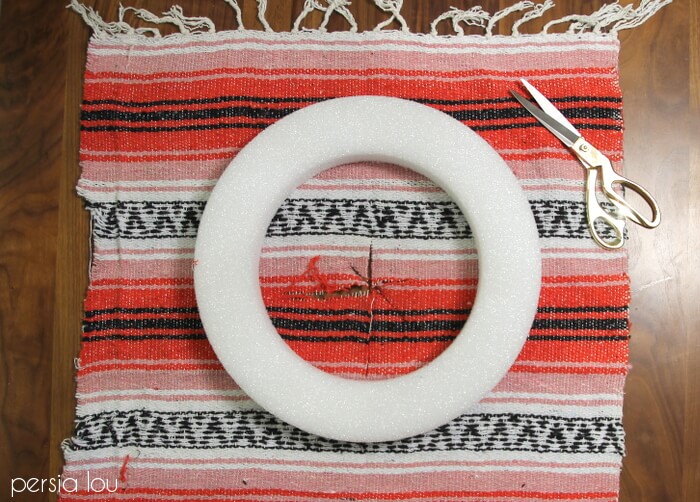
Then starting in the center, I cut slits in the blanket almost up to the wreath. This gives you a bunch of triangles in the middle that you can wrap around the wreath form.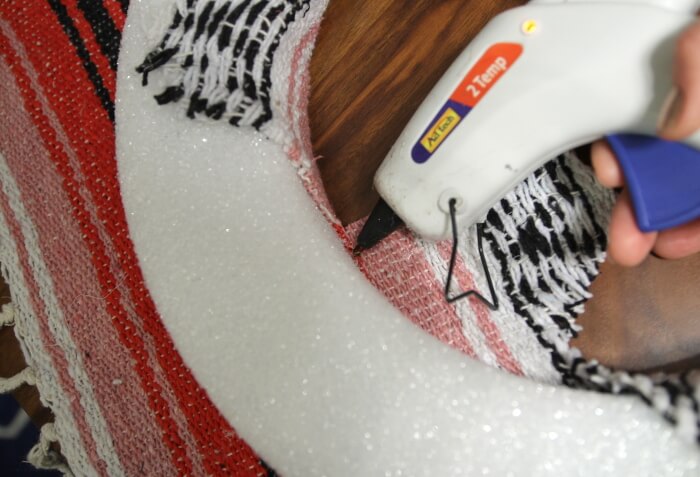
I used hot glue to secure these to the wreath, making sure the place some glue close the front of the wreath and smoothing the blanket over it.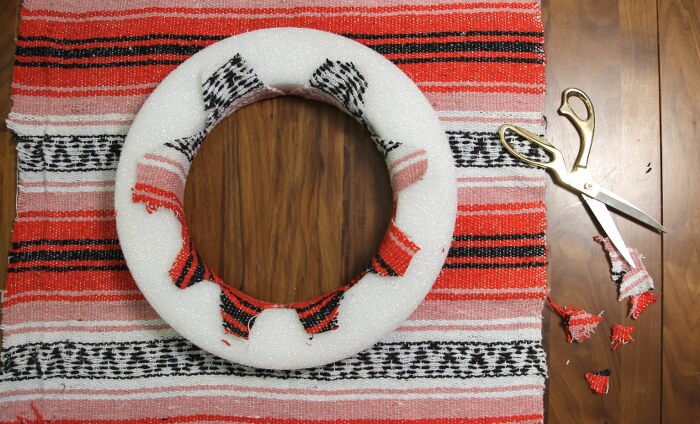 Next, I glued the blanket to the sides of the wreath form. Gently pulling and smoothing it as I went. On the back of the wreath, I cut the excess blanket into slits which I glued down trimming excess as I went.
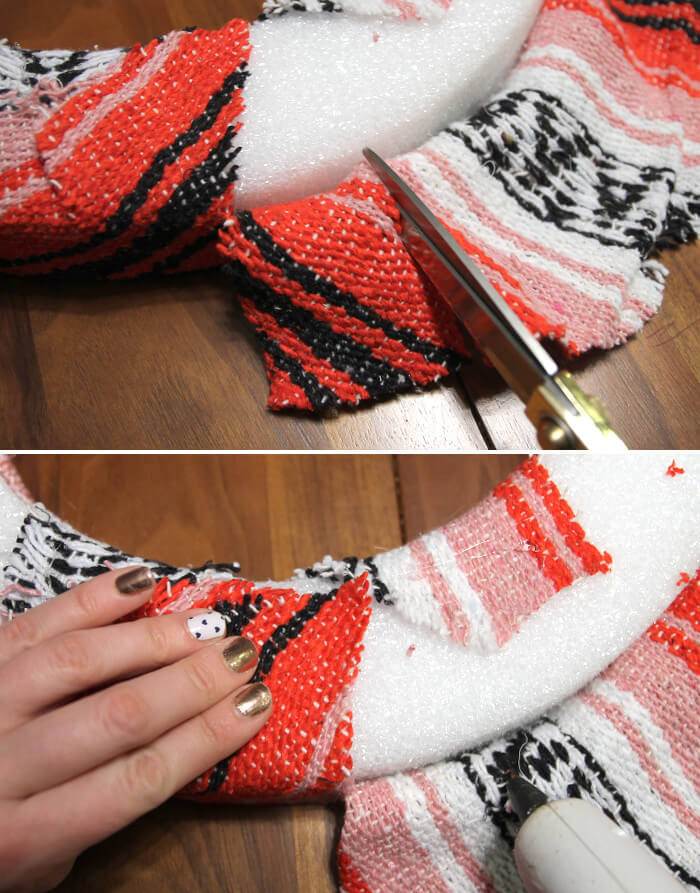
When the blanket was smoothly covering the wreath form, there were a few gaps where styrofoam was showing in the middle of the wreath, so I covered it with my black twill tape.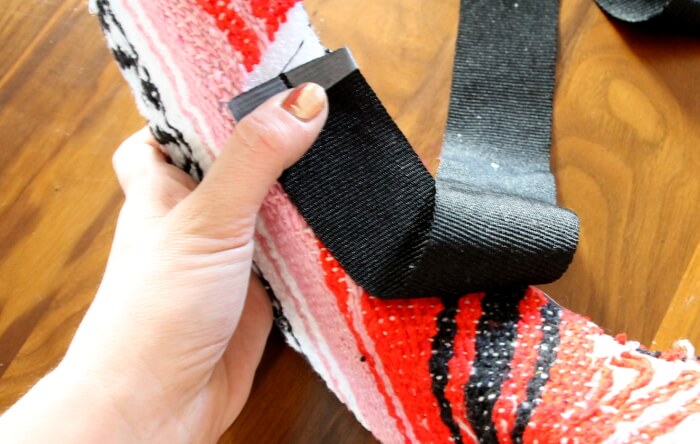
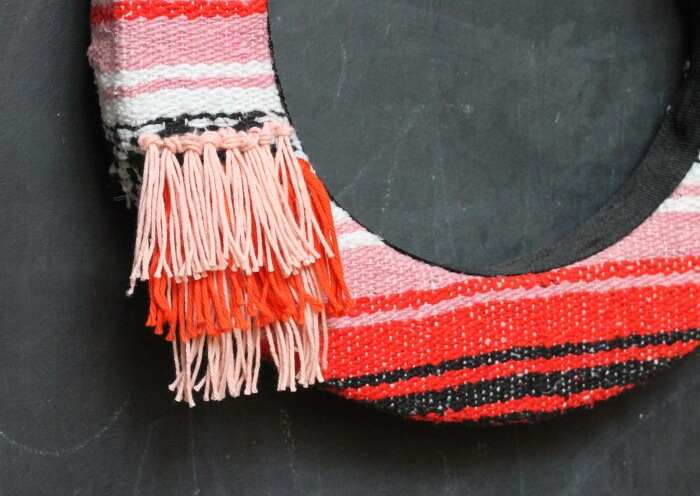
Then it was time to the woven tassel detail! I used cotton yarn and a plastic yarn needle to attach the tassel.
Start off by threading your yarn needle with three pieces of yarn about double the length of your desired tassel.
Threading three pieces of yarn into the little eye of your plastic needle may seem like a challenge, so I wanted to show you the trick my grandma (the Lou of Persia Lou) taught me for quickly threading a yarn needle. Here’s how to do it: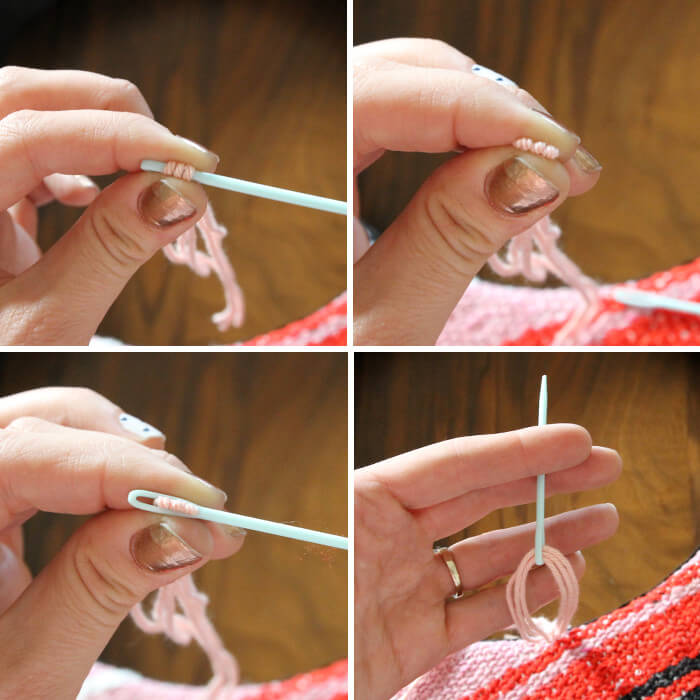
- Wrap all three strands around the side of the needle’s eye, pulling down tightly. Pinch the yarn over the sides of the needle.
- While still pinching the yarn, pull the needle out with your other hand.
- Push the eye of the needle over the little yarn bumps you are still pinching.
- Pull one end through – et voila!
To add a tassel to your wreath, push your needle under two of the blanket’s vertical warp threads and pull your yarn through.
Then, use the needle and/or your fingers to pull up a little loop of the strands in between the two vertical threads. Loop the tail ends of the yarn over the top of the loop and down through. Gently pull to tighten.
I added a row of pink, a row of coral-y red, and another row of pink. After adding all the tassels in each row, I trimmed them to the same length.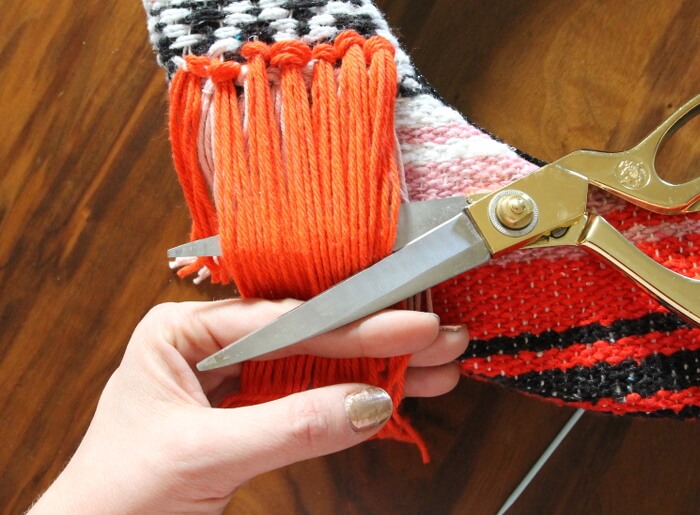 A little trim, and my wreath was nearly done! I simply glued a piece of striped trim around the top for hanging, and it was all done!
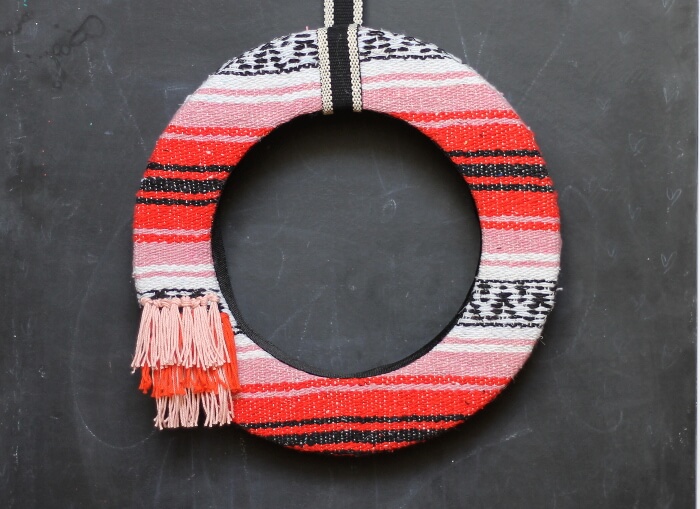
I tried hanging it on the wall in our living room, and I like it there, but it might move around a bit.
So, what do you all think of my new summer wreath?
Happy Making!


Comments + Project Love
Sharon says
Totally fabulous! I adore this, and love the idea of repurposing a blanket, too. Thank you!
Theresa @DearCreatives says
I’d love to recycle a blanket to a wreath. Love this DIY! Pinned for later.