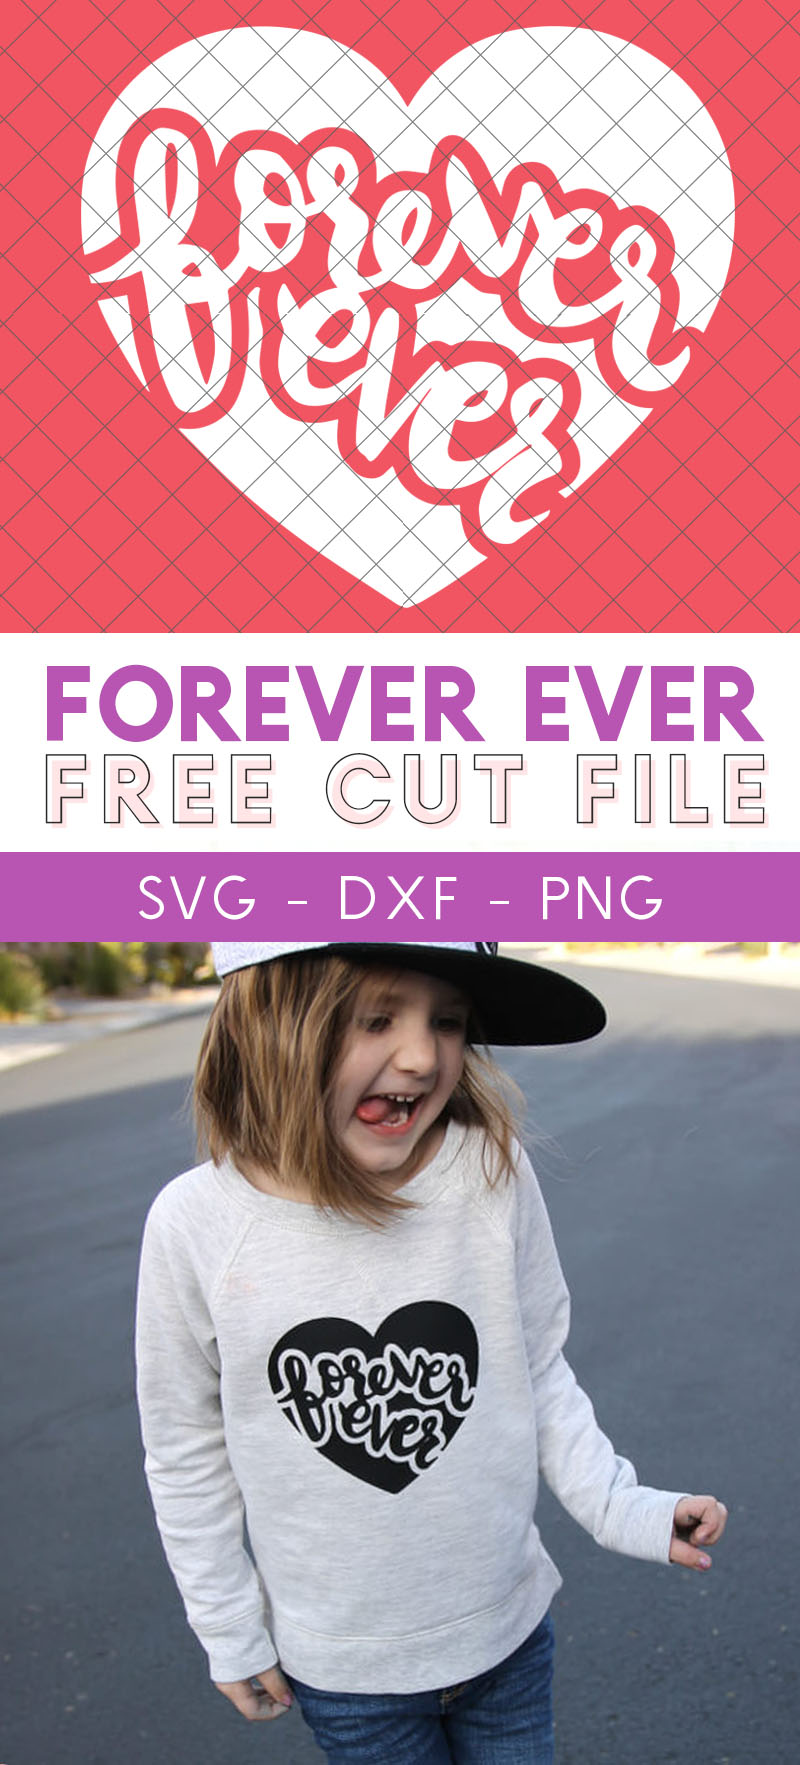
Make your own adorable Valentine’s Day projects with this free hand lettered “Forever Ever” SVG Cut File. This post was originally shared at Craftaholics Anonymous, and it contains affiliate links, which provide me with a small commission at no extra cost to you. Thanks!
Who is ready for a brand new free hand lettered cut file?? 🙋♀️🙋♀️🙋♀️ YAY!
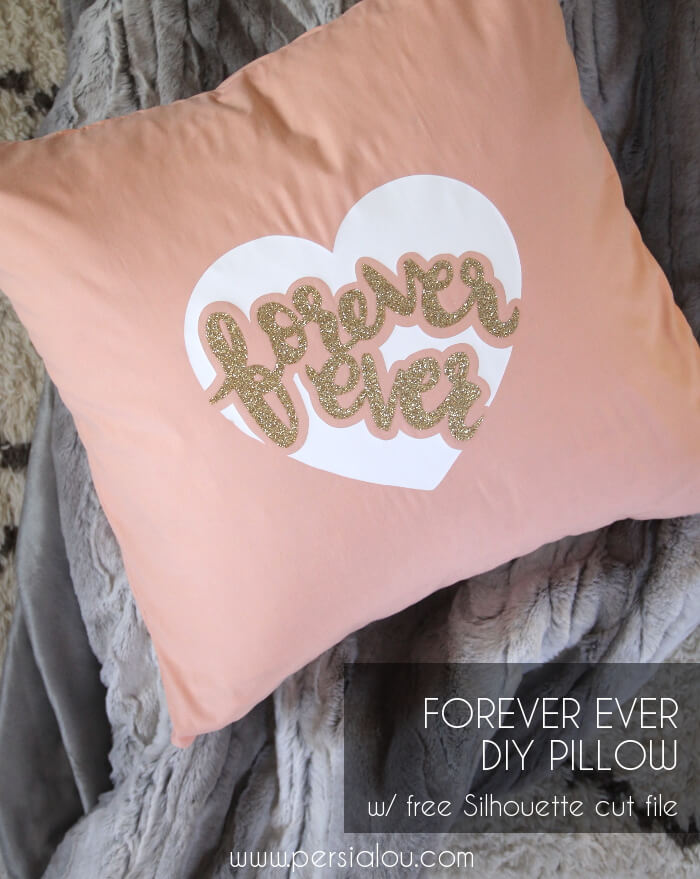
I hand lettered this forever ever heart design, and used it for a few cute projects I’m excited to share with you all! Keep reading for more info on my DIYs and to get the free cut file.
Easy DIY Forever Ever Pillow Cover
I don’t know about you guys, but it seems like I am in pretty near constant need of new throw pillows. Our pillows get a lot of napping, throwing, and fort-building love, so they regularly need a refresh.
The good news is pillow covers are easy to whip up, and today I have a super cute DIY pillow cover for you all that involves hearts and love and a peachy pink, so that totally means Valentine’s Day, IMO.
Look at me, crafting for the seasons and what not.
BUT – this guy will be hanging out long past V Day because love is for all seasons, friends.
Oh and – hey – since I made this pillow using iron on heat transfer vinyl and my Silhouette Cameo it took less than an hour to make. Quick and easy for the win!
If you want to make your own pillow, you are in the right place. Keep reading for the full tutorial and to get that free cut file. 🙂
DIY Forever Ever Pillow Supplies:
- 1 yard of fabric
- Silhouette, Cricut,
 or other electronic cutting machine
 - Heat Transfer Vinyl (I used white and gold glitter)
- Pillow Form
- Sewing machine and thread
- My Forever Ever Cut File (Grab free cut file at the end of this post.)

How to Make a Valentine’s Day Forever Ever Pillow
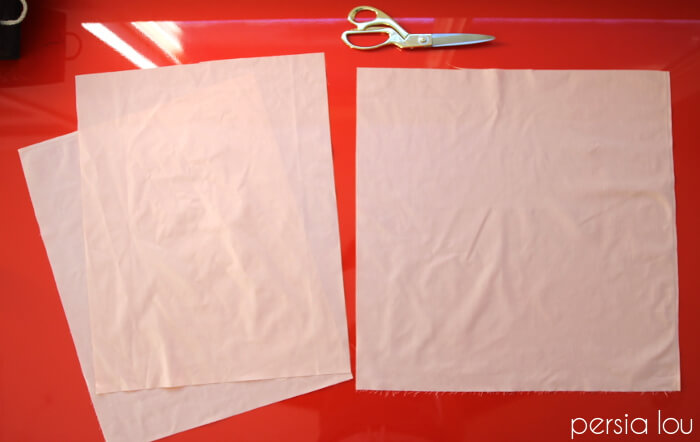
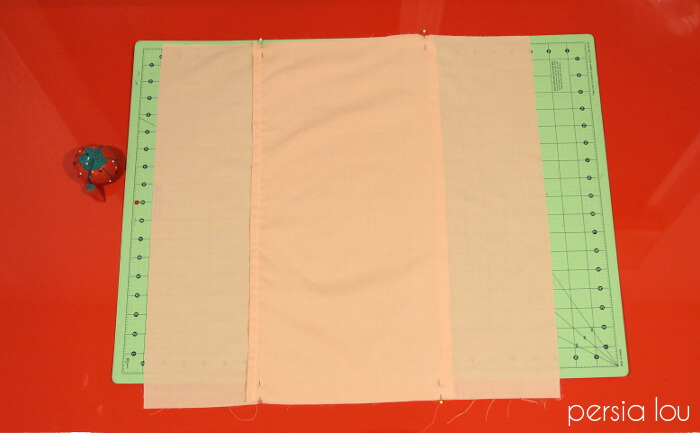
Begin by cutting your fabric. You will need three pieces – one square for the pillow front and two rectangles for the back. My pillow form was 19″ so my pieces were cut to 20″ x 20″ and 20″ x 16″. For a 16″ pillow form, you will need a 17″ x 17″ square and two 17″ x 13″ rectangles.
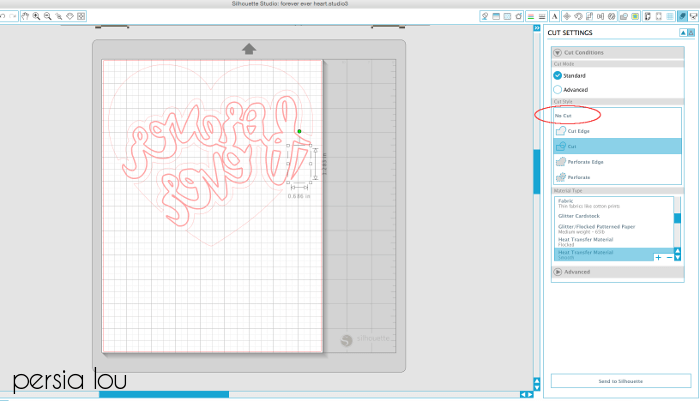
Next we will cut, weed, and apply the vinyl to the pillow front.
Start by downloading my forever ever heart design and opening it in your cutting machine software. The file is already mirrored and ready to be cut out of heat transfer vinyl. If you are cutting the design all out of one color, just go ahead and cut the design and weed out the negative space (and – sneak peek! – scroll to the bottom of this post to see what it looks like in all black).
If you want to cut the design out of two colors like I did on my pillow, you will need to do two separate cuts. Click on the sections you do NOT want to cut and then select “No Cut” before cutting. Then, go back and switch it to the opposite before cutting the next piece. (You can also use the cut by color technique to make this super easy!)

Grab your square pillow front, and let’s adhere that vinyl! To find the center of the square, fold it in half one way and then the other. Give the center fold a quick finger press, and unfold. Center the heart shape over the center mark, cover with a scrap piece of fabric and firmly press for 15-20 seconds.
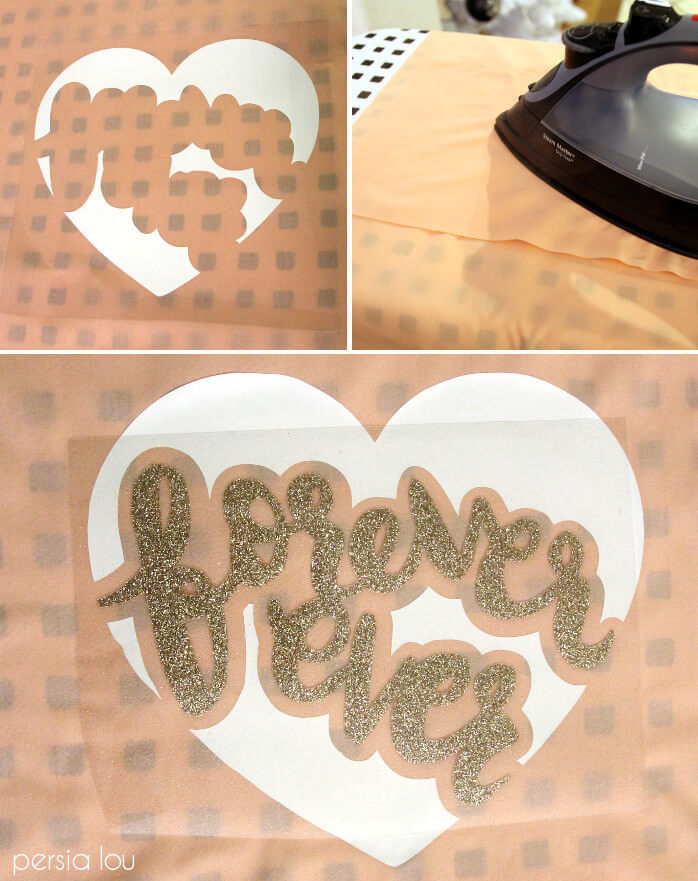
Remove the plastic, and you will see your cute heart shape! Now, line the lettering up, so it fits into the heart, and repeat the pressing process. Our pillow front is all done!
To prepare the back panels, press one of the long edges of each piece up about 3/8″ and then again about 3/8.”
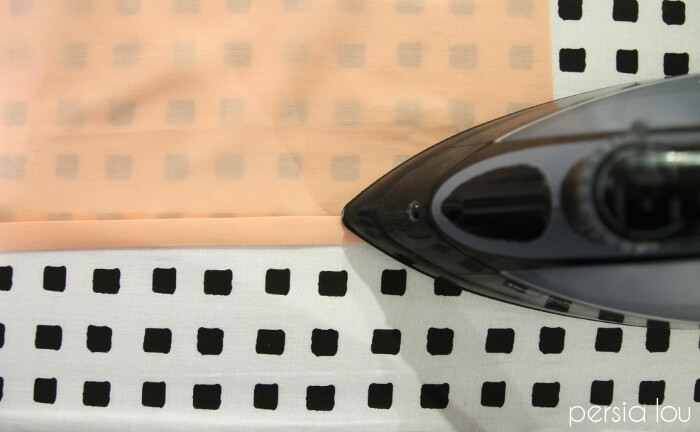
Stitch over the top of the pieces you pressed to create the hems of on the pillow back. Now your pieces are nearly ready to sew together.

Layer the back rectangles so they overlap in the middle and form a 20″ x 20″ square. Pin the pieces together so they remain in that shape.
Finally, pin the pillow front to the back with right sides facing each other. Sew around the entire outer edge of your square leaving about a 1/2″ seam allowance. Flip your pillow cover inside out, and stuff in the pillow form.
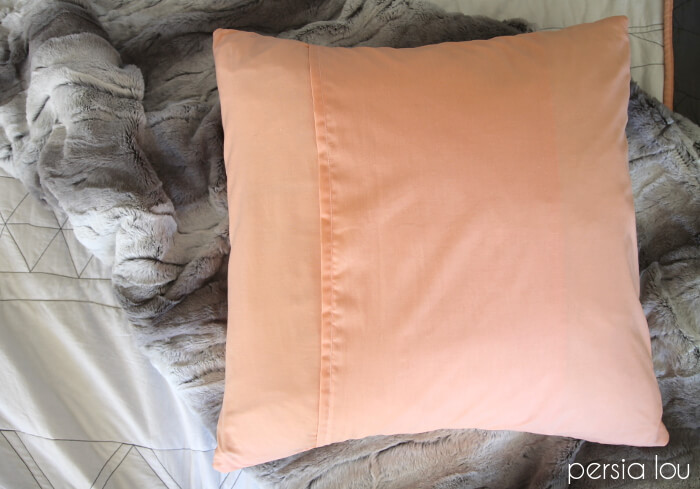
Et voila! Adorbs new pillow.

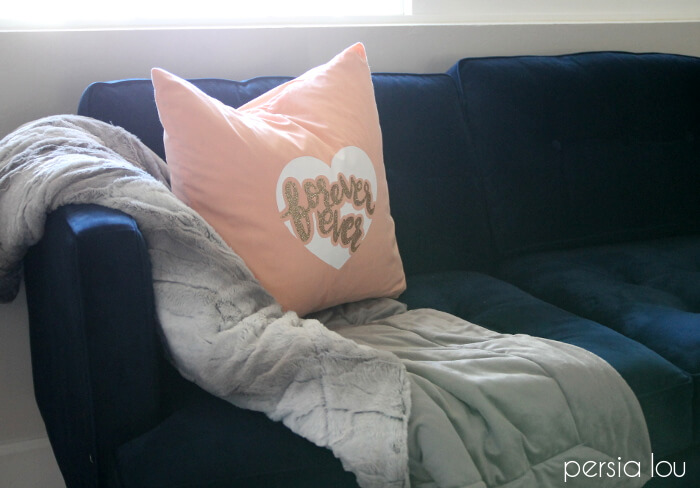
It looks pretty sweet sitting on our new sofa. Can a person love a loveseat? I mean it’s a loveseat, right?
So here’s the thing. This was the first time I designed a Silhouette project that I hand-lettered, and I really just loved the way it turned out. So I couldn’t just use it once and be done. I cut it out of black vinyl and ironed it on to a sweatshirt for my little girl too.
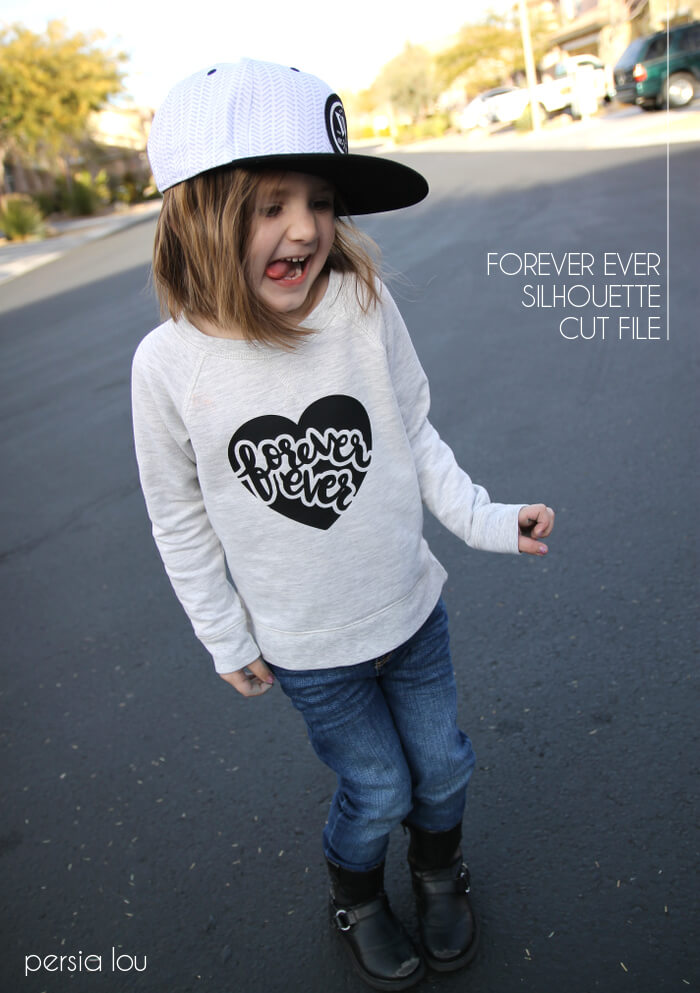
She loves “styles” – which is how she describes fashion and clothing. Love her. Are Mommy and Me sweatshirts cool or no? I think yes.
Ready to grab that free cut file and get crafting??
Free Forever Ever Heart SVG Cut File
Before downloading, please pin the image above! Spreading the word about our free cut files helps to keep them free! 🙂
Please Note: These cut files are free for personal use only (making things for yourself or as gifts). If you would like to use these designs for products you make and sell, you can purchase a limited commercial use license in my shop HERE.
When you click the link below, a ZIP file containing the SVG, DXF, and PNG versions of the cut files will download. You will need to unzip the file before opening the files in your cutting machine software.
Download the Forever Ever Heart SVG Cut File
If you use this design to make your own shirt, I want to see it! Tag me on instagram or share to my facebook page. It’s seriously my favorite thing to see you guys out there in the wild using my designs. 🙂
Happy Making, friends!

Check out more of my cut files here:
[the_grid name=”Cut Files Footer”]


Comments + Project Love
Hannah & Jess says
I am always on the lookout for new pillows. I think they're a cheap, easy way to transform a room.<br /><br />This pillow is gorgeous! It would look amazing sitting on my bed.<br /><br />xx Hannah<br />www.eatingwithalice.com
Virginia says
Awesome freebie! Thanks, super cute projects
Erica Sooter says
Eek! This is SO adorable. And I just got my first roll of gold foil heat transfer material so I'm ready to party!