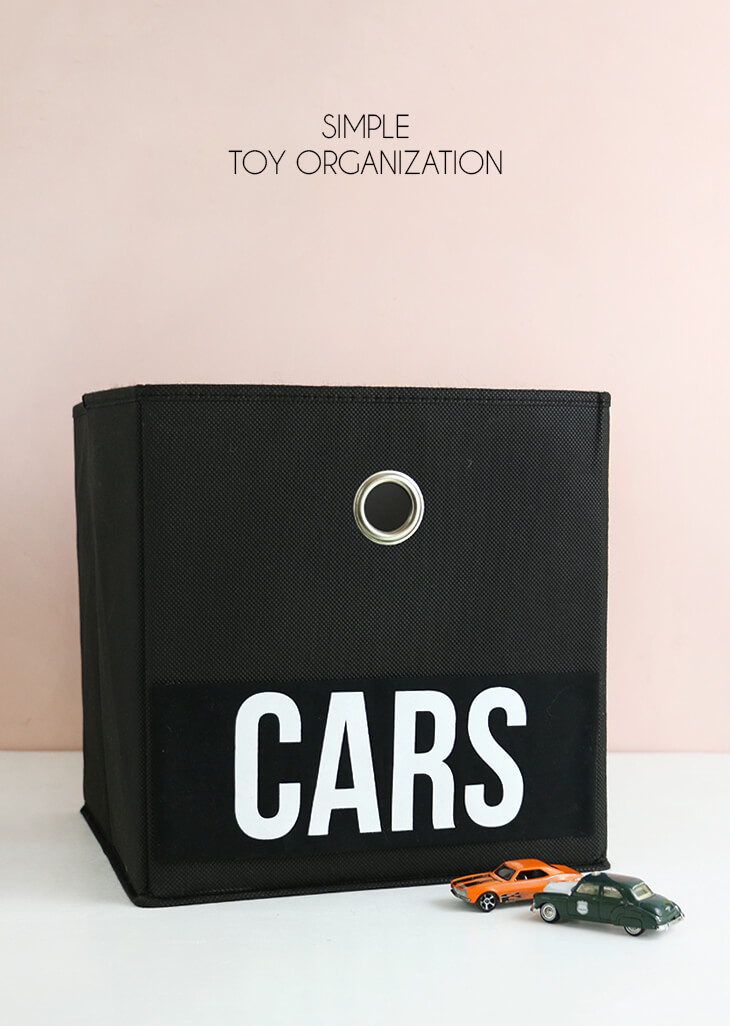
A Simple Toy Organization idea – label toy bins using heat transfer vinyl! Full instructions for creating your own toy organization labels. Thank you to Expressions Vinyl for sponsoring this post, which also contains affiliate links that help to support this blog. Thanks!
It’s right about this time of year that I start feeling the need to clean out and organize everything. The kids toys are a battle that I seem to be constantly fighting. Tell me I’m not the only one, guys! And with Christmas coming I’m feeling extra pressure to get this situation under control.
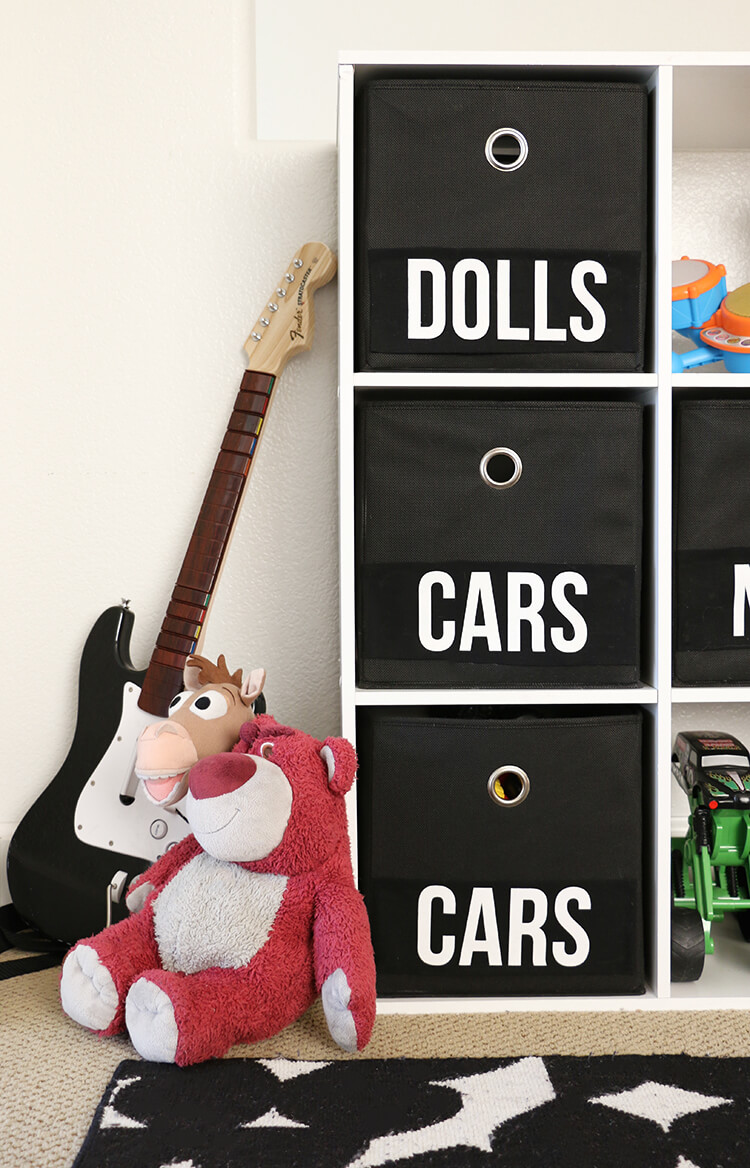
I’ve been thinking it’s time for some new simple toy organization, so the kids and I went through and selected a bunch of their toys to be donated to charity and set about clearly organizing the rest. I really wanted big clear labels for all of their storage bins to make it easier for them to clean up on their own, and I thought heat transfer vinyl would make it easy to get that look.
This project actually started out with kind of a big fail. I didn’t realize that the fabric my bins are covered with is a polyester material that does not stand up well to heat. So, when I first tried to apply the heat transfer vinyl directly to the storage bin, I just ended up melting the fabric. Wah wah.
I still really wanted the big clear labels I had envisioned, so I figured out a work around. If you have bins covered in cotton, twill, or another fabric that can withstand high heat, you could just iron the labels directly onto the bins.
Simple Toy Organization Supplies:
- Collapsible Fabric Storage Cubes
- Black Cotton Fabric
- White Stripflock Heat Transfer Vinyl (I love to order from Expressions Vinyl)
- Weeding Tool
- Silhouette Cameo
- Hot Glue Gun
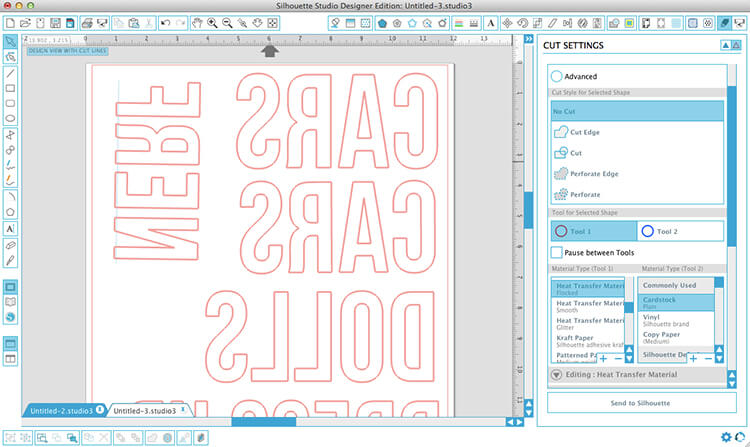
To make your own simple toy organization bins, start by typing out your words in the Silhouette Studio software. Scale them to the size you want your finished labels to be.
For heat transfer vinyl, you need to always mirror your design because you cut it on the back side, and you will flip it over to apply it to your project. To mirror your text, click on it to select it, and then select Object > Mirror > Flip Horizontally. Next, select the correct material from the Cut Settings menu, I used flocked heat transfer material for my project, and send it to the Silhouette to cut.
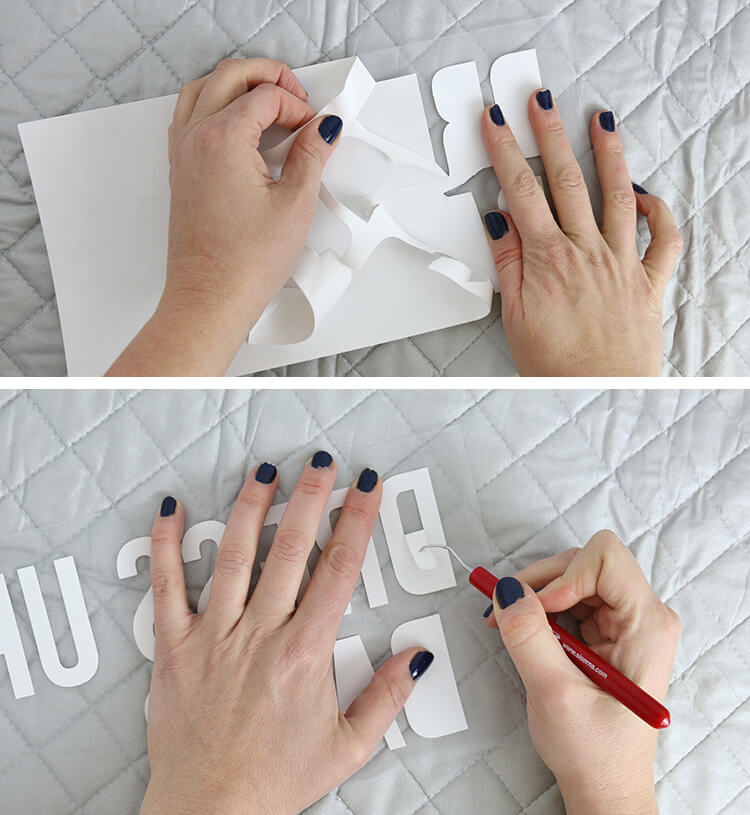
After you labels have cut, you need to remove the excess vinyl from your design. This step is called weeding. Just peel off the excess. Don’t forget to remove the pieces from the insides of the letters, a weeding hook works great for this.
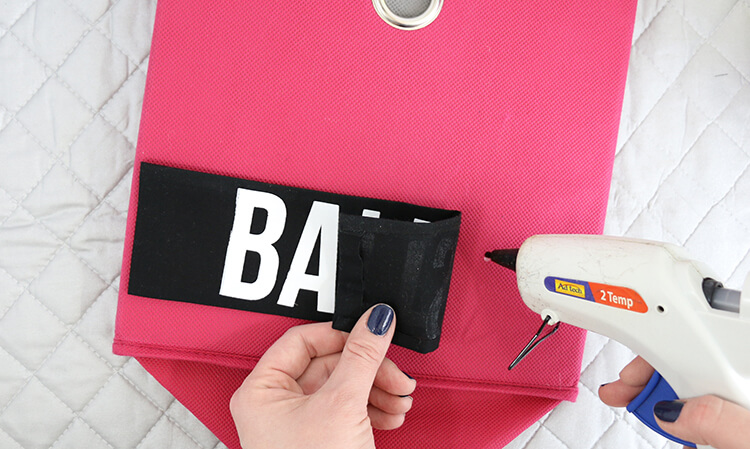
Since I couldn’t apply the heat transfer vinyl directly to my bins, I decided to apply the labels to a piece of cotton fabric that I then attached to the bins. I cut the fabric to size and pressed under the edges, and then applied the vinyl labels.
With your iron on the cotton setting and the steam turned off, press down with firm pressure for 15-20 seconds. Stripflock is a cold peel vinyl, which means you need to let it cool down before removing the clear transfer sheet.

All that was left to do was glue the labels to the bins. I just used my good ol’ hot glue gun, and it worked great.
And that’s it! The kids and I filled up all the bins and organized the toys really quickly. I am really hoping these new labels will help to keep things organized.
Do you have any great tips for simple toy organization? I’d love to hear them if you do!
Happy Organizing and Happy Making!


Comments + Project Love
Jeanine says
Quick question, why couldn’t you iron the htv onto the bins??
Alexis says
Because the fabric the bins was made out of couldn’t stand up to the heat of the iron and it just melted. So sad! It was definitely a make it work moment. Ha! Thanks for stopping by. 🙂