I am not the best planner. I’m kind of a take it as it comes, see how it goes kind of a gal. Sometimes this doesn’t work out so well.
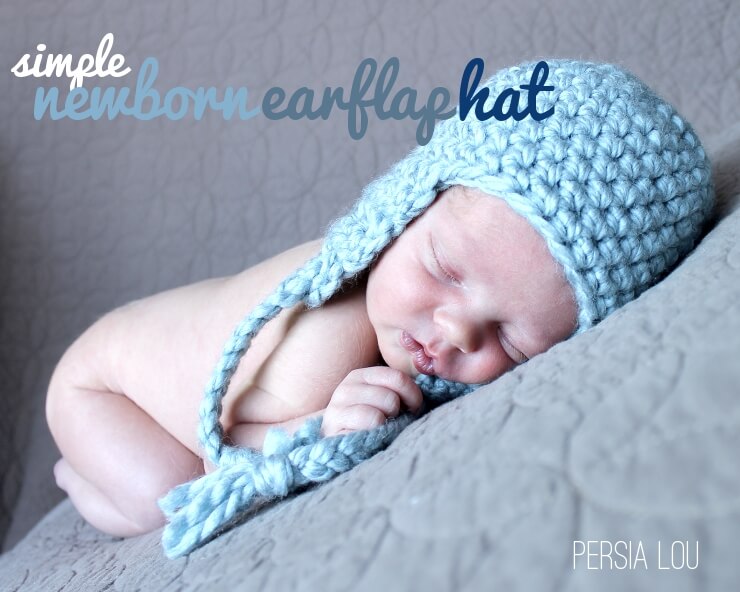
For instance, I had been thinking that maybe I wanted to do newborn photos with my new little guy, but I never really thought about actually contacting a photographer until it was getting to be too late. Oops. So I thought maybe I could pull off some decent photos myself. After little pinterest searching, I was armed with some great tips on taking newborn photos (find ’em here and here) and ready to give it a shot.
Well…. Almost ready. Again with the poor planning, I had no cute little newborn photo shoot props! So I had to whip one up. I came up with this simple little earflap hat in a chunky yarn that went from start to finish in a couple hours. Perfect.

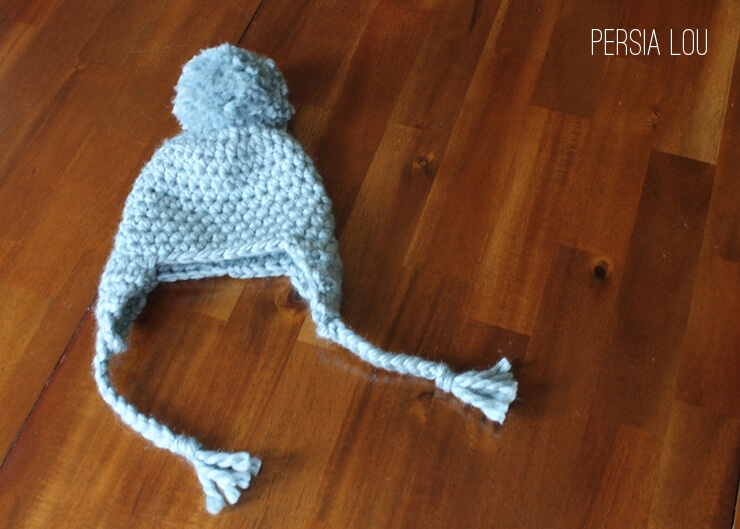
At first, I thought I would add a pom pom to the top of the hat, but then I decided it made the hat bigger than I wanted. But, if you like the pom pom top, by all means, go for it. You can quickly make a pom pom with just your fingers, and attach it to the top of your hat, like so:
So… Do you want to make one for a special new little baby in your life? Here’s how:
Materials
Super Bulky weight yarn – I used Lion Brand Wool-Ease Thick and Quick
Size K Crochet Hook
This hat is very small as it is intended for a brand new baby. If your hat is a just bit too small, you may want to try a larger hook.
This pattern uses American crochet terms.
st = stitch
ch = chain
sl st = slip stitch
hdc = half double crochet
hdc dec = half double crochet decrease (tutorial on that stitch here)
Pattern
Ch 4, join with slip stitch to form loop.
Round 1: Ch 2 (counts as first st), 11 hdc in loop, sl st in second ch to join. (12 sts)
Round 2: Ch 2, hdc in same st, 2 hdc in each st of previous round, sl st to join. (24 sts)
Round 3: Ch 2, hdc in next st, 2 hdc in next st, *hdc in next 2 sts, 2 hdc in next st, repeat from * 6 times, sl st to join. (32 sts)
Rounds 4-11: Ch 2, hdc in each st around, sl st to join. Finish off. Weave in ends.
Earflaps:
Counting from the back join, start earflaps in stitch 5 and 21. Work one earflap at a time.
Row 1: Ch 2, hdc in next 7 sts, ch 2, turn. (8 sts)
Row 2: hdc in next 5 sts, hdc dec over next 2 sts, ch 2, turn. (7 sts)
Row 3: hdc in next 4 sts, hdc dec over next 2 sts, ch 2, turn. (6 sts)
Row 4: hdc in next 3 sts, hdc dec over next 2 sts, ch 2, turn. (5 sts)
Row 5: hdc in next 2 sts, hdc dec over next 2 sts, ch 2, turn. (4 sts)
Row 6: hdc in next st, hdc dec over next 2 sts. (3 sts)
Finish off. Weave in ends.
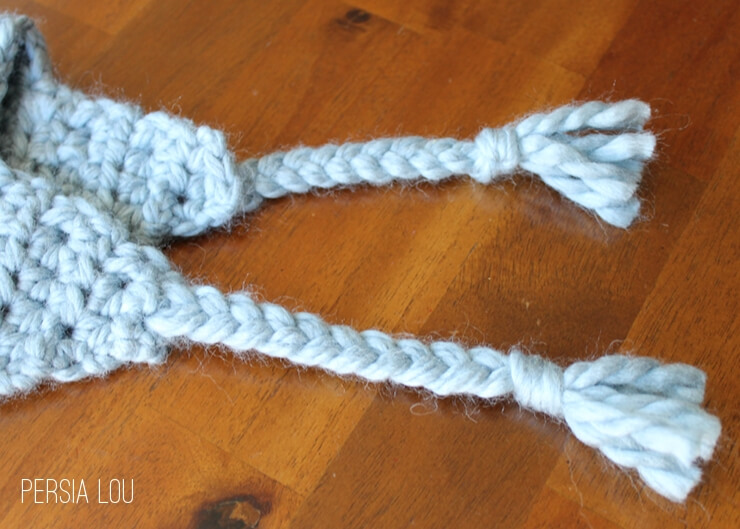
To add braids and tassels, cut 3 pieces of yarn about two feet long. Pull yarn through earflaps so that half the length is on one side of the middle stitch of the last row and half the length is on the other side. (The yarn loops around the post of the middle stitch.)
Braid the 6 strands of yarn, finish with a knot, and cut leaving about an inch-long tail.
I hope that’s all clear. Please, let me know if you have any questions about the pattern.

Linking up at some of my favorite parties.


Comments + Project Love
Anna B says
such a DOLL!! love that baby!
Susan @ Oh My! Creative says
So adorable!!<br /><br />Thanks for linking up to Whimsy Wednesday! Your project has been featured this week on my blog in a sewing roundup!<br /><br />http://www.ohmy-creative.com/sewing/14-easy-sewing-projects/<br /><br />Also, you can add your project {or any project} to my website. I feature them on my main slider on the home page…follow this link to submit your project!<br />http://
Bethany Lee says
These photos are sooooo cute, and you did a great job on the hat! Thanks for stopping by my blog and commenting on my neon statement necklace. 🙂
Mander says
Hi Alexis,<br /><br />I'm almost finished with the first earflap (my first earflap ever!) and I'm unsure how to finish it off. Can you explain a bit more how this is done for me please? <br /><br />I love this hat! I can't wait to take my first baby home in it in Feb! <br /><br />Thanks 🙂
Alexis Middleton says
Congratulations on your pregnancy! And your first ear flap! Haha… And thanks for your question. <br /><br />I went back to look at the pattern for the earflap, and noticed an error that I will correct now. Row 6 of the earflap ends with "ch 2, turn," but you should not chain 2 at the end of the final row. (Oops… sorry!) Instead, just do your two hdc, and then pull the yarn through
krochetkids says
wow its so cute baby and its hate is so so beautiful ! thanks for sharing.<br /><a href="http://www.krochetkids.org" rel="nofollow">crochet baby hats</a>
Martha Joy says
Thank you Mrs. Middleton for the cute and fun baby hat pattern! I've used it a couple times now (with a little modification :), with adorable results! 😉 I hope to make some more soon – thanks so much for sharing!! And I really like that it uses chunky yarn. I really enjoy working with the chunky yarn and am glad for a good pattern! :)<br /><br />Thanks again. Seek first the kingdom of God
Amhers104 says
I have followed the pattern and all the steps correctly. At this point I am on row five in do have 32 stitches however right now I just have one round flat circle. If I continue on doing two chains and half double crochet in each stitch for the next six Rose I think I will just have one large circle. Any ideas of what I have done wrong. I am assuming it should not look like this. Any help would