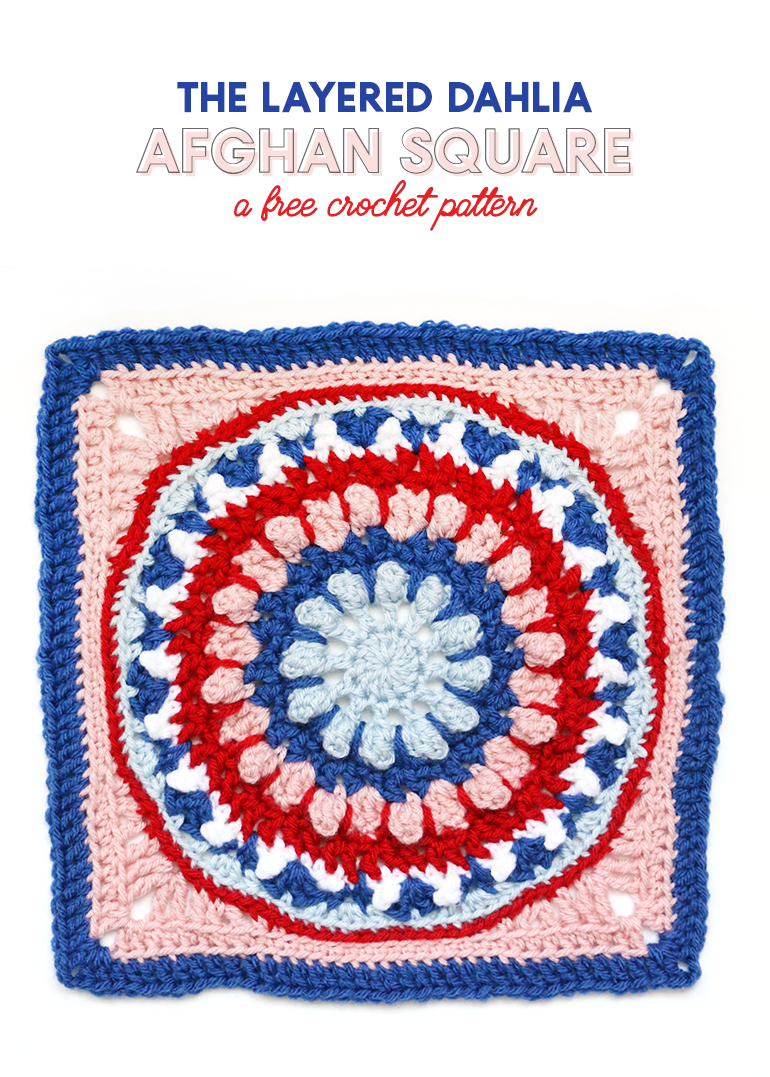
The Layered Dahlia is a free crochet pattern (and step by step photo tutorials) to help you make your own beautiful 12 inch afghan square. Make a whole bunch and piece them together for a layered dahlia blanket OR combine with other 12″ afghan squares to make a beautiful sampler afghan! This post contains affiliate links, which help to support this site.
I have a fun new crochet pattern for you all today – a 12 inch afghan square! Why a 12 inch afghan square? Well, these pretty little squares are a great way to build beautiful afghans one block at a time. I have created two afghans using twelve inch squares in the past (you can see them here and here), and I have been itching to make another one. I love how you get to create so many different pieces and put them all together to form one beautiful thing. I have a few other afghan square patterns here on the blog (the framed hexagon and southwestern blanket square) , but I have been working on some other ideas and today I wanted to share my latest square pattern with you all.
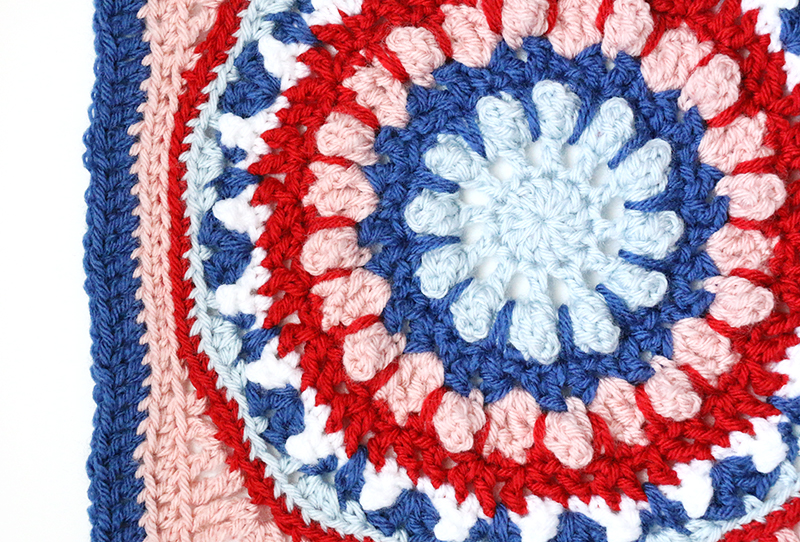
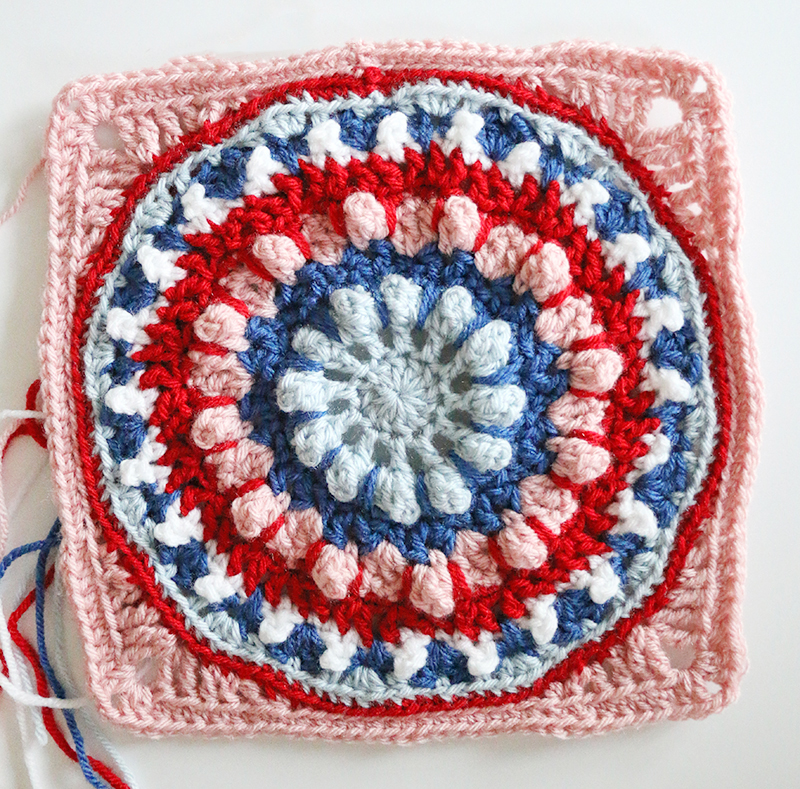
I have named this pretty little lady the Layered Dahlia because that big textured circle design in the center reminds me a dahlia (don’t you love dahlias???). This square incorporates different stitch techniques to create texture and visual interest, but I wouldn’t say that any of the stitches are particularly complicated or difficult. I have tried to include stitch explanations for the more unusual stitches plus photos for each round, so hopefully that will make the square easier to tackle.
Okay, ready to crochet? Here’s everything you will need.
The Layered Dahlia 12 Inch Afghan Square Supplies
- Size 4 Medium Worsted Weight Yarn – I used Lion’s Brand Vanna’s Choice (for my sample I used pink, scarlet, white, silver blue, and colonial blue)
- Size J (6.00 mm) Crochet Hook
- Scissors
- Finishing or Tapestry Needle
- Blocking Mat
The Layered Dahlia 12 Inch Afghan Square Pattern
Please Note: My patterns are free for personal use. You may sell items that you make from the pattern as long as you include a link back to the pattern when possible. Please do not sell or redistribute the pattern in anyway. If you want to share the pattern with a friend, please just send them a link. Thank you for your support!
This pattern uses American crochet terms.
Stitches Used:
- Chain (ch)
- Slip Stitch (sl st)
- Single Crochet (sc)
- Half Double Crochet (hdc)
- Double Crochet (dc)
- Treble Crochet (tr)
Special Stitches Used:
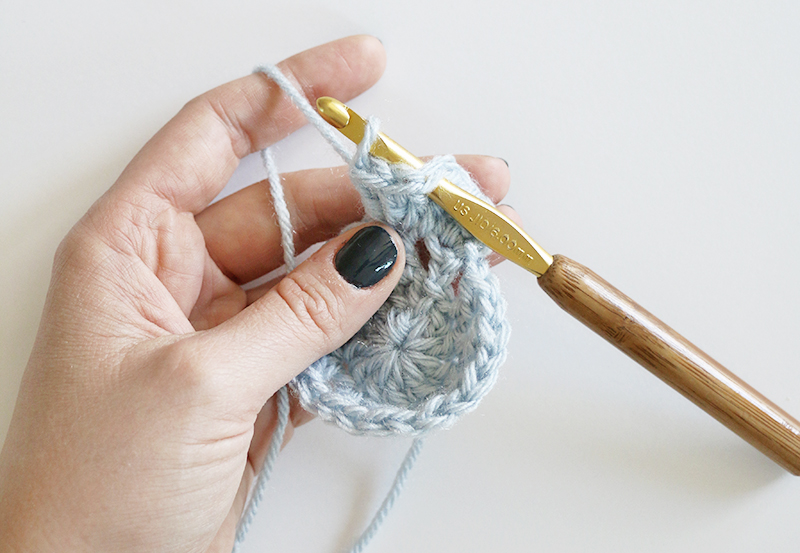
3 Double Crochet Popcorn Stitch (3 dc pc): Work 3 double crochet stitches in the indicated stitch. Drop the working loop from the hook and insert the hook front to back through the top of the first double crochet stitch and insert hook back through working yarn loop (see image below). Draw the loop through the first double crochet stitch. Popcorn stitch formed.
Beginning 3 Double Crochet Popcorn Stitch (beg 3 dc pc): This stitch is worked the same as the 3 dc pop (above), but since it is worked at the beginning of a round, the first double crochet stitch is replaced with a ch 2.
Picot (p): Chain 3. Slip stitch through the top of the previous stitch (in this pattern, it will be a single crochet). Picot formed. (There are a few different ways to form picot stitches. This method is what I used here, but you can use a different variant if you like.)
Single Crochet Spike Stitch (sc spike): The single crochet spike stitch is basically just an elongated single crochet that is worked into a lower row instead of the previous row. Insert the hook in to the stitch indicated in the pattern, draw up a loop and pull the yarn up to the height of the working yarn. Yarn over, and pull the yarn through both loops to finish the sc spike.
Half Treble Crochet (htr): This stitch is between a double and treble crochet stitch in height. It begins like a treble crochet by wrapping the yarn around your hook twice. Next, insert hook into indicated stitch and yarn over (four loops on hook). Yarn over and draw through two loops (three loops on hook). Finally, yarn over and draw through all loops. Half treble crochet formed.
The Layered Dahlia Pattern: 12 Inch Afghan Square
Feel free to change colors whenever you like. I will indicate when I have changed colors in the sample, but I switching up the color changes can create some really different looks, so experiment to see what you like. 🙂
Round 1: With Color A, start with magic loop, ch 2 (counts as dc), work 11 dc in magic loop, sl st to beg ch 2 to join, pull to tighten (12 dc total).
Round 2: Ch 3 (counts as dc, ch 1), *(dc, ch 1) in next st, repeat from * around, sl st to 2nd ch of beg ch 3 to join, (12 dc, 12 ch-1 sps).
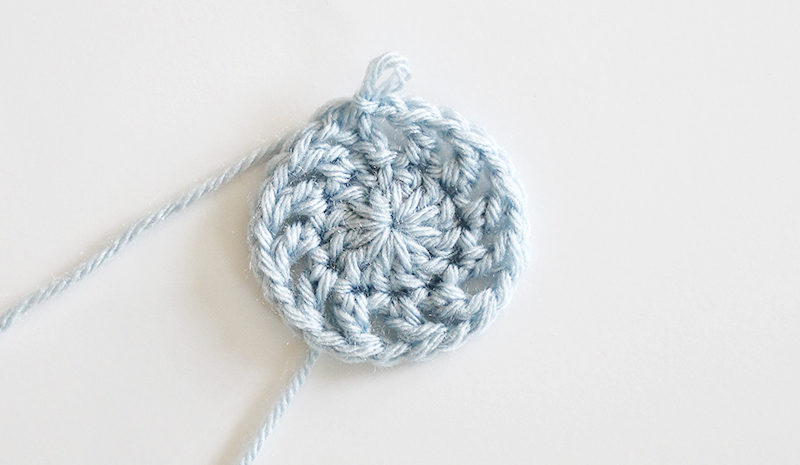
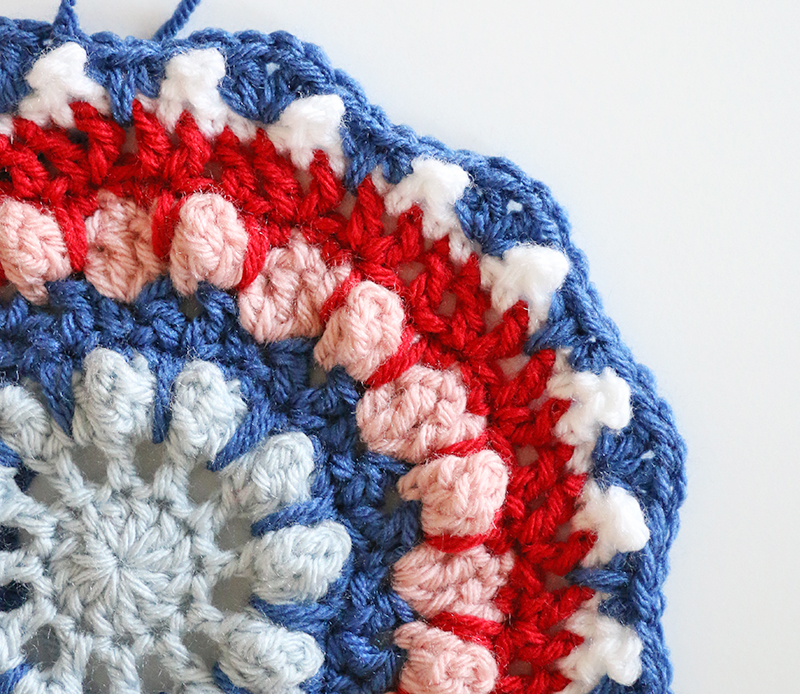
Round 3: Beg 3 dc pc, dc in ch 1 sp, *3 dc pc, 2 dc in next ch 1 sp, 3 dc pc, 1 dc in next ch 1 sp, repeat from * around ending with 2 dc in ch 1 sp. Sl st to join. Finish off Color A.
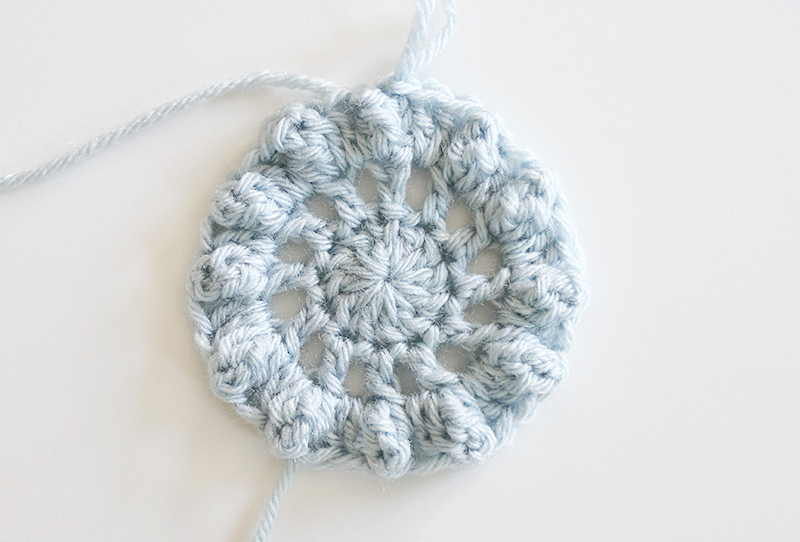
Round 3 is basically 12 popcorn stitches (see the special stitch instructions above) with alternating 1 dc and 2 dc in the ch-1 sps between.
Round 4: Join Color B in top of beg pc from previous round. Ch 1, sc in same st, *sc, sc spike in ch-1 sp 2 rnds below (see image), sc in same st as previous sc, sc in next 3 dc pc, sc, sc spike in ch-1 sp below, sc, sc in next 3 dc pc, repeat from * around, ending with sc, sc spike in ch-1 sp 2 rnds below, sc in same st as previous sc, sl st to join.
In other words, round 4 works a single crochet in each popcorn stitch and a sc, sc spike, sc in between each popcorn stitch. The spaces that have two double crochets will get a sc in each dc, and the spaces with only one double crochet will squeeze both sc sts in that one dc.
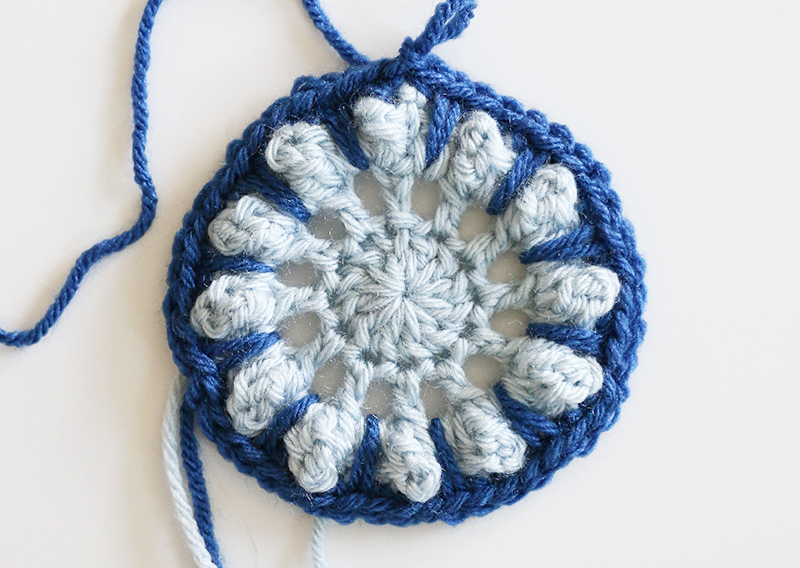
Round 5: Ch 1, sc in same st, sk 1 st, (dc, ch 1, dc) all in sc spike, *sk 1 st, sc, sk 1 st, (dc, ch 1, dc) all in sc spike, repeat from * around, sl st to join. Finish off Color B.
Round 6: Join Color C where previous round finished off, (ch 3 (counts as dc, ch 1), htr, ch 1, dc) all in same st, sk 1 st, sc in ch-1 sp, *(dc, ch 1, htr, ch 1, dc) all in next sc st, sk 1 st, sc in ch-1 sp, repeat from * around, sl st to join.
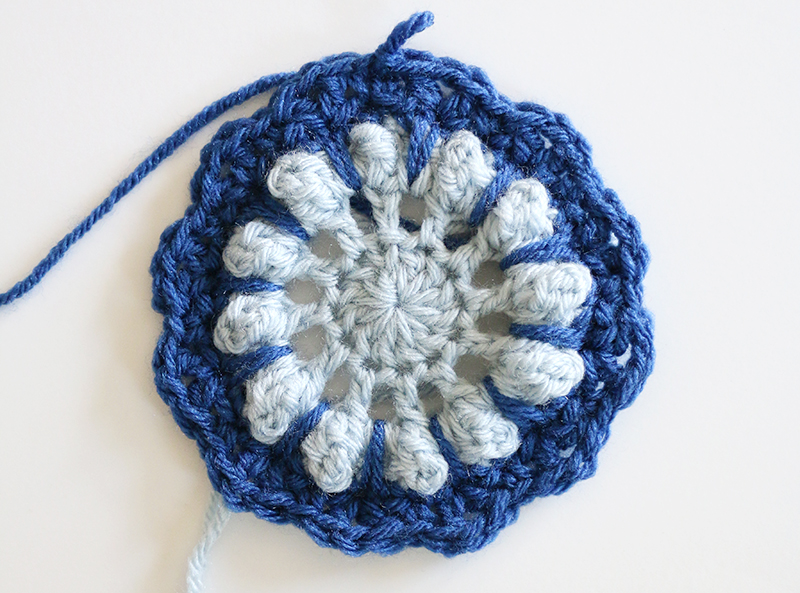
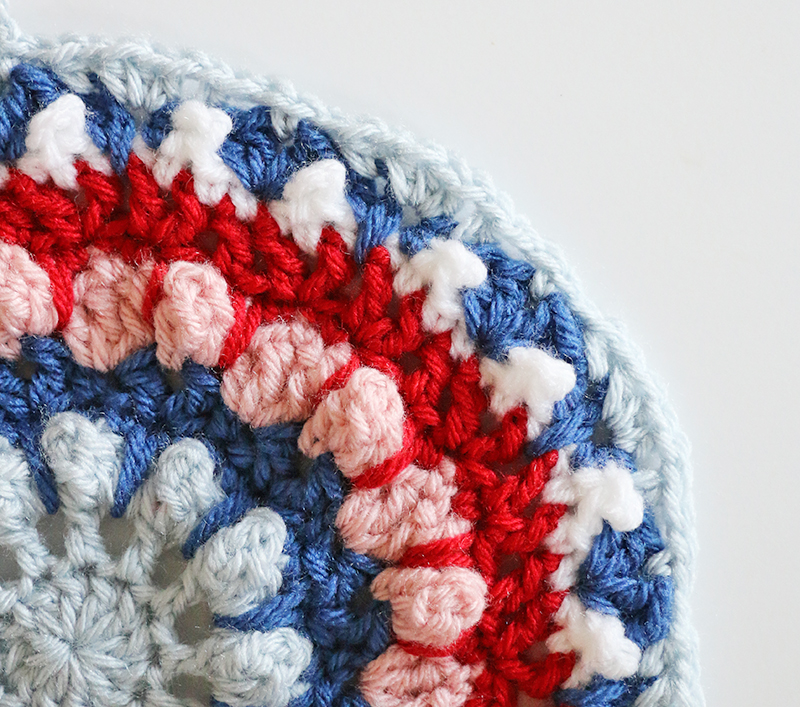
Round 7: Ch 2 (counts as hdc, ch 1), sk ch-1 sp, sc in next st, ch 1, sk ch-1 sp, hdc in next st, 3 dc pc, *hdc, ch 1, sk ch-1 sp, sc in next st, ch 1, sk ch-1 sp, hdc in next st, 3 dc pc, repeat from * around, sl st to join. Finish off Color C.

Round 7 is 12 popcorn stitches separated by hdc, ch 1, sc, ch 1 hdc.
Round 8: Join Color D to top of pc st. Ch 1, sc in same st, *sc spike in sp between sc and dc 2 rnds below (see image below), sc in ch-1 sp, sc in next st, sc in ch-1 sp, sc spike in sp between sc and dc 2 rnds below, sc in top of pc st, repeat from * around, sl st to join.
Spike stitches frame the popcorn stitches from the previous round.
Round 9: Ch 2 (counts as dc), *sk 1 st, (dc, ch 1, dc) in next st, sk 1 st, (dc, ch 1, dc) in next st, sk 1 st, dc in next st, repeat from * around, sl st to join. Finish off Color D.
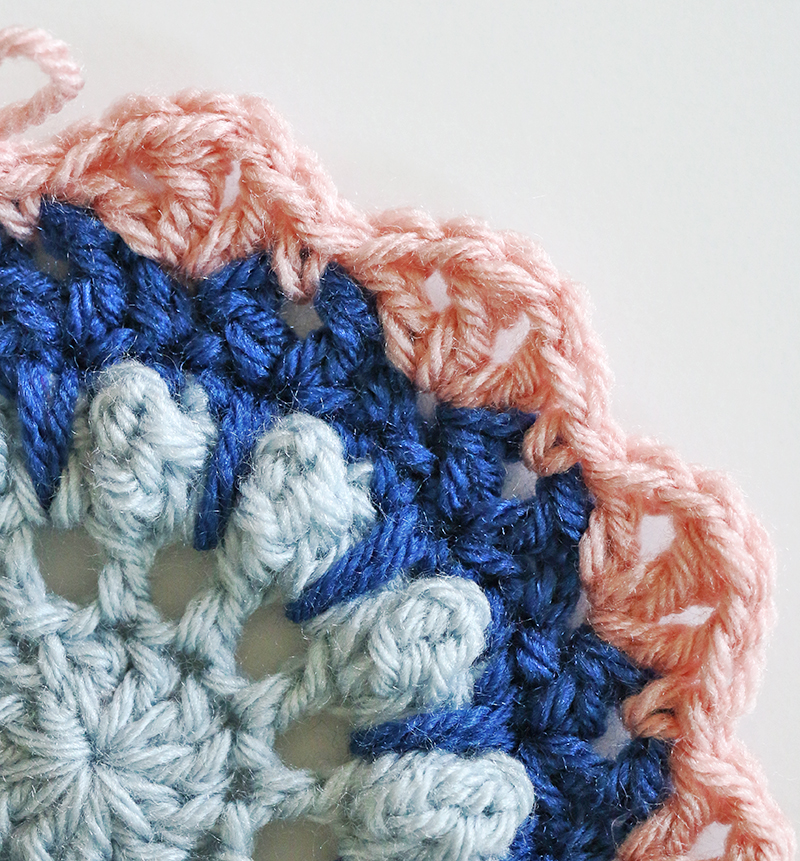
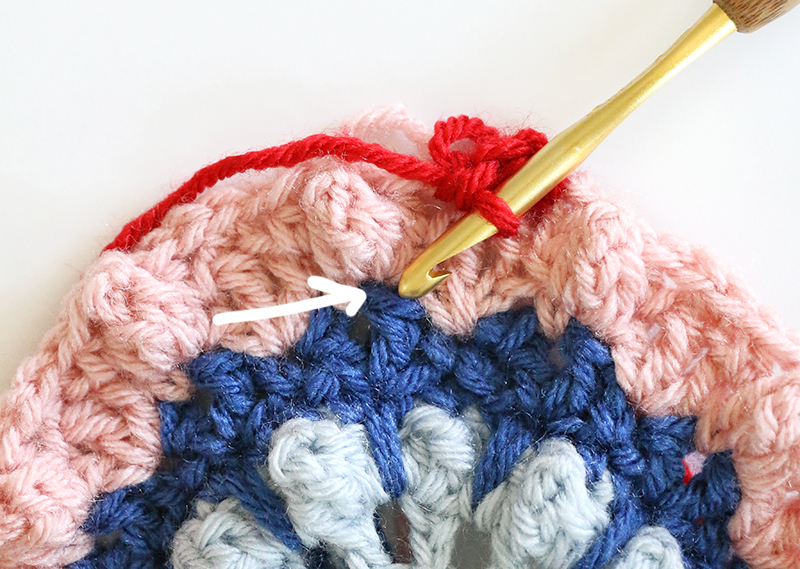
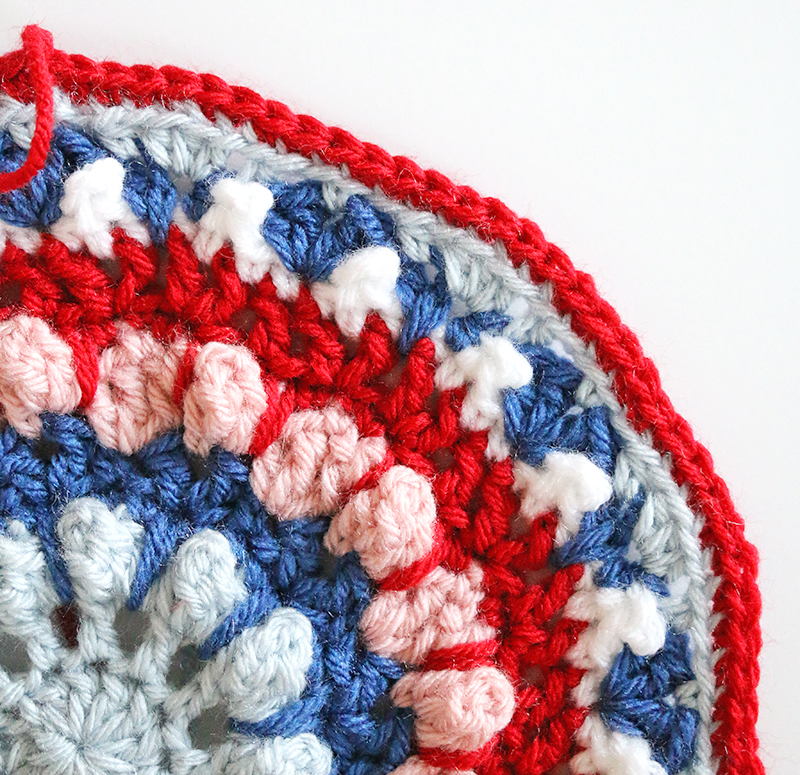
Round 10: Join Color E where the previous round finished off. Ch 1, sc in same st, sc, *sc in ch-1 sp, p, sc in next 3 sts, sc in ch-1 sp, p, sc in next 2 sts, repeat from * around (last repeat ends with 1 sc in last st), sl st to join. Finish off Color E.
Single crochet in each stitch and ch-1 space. Picots are worked over ch-1 spaces.
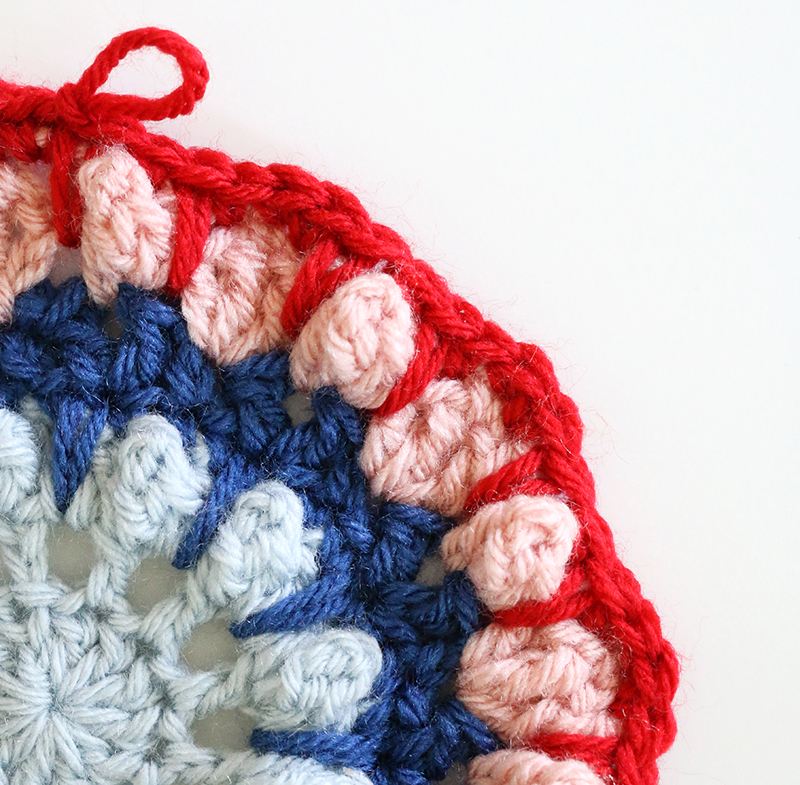
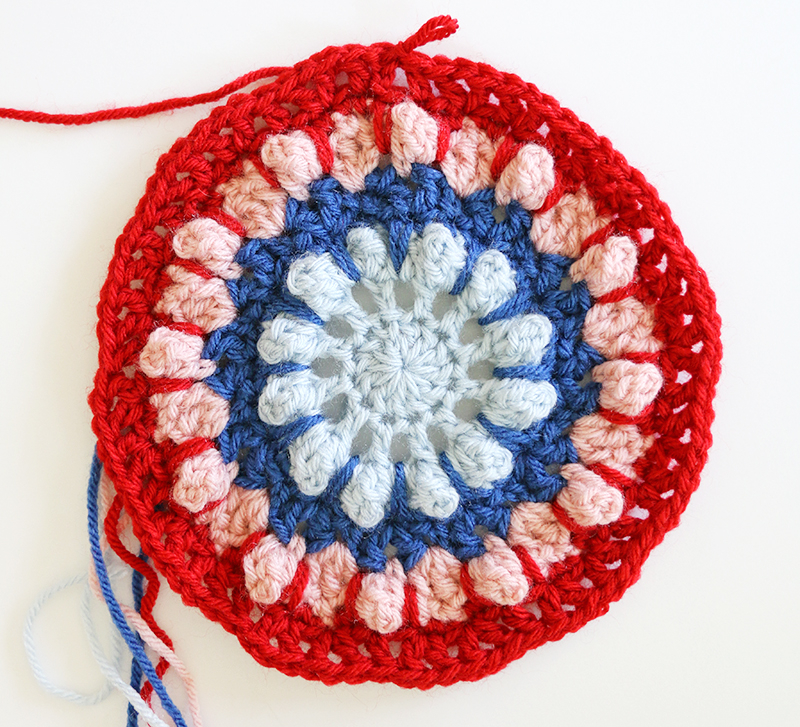
Round 11: Join Color B where the previous round finished off. Ch 2 (counts as dc), (dc, ch 1, 2 dc) all in same st, *skip sc, p, and sc; sc in next st, sc spike in sp between 2 dcs 2 rnds below (see image below), sc in next st, skip sc, p, and sc; (2 dc, ch 1, 2 dc) all in next st, repeat from * around, sl st to join. Finish off Color B.
Work stitches behind and around picots. Picots are separated by either two or three single crochets. Sc, spike, sc is worked over the 2 sc sections, while 2 dc, ch 1, 2 dc shells are worked over 3 sc sections.
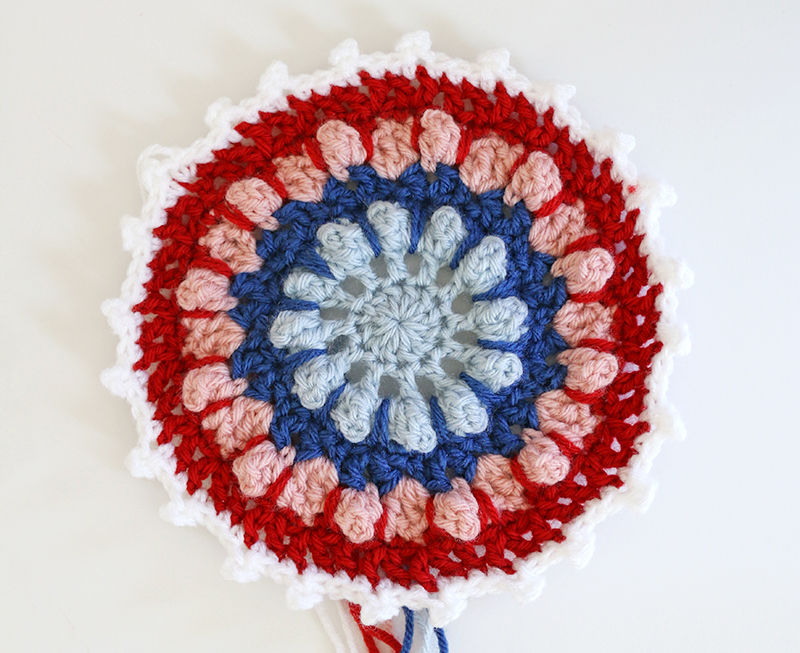
Round 12: Join Color A in ch-1 sp of any (2 dc, ch 1, 2 dc) shell of previous round. Ch 1, sc in same sp, *ch 1, sk 2 dc, hdc in next st, ch 1, 3 hdc in sc spike, ch 1, hdc in next st, ch 1, sc in ch-1 sp, repeat from * around, sl st to join. Finish off Color A.
Round 13: Join Color D where previous round finished off. Working in back loops only, sc in each st and ch around, sl st to join (120 sc sts). Finish off Color D.
Round 14: Join Color C where previous round finished off. Working in back loops only, sl st in next 13 sts, *sc, sk 1 st, hdc, sk 2 sts, (dc, ch 1, dc) in next st, htr, sk 1 st, (2 tr ,ch 2, 2 tr) all in next st, sk 1 st, htr, (dc, ch 1, dc) in next st, sk 2 sts, hdc, sk 1 st, sc (corner formed), sl st in next 13 sts, repeat from * 3 times, sl st to join.
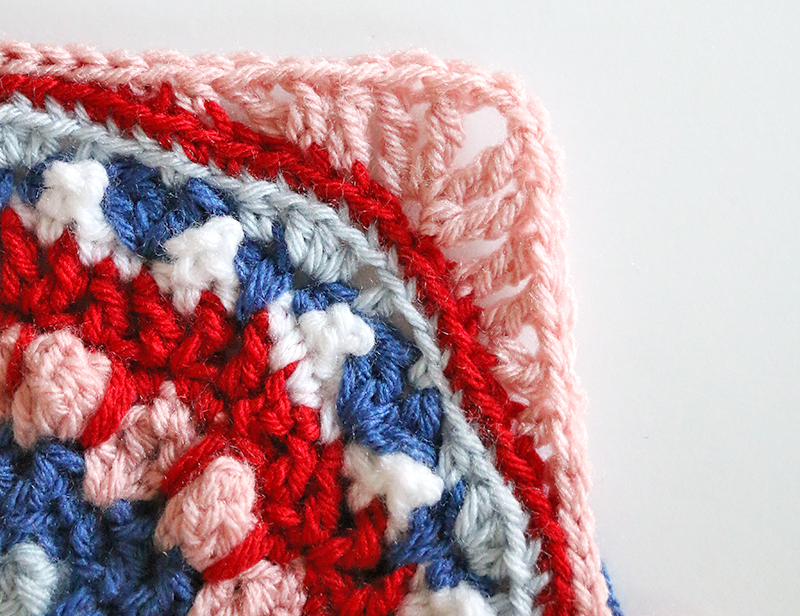
Round 15: Working in back loops only, ch 1, sc in same st, sc in next 13 sts, hdc, hdc, hdc in ch, hdc in next 4 sts, (2 dc, ch 2, 2 dc) all in ch-2 sp, hdc in next 4 sts, hdc in ch, hdc, hdc, *sc in next 15 sts, hdc, hdc, hdc in ch, hdc in next 4 sts, (2 dc, ch 2, 2 dc) all in ch-2 sp, hdc in next 4 sts, hdc in ch, hdc, hdc,repeat from * 2 times, sc in last st. Finish off Color C.
Round 16: Join Color B where previous round finished off. Working in back loops only, Ch 2 (counts as dc), dc in next 22 sts, (2 dc, ch 2, 2 dc) in ch-2 sp, *dc in next 33 sts, (2 dc, ch 2, 2 dc) in ch-2 sp, repeat from * twice, dc in remaining 10 sts. Finish off. Weave in ends.
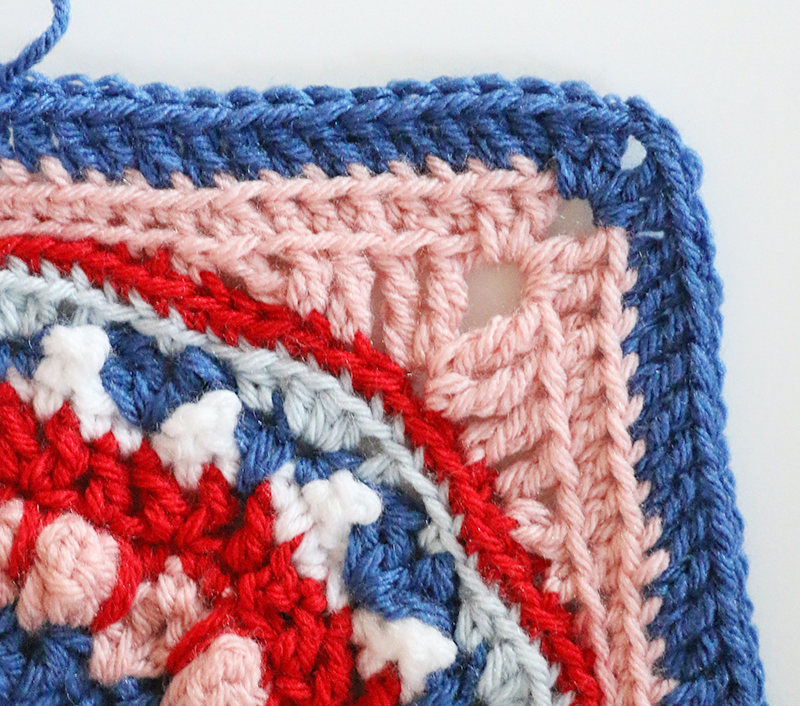
Finish the square off with a double crochet in each stitch and (2 dc, ch 2, 2 dc) in each corner. I like the look for working this round into the back loops only but that is optional.
Because crochet tension varies, your square may end up slightly larger or smaller than 12 inches. If your square looks like it will be bigger than 12 inches, you could try swapping out the last round for sc or hdc. If it is small, add on another round of sc, hdc, or dc stitches.
This square will need some light blocking to pull the corners out a bit more. Just get the square wet and stretch to the right size and shape on your blocking mat. (If you don’t have a blocking mat, I have used an old yoga mat and some pins with good results.)
And that’s it! I am really happy with the way this square turned out. It has lots of texture from the popcorn, spike, and picot stitches, but isn’t too stiff thanks to the skipped stitches and chains. I hope you will like it too and that the photos will help you to create your own. Here’s another version of the square using different colors and changing the colors in different places:
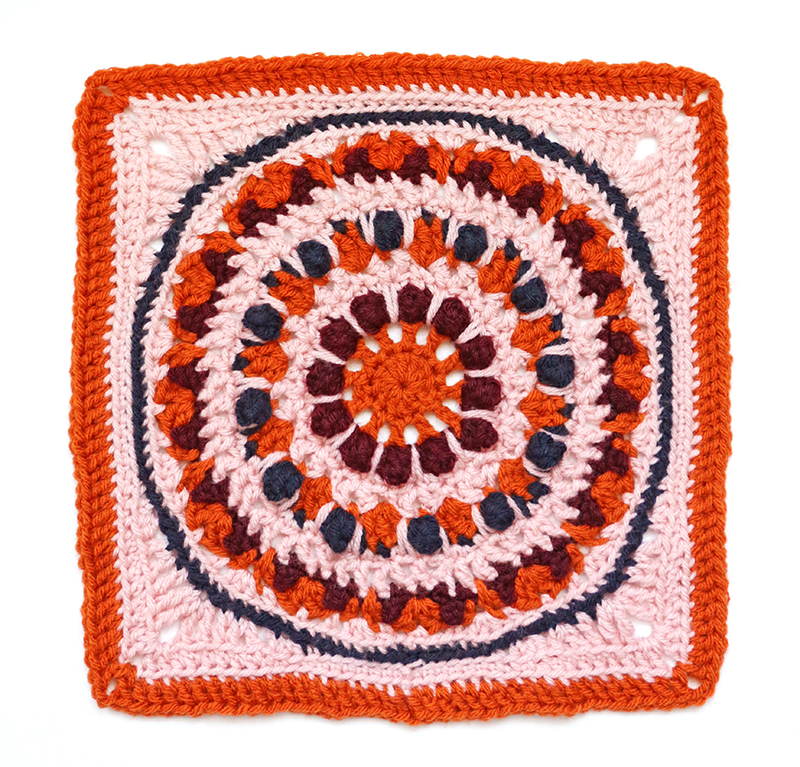
It’s still got that pretty pink, but I switched up the other colors for a look that’s a bit more fall. What do you guys think? Which one do you prefer?
If you have any questions about the pattern, please let me know in the comments, and if you make your own layered dahlia square, I want to see it! you can share your photos to my facebook page or tag me on instagram or twitter (@persialou). Or email me at alexis [at] persialou [dot] com.
Until next time, Happy Making!


Check out all of my free crochet patterns here, or try one of my favorites:
Crochet Feather and Fan Blanket (video!)


Comments + Project Love
Jill Schreier says
can’t print pattern to do
CalamityJanie says
Can you make this pattern available on Etsy without all the ads and stuff? I’d gladly pay a few bucks for this awesome pattern!