This beginner’s guide to the Silhouette Go mobile app will teach you everything you need to know to make your first project in minutes! The Silhouette Go app makes it easier for you to craft with your Silhouette machine on the go! This post was made in partnership with Silhouette and may contain affiliate links, which help to support this site at no extra cost to you. Thanks!
Today, I am going to be talking all about Silhouette Go! If you have been wondering if you can use your Cameo with your iPad or thinking you wanted to try some more mobile Silhouette crafting, then this post is for you!
What is Silhouette Go?
Silhouette Go is a new mobile app that makes it easier to use your Silhouette machine on the go. It allows you to access your library of designs from your mobile device and cut or sketch projects without a computer!
This new app can be used with Android devices as well as iPhones and iPads. The app is free to download, and you can find the right Silhouette app for your device right here.
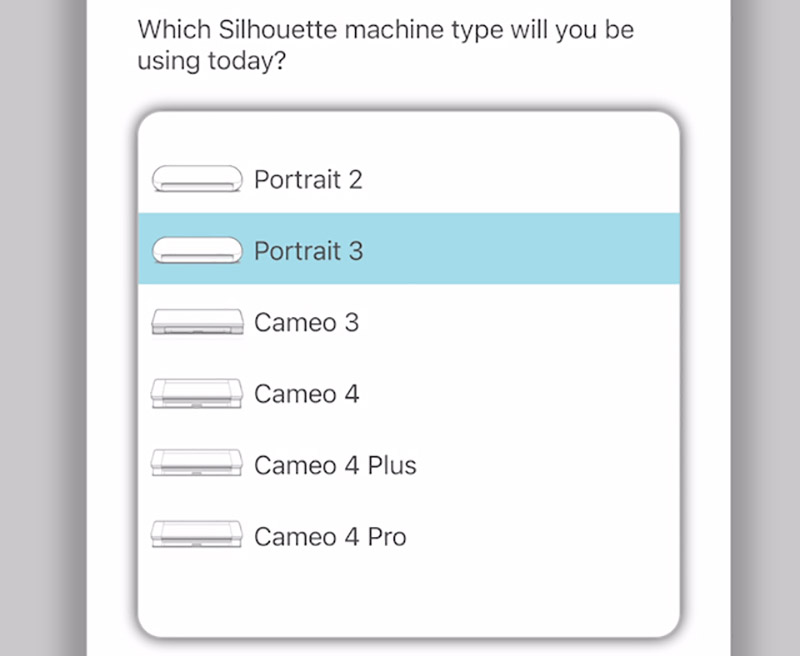
What Machines work with the Silhouette Go App?
The Silhouette Go app only works with those machines that have Bluetooth capabilities, which means the mobile app will only work with Cameo 3, Cameo 4, Cameo 4 Plus, Cameo 4 Pro, Portrait 2, and Portrait 3 machines.
How to Use the Silhouette Go Mobile App
I have put together a video tutorial to walk you through the basics of using the Silhouette Go app. You can watch the video below or keep scrolling for even more details or if you prefer to read.
First, let’s talk about how to open files in the Silhouette Go app.
How to Open Files in the Silhouette Go Mobile App
There are two basic ways to access your cut file designs in the Silhouette Go app:
- Importing your designs into your library through the Silhouette Studio software on your computer.
- Opening SVG files saved to your mobile device.
I find the easiest method is to save your designs to your Silhouette library ahead of time. You can organize your library as you like using folders and search the library using keywords in the app. I will walk you through both methods below.
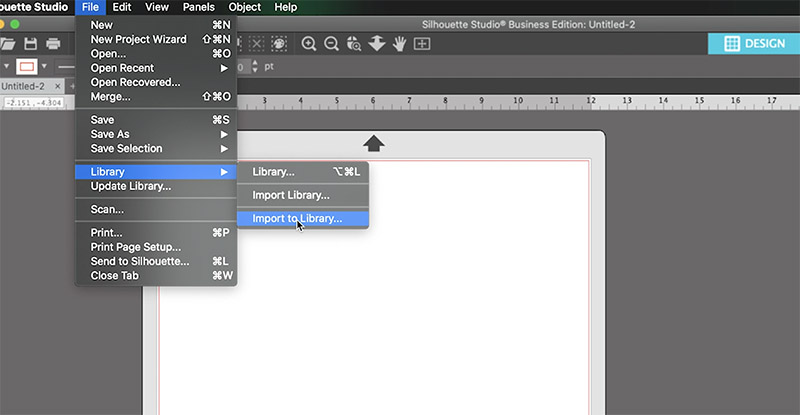
How to Add Designs to Your Silhouette Library
When you first download the Silhouette Go app, you will be prompted to log into your Silhouette account. This will allow all of the designs you have uploaded to your Silhouette library to be accessible through the mobile app.
Designs that you have purchased through the Silhouette Design Store are automatically added to your Library, but you can also easily add your own designs to your Library.
To add designs to your Silhouette library, you will need to use the Silhouette Studio software on a computer. In Silhouette Studio, click File > Library > Import to Library and then find the file you want to add to your library.
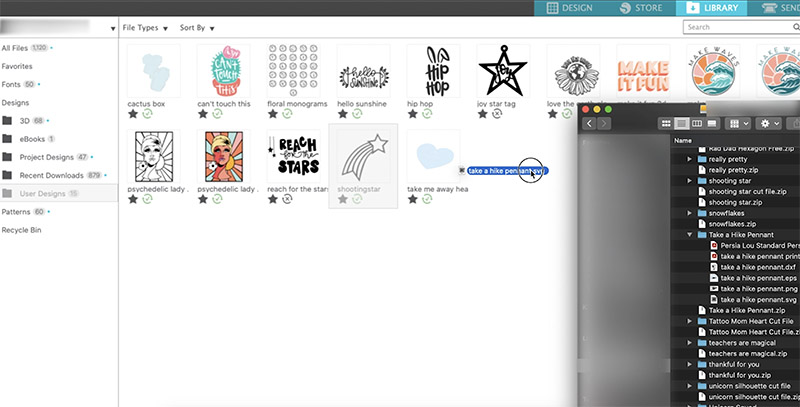
You can also simply drag and drop files into your library in the “Library” tab of Silhouette Studio.
How to Open SVG files Saved to Your Mobile Device in Silhouette Go
You can also open SVG files that you have saved to your phone or tablet in the app. Simply click on the “Device” icon at the bottom of the Library page and then locate the file on your device.

This option is currently only available for SVG 1.0 files, which may mean some of the cut files available to download online might not work with the app unless they are first uploaded to your Silhouette library. For instance, all of the free cut files I offer here on my site are SVG 1.1 files (a more recent version of an SVG file). However, those same designs work just fine in the app when they are first uploaded to the Silhouette library.
Uploading designs to your Silhouette library ahead of time also allows you to use other file types (such as PNGs or DXFs) with the Silhouette Go app.
How to Edit and Arrange Your Design in Silhouette Go
Once you have your chosen design opened in the Silhouette Go app, you can arrange and modify the design the tools included in the app, which I will explain below.
It’s important to note that Silhouette Go is not at all intended to replace the powerful Silhouette Studio design software. Silhouette Go will not allow you to create new designs, but it will let you arrange and scale existing designs to get them ready to cut or sketch.
How to Use the Silhouette Go Tools
Silhouette Go has several basic tools to help you arrange your design on the cutting mat.
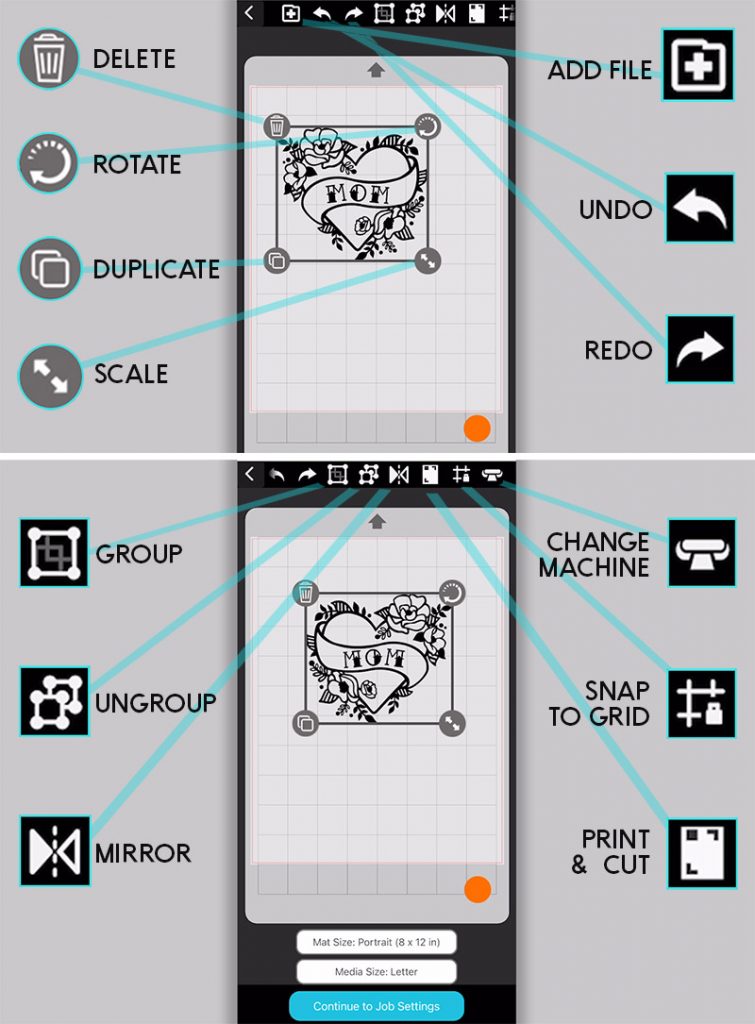
These are all of the tools available for arranging your design in Silhouette Go:
- Delete. Tap the trash can to delete the selected object.
- Rotate. Tap the icon to rotate the selected object by 90 degrees or tap and drag for freeform rotation.
- Duplicate. Make a copy of the selected object.
- Scale. Drag to resize the selected object.
- Add File. Tap this icon to go back to the library screen and add an additional design to your cutting mat.
- Undo. Tap to undo your last action.
- Redo. Tap to redo your last action.
- Group. Tap and drag to select multiple objects and then tap the group icon to join them together.
- Ungroup. Tap to ungroup the selected group of objects.
- Mirror. Tap to mirror (flip horizontally) the selected object. You will need this tool when working with heat transfer vinyl!
- Print & Cut. Turn on the registration marks for Print and Cut projects.
- Snap to Grid. Tap to turn on a smaller grid and then objects will stick to the grid lines as you move them. This can be helpful for lining up elements of your design.
- Change Machine. Tap to change the machine you are working with.
How to Send Your Project to the Machine
Once you have your design arranged as you like it on your cutting mat, you are ready to send to your machine. Click “Continue to Job Settings” and then you can change the material, action, and tool settings.
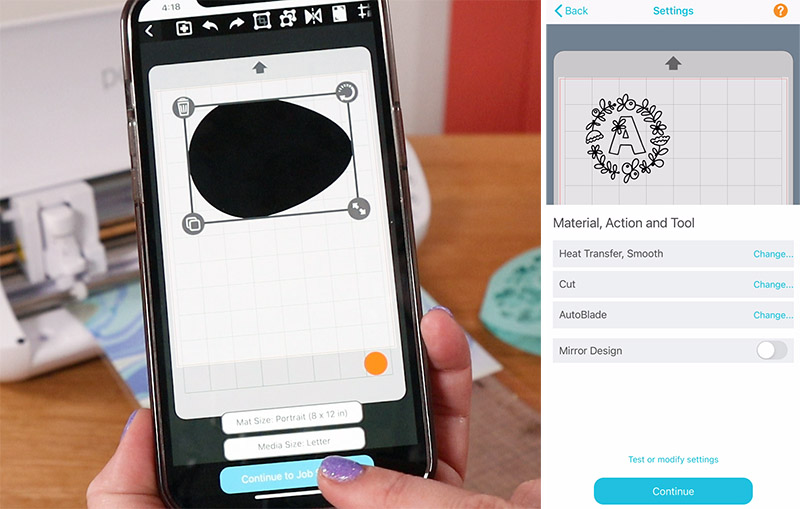
Click on the link above the “Continue” button to adjust your cut settings or do a test cut.
Finally, on the Action preview screen, you can turn on and off cut lines for different parts of the design.
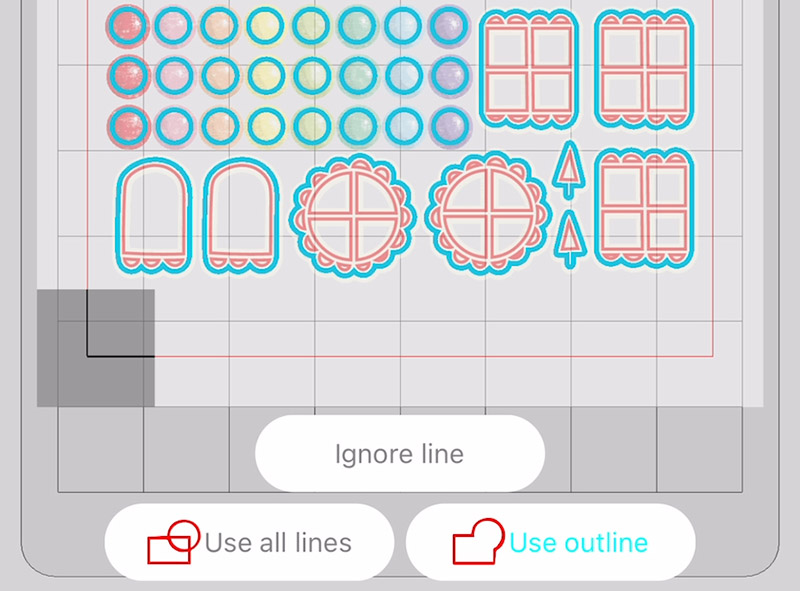
When your settings are just as you want them, click Send, and let your machine do it’s thing.
That’s all there is to using the Silhouette Go app with your Silhouette machine! As I mentioned before, Silhouette Go is not a replacement for Silhouette Studio, but I think this app can be really useful for some situations.
What is the best way to use the Silhouette Go app?
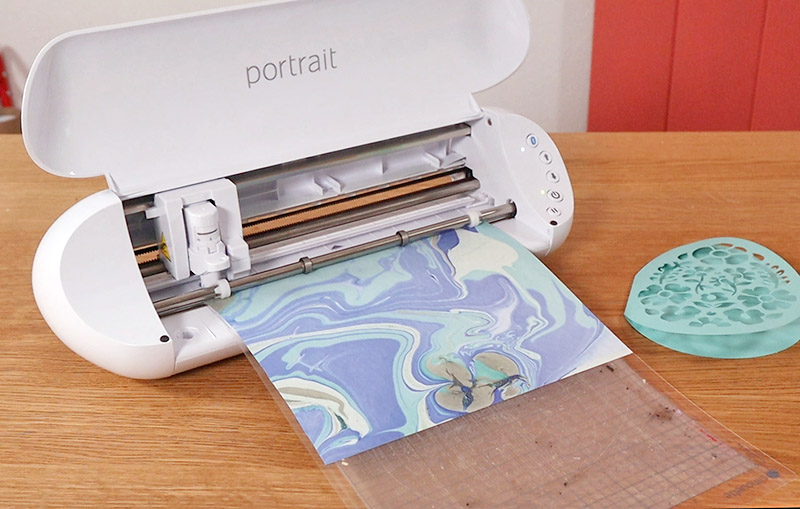
I think the Silhouette Go app would be best for fairly simple projects where you are using existing designs that don’t need much modification. I also love pairing Silhouette Go with my Portrait because it is so small and lightweight!
I really love the idea of using Silhouette Go for an easy crafting party in any location! You could fill a folder in your library with designs for the projects you are working on, and then let the guests cut and craft from that folder. Wouldn’t that be perfect for making onesies at a baby shower??
What do you think?What would you use the Silhouette Go app for?
Until next time, Happy Making!

Check out more Silhouette posts:
[the_grid name=”Silhouette Crafts Footer”]


Comments + Project Love
Nate McGill says
Oh great! Thanks to teaching us this new Silhouette app, I am familiar with computer and smartphones, basically, I am a writer and I like to decorate my writing,
Gail Grace says
Is their a way to purchase designs on the iPad Pro?
Dwayne Pasachke says
Does this software also deal with the webp files?
Cherie Durkin says
Does the Silhouette Go have a save feature?
Thank you!
Tammy says
I have downloaded the Go Ap on both my I phone and I pad, and have went through the set up. However, it seems my designs that I have purchased are showing up but it is showing the Silhouette Design S instead of the actual design. Unless I know the name of the design I have to open to see if it’s the one I want. Any ideals? Love your how to videos!