Learn how to layer heat transfer vinyl with your Silhouette using this cut out technique. I have a full video tutorial to walk you through each step and make layering heat transfer vinyl easy! Plus make a DIY hip hop bunny t-shirt – a perfect boys Easter shirt! This post contains affiliate links, which allow me to earn a small commission at no extra cost to you.
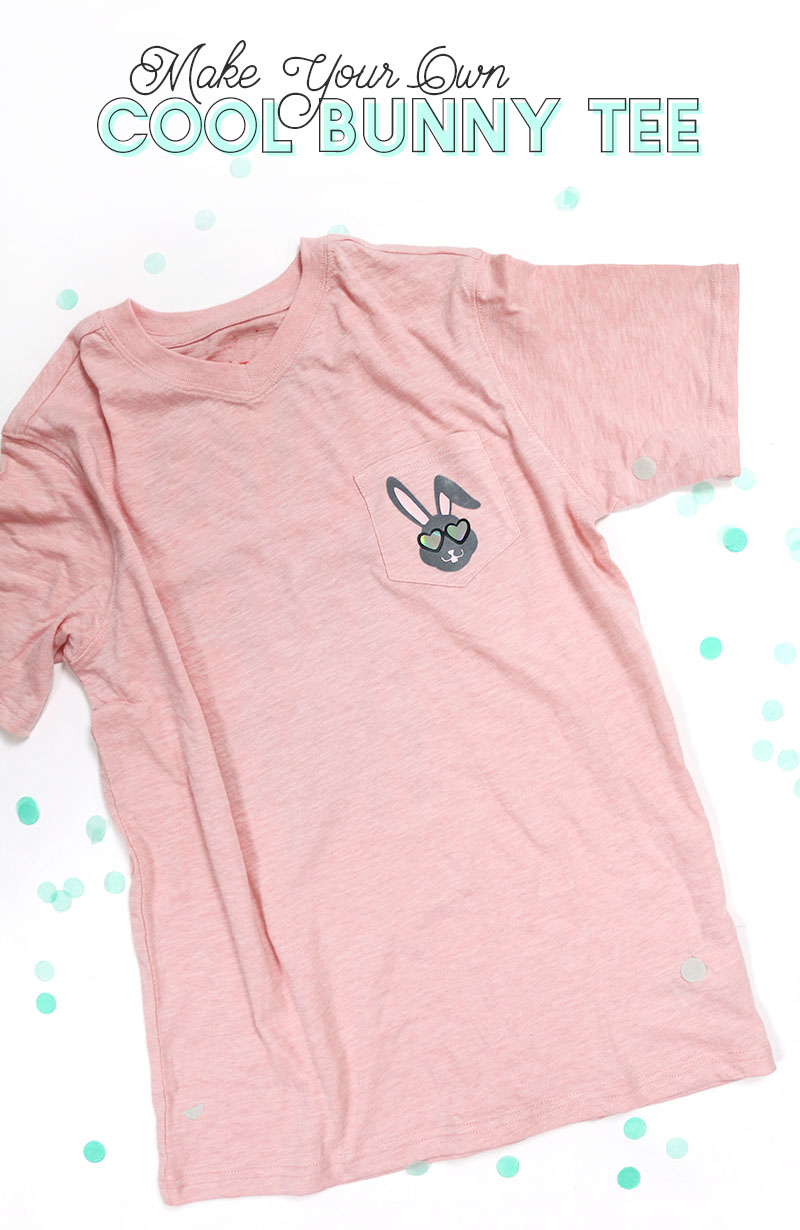
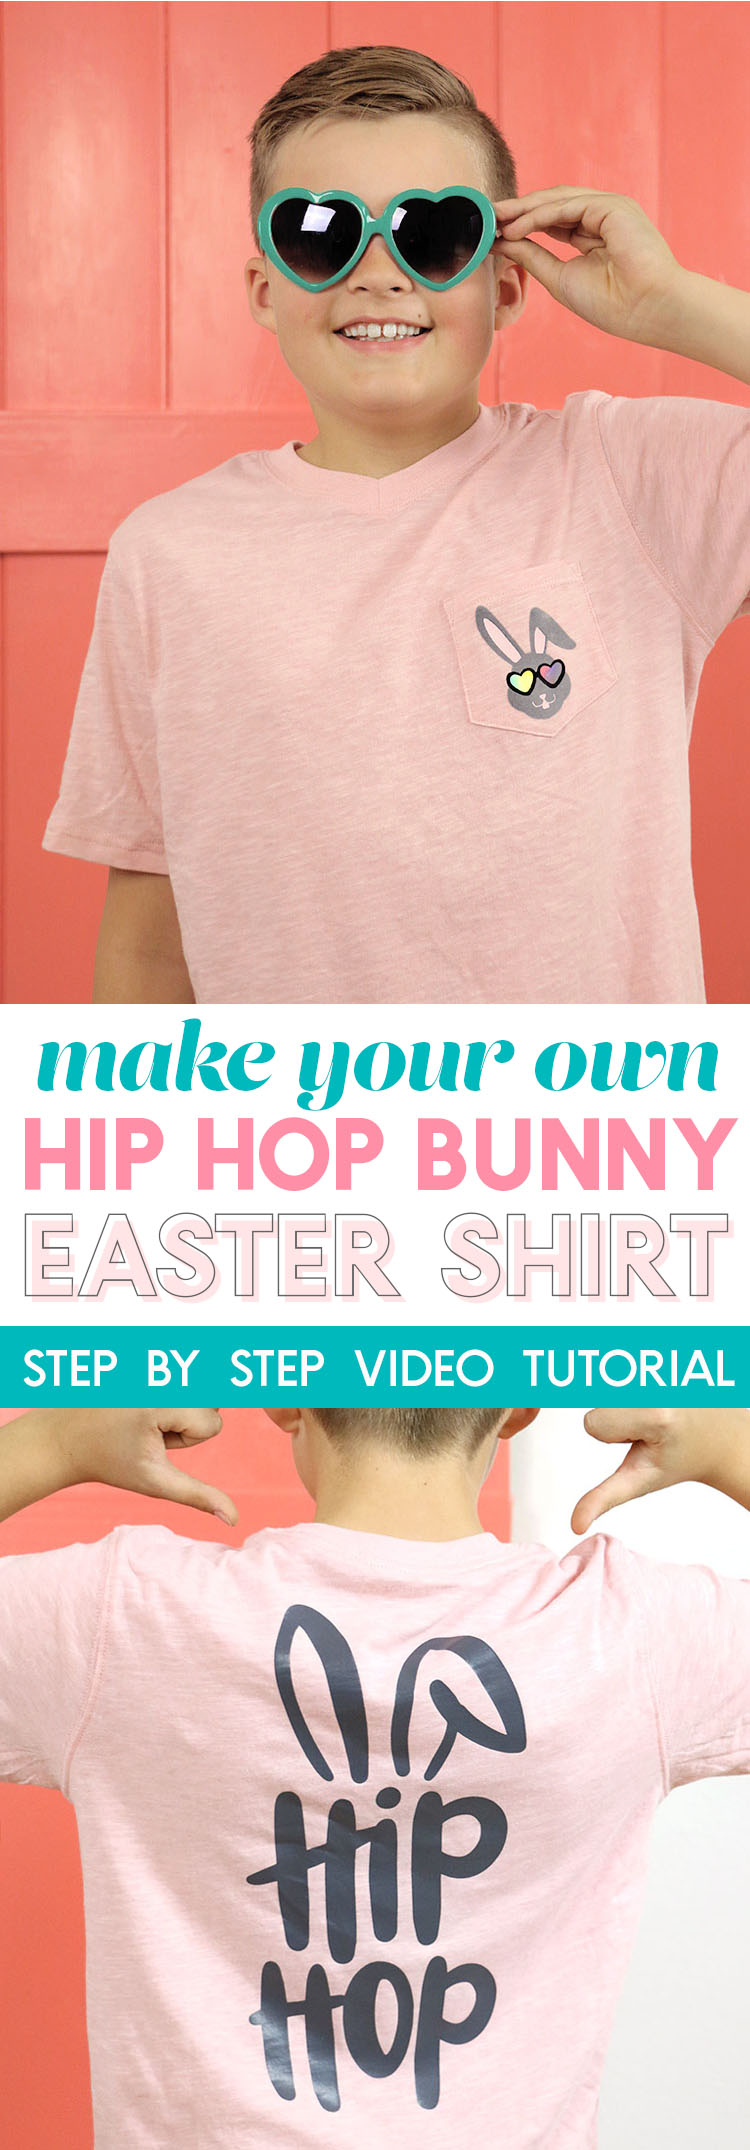
My son is at that age when he is still very much a little kid but old enough to feel that he is growing out of certain things. Do you know what I mean? He still loves bunnies and Easter and all of that, but he also wants to feel like a cool big kid! I feel like this hip hop bunny tee is the perfect fit for this age. It is fun and playful but still just a little bit edgy and cool, especially for a boy’s Easter shirt.

He seems to really love it, and you know what? I LOVE that. I love the “Hip Hop” design on the back, but probably my very favorite part of this little t-shirt is the multi-colored, layered bunny on the front. You can get both of these cute bunny cut file designs in my cut file shop or just by clicking the “Buy Now” button below.
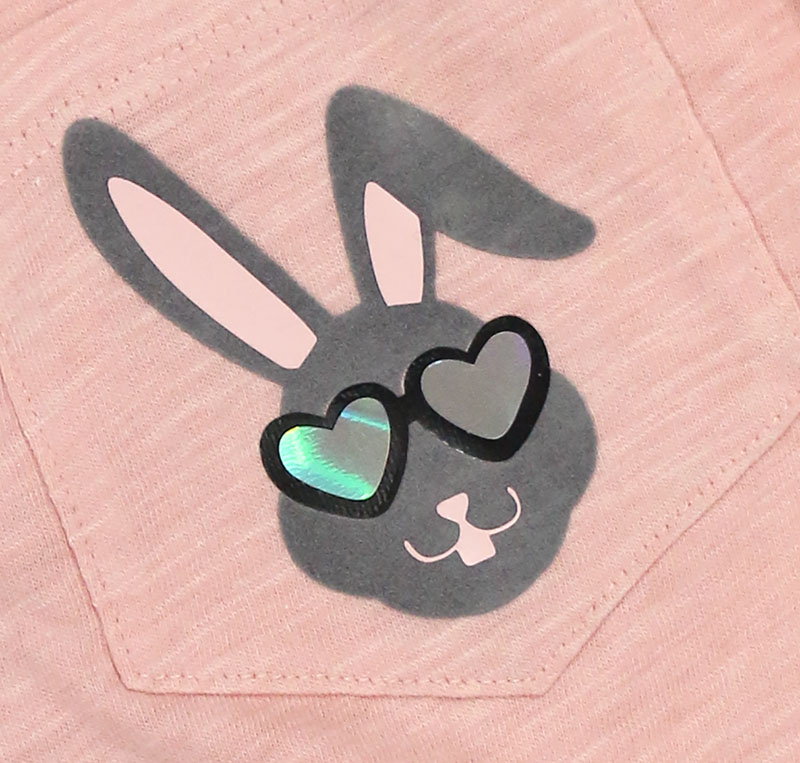
This guy is made with for different kinds of heat transfer vinyl including flocked (fuzzy) and metallic! It makes for a pretty awesome looking bunny. I thought it would be helpful to share a detailed tutorial all about layering heat transfer vinyl, and this little bunny is going to help us do just that!

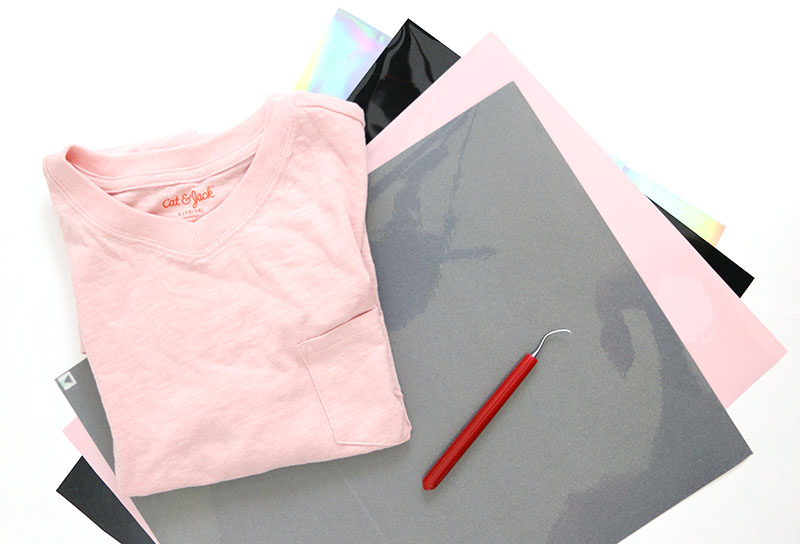
DIY Hip Hop Bunny Boy’s Easter Shirt Supplies:
- My Hip Hop and Sunglasses Bunny Cut Files
- Plain T-Shirt (I got mine from Target)
- Flocked Heat Transfer Vinyl (for the bunny)
- Easyweed Heat Transfer Vinyl (for the ears, mouth, glasses, and shirt back)
- Holographic or Metallic Heat Transfer Vinyl (for the glasses lenses)
- Silhouette Cameo (or other electronic cutting machine)
- Silhouette Studio Designer Edition (necessary for working with SVG files)
- Weeding Tool (this thing is my favorite!)
- Iron or Heat Press
- Ironing Pad
- Parchment Paper or Multi-Use Paper
How to Layer Heat Transfer Vinyl (Cut Out Method)

I have put together a video tutorial to walk you each step of layering the HTV and (hopefully) make it really easy for you to tackle your own layered vinyl projects. I will give a written overview of the steps below as well. 🙂
Step One – Mirror and Size Design
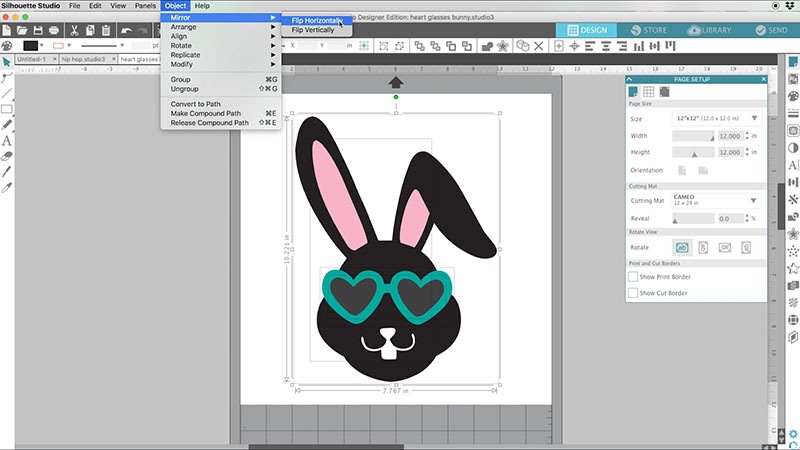
As with any heat transfer vinyl project, you want to maker sure to mirror your design. In the Silhouette Studio software, you can do this by selecting the entire design and then clicking Object > Mirror > Flip Horizontally. Then scale your design to the size you want it to cut at.
Step Two – Fill Design Elements with Color
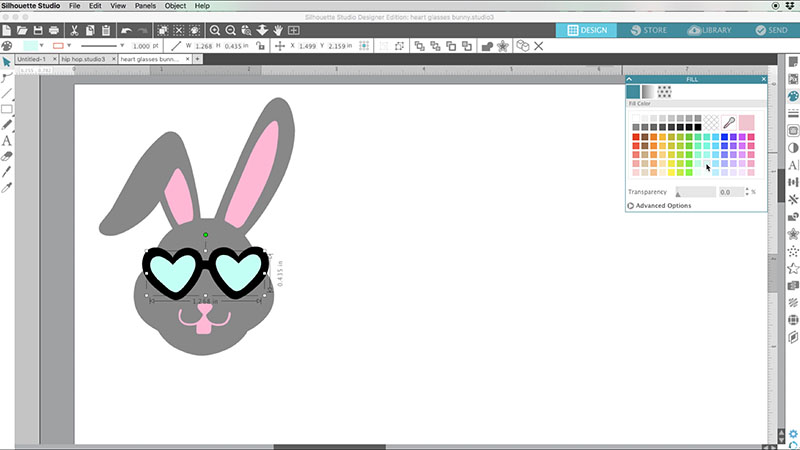
Next, use the Fill panel to change the color of each of your design elements to match the vinyl you will be using for each piece. This will give you an idea of what your final design will look like plus it makes cutting each piece much easier later on.
Step Three – Subtract Overlapping Elements
![]()
Next up is the trick to layering heat transfer vinyl with out the extra thickness of actually putting one layer of heat transfer vinyl on top of another. You can simply apply layers of HTV on top of each other (except for you cannot layer on top of glitter or metallic HTVs), but this method gives you a thinner finished project plus it helps you to easily line up your pieces. (UPDATE: I have made another tutorial for layering heat transfer vinyl without the cutout method that you might want to check out HERE.)
I decided to layer the bunny ears and mouth on top of the bunny head, but I was worried about how the sunglasses might look overlapping the thicker flocked vinyl. Because of this I decided to use this cut out method for layering vinyl. First, I made copies of the glasses and lenses and put them to the side for later. Then, I selected both the bunny head shape and the sunglasses shape and clicked on the Modify panel and then selected Subtract. This cuts the sunglasses shape out of the bunny head shape.
Next, I used the offset tool to make the sunglasses shape just slightly larger to avoid gaps between the two pieces when layering. I repeated this process to cut the lenses out of the sunglasses shape, and then I was ready to cut.
Step Four – Cut by Fill Color

In the Send tab, under “Action,” click on Action by Fill. This will separate each of the different colored design elements into their own individual layers, which makes it super easy to cut each part of the design separately from each piece of vinyl. (Read more about how to cut by color with your Silhouette HERE.)
Step Five – Weed
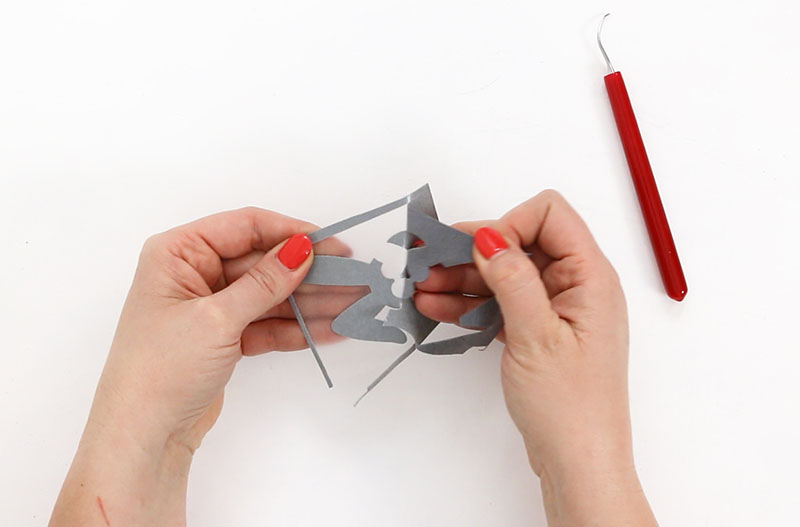
Use your weeding hook to remove all the excess vinyl from around your design.
Step Six – Iron on Each Layer
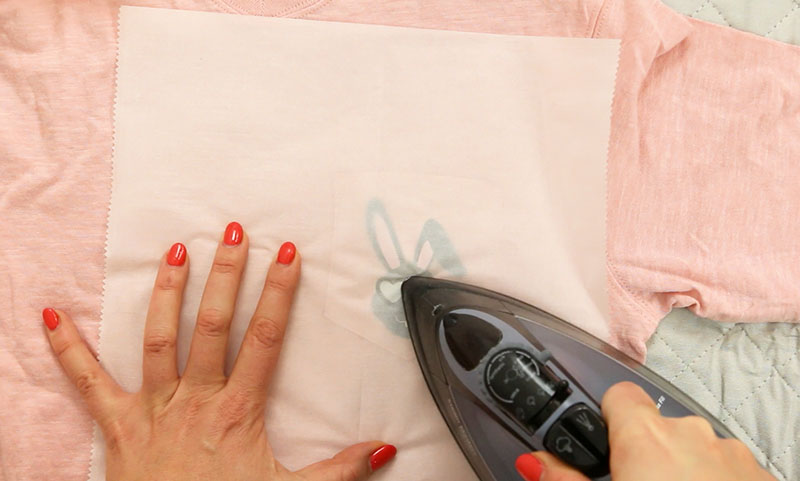
Starting with the bottom-most layer, apply the design to your shirt using an iron on the cotton setting with the steam turned off (or use a heat press or Easy Press). It is important to not give the first layers too much heat right away because they will continue to be heated with each additional layer. Flocked heat transfer vinyl is a great base layer because it is a bit tougher than regular thin HTV.
After the flocked vinyl has had a chance to cool, remove the clear plastic backing, and apply the next layer. Be sure to cover the design with a piece of parchment paper or multi-use paper to protect the previously applied vinyl from the iron. Repeat this process until all the layers have been applied.
And that’s it! I’m so happy with the way this cute shirt turned out.


Check out more vinyl projects here:
[the_grid name=”Vinyl Projects”]


Comments + Project Love
Cecilia Hernandez says
I couldn’t see the tutorial video. It wasn’t working. But the explanation helped.
Kristine says
This was such a helpful tutorial. Thanks for making time to put this together!
Trudie says
Thanks for the very informative video. Getting closer to having the nerve to try. Thanks for sharing. BTW, loved the shirt.
Rachel says
How do the edges of the plastic not leave impressions on the vinyl that’s already pressed?
Annie says
I want to thank you for your well written instructions for using htv. I am new to this , and have watched a couple of videos, but got more clarity from your site. So grateful!