Learn how to work with etched glass vinyl and make a beautiful snowflake glass cloche to decorate your home this winter. I am also sharing a free snowflake svg cut file that you can use for all kind of winter-themed crafts! A big thanks to Expressions Vinyl for sponsoring this post. This post contains affiliate links, which provide me with a small commission at no extra cost to you.

If you have ever etched glass using etching cream and a stencil, you know that it can be a smelly and slightly stressful project. You need glove and have to move fairly quickly and if you get one drop of etching cream out of place it can make your project less than perfect. I really do love the results you can get using etching cream, BUT if you are looking for a much easier way to get a really similar look, then this is the post for you.
Today we are talking all about etched glass vinyl. This stuff is great! It works just like a regular permanent adhesive vinyl, but it gives you the look of etched glass! It comes in four colors and will help you make custom glass decor for your home easily.
I used the clear color to add snowflakes to a glass cloche to make a pretty winter decor piece, but you can use this technique to create all kinds of items (custom mirrors, glass candy jars, etched picture frames, etc., etc.) Ready to get making?
Etched Glass Vinyl Snowflake Cloche Supplies:
- Glass Cloche or Bell Jar – I picked mine up at Hobby Lobby but this one on Amazon looks very similar
- Etched Glass Vinyl
- Silhouette Cameo, Cricut, or other electronic cutting machine
- Weeding Tool (this one is my favorite, and I recommend it 100%)
- Transfer Tape
- Application Tool
- My Free Snowflake Cut Files (Click to HERE to download the SVG, PNG, and DXF files in a ZIP file. Cut files are free for personal use ONLY. You can purchase a commercial use license HERE.)

How to Work With Etched Glass Vinyl
Etched glass vinyl is basically the same as any other permanent adhesive vinyl. The only difference is that it is semi-transparent and give you that cool etched glass look. If you have worked with adhesive vinyl before, then you will find this whole process very familiar, but if you haven’t – don’t worry – I will walk you through each step.
Etched Glass Step One – Prepare Design & Cut
Start by opening the snowflake svg file (or one of the other files) from the supply list above in your cutting machine software. The file contains six different snowflake designs. You can copy and paste the designs to make more of the same style and scale the snowflakes to create different sizes. When you have your snowflakes scaled and ready to cut, adjust the cut settings in your software. I use a Silhouette, and for this vinyl, my cut settings were blade – 1, speed – 5, and thickness – 10.
I always recommend doing a test cut, especially when working with new materials. This will help you to adjust your cut settings if necessary and avoid wasting any of that precious vinyl.
Finally, send the file to your machine to cut.
Etched Glass Step Two – Weed
After your snowflakes are done cutting, you need to remove the excess vinyl from around the design. I love my Siser hook for weeding, but even a straight pin or tweezers will do the trick.
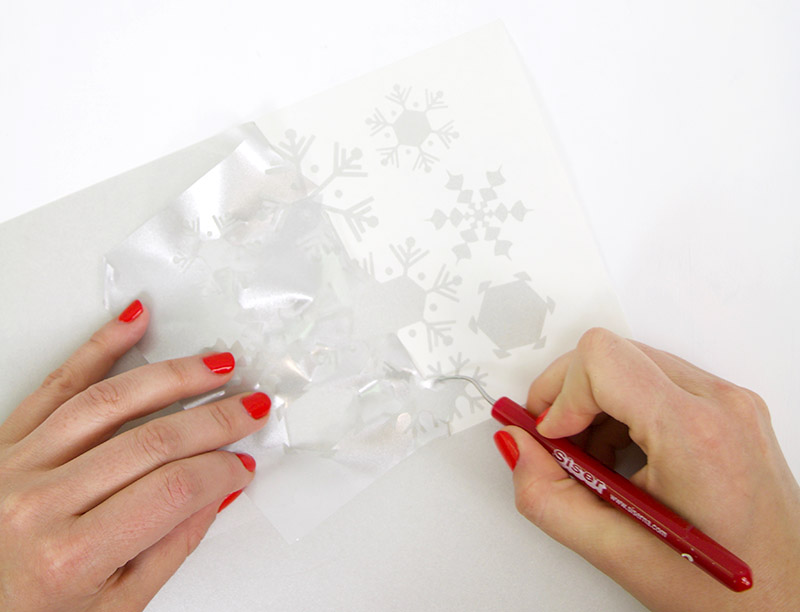
Go really carefully around these small details to avoid losing any pieces. You can see I lost one of the small dots from that snowflake up in the corner from going a bit too quickly. For intricate designs like these you may also want to try the reverse weeding method, which I explain in this post.
After removing the vinyl from around your snowflakes, use your hook or pin to carefully remove the pieces from inside the snowflake designs as well.
Etched Glass Vinyl Step Three – Apply Transfer Tape
Next, we will use transfer tape to transfer our cut decals from the paper backing to our glass cloche. Start by applying a piece of transfer tape to the top of the decals. Then, use your application tool to smooth the transfer tape down and attach it to the vinyl.
![]()
![]()
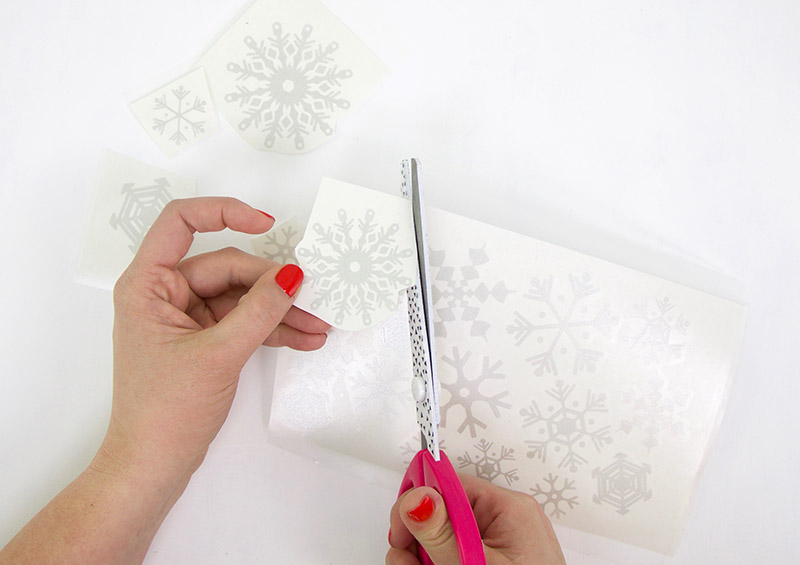
If you cut a bunch of snowflakes close together like I did, then now is a good time to cut them apart from each other with a pair of scissors. This will make it easier to apply them individually to the glass.
Now we are ready to apply some snowflakes!
Etched Glass Vinyl Step Four – Apply Decals
Before the vinyl to your glass surface, you may want to wipe the glass surface off first with some rubbing alcohol. This cleans and prepares the glass to help you get a really good application. Once the surface has dried completely, you are ready to go.
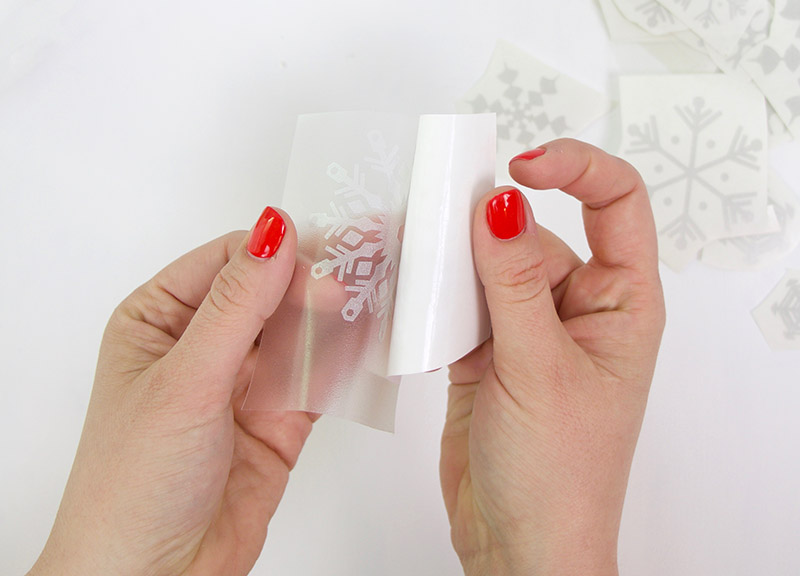
Start by carefully peeling the transfer tape and vinyl off of the backing. If some of the pieces don’t want to come off the backing, try rubbing the transfer tape down on the decal again.
Then, carefully place your decal onto your glass cloche and smooth it down with your fingers being careful to avoid wrinkles. Next, use your application tool to burnish the decal onto the glass surface. The vinyl’s adhesive is activated by pressure, so this step is essential to getting a good, permanent application.

Finally peel off the transfer tape, and continue the process with your next snowflake.

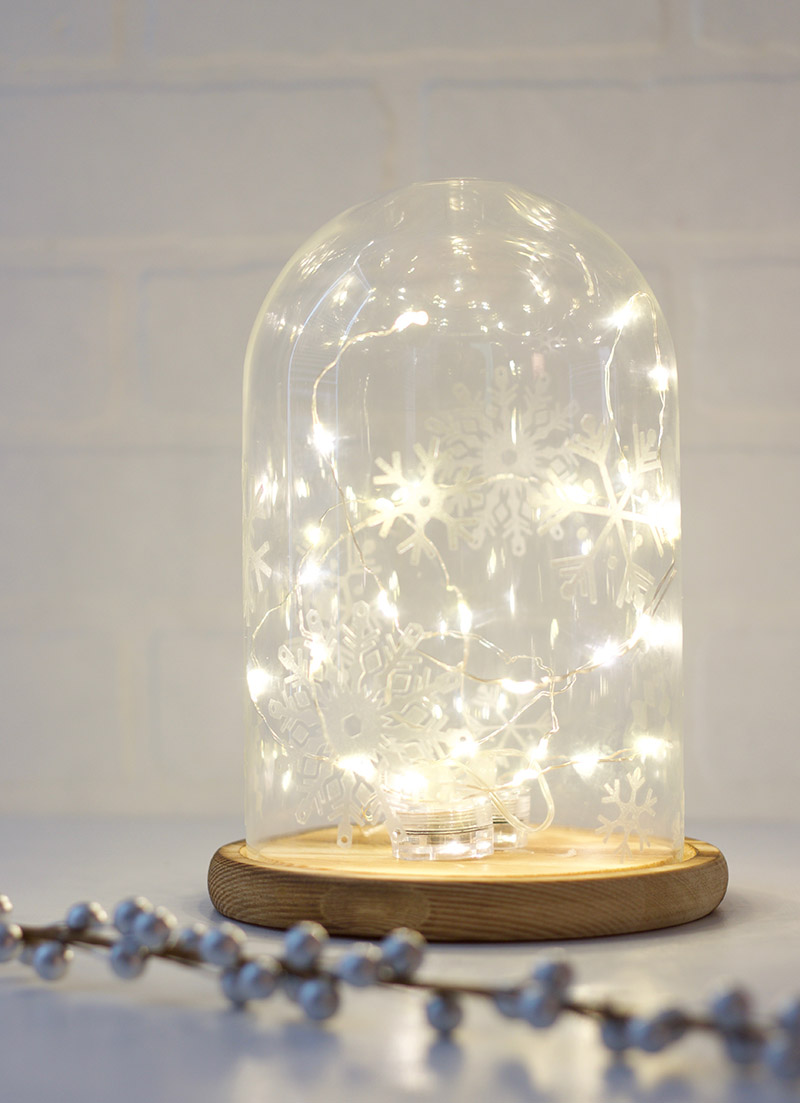
Isn’t it pretty? I just love how easy it is to get that etched glass look with this vinyl. I have so many ideas rolling around in my head for how to use this stuff next. For now though, I filled my cloche with some fairy lights, and I love how pretty it looks lit up in the evenings.
What would you make with etched glass vinyl? Tell me about it in the comments. 🙂
Until next time, Happy Making!

Check out more vinyl projects:
[the_grid name=”Vinyl Projects”]


Comments + Project Love
Ashley says
Great tutorial, this is such a cool idea! Just wondering how this holds up when washed? Probably wouldn’t wash this particular item, but I am interested in using this vinyl for etching dishware (like casserole dishes and drinking glasses).
Alexis says
Hi Ashley! I have not tried washing the etched glass vinyl yet, but I think you should be okay with hand washing. This vinyl has a permanent adhesive like the vinyl I use on my mugs (https://persialou.com/2016/09/how-to-diy-personalized-mugs-and-tea-cups-with-vinyl.html), so I think it should work similarly to that vinyl. You might be able to get away with putting it in the dishwasher (I do sometimes and usually it comes out fine), but handwashing is definitely recommended to keep your design looking perfect. All of that said, I would not use it on a casserole dish. I think the vinyl would likely melt in the oven (especially if it was placed on a hot metal rack or something like that). I hope that’s helpful!
Ashley says
Thanks so much for the quick reply! Good point on the oven- I will try it for glassware but do traditional etching for the casserole dish! Love love love your blog!!
Robin Smith says
Hello,
would your technique work for a glass waxed candle that would eventually be used?
Thank you
Alexis says
I haven’t actually tried it on a glass candle, but I think it would work. My only concern would be the heat, but I have used adhesive vinyl on mugs that have had hot liquid inside without an issue, so I think you should be good.
Becca Taylor says
Thank you for this tutorial! This is my first project with vinyl and your tips have given me the confidence I need to get started! I’m using the snowflakes for a mirror in my daughter’s Frozen room. 🤞