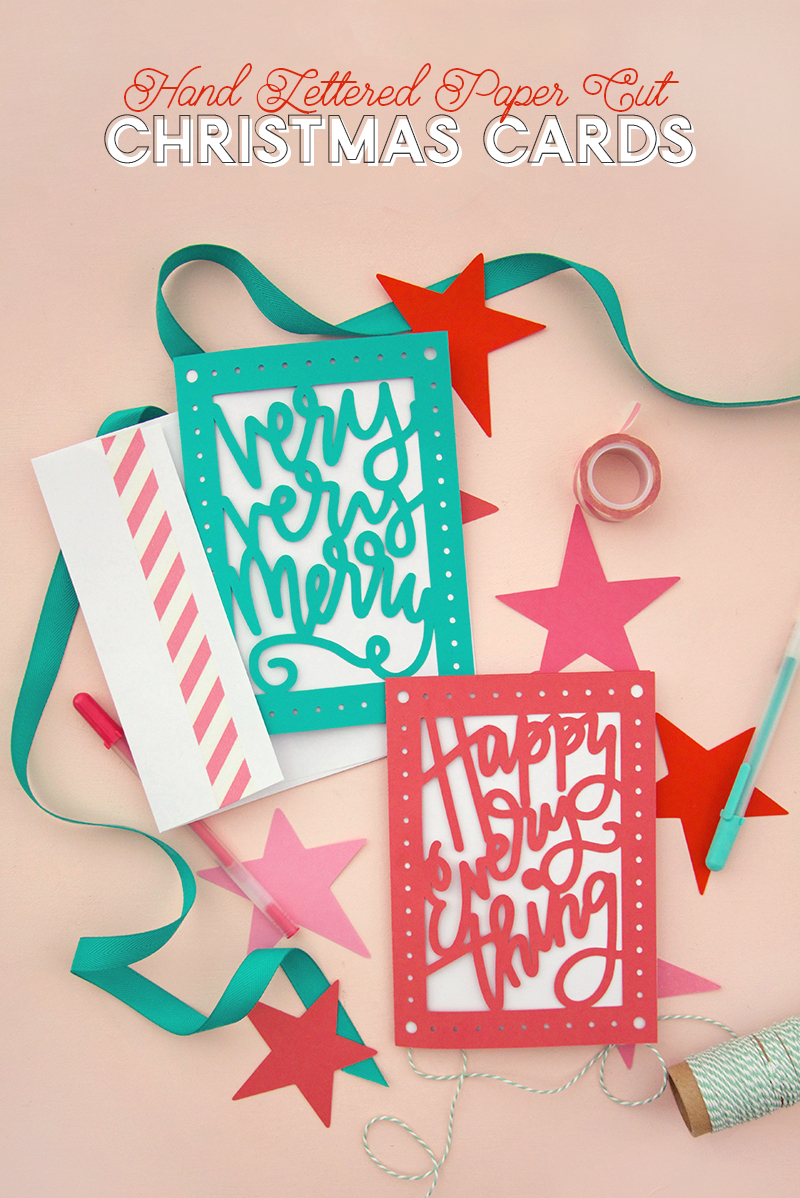
Still need to send out a Christmas card or two? Don’t worry! You can make some beautiful, hand-lettered paper cut Christmas cards in no time at all with my free cut files! I originally shared this Christmas Card DIY at Crafts Unleashed. This post contains affiliate links, which provide me with a small commission at no extra cost to you.
Guys. Isn’t paper cool? I really love paper. I mean I also love paint and yarn and fabric and vinyl and all kinds of craft supplies, but there is just something awesome about paper, right?
It’s such a simple thing, but it has so much potential – so many things you can do with it! Today, I’m taking some colorful paper, cutting it up, and making these cute and festive holiday cards.
Who’s ready for a Christmas Card DIY?

If you have ever tried intricate paper cuts by hand, you know it can be a little tricky and time consuming. I’m taking a big shortcut with these cards and bringing in my trusty Silhouette Cameo to take care of the tricky part for me, which means you can make a whole stack of these cards in no time at all. Here’s what you need to make your own.
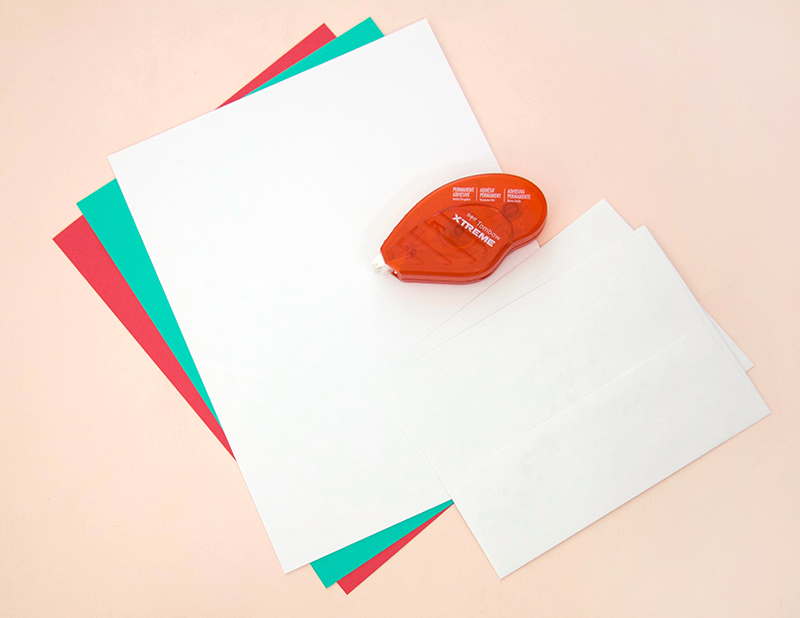
Paper Cut Christmas Card Supplies:
- Colored Cardstock
- White Paper
- A7 Envelopes
- Permanent Adhesive
- Paper Trimmer
- Silhouette Cameo or Cricut (or a Craft Knife and patience)
- My Free Christmas Card Cut Files (Click to HERE to download the SVG, PNG, Studio, and DXF files in a ZIP file. Cut files are free for personal use ONLY. You can purchase a commercial use license HERE.)
Paper Cut Christmas Card DIY
First we will need to prepare the file before cutting. Start off by downloading one of the cut files from the supply list above. (If you don’t have an electronic cutting machine, but do have some time and patience, you can print the PDF file onto colored cardstock and cut out the design using a craft knife. It could also make a fun coloring page card.)
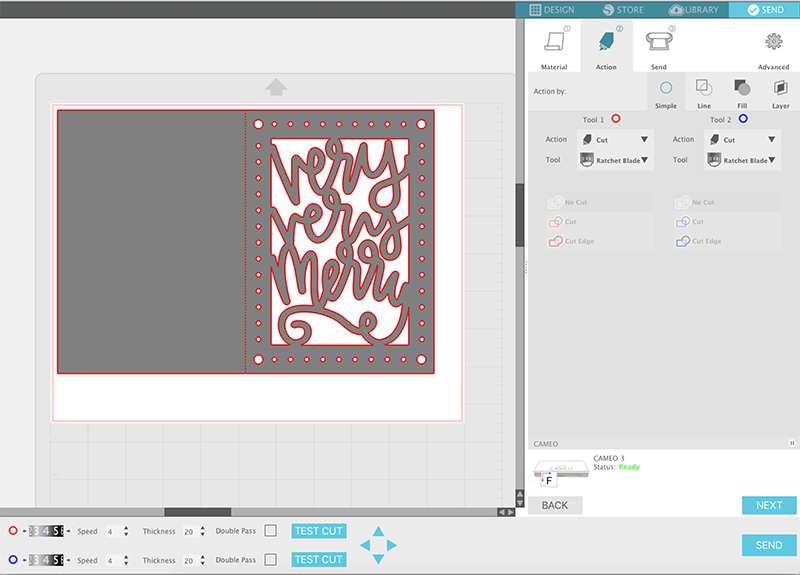
Open the file in your software (I’m using a Silhouette), and make sure you have your settings properly adjusted for cutting cardstock. Place the cardstock onto your cutting mat, load it into your machine, and send it to the machine to cut.
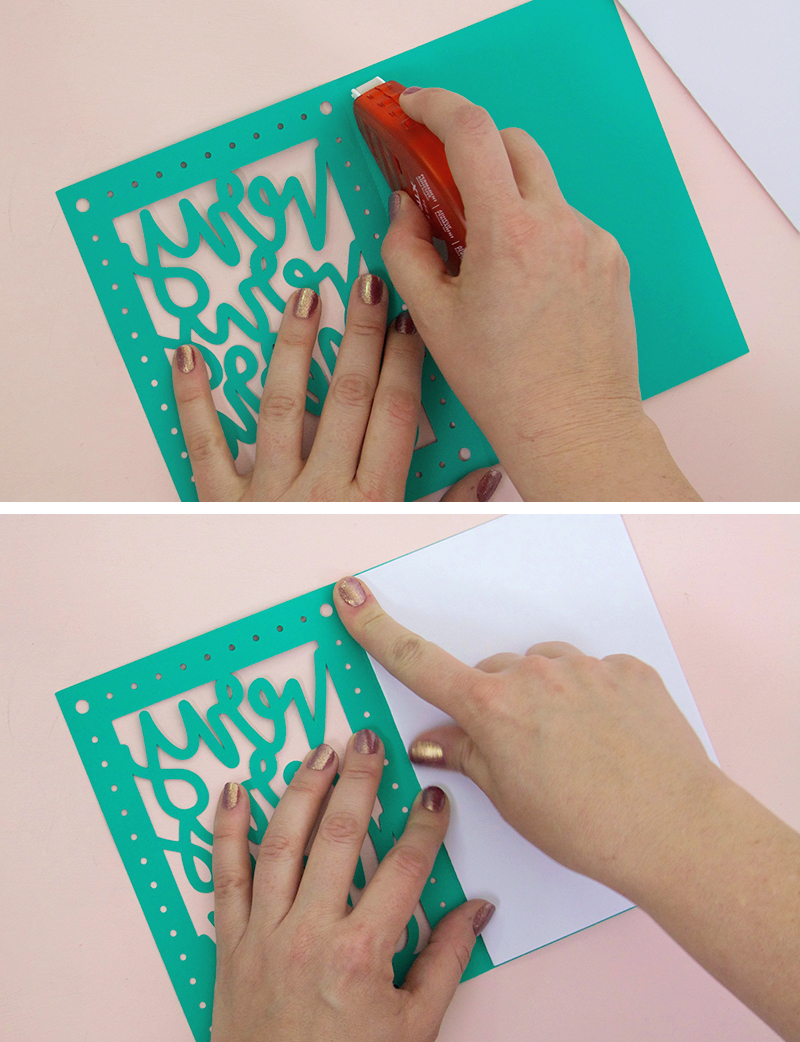
After the machine is done cutting, very carefully remove the card from your cutting mat. To keep the cardstock from curling up too much, try to peel the cutting mat away from the cardstock instead of peeling the cardstock off of the mat.
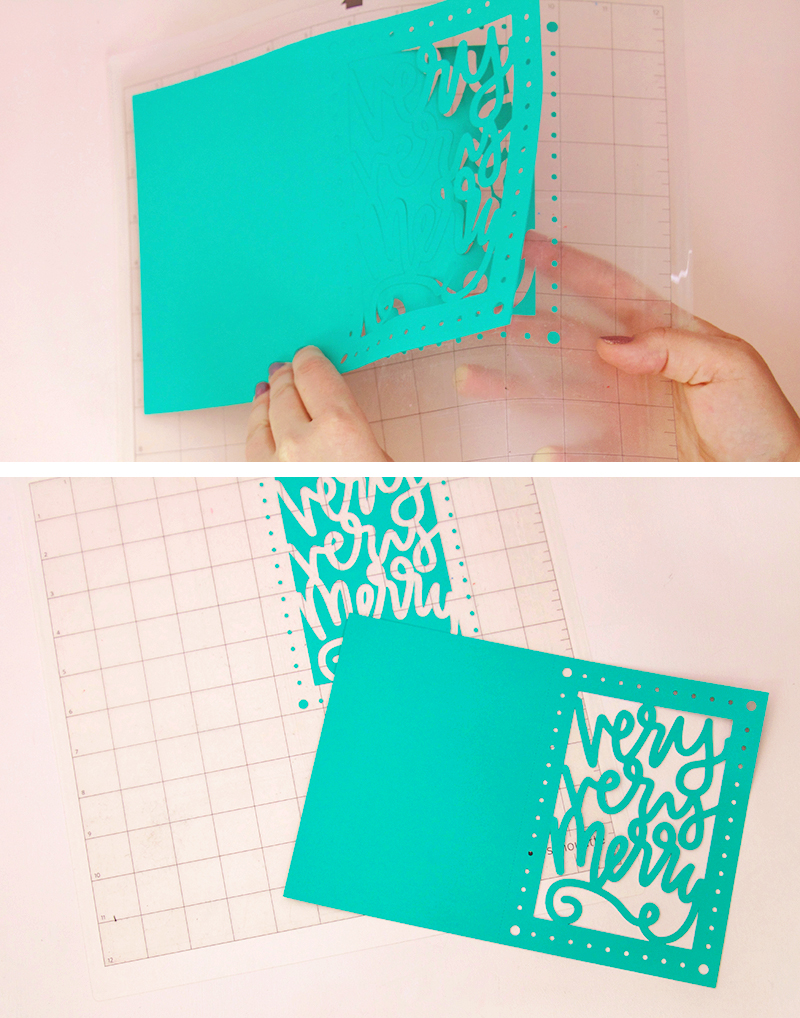
Fold the cardstock in half. I included a perforated fold line in the cut file to make it easy.
Next, we will make a liner for our card. Cut a piece of white paper down to 9.75″ x 6.75″ using your paper trimmer and then fold the paper in half to form the liner for your card. Use a permanent tape runner or other adhesive to attach the white liner to the back of the card close to the fold line.
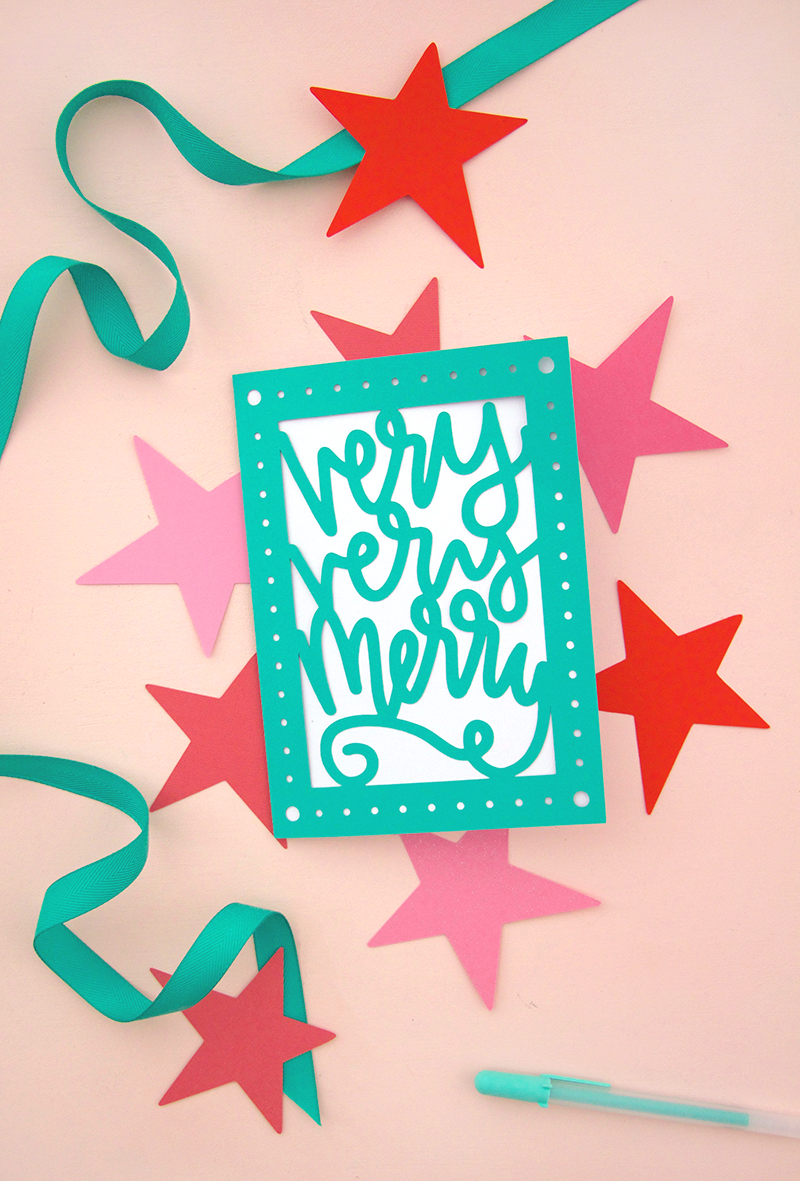
And that’s it! Write a note inside the card, slip it into an envelope, and maybe finish it off with some stickers or washi tape. Your cute little paper cut Christmas card is all ready to send!

Happy Holidays and Happy Making!

Check out more of my cut files here:
[the_grid name=”Cut Files Footer”]


Comments + Project Love
Jocelan Perry says
Thank you for sharing .
Alexis R says
This is so cute! And my name is Alexis, too!