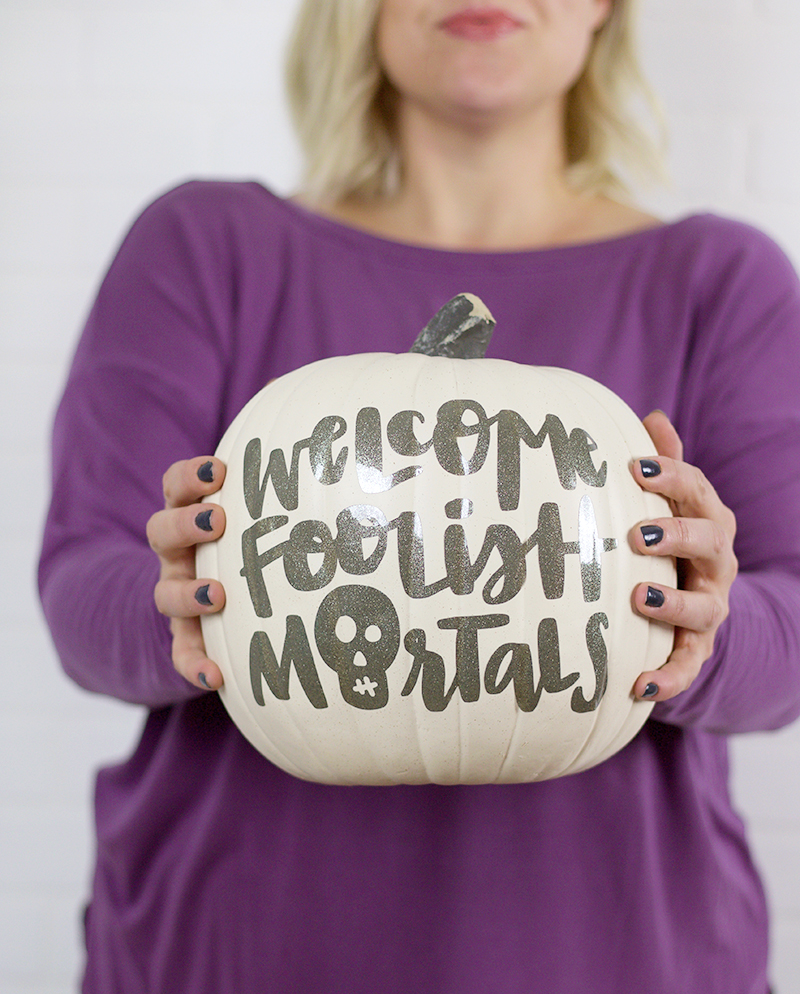
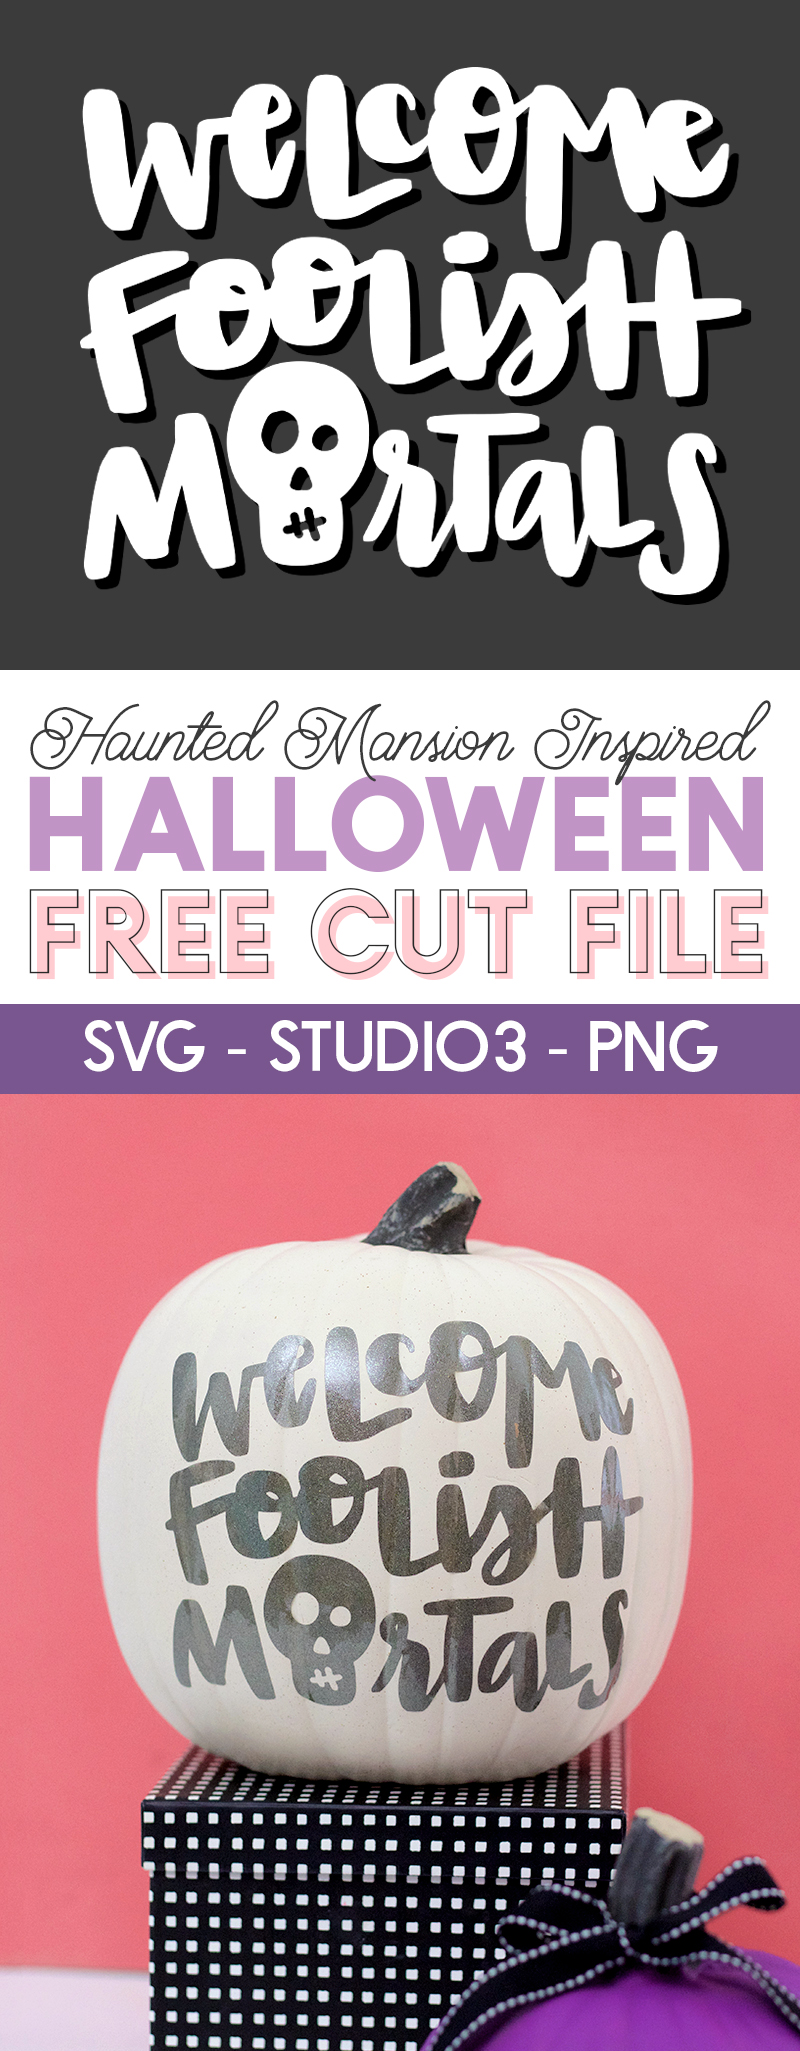
I have a fun little Haunted Mansion inspired Halloween craft to share with you all today – a simple no-carve pumpkin craft! But this free SVG cut isn’t just for pumpkins! You can use it to create all kinds of projects to decorate your Halloween home this year. A big thanks to Expressions Vinyl for sponsoring this post, which also includes affiliate links that help to support this site.

I am a huge Disneyland nerd. HUGE. It’s been a little while since we have been able to get there, so I’m bringing some of that Disney Halloween magic into our home with this little Haunted Mansion inspired no-carve pumpkin craft.
I created this little svg cut file design using my ipad pro and apple pencil, and it’s pretty much the best way to welcome people to your home this Halloween season. 🙂 I kept things simple with this project and just added some fun glitter vinyl to a little craft pumpkin, but you could use the design for so many things. How about cutting a stencil and painting the design on a welcome mat? OR you could also add it to a sign or wreath. So many possibilities!
If you want to make your own Haunted Mansion pumpkin (or other craft!) here’s what you will need.
Haunted Mansion Inspired Pumpkin Craft Supplies:
- Craft Pumpkin (or a sign maybe?)
- Adhesive Vinyl (Expressions Vinyl has some awesome glitter options. I used Transparent Glitter in Dark Grey but would love to get some of the Glitter FX in Galaxy Black.)
- Silhouette Cameo or other cutting machine
- Transfer Tape (The clear transfer tape is my very favorite, and one roll will last you forever.)
- Weeding Tool
- Application Tool (optional, but helpful)
- Welcome Foolish Mortals Design – Download the SVG, Studio 3, or PNG file
How to Make a Haunted Mansion Inspired No-Carve Pumpkin
Step One – Cut Your Vinyl
Start by downloading the cut file from the supply list above. Open the file in your cutting machine software. Size the design to whatever size you want your decal to be. Make sure the design has been marked to cut in your software.
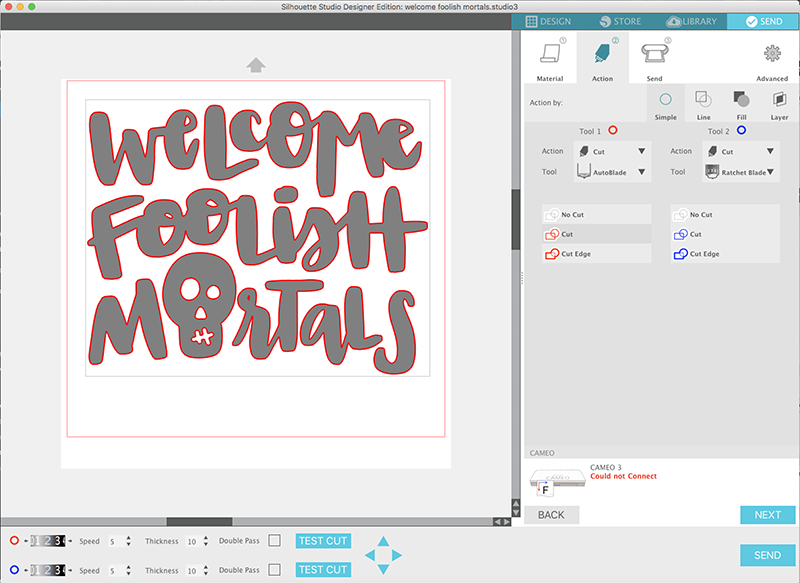
If you are cutting adhesive vinyl as I did for my pumpkin, you want the image to cut just the way it will read when it is on the finished project. If you are making anything with heat transfer vinyl (a t-shirt or tote bag, for example) you need to be sure to mirror your image. Adjust your cut settings as necessary, and send it to cut!
Step Two – Weed
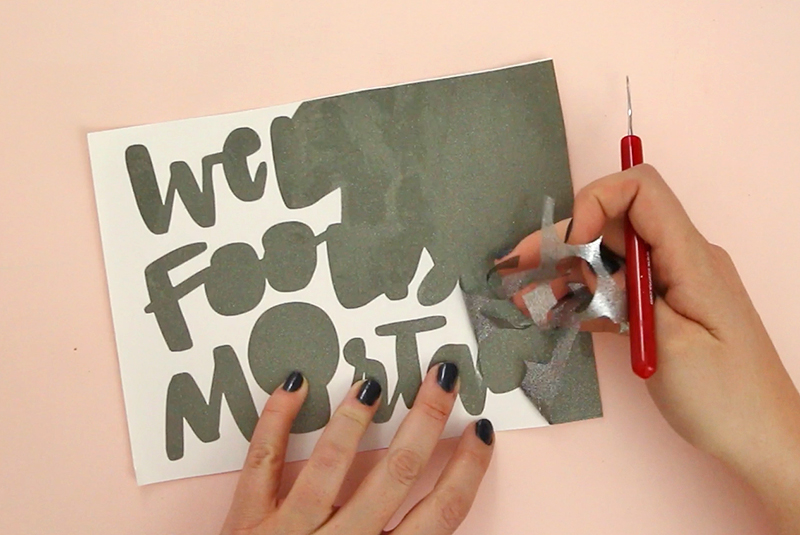
When your decal is done cutting, it’s time to weed (or remove the excess vinyl). I love my Siser hook for this job, but a straight pin or tweezers works well too. Don’t forget to get all the little insides of the letters.
Step Three – Pick up Decal with Transfer Tape
Transfer tape is the secret weapon for getting a good vinyl decal application. It allows you to get the design off of the paper backing and onto your project while keeping everything in its proper place.
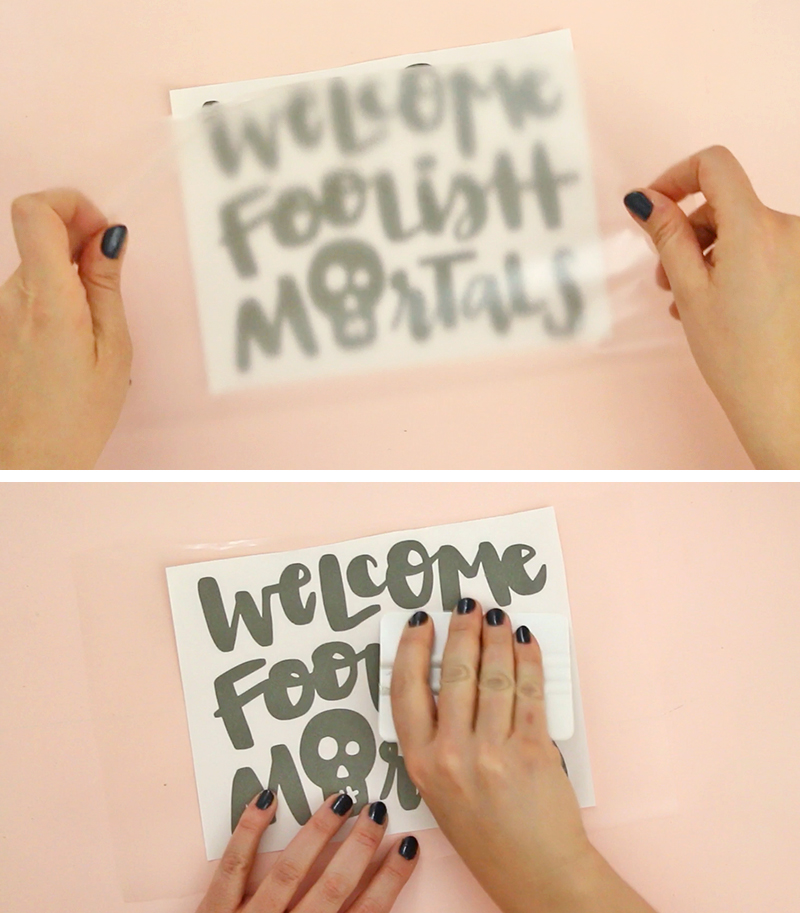
Apply transfer tape to the top of the decal. I am personally a big fan of the clear transfer tape from Expressions Vinyl because I love being able to see everything so clearly. Burnish the transfer tape onto the decal, and peel it up off of the paper backing.
![]()
Step Four – Apply Decal to Pumpkin
When applying a vinyl decal to a curved surface like a pumpkin, there are a few tricks you can use to get a nice, smooth application. (You might want to reference this post that outlines how to apply a vinyl decal to a mug for more detailed tips on how to accomplish this.)
I recommend starting by pressing down the center line of the decal and then moving your way out to the edges. Use a pair of scissors to clip the transfer tape in between parts of the design (be sure not to clip through any vinyl!). Then slowly smooth down each section moving from the center out.
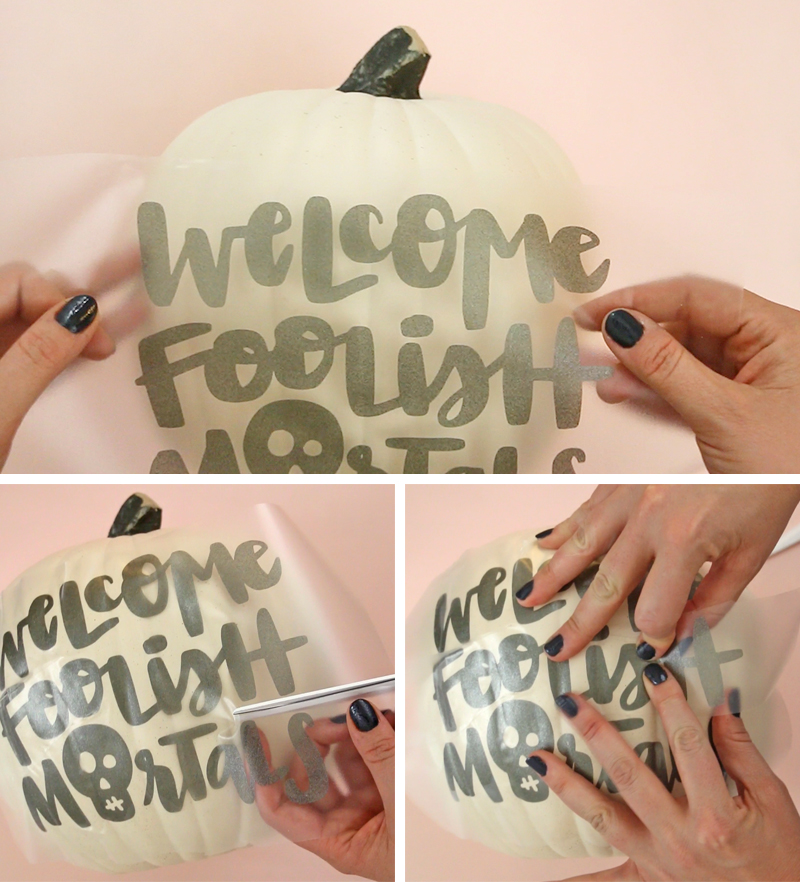
Finally, use your application tool (or an old credit card works fine too) to burnish the vinyl down onto your surface and then peel off the transfer tape.
Voila! Your pumpkin is all ready to welcome any foolish mortals that stop by your home this Halloween season.

I love the sparkle this vinyl adds!
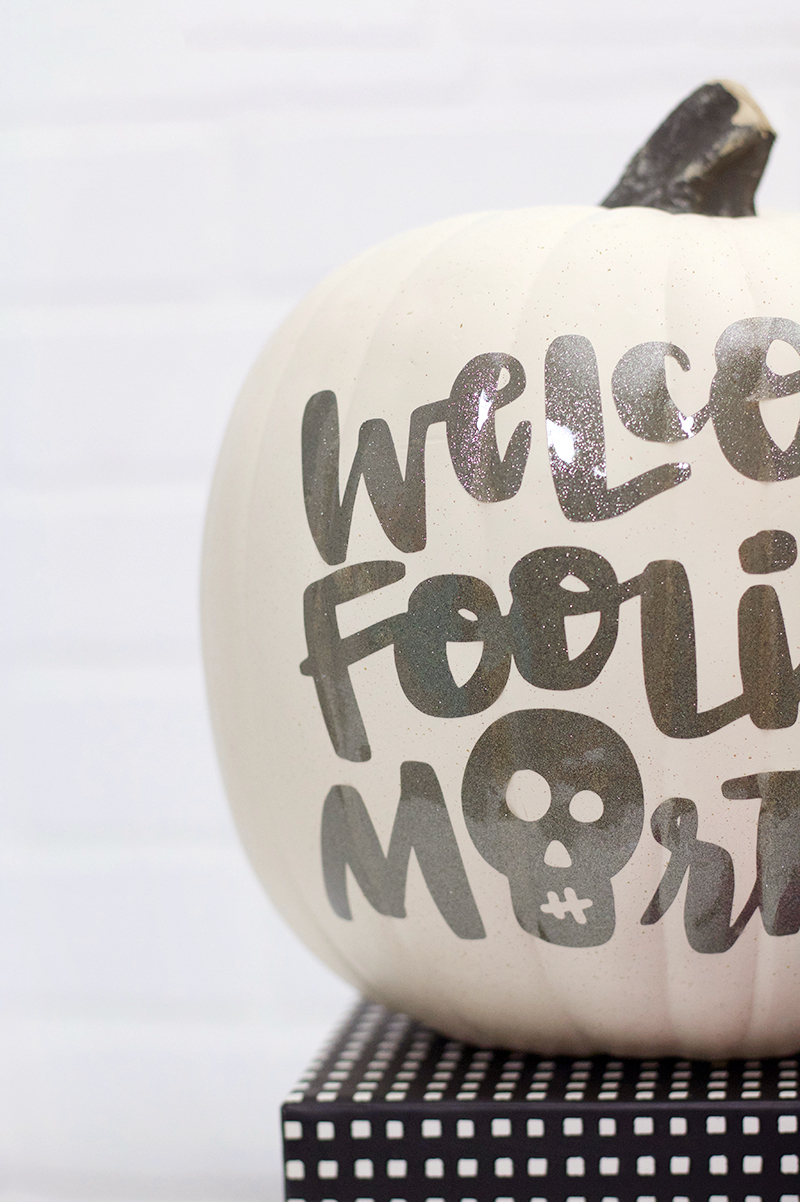
I have to say that no-carve craft pumpkins are kind of my favorite kind. Love a cute craft that isn’t messy and that I can re-use year after year! So, what do you think? Where would you put this design? Tell me all about it. 🙂
Happy Haunting and Happy Making!

More Halloween Craft Ideas:


DIY Printable Halloween Treat Bags


Comments + Project Love
Amy | Delineate Your Dwelling says
Love love love it this pumpkin! Pinning!
Sam says
OH MY GOSH! I love this! I bet it took a bit of patience to get the wording to sit on the pumpkin nicely, so really appreciate your tips there!! Gotta love fall crafts 🙂
Pat says
cant wait to try this. The grandkids will be thrilled