Learn how to make your own DIY custom foil shirts at home! You can create beautifully shiny t-shirt designs in all kinds of colors with this easy DIY technique. Plus snag two free cut files to make your own cute DIY Halloween shirts. This post contains affiliate links that help to support this site at no extra cost to you.
I love crafting for the holidays, especially when that crafting creates something fun I can wear! I loved the Halloween tee I made last year (because Hocus Pocus is pretty much the best), so it seemed like a good time to make some more spooky shirts, which is just what I did. 🙂
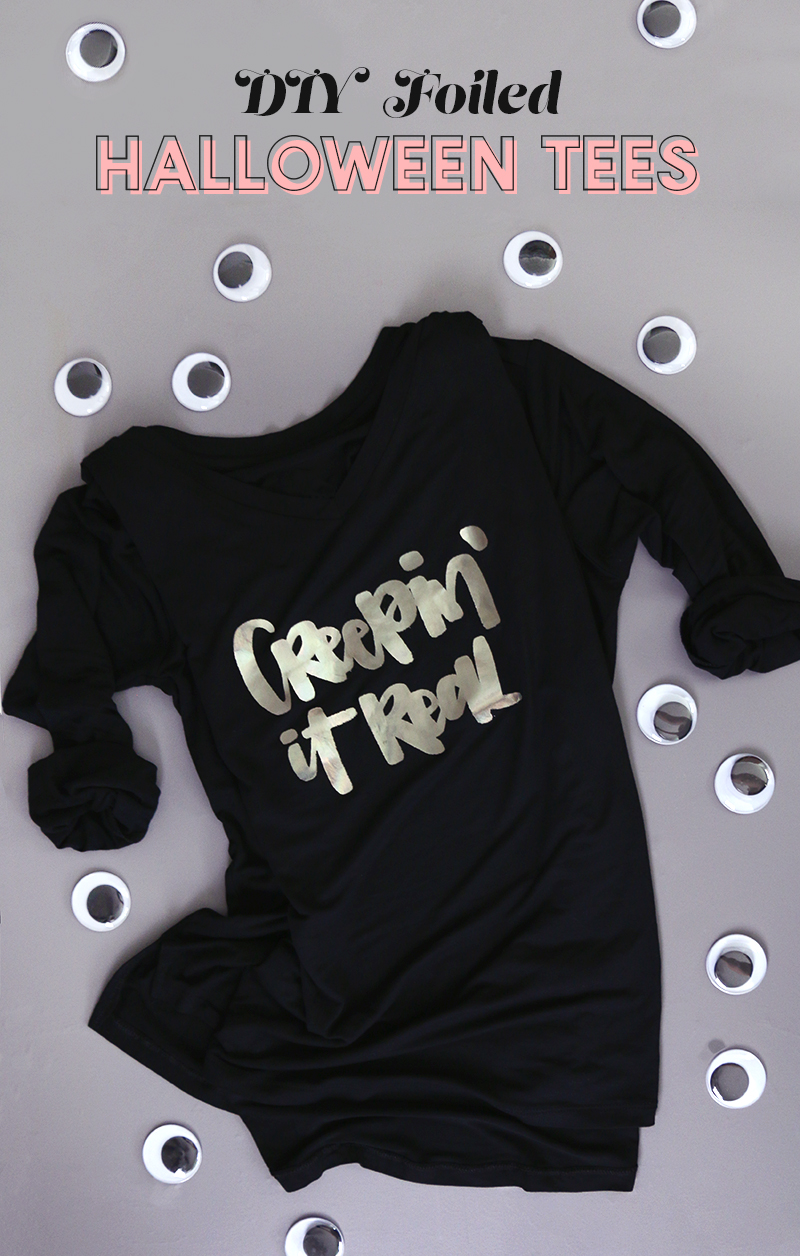
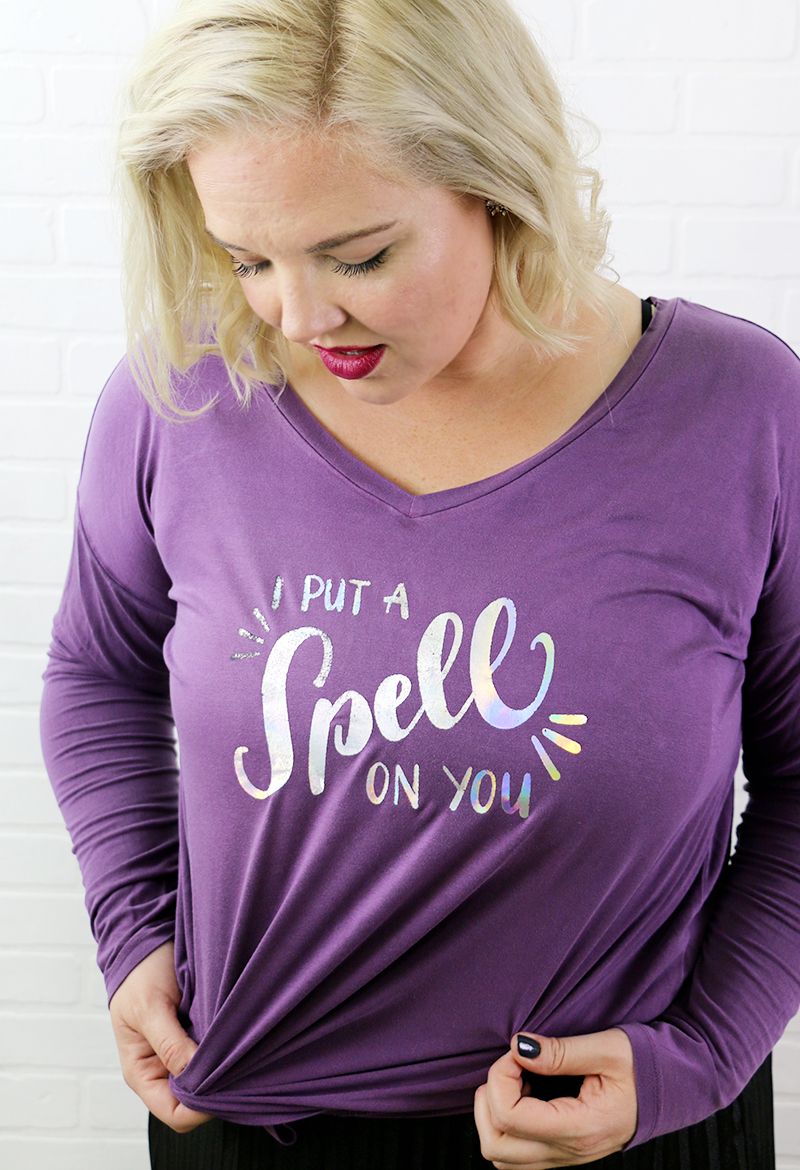
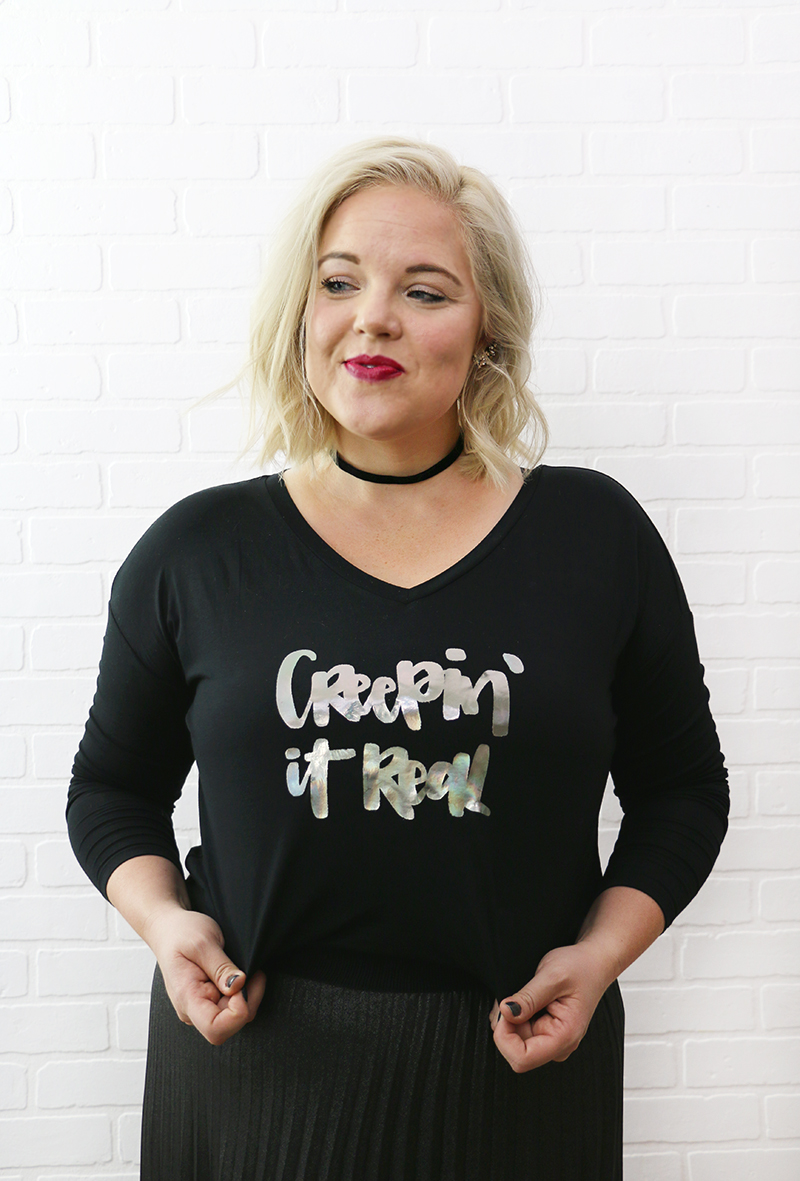
This time I decided to try out a fun technique I have been wanting to try for a while now – foil! I am really happy with the way these shirts turned out, and I’m ready to share all my best tips and tricks for making your own beautiful DIY custom foil shirts. Plus, I have free cut files for two different Halloween designs perfect for making your own adorable DIY Halloween shirts. (You might spot another Hocus Pocus inspired design – I can’t help myself!)
Ready to make some cute foiled Halloween shirts? Here’s everything you’ll need.
DIY Custom Foil Shirts Supplies:
- T-Shirt
- Siser Easyweed Adhesive or DecoFoil Hot Melt Adhesive
- Foil Transfer Sheets (I used Pewter on the black shirt, and Iridescent on the Purple)
- OR for a more simple one-step foil look, try Siser Easyweed Electric
- Silhouette Cameo or Cricut Maker
- Iron
- My Free Halloween Cut Files – Download Creepin’ It Real or I Put a Spell on You (Cut files are free for personal use ONLY. You can purchase a commercial use license HERE. Links will download a ZIP file containing SVG, PNG, and DXF files.)
How to Make DIY Foil Shirts with DecoFoil
Step One – Cut Design from Adhesive
I have included two adhesive options in the supply list above. For these shirts, I used the DecoFoil Hot Melt Adhesive. I have also used the Siser Easyweed Adhesive for other projects, and have found it to be a bit easier to work with. The process for using both is similar.
The first step is to cut out your design from the adhesive. I used my Silhouette to cut out my design, but you can also cut the hot melt adhesive by hand with scissors or a craft knife.
Start by downloading one of the designs from the supply list above and open it in your cutting machine software. Next, just like when working with heat transfer vinyl, you will need to mirror the design in the software. This will ensure that your design reads the right way when it is applied to your shirt.
After your design has cut, you will need to remove the excess adhesive. I’m very fond of my favorite weeding tool, but tweezers, straight pins, and small sharp scissors are all great for this.
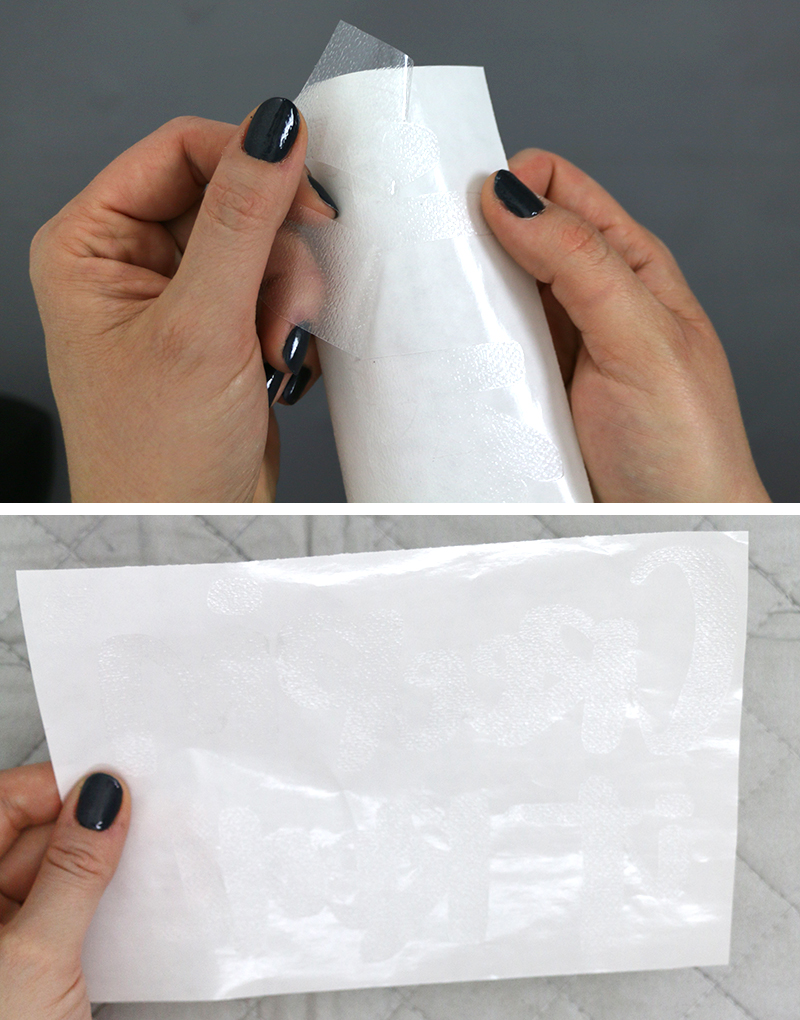
It’s a little difficult to photograph, but I think you can see in the photo above how I just have removed all the excess adhesive from the paper (this is the DecoFoil Hot Melt Adhesive).
Step Two – Iron On Adhesive
Once your design is cut, you are ready to apply the adhesive to the shirt. Place the design on your shirt and cover with a piece of parchment paper. With the iron on a medium-high setting and the steam turned off, press for about 30 seconds making sure the entire design is covered. After 30 seconds, remove the parchment paper and WAIT. This is probably the most crucial part of getting a nice foil application with the Hot Melt Adhesive. You have to wait for the adhesive to completely cool before removing the paper backing. I didn’t wait long enough on my purple shirt and parts of the design didn’t foil quite as nicely.

Once the shirt is cool to the touch, peel off the paper backing, and you should see a shiny adhesive version of the design on your shirt.
Step Three – Adhere Foil
Now it’s time for some foil action! Trim down a piece of your foil to be slightly larger than your design. Place the foil color side up on top of the adhesive. Cover the foil with your piece of parchment paper.
It’s time to press again, but this time you want to really use some firm pressure (push down on your iron) and iron for 30-40 seconds. Move your iron around in a circular motion as you press down. This is especially important if you iron has steam holes on the bottom of it – you want to make sure each part of the design is getting pressure and heat from the iron. After you have given each part of the design firm pressure and heat for 30-40 seconds, you can remove the iron and parchment paper, and again, WAIT. Allow the shirt and foil to completely cool before attempting to remove the foil.

When your shirt is cool to the touch, peel off that foil and check out your awesome custom foil shirt! This is seriously the best part. So cool! To keep your sweet metallic shirt looking good as long as possible, hand wash and lay flat to dry.
All that’s left to do is try on your new DIY foil shirt and maybe hit up some Halloween parties. I love the shiny finish! It’s so much fun.


So, what do you think? Do you need some DIY custom foil shirts in your life?
Until next time, Happy Haunting and Happy Making!

Check out more of my free SVG cut files here:
[the_grid name=”Free Cut Files Footer”]


Comments + Project Love
Josie says
HELP! I finished a baby fan and feather but the top and bottom peaks and valley don’t match or look the same.! What did I do wrong?
Alexis says
Hi Josie! I’m sorry you are having issues with the blanket! If you want to share a picture to my facebook page here – https://www.facebook.com/persialou I might be able to help you more effectively.