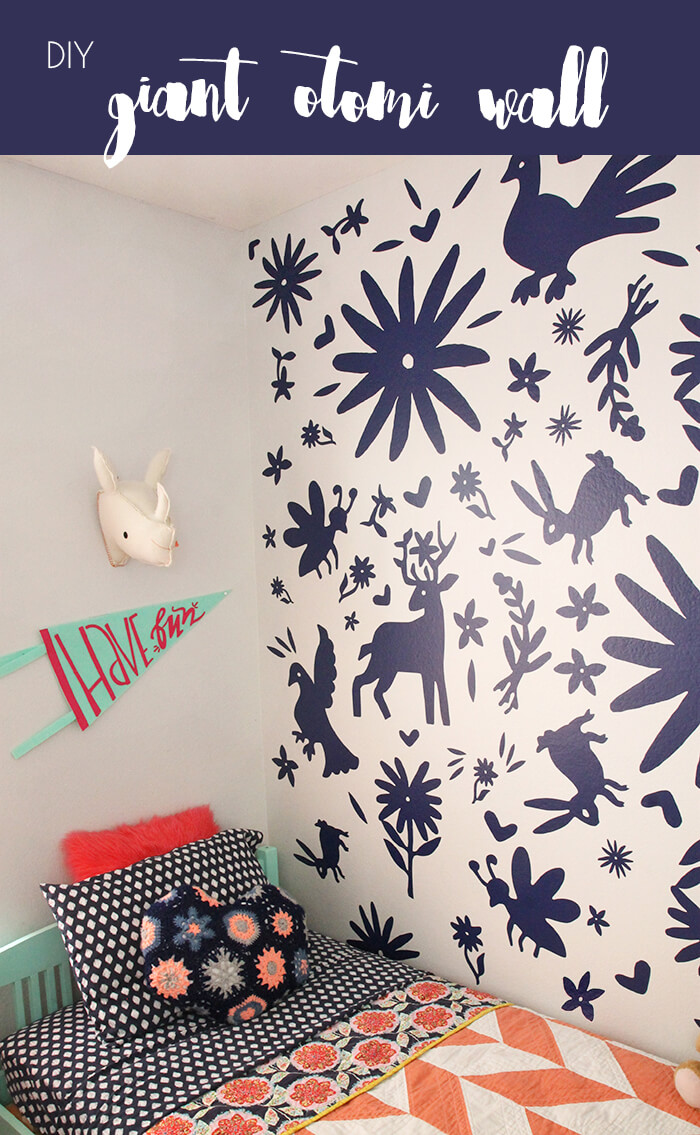
Make your own giant Otomi wall with removable adhesive vinyl – no painting or artistic ability required! A big thanks to Expressions Vinyl for sponsoring this post, which also contains affiliate links that help to support this blog. Thanks!
My little girl’s room has been needing some sprucing up. It has some cute elements, but really it’s been kind of a mess – a hodge podge of items and styles without any real direction or focus. It’s a project I have been wanting to tackle, and this month’s Expressions Vinyl challenge was the perfect opportunity to work on it. (Psst – there is a competition for the best vinyl project, and I need your votes! Please click HERE to vote, and I will love you forever! <3)
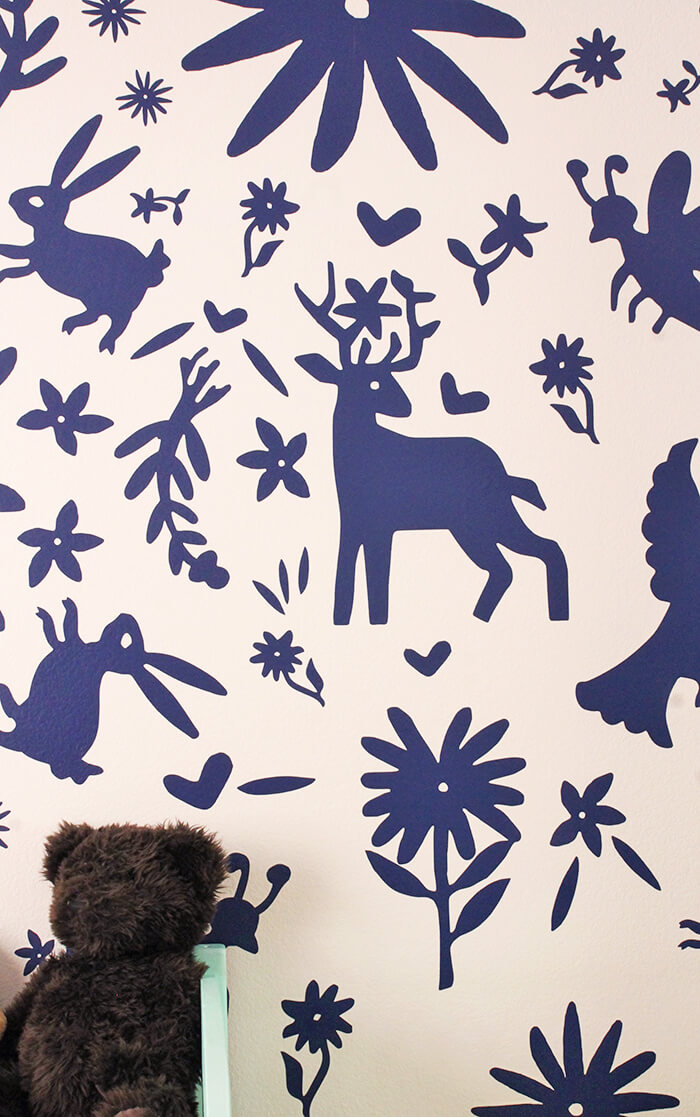
Are you guys familiar with Otomi Embroidery? It is a beautiful type of traditional embroidery from Mexico that incorporates animals, flowers, and other elements. I’ve become kind of obsessed with it, and have wanted to create my own Otomi-inspired project for a while.
I thought it would be a great pattern to incorporate into my daughter’s room. At first I thought I might add an Otomi-inspired design to her plain dresser that I’ve been meaning to finish for ages, but the more I thought about it, the more I wanted to go big, and that’s how I ended up here with a giant Otomi wall.
I really love the finished wall – it totally makes the room – and it was not as difficult to do as it might seem. I’m going to walk you through all of the steps in case you want to attempt your own Otomi wall or if you want to do any kind of large-scale vinyl accent wall.
DIY Otomi Wall Supplies:
- Dark Blue Indoor Vinyl (I used almost two rolls for this wall)
- Transfer Tape
- Weeding Tool
- Application Tool
- Silhouette Cameo
DIY Otomi Wall
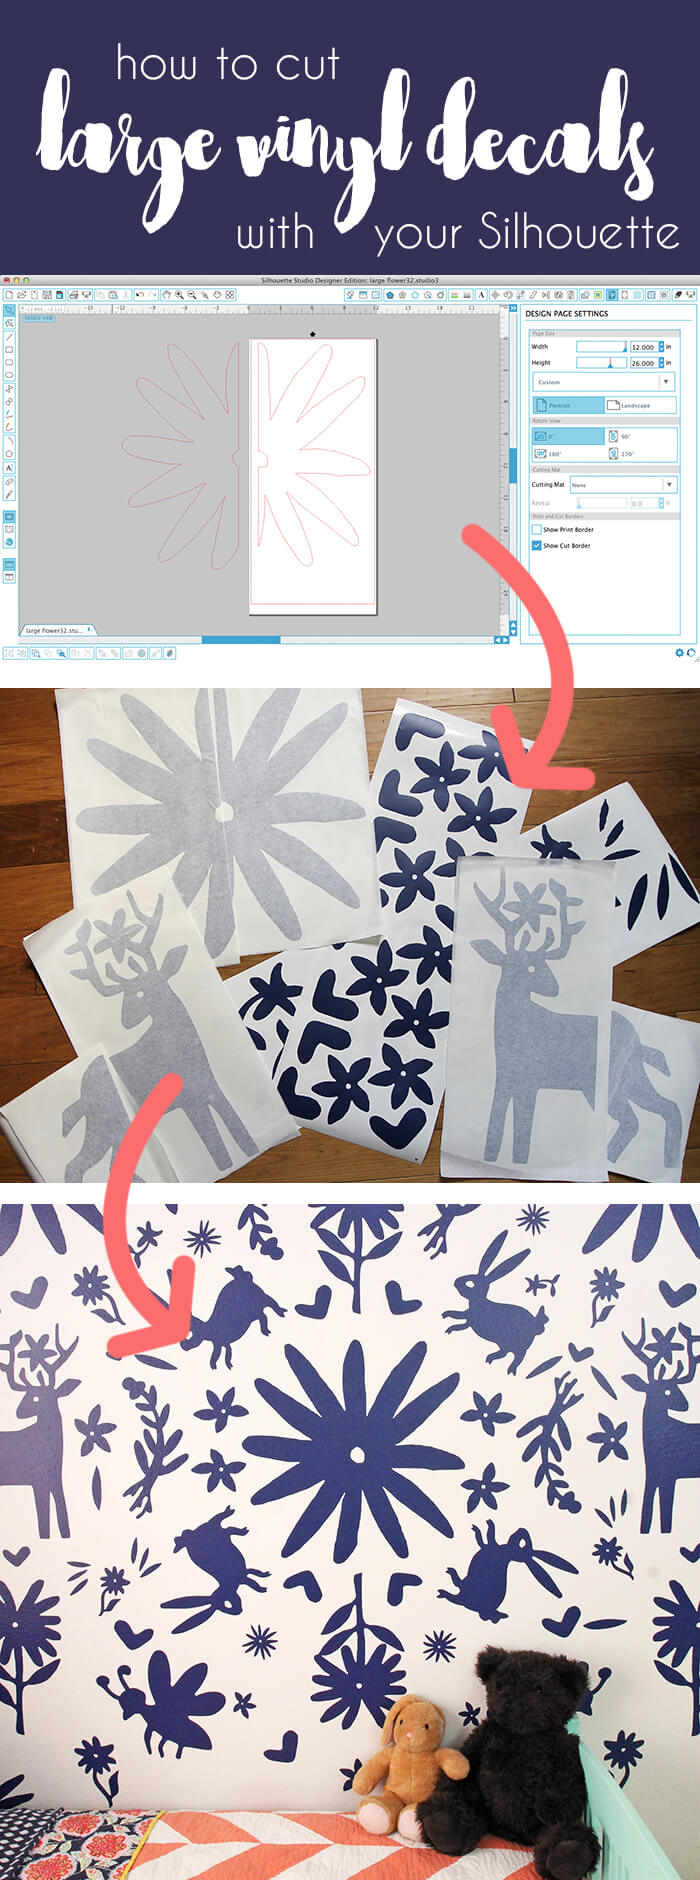
I started this project by plotting out my design in Photoshop. I found inspiration and design elements from searching Otomi patterns online. In Photoshop, I combined my favorite elements and arranged them into a basic design for the wall.
Laying out the general design gave me an idea of how many of each element I would need to cut. My plan was to plot out where the large flowers and animals would be placed and then to fill in the empty space with small flowers, leaves and hearts. Once I had a list of how many of each animal and flower I needed to cut, I set up my Silhouette and got to cutting.
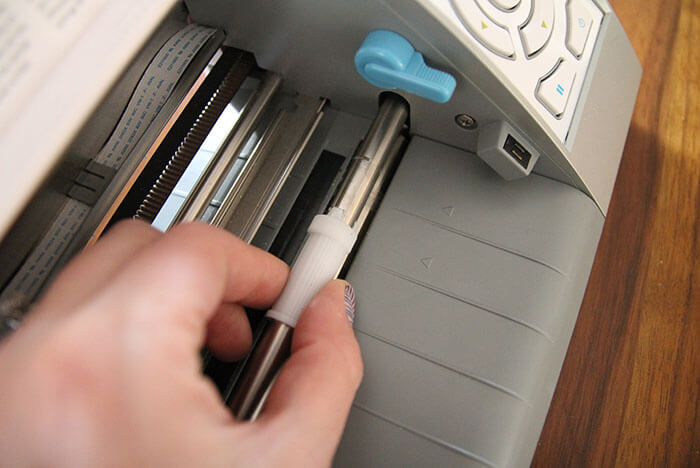
Normally, when I am cutting small pieces of vinyl, I like to use a cutting mat; however, when you are cutting pieces longer than the 24 inches available on a cutting mat, you need to cut straight from the roll. Because I was cutting larger pieces, I needed to cut directly from the vinyl roll. This is not complicated at all, but there are a few adjustments you need to make.
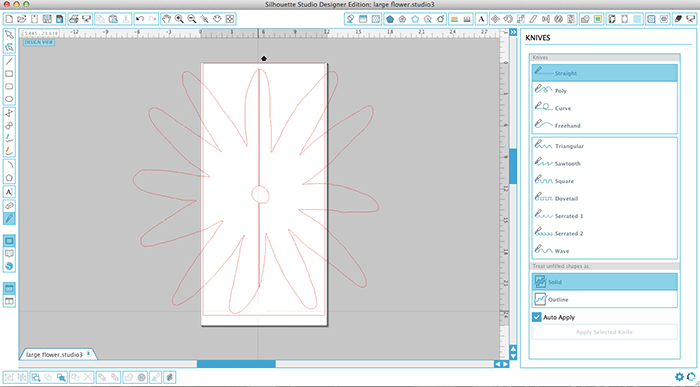
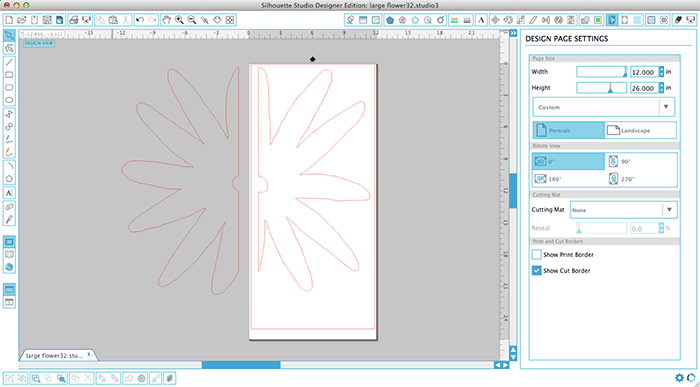
First, start by setting up the Design Page Settings to reflect the size you will be cutting.
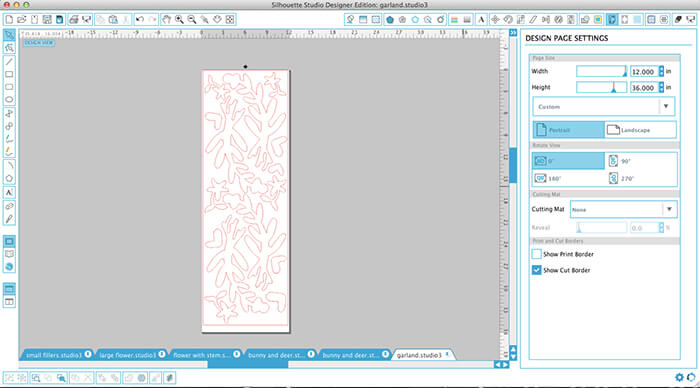
If you are using 12 inch wide vinyl, the width of your page should be set to 12 inches (if you use 9 inch vinyl, set it to 9 inches). The length can be adjusted to fit the length of your design up to 10 feet. I kept my cuts to about 4 feet in length. Select “None” from the cutting mat menu.
Next, prepare your Cameo for cutting vinyl without a mat. Since the vinyl is a bit narrower than the cutting mat, you need to start by adjusting the rollers. Twist the knob on the right side of the machine to release the bar, and then twist the right white roller and slide it in to the next position to the left. Once the roller is locked in place, twist the knob back to lock the bar in place again. (The method for moving the roller is a bit different with the Cameo 3, but the general idea is the same.)
Next, load your vinyl into the machine. Select load media (not load cutting mat) if you are using a Cameo or Cameo 2 (Cameo 3 has just one load button). Make sure to carefully line the edge of your vinyl up with the line on the Cameo. Like this:
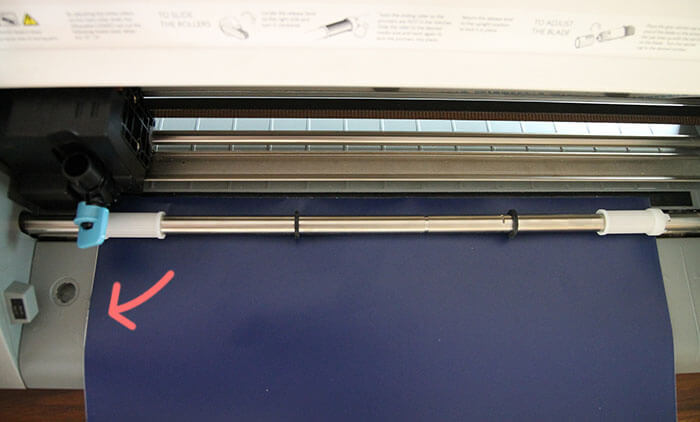
If you load the vinyl into the machine crooked, then as the machine cuts and feeds the vinyl through, it will become more and more crooked until the vinyl can go off the rollers completely, and then your cut will get all messed up, which means you wasted a bunch of vinyl, which might lead to an expletive or two slipping out. I may know about this from experience, guys. See:

See that sad, crooked vinyl? Wah Wah. Don’t let this happen to you.
Anyway, once I was all set up for cutting long pieces of vinyl, I started cranking out decals to fill my wall with.
A few of the pieces – the largest flowers and the deer – couldn’t fit on just one piece of vinyl so they had to be pieced together. It’s not at all difficult to cut large scale designs, but it does take a few extra steps. Don’t worry – I will walk you through it.
How to Cut Large Vinyl Decals
The first step in cutting large scale decals with your Silhouette is to scale your design to the size you want it to cut. (Use the handles in the corners to keep your proportions the same as you scale.) I wanted my largest flowers to be about 23″ wide, so I scaled them to that size. Don’t worry about the image going outside of the cut border.
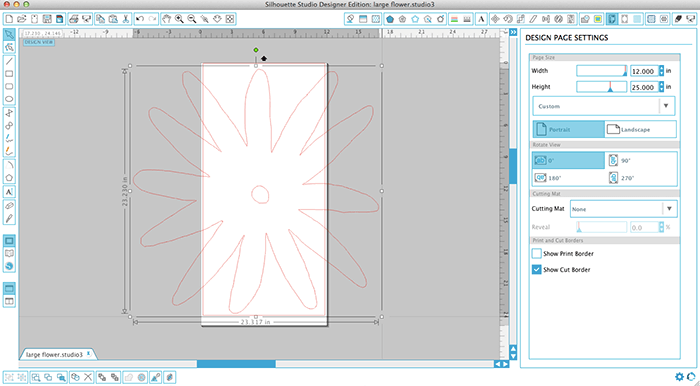
Once you have the image sized correctly, use the knife tool to cut it into pieces that are narrow enough to fit on your piece of vinyl (12 inches). I just needed to cut my piece in half. Make sure you have selected treat unfilled shapes as solid under the knife options, and hold down the shift key to keep your cut straight.
When your design is cut in two, place one half within the cut border and send it to the Silhouette. Repeat for the second half.
When your decals have cut, use your weeding tool to remove the excess vinyl from your design.
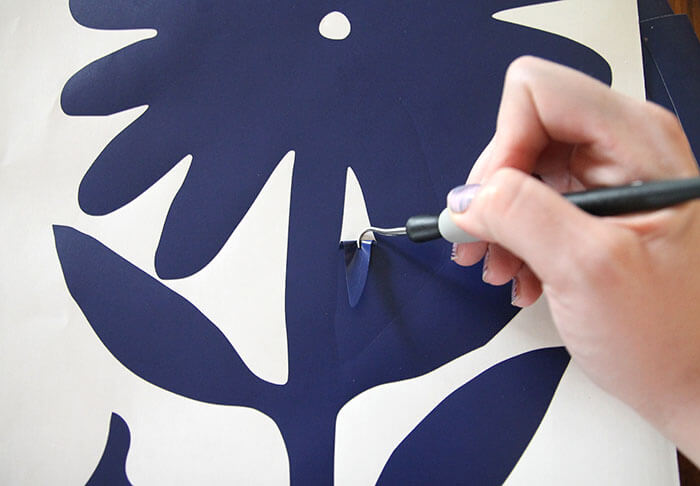
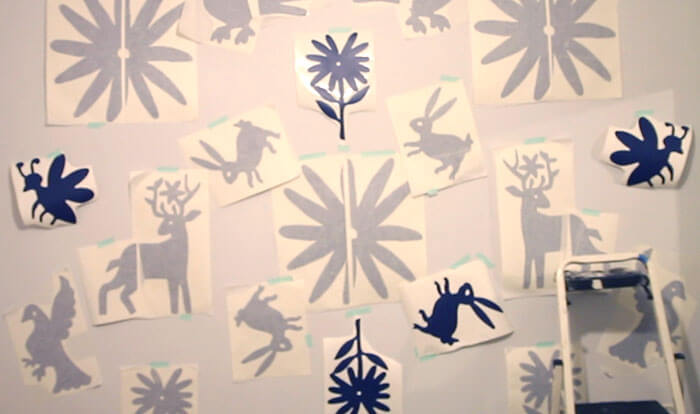
Pretty soon I had a whole pile of decals – large and small – ready to apply.

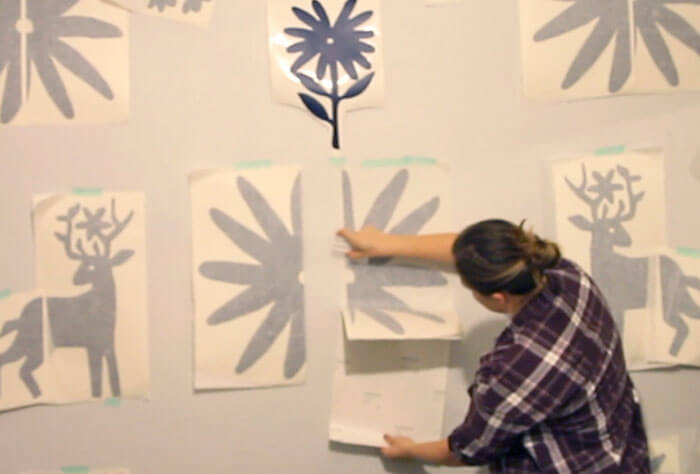
The application process took a few hours, but really wasn’t too complicated. I started by using masking tape to arrange the placement of the larger decals. This helped me cement my final layout before I actually applied any vinyl to the wall.
For the larger decals, I used a hinge method to apply them to the wall exactly where I wanted them without getting any bubbles or wrinkles. First, I applied transfer tape over the top of the decal and left the backing on to make a kind of vinyl sandwich. Next, I placed the decal where I wanted on the wall, and secured to at the top with a piece of tape. Then I slowly peeled the backing off while pressing the decal onto the wall with the application tool. Like so:
Finally, I carefully peeled off the transfer tape, leaving the decal perfectly placed on the wall. Our walls have a bit of an orange peel texture, which isn’t idea for vinyl, so I had to be really carefully when removing the transfer tape. I also used a blow dryer to add a little bit of heat, which I found helped the vinyl adhere to the wall a bit better.
I repeated this process for all of the large decals, and then went back and filled in the extra space with my small decals. Instead of using transfer tape for the small decals, I just peeled them off the backing and stuck them on the wall. Easy Peasy.
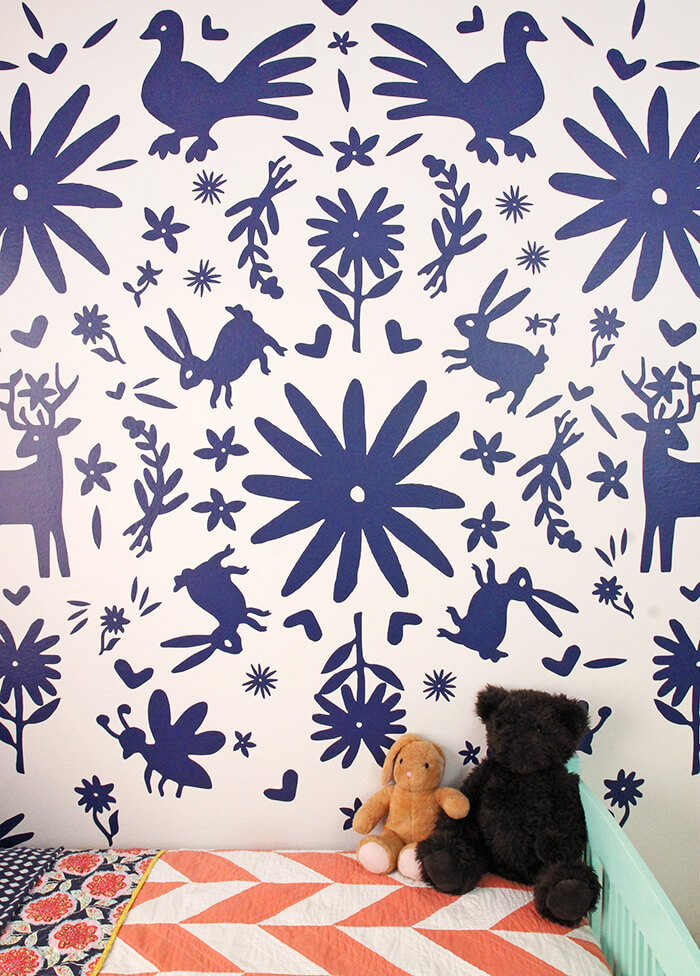
When I was all done, here’s what I ended up with:
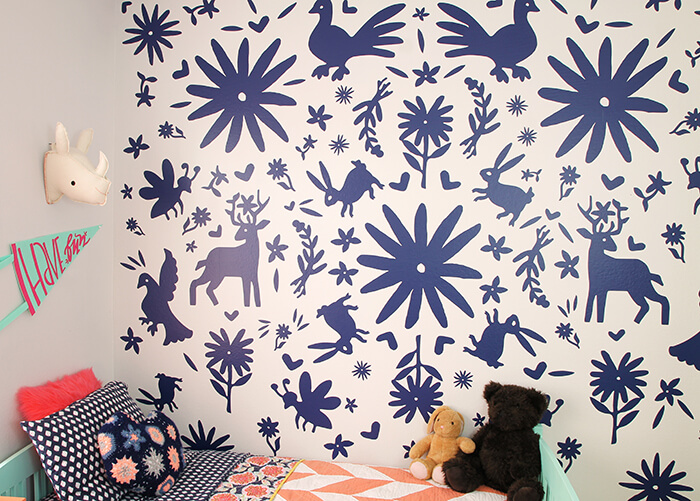
I really kind of love it. My daughter is pretty excited about her room’s new look too, so everyone is happy.
I love vinyl for projects like this because it is not messy like paint, and it is so easy to remove if you get tired of it down the road, not that I am tiring of this pretty wall any time soon.
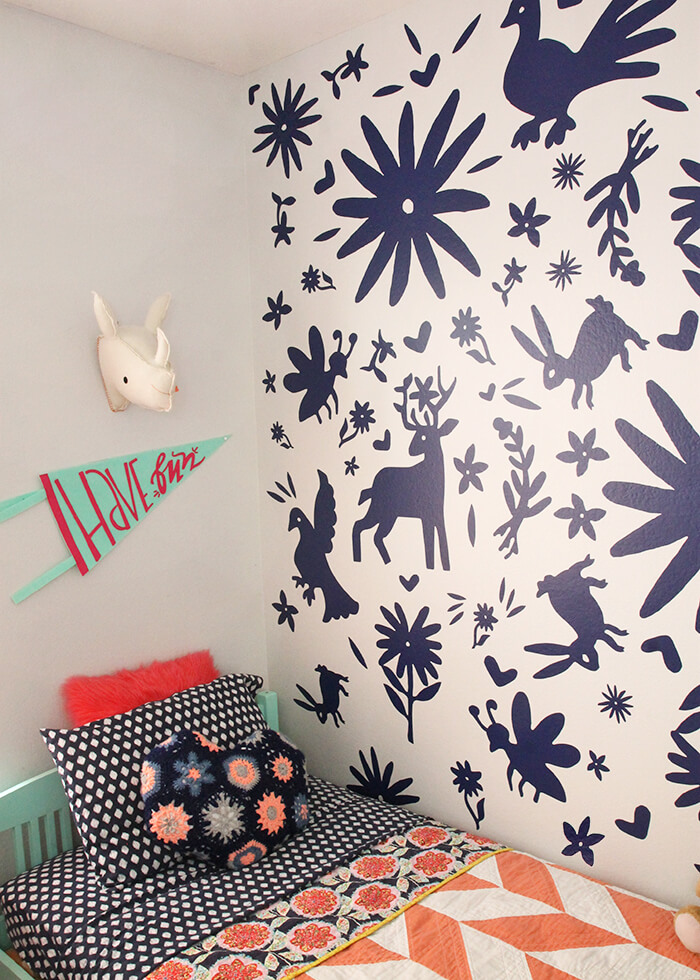
The room has much more personality now and a bit more direction. I love that some of my older DIYs fit so well with the new wall (like my herringbone quilt and heart-shaped hexagon pillow). I’m looking forward to polishing it up even more in the next little while.
This is actually the second vinyl accent wall I have done in our home. The first was my geometric accent wall, which used a slightly different technique. You can check that out HERE if you like.
Looking for more vinyl inspiration?
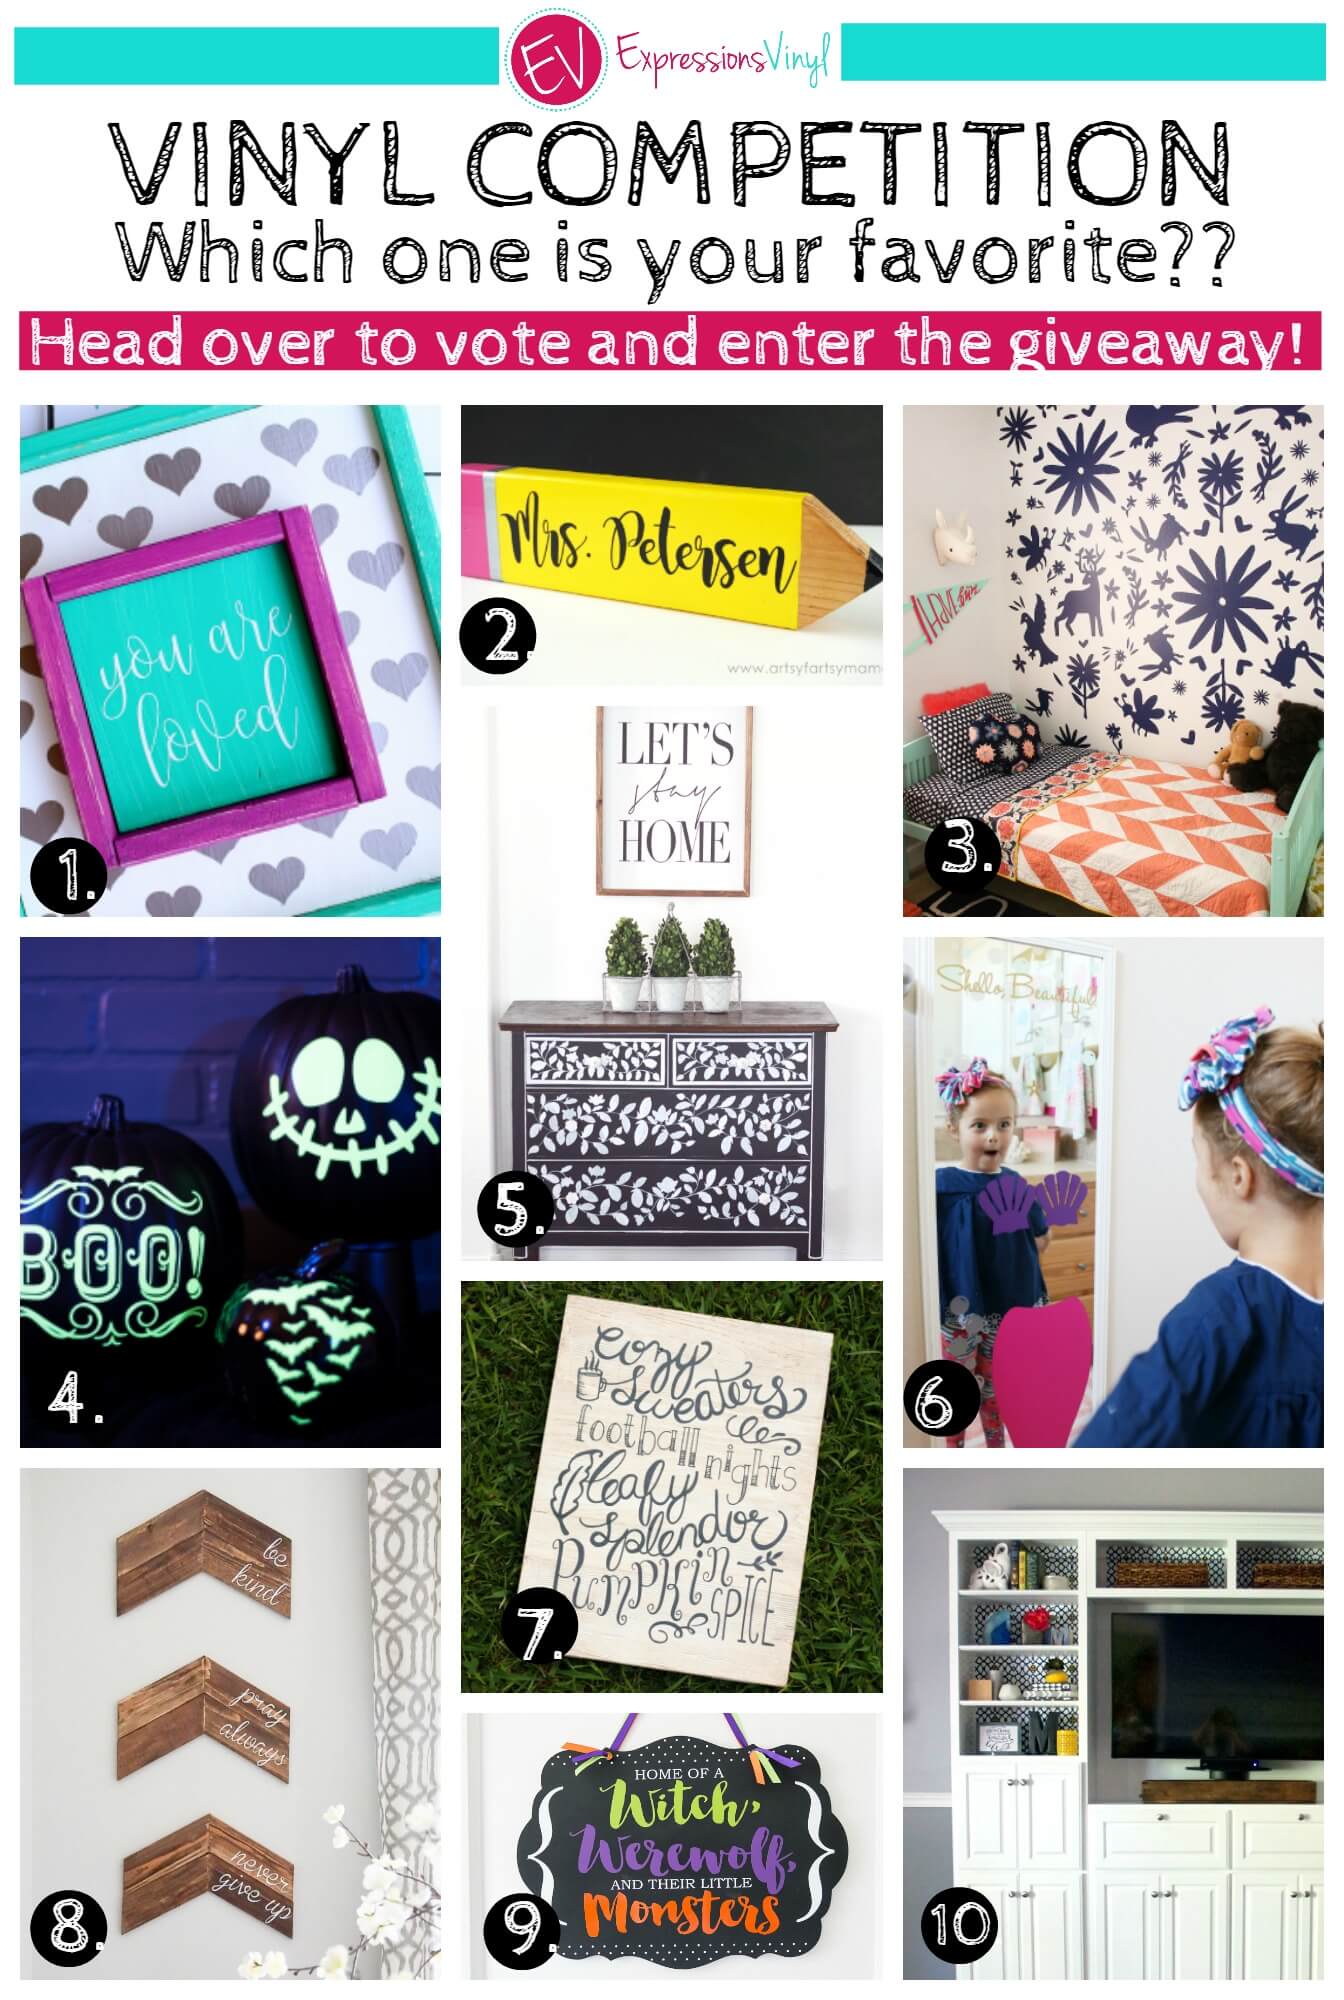
Nine of the other Expressions Vinyl Ambassadors have put together some awesome vinyl projects this month, and you guys get to vote for your favorite! I would absolutely love a vote for my otomi wall if it’s your fave. 🙂 Head on over to the Expressions Vinyl blog to vote and enter to win some vinyl for your own projects! YAY! Good luck!
I hope you like my DIY Otomi Wall! Would you ever try a big vinyl project like this? Tell me about it in the comments. 🙂
Happy Making!


Comments + Project Love
Clarissa says
This turned out so beautiful! I can’t believe you did this yourself!!
-Clarissa @ The View From Here
Alexis says
Thanks so much, Clarissa!
Taylor Cooley says
can you share the design? I LOVE
Guadalupe says
Is it possible to get this design? I would be willing to pay for it too. Thanks.