
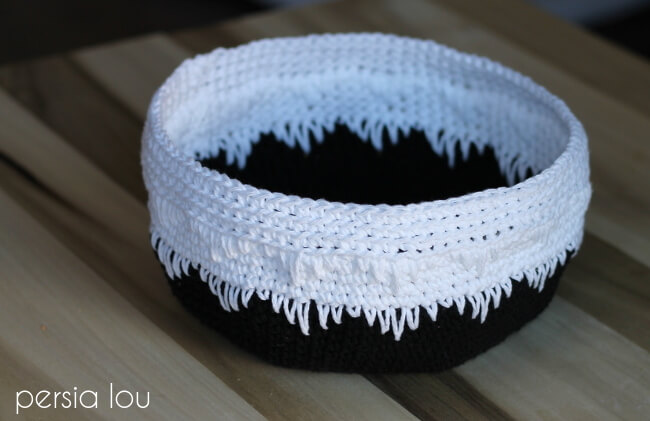
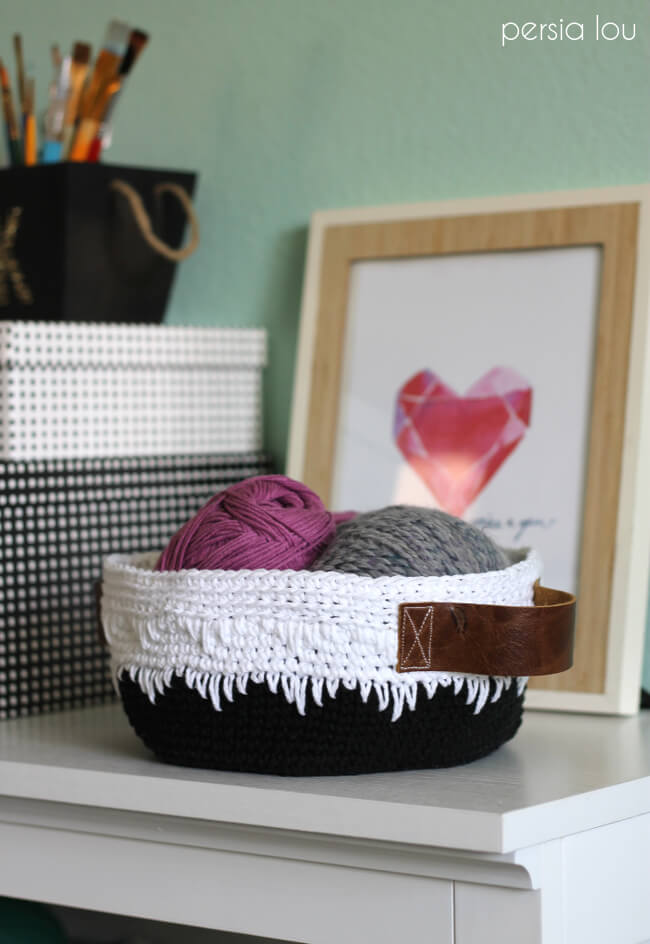
If you’ve been around here much you probably have noticed that I’ve been into black and white geometrics lately. (Did you see my kid’s new table, by the way?) So, anyway, I decided to see how I could interpret the trend in crochet. I ended up with this little basket that is a perfect addition to my craft area, which I am currently working on organizing and sprucing up.
This basket has lots of fun texture, so while it may look complex, it really only uses variations of the single crochet. Simple! You can totally make this.
Geometric Crochet Basket Pattern
Materials needed:
- Cotton worsted weight yarn in two colors (I used one ball each of Lily Sugar N’ Cream in black and white)
- Size H (5.00 mm) crochet hook
- Leather
- Thread
- Sewing Machine or Needle
With the black yarn,
Round 1: 7 sc in magic ring, sl st to join.
Round 2: ch 1, 2 sc in each st around (14 sc)
Round 3: ch 1, *sc, 2 sc in next stitch, repeat from * 6 times, sl st to join (21 sc)
Round 4: ch 1, *sc, sc, 2 sc in next stitch, repeat from * 6 times, sl st to join (28 sc)
Round 5: ch 1, *sc, sc, sc, 2 sc in next stitch, repeat from * 6 times, sl st to join (35 sc)
Round 6: ch 1, *sc, sc, sc, sc, 2 sc in next stitch, repeat from * 6 times, sl st to join (42 sc)
Round 7: ch 1, *sc, sc, sc, sc, sc, 2 sc in next stitch, repeat from * 6 times, sl st to join (49 sc)
Round 8: ch 1, *sc, sc, sc, sc, sc, sc, 2 sc in next stitch, repeat from * 6 times, sl st to join (56 sc)
Round 9: ch 1, *sc, sc, sc, sc, sc, sc, sc, 2 sc in next stitch, repeat from * 6 times, sl st to join (63 sc)
Round 10: ch 1, *sc, sc, sc, sc, sc, sc, sc, sc, 2 sc in next stitch, repeat from * 6 times, sl st to join (70 sc)
Round 11: ch 1, *sc, sc, sc, sc, sc, sc, sc, sc, sc, 2 sc in next stitch, repeat from * 6 times, sl st to join (77 sc)
Round 12: ch 1, *sc, sc, sc, sc, sc, sc, sc, sc, sc, sc, 2 sc in next stitch, repeat from * 6 times, sl st to join (84 sc)
Round 13: ch 1, *sc, sc, sc, sc, sc, sc, sc, sc, sc, sc, sc, 2 sc in next stitch, repeat from * 6 times, sl st to join (91 sc)
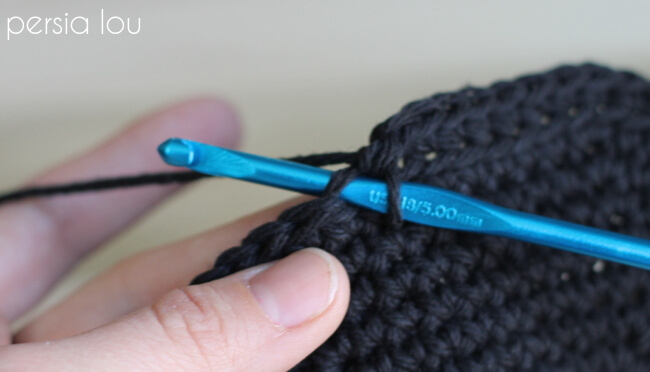
Round 14: working in back loops only (see photo below) sc in each st around, sl st to join (91 sc)
Rounds 15-21: ch 1, sc in each st around, sl st to join (91 sc). Finish off, weave in ends.
At this point your basket will look like this: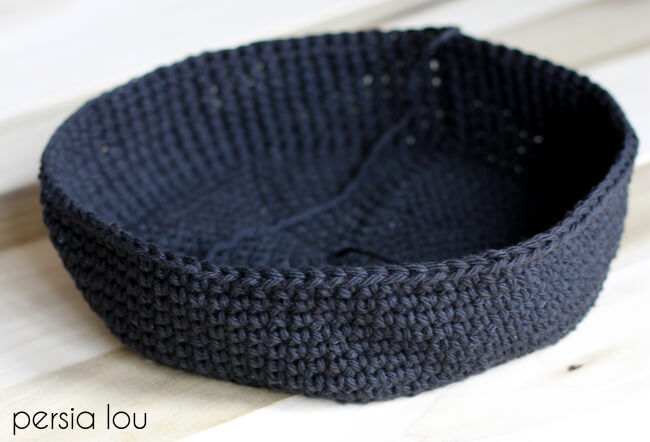
Now it’s time to join the white yarn and start adding the geometric pattern and texture. To create the zig-zag pattern, the next row of sc is worked into the previous rows. Below I have pictured how to work a sc into the stitch two rows below the current working row.
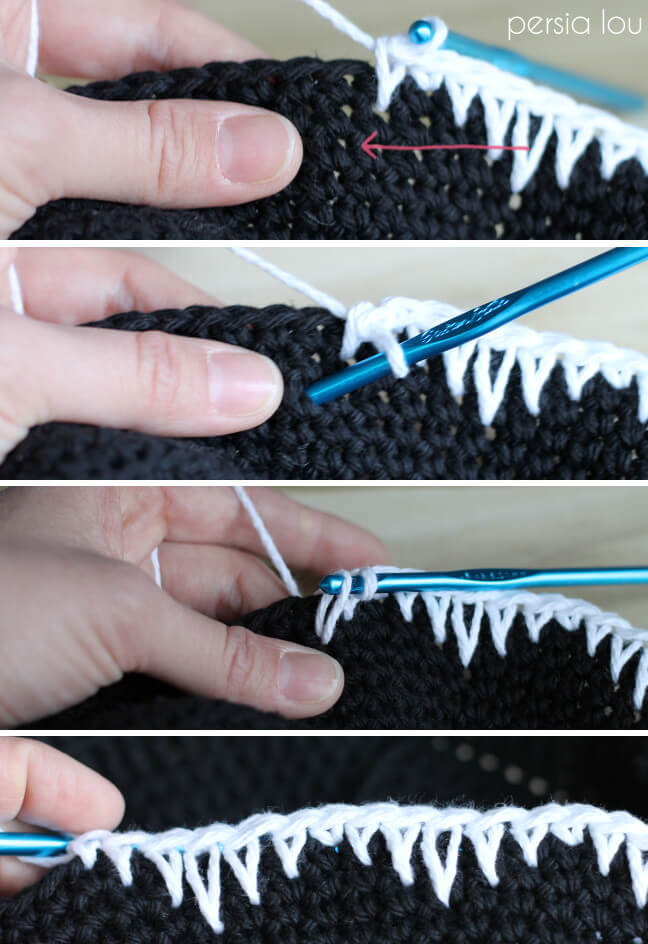
When you work the stitch, be sure to pull the yarn up to the top of the piece so it doesn’t pull or bunch.
Round 21: with the white yarn, ch 1,* sc, sc in next st 1 row down, sc in next st 2 rows down, sc in next st 3 rows down, sc in next st 2 rows down, sc in next st 1 row down, repeat from * 15 times, sc in next st, sl st to join (91 sc).
Rounds 22- 25: ch 1, sc in each st around, sl st to join (91 sc).
The next round repeats the zig-zag pattern from Round 21 in white yarn to add more texture.

The next round repeats the zig-zag pattern from Round 21 in white yarn to add more texture.
Round 26: ch 1,* sc, sc in next st 1 row down, sc in next st 2 rows down, sc in next st 3 rows down, sc in next st 2 rows down, sc in next st 1 row down, repeat from * 15 times, sc in next st, sl st to join (91 sc).
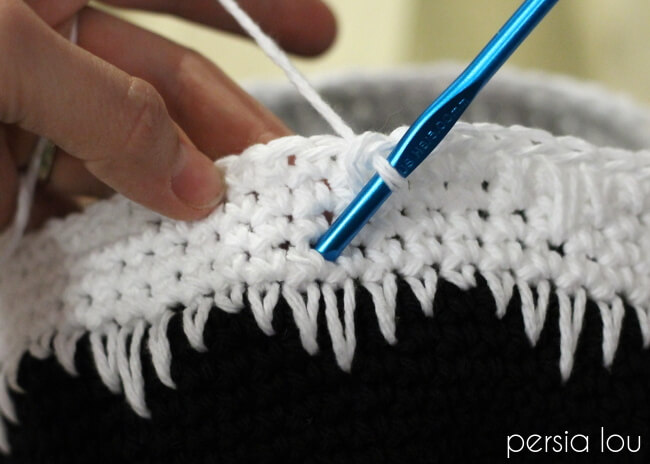
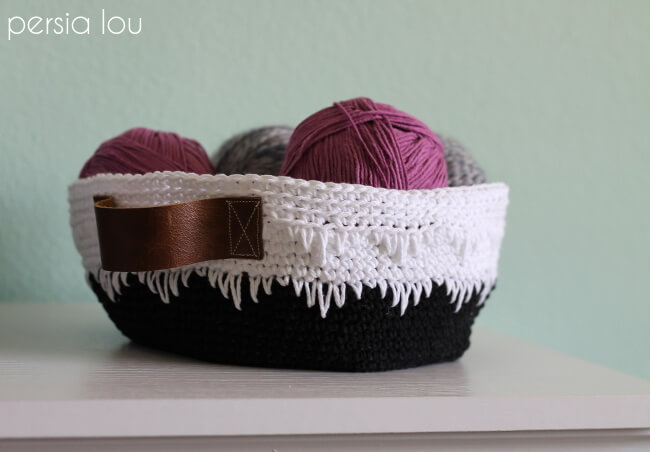
The final 3 rounds are worked in the back loops only to create a striped texture.
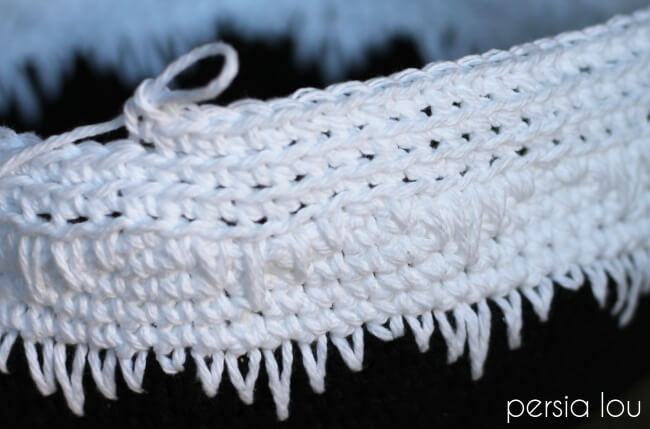
Round 27: working in back loops only, ch 1, sc in each st around, sl st to join (91 sc). Finish off, weave in ends.
Yay! Now we’re nearly done! Here’s what it looks like now:
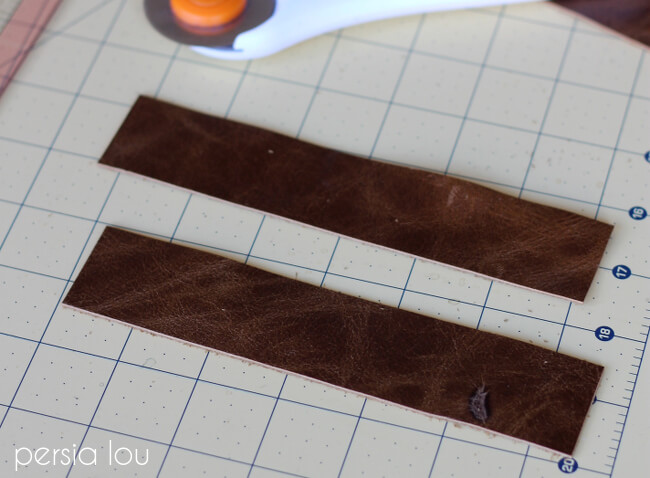
At this point the basket could be complete, but I decided to add a couple of leather handles to finish off the modern look. To make the handles, you will need to cut two pieces of leather to 1 1/4″ x 6 1/2″.
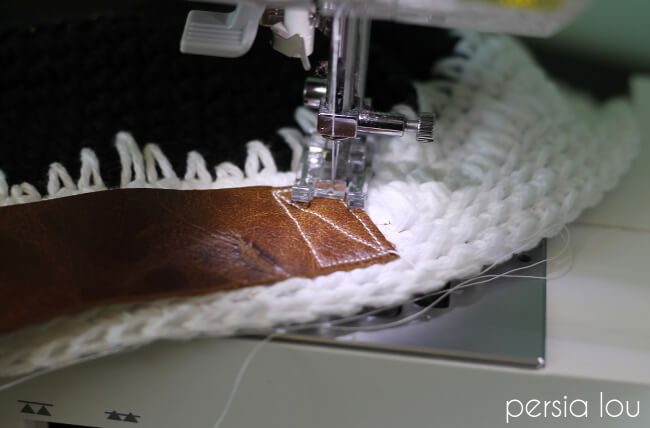
Finally, sew the handles onto your basket by first sewing a rectangle and then an X through the middle of the rectangle with a heavy duty needle and sewing machine.

And that’s it! My new little basket is holding some of my favorite yarns.


Seeing them displayed in my craft space gets me inspired to get making.
This post originally appeared on Craftaholics Anonymous. Linking up at some of my favorite parties.
Seeing them displayed in my craft space gets me inspired to get making.
This post originally appeared on Craftaholics Anonymous. Linking up at some of my favorite parties.
If you like this post, check out some of my other crochet patterns:


Comments + Project Love
Amy W says
Those leather handles! Love.
Amy Lee Scott says
Girl, you are making all my crochet dreams come true!!! And those handles are perfection 🙂
For My Love Of says
Girl! I totally cannot make this. Crochet is a skill i have not. You could legit sell these. So all the crochet impaired like myself can still have one. They're so cool!
girlathomeblog says
Oh this is soooo cool! I love it! I have not crocheted in years but I think I will have to make a go at this. Yours is so beautiful!
Bobbie Jones says
Love it! And you are very detailed with your tutorial. Pinning it to make it later!!
Katie Nathey says
This is so beautiful Alexis! I don't know how to crochet but boy do I have respect for those that do. Soooo pretty, I want one! Pinned 🙂
Sonnet says
This is so stinkin cute! LOve the colors and the pattern, amazing!!
Alessandra Poggiagliolmi says
beautiful!!!!<br />xxxx Ale
Jodiebodie says
I am a big fan of the spike stitch for colour patterns. This is the first time I have seen spike stitch used to add texture. A nice spin on the technique which adds a lot of interest to your basic basket.
Toni Barsi says
Wow Alexis! I had never heard of the spike stitch before, but this is awesome! Love the colors and the adorable handles.
JoyMar says
I love this basket. I am going to make some for my daughter's teachers as gifts. Would you mind if I made some to sell?
Alexis Middleton says
Hi! Yes, you are welcome to sell any baskets you have made from my pattern. If you sell them online, I would appreciate a link back to the pattern. Thanks!
JoyMar says
Thank you so much!
Linda Calvert says
Thank you for sharing this – it is so cute and doesn't look to difficult!
Eva - Ideal Accents Designs says
Hi, I love your basket and I'm in the progress of making it now. A quick Q though, I got to row 14 did that in a back loop only now on row 15 – 21 is it back loop only again or just regular sc, sorry I'm new so I'm having a hard time just by looking at the pic.<br />thanks
Alexis Middleton says
Hi Eva! Rows 15-21 are worked through both top loops. Happy Crocheting! 🙂
Waseem Randhawa says
You know, this post terribly got Maine thinking…that’s why i created a call to reply in Associate in Nursing extremely post.. I conjointly need to share info concerning. <a href="http://tipsongift.com/basket/" rel="nofollow"><br />Basket<br /></a>.
Linda Petricko says
Love the basket. Instead of leather handles I added a row of reverse sc to the top for more texture .
ambient says
What a gorgeous basket? Would you mind adding this pattern on Ravelry so that I can favorite it?