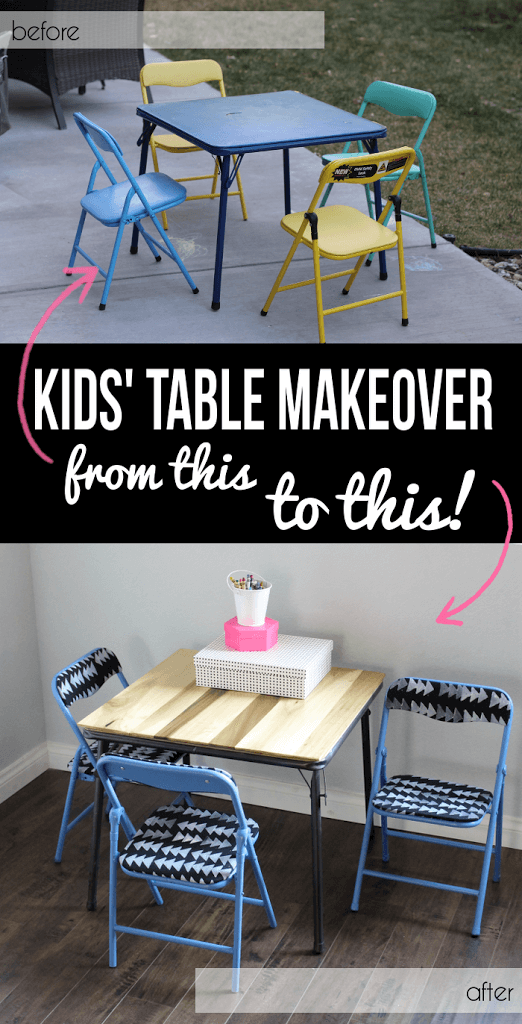
Give an old vinyl covered table new life with this Kids Table Set Makeover. It’s easy to update this table to give it a custom, modern look and a real wood top. This post contains affiliate links, which help to support this blog. Thank you!
A few months ago a friend posted this little table and chairs for sale on facebook:

They were a little beat-up, but I had been wanting to get a craft table for the kids and since I am a believer in the power of spray paint, I was definitely interested. She ended up giving them to me for free (so nice!), and I started my scheming. I have been wanting to refinish and recover some folding chairs for a long time, so I immediately knew what I was going to do with those babies, but the table was a bit more tricky.
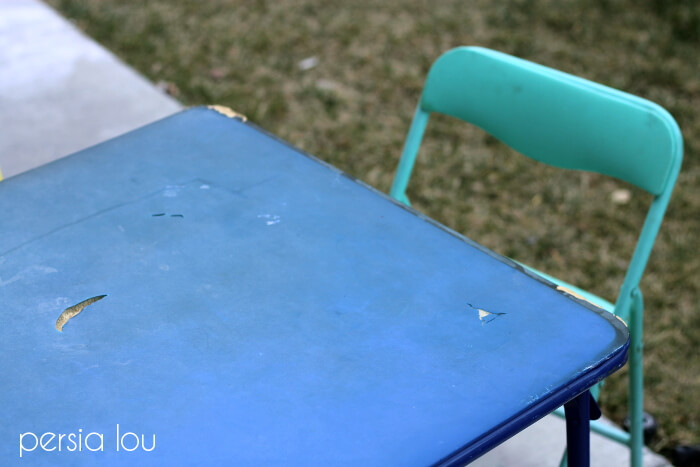
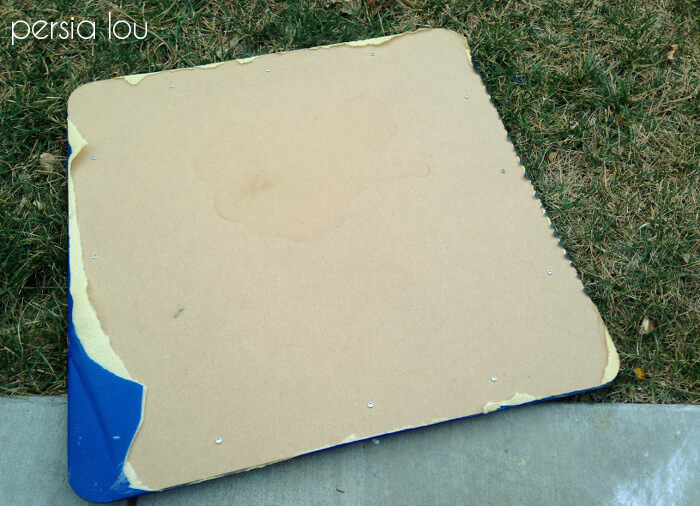
It was covered with sad, ripped vinyl. Since I wanted a hard surface, recovering with new vinyl wasn’t a good solution. “Wouldn’t it be beautiful with a natural wood top?” I thought to myself. Yes, yes, it would. So I headed off to the hardware store to see what I could come up with.
If you want to do your own kids table set makeover, here’s everything you will need:
- A kid-sized folding table and chairs (similar to this)
- Poplar Hobby Boards
- Liquid Nails
- Rustoleum Universal Metallic Oil Rubbed Bronze
- Rustoleum Spray Paint in your favorite color
- Staple Gun
- Fabric – I stamped my own, but this one would be great too!
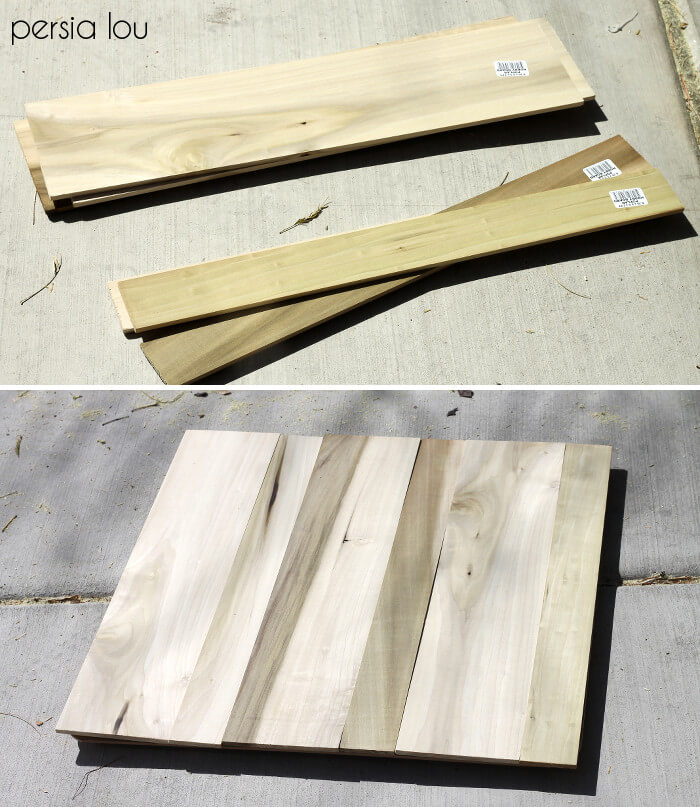
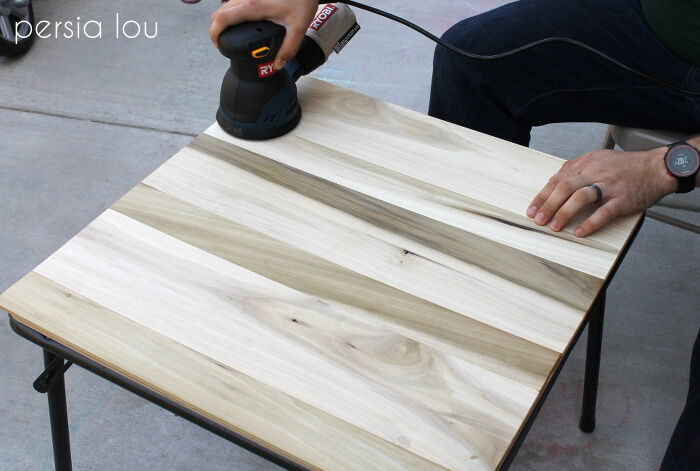
I did a bit of searching around trying to find something that would be pretty but that wouldn’t cost a ton of money. Eventually I found these great poplar “hobby” boards. I loved the variation in the wood grain, and they were nice straight, real wood boards for a couple bucks each. PLUS(!) – my little table was 2 feet square, and the boards were pre-cut to 2 feet long. I did a little quick math in the store and realized I could buy three of the 5.5″ boards and 3 of the 2.5″ boards and not have to do any cuts. I was sold. (One of these days I’m going to get over my fear of saws…. Maybe. I’m working on it, okay?)
I grabbed the boards, some liquid nails, a couple cans of spray paint, and ran home to tear my table and chairs apart.
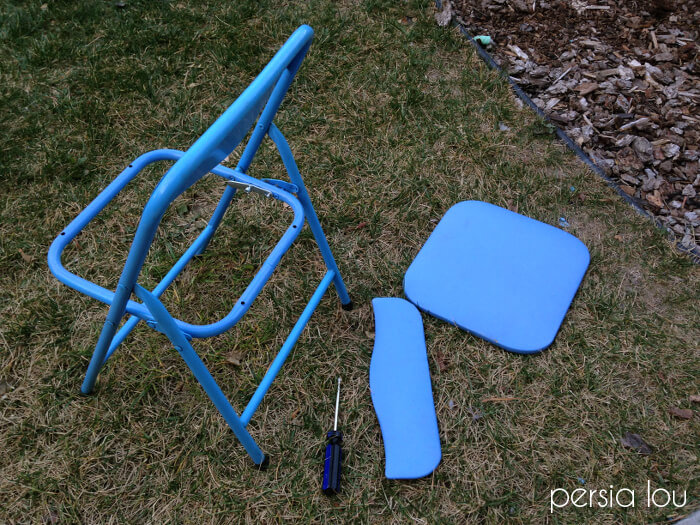
A screwdriver is all you need to take these guys apart. Maybe a pair of scissors to help you rip off all that lovely vinyl.
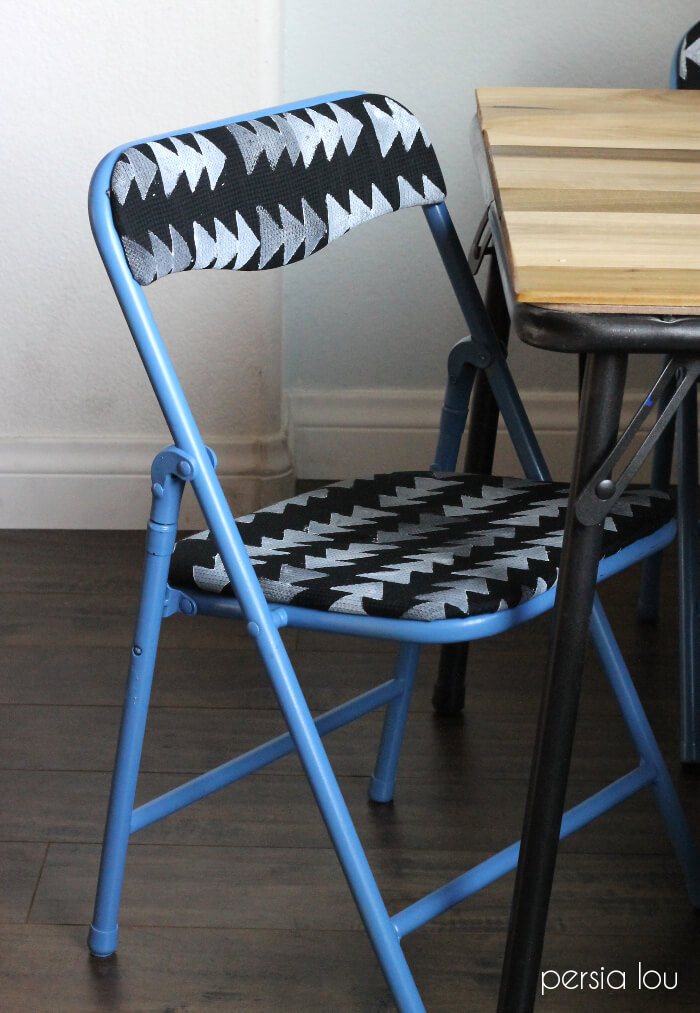
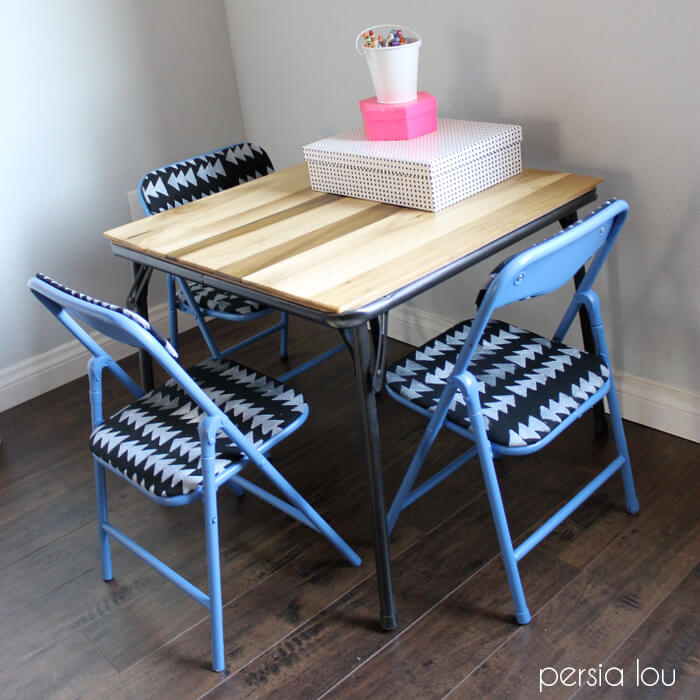
Next, the base of the table and the bases of the chairs all got a few coats of spray paint. For the table base I used Rust-Oleum Metallic in Oil Rubbed Bronze![]() . This stuff is seriously kind of amazing. The table base doesn’t look painted at all. My son helped me pick out the color for the chairs, and we chose Rustoleum Wildflower Blue in a satin finish.
. This stuff is seriously kind of amazing. The table base doesn’t look painted at all. My son helped me pick out the color for the chairs, and we chose Rustoleum Wildflower Blue in a satin finish.

For the table-top, we attached the boards to the original table top using liquid nails and clamped the boards down. When the glue was set, we gave the new top a good sanding to smooth out any unevenness between the boards.
Finally, we sealed the table top with a couple of coats of semi-gloss polyurethane.
For the chairs, I decided to make my own fabric to recover the seats. I made a stamp and just went to town making my own pattern. I kind of love the way it turned out (you can read more about that HERE).
I used a staple gun and 1/4″ staples (longer staples will poke through the seats – ouch!) to wrap the fabric around the seats and backs.

Then all that was left to do was screw everything back together and enjoy! Our Kids Table Set Makeover is donezo and the kids have been really excited about their new little table.

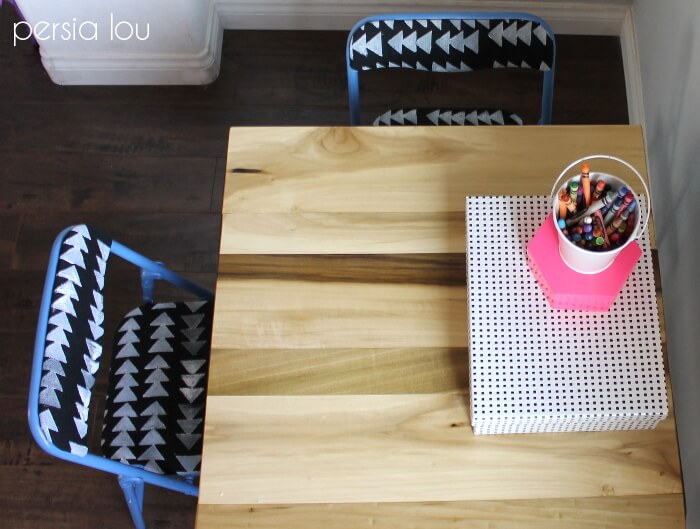
Eventually the table and chairs will be living in our loft which is currently being converted to a craft/office space. I’m excited to give the kids a space dedicated to their projects so we can all work together! (Or so I can throw crayons and stickers at them while I’m trying to get some work done, which is probably more realistic.)
All in all, I think I spent about $35 on wood, paint, and fabric for this project, and I have a good amount of paint and fabric left over. So, I think we did pretty good with this little Kids Table Set Makeover. What do you think?
Have you ever taken on a furniture makeover? How did it go? Tell me all about it in the comments.
Happy Making!

If you liked this post, you might want to check out these:


Comments + Project Love
Amy W says
This turned out so so great. I'm with you, I little scared of the saw thing… maybe someday!
ChristaQuilts says
This is awesome!!
Mindi Carwin says
Oh Alexis it is so awesome!! I love that you added wood to the top of the table, so clever! And the fabric on the chairs is perfect! You go girl! Love it, and once you get over that fear of tools, you are going to go buck wild, so just do it!
saraH says
Wonderful idea! Love the after.<br /><br />
Brandi says
Looks so good!
Katie Nathey says
This table is so awesome, I want to hang out there! You must be the coolest mom ever! Pinned 🙂 Oh and I love your new blog photo too 🙂
Amy @ Homey Oh My! says
Forever a believer in the power of paint! Wow. <br />Covering the tabletop with wood boards was a stroke of genius. And I LOVE the patterns you created on the chairs!
Deonna Wade says
Hey Alexis! Love your new blog design and LOVE this table and chairs. I'm inspired…my card table is so messed up from crafting that I just might have to try this sometime this summer. The stamped fabric is so cute and simple. Pinned 🙂
Rachel H says
This turned out so great! It's so very Nate Berkus. 🙂
anu says
What a cute makeover! Love that you painted the fabric!
Sonnet says
This is adorable!! Such a great idea, it turned out awesome
Colleen says
This looks fantastic! The fabric makes my heart happy- I still am crushing (but haven't bought) on the Nate Berkus rugs from last season… this DIY would fill that obsession 🙂
Costuless Inc. says
Wow! I really like your kids table and chair makeover. These are all adorable and and fantastic. I am inspired to pursue my kids table and chair <a href="http://www.costuless.com.ph/" rel="nofollow">furniture</a> makeover too since they are requesting it for this coming summer. Thank you!