This post brought to you by The Duck® Brand. The content and opinions expressed below are that of Persia Lou.
Learn how to make your own DIY Tape Bows easily. These perfect bows are great for quickly dressing up any gift without making a mess. Glitter Tape makes it so easy to get that sparkly look.
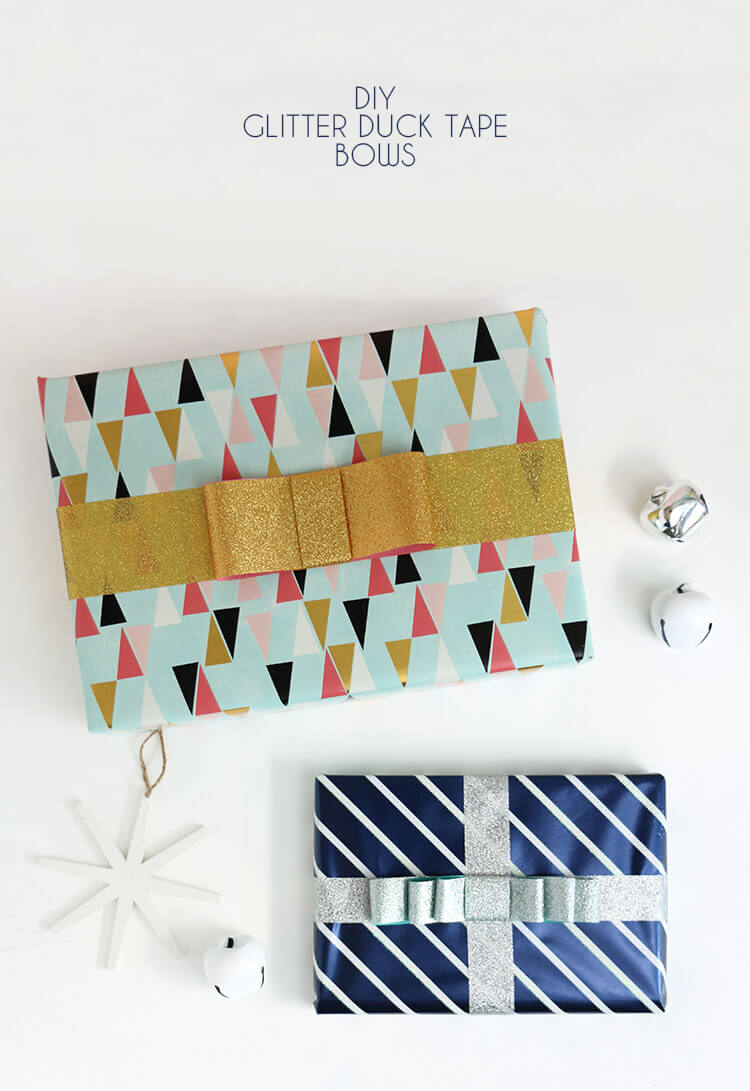
Wrapping gifts is one of my favorite parts of Christmas time. I have so much fun picking out papers, ribbons, tags, and coming up with creative wrapping ideas. Duck Tape® sent me some of their awesome Duck Glitter® tape, and I knew it would be perfect for making DIY tape bows to easily add sparkle and dimension to my gifts this season.
This awesome tape is an easy, mess-free way to get a pretty, shimmery look. It is also flexible and durable, so it works great for creating these fun bows that add easily add some wow to any gift. They are so simple to make, and I will walk you through all the steps!

DIY Tape Bows Supplies
- Glitter Duck Tape
- Colored Tissue Paper
- Cutting Mat and Rotary Cutter OR Craft Knife
- Scissors
- Double Sided Tape (optional)
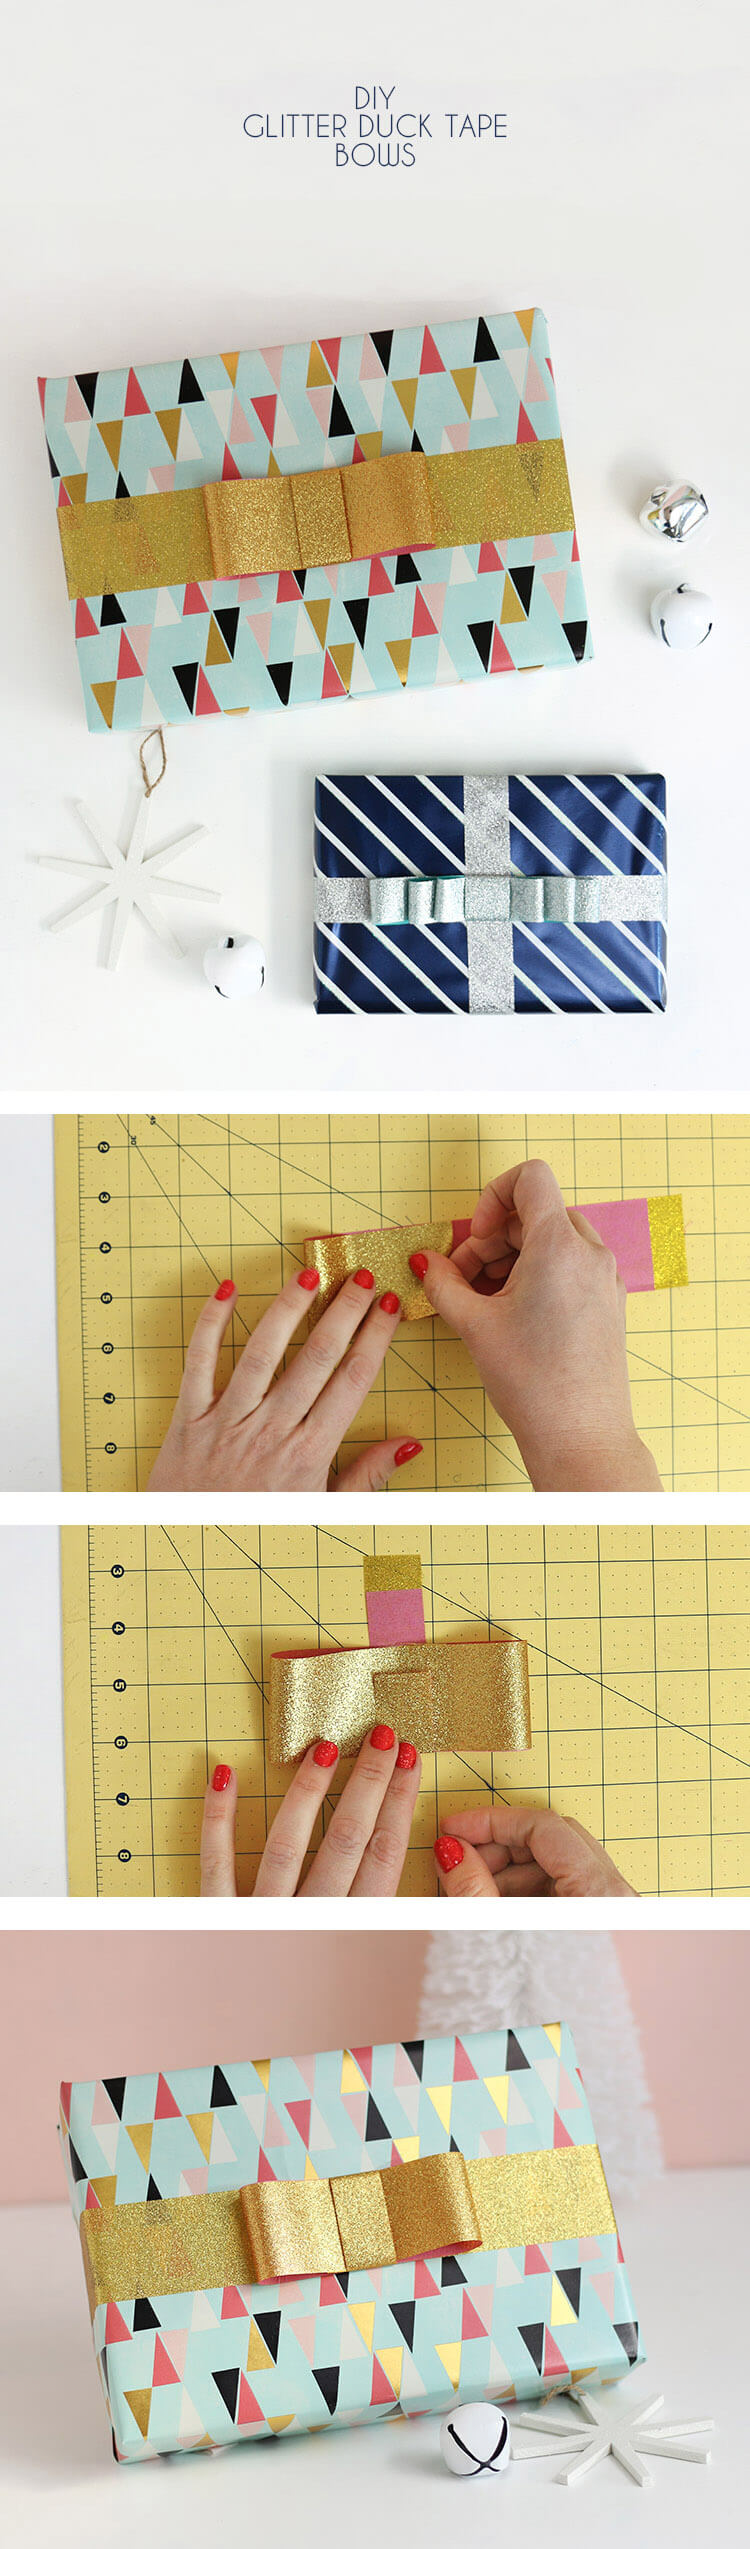
Colored tissue paper gifts the underside of your bows a fun pop of contrasting color. Choose a color to coordinate with your glitter tape and your wrapping paper. Start by trimming your tissue paper down to about twice the desired width of your finished bow. My tissue paper was 10 inches wide. Then carefully lay down pieces of tape over the tissue paper leaving about half an inch off of the tissue paper on each side.
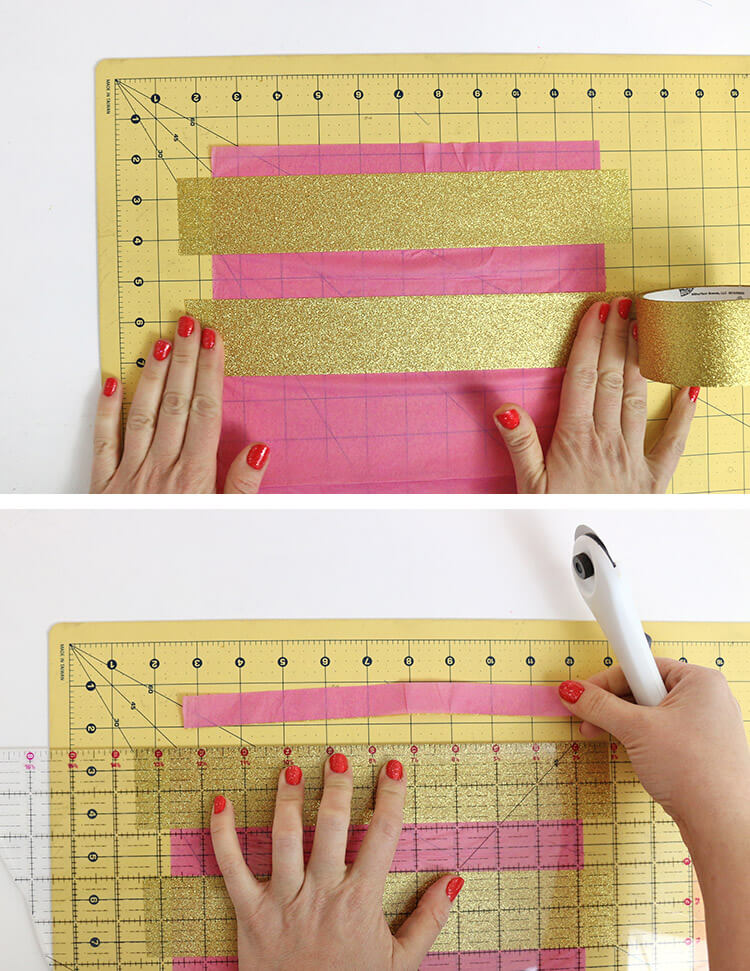
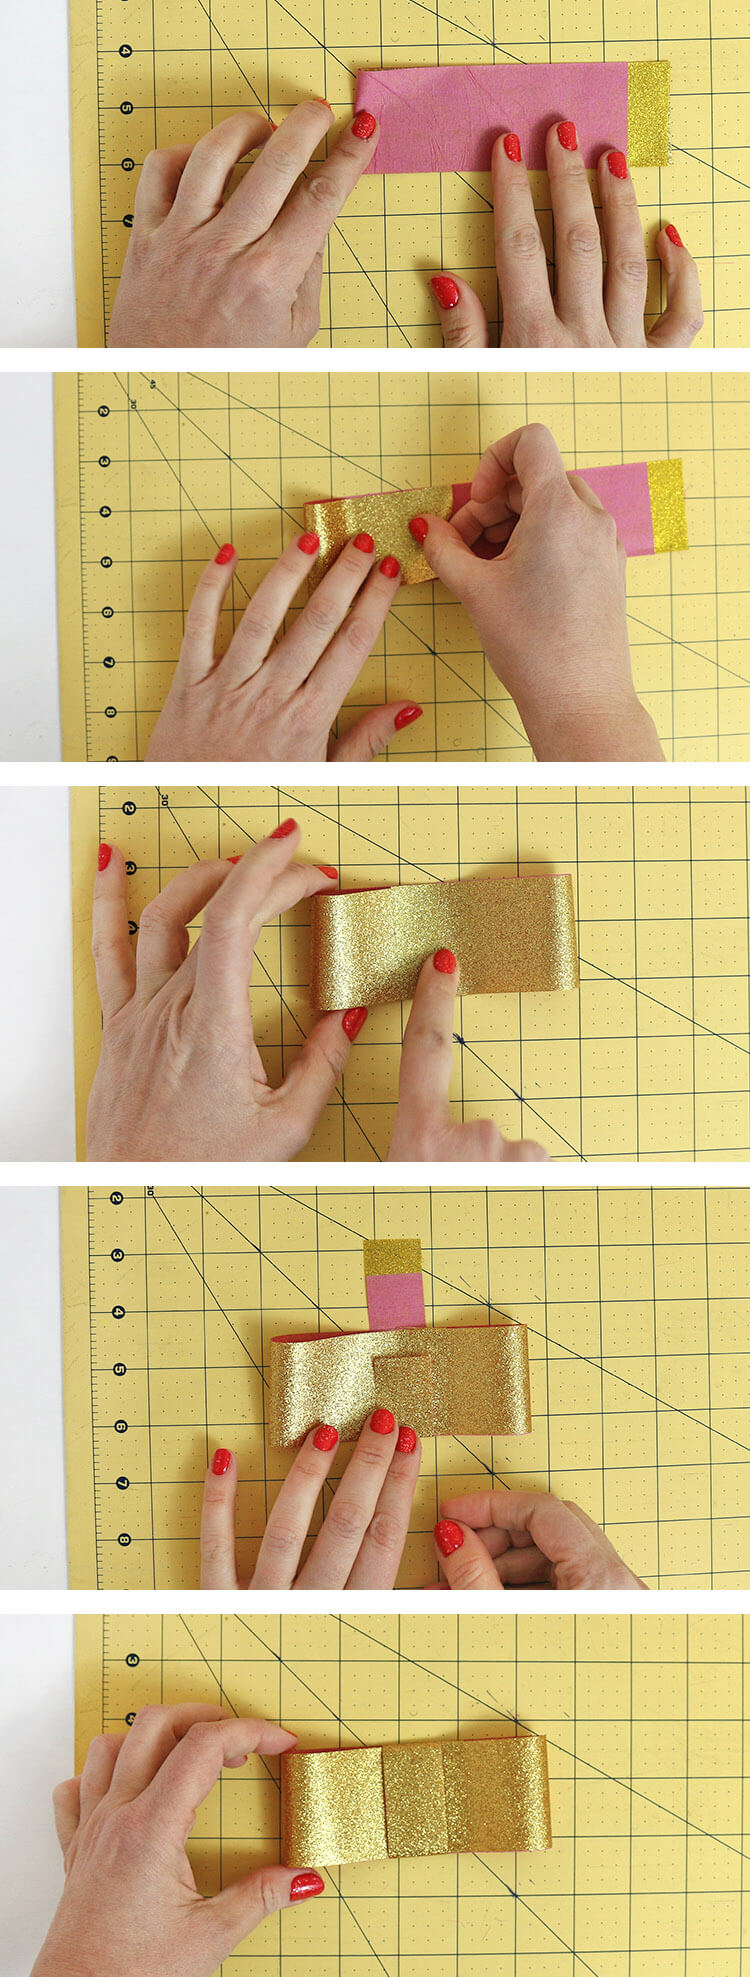
Use your rotary cutter (or craft knife) to trim off the tissue paper around the glitter tape. Now you have strips of glitter duck tape with coordinating tissue paper on the other side, and you are ready to form your bows. Next, fold your strip in half with the glitter sides facing and press the center fold to mark the middle of the strip. Now, fold the strip in the other way, and use the exposed adhesive ends to form a loop that will form the loops of the bow. Take another strip and cut it in half lengthwise using your rotary cutter. Wrap this thinner strip around the center of your bow, trim it to size, and secure in place with exposed tape end. And that’s it – your DIY tape bows are all done!
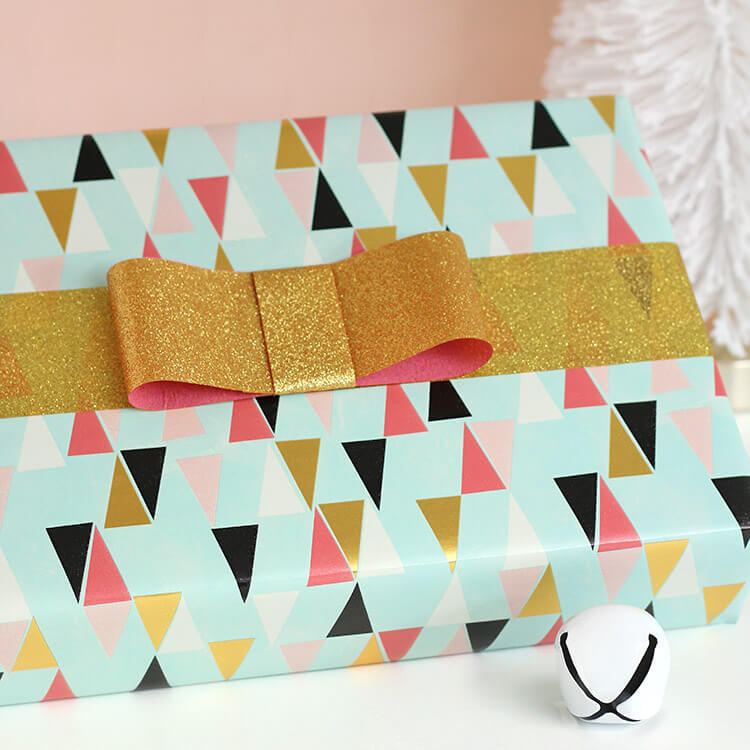
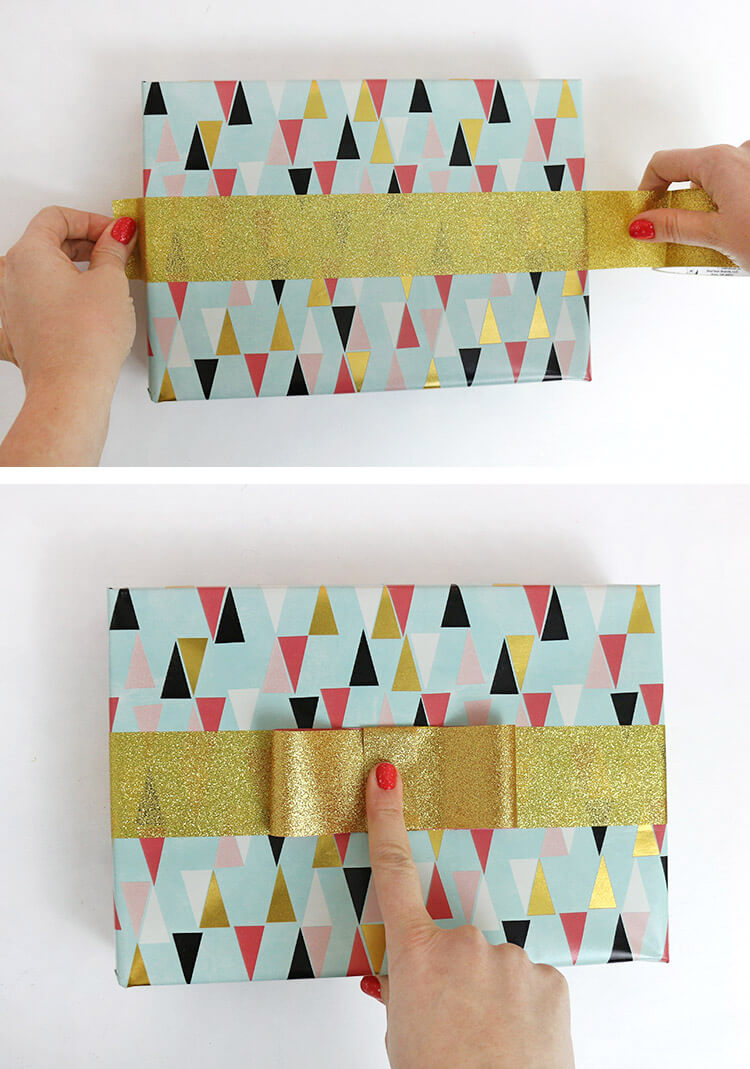
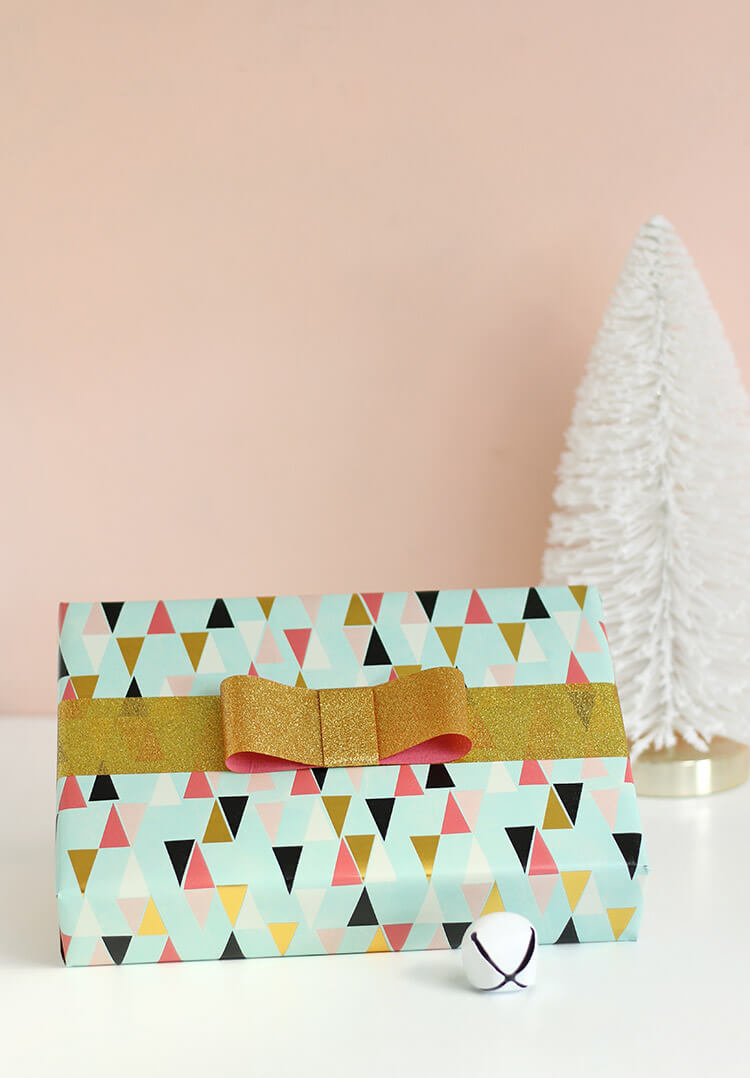
The glitter tape is perfect for replacing ribbon too! No tying or bunching to worry about – just peel and stick around your gift. Attach the bow to the top of your gift with a piece of double sided tape or a small loop of glitter tape.
I love how easy it is to get a perfect bow with this sparkly glitter tape! And the best part is that none of that glitter is coming off.

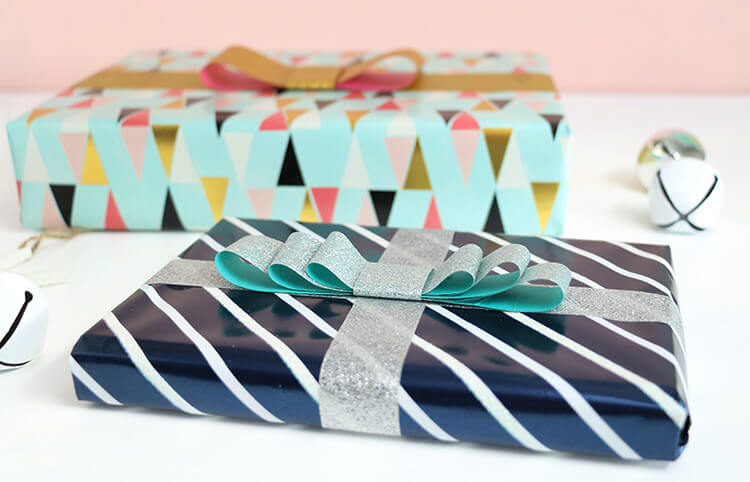
There are so many possibilities with this technique – try thinner strips or stacking several for a different look.
Do you guys like this look? I will definitely be using lots of these fun bows on my gifts this year. If you are looking for more fun holiday crafting ideas, be sure to follow Duck brand’s holiday Pinterest board for lots of inspiration.
And if you make your own DIY tape bows, I would love to see them!
Share your photos to my facebook page or tag me on instagram or twitter (@persialou), and don’t forget to use the hashtag #persialou for a chance to be featured.
Happy Making!


Comments + Project Love
Natalie says
Oh my gosh I love this, it looks so neat and lovely. Definitely stealing this for my Christmas wrapping this year!
– Natalie
http://www.workovereasy.com