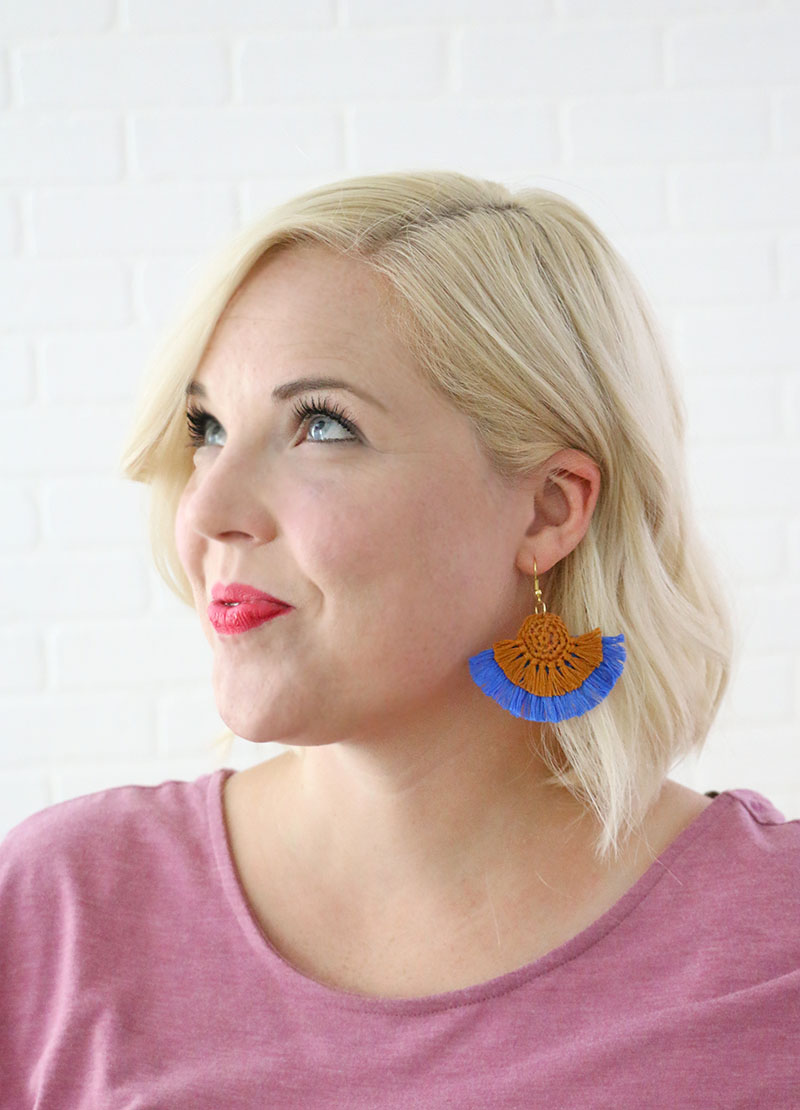
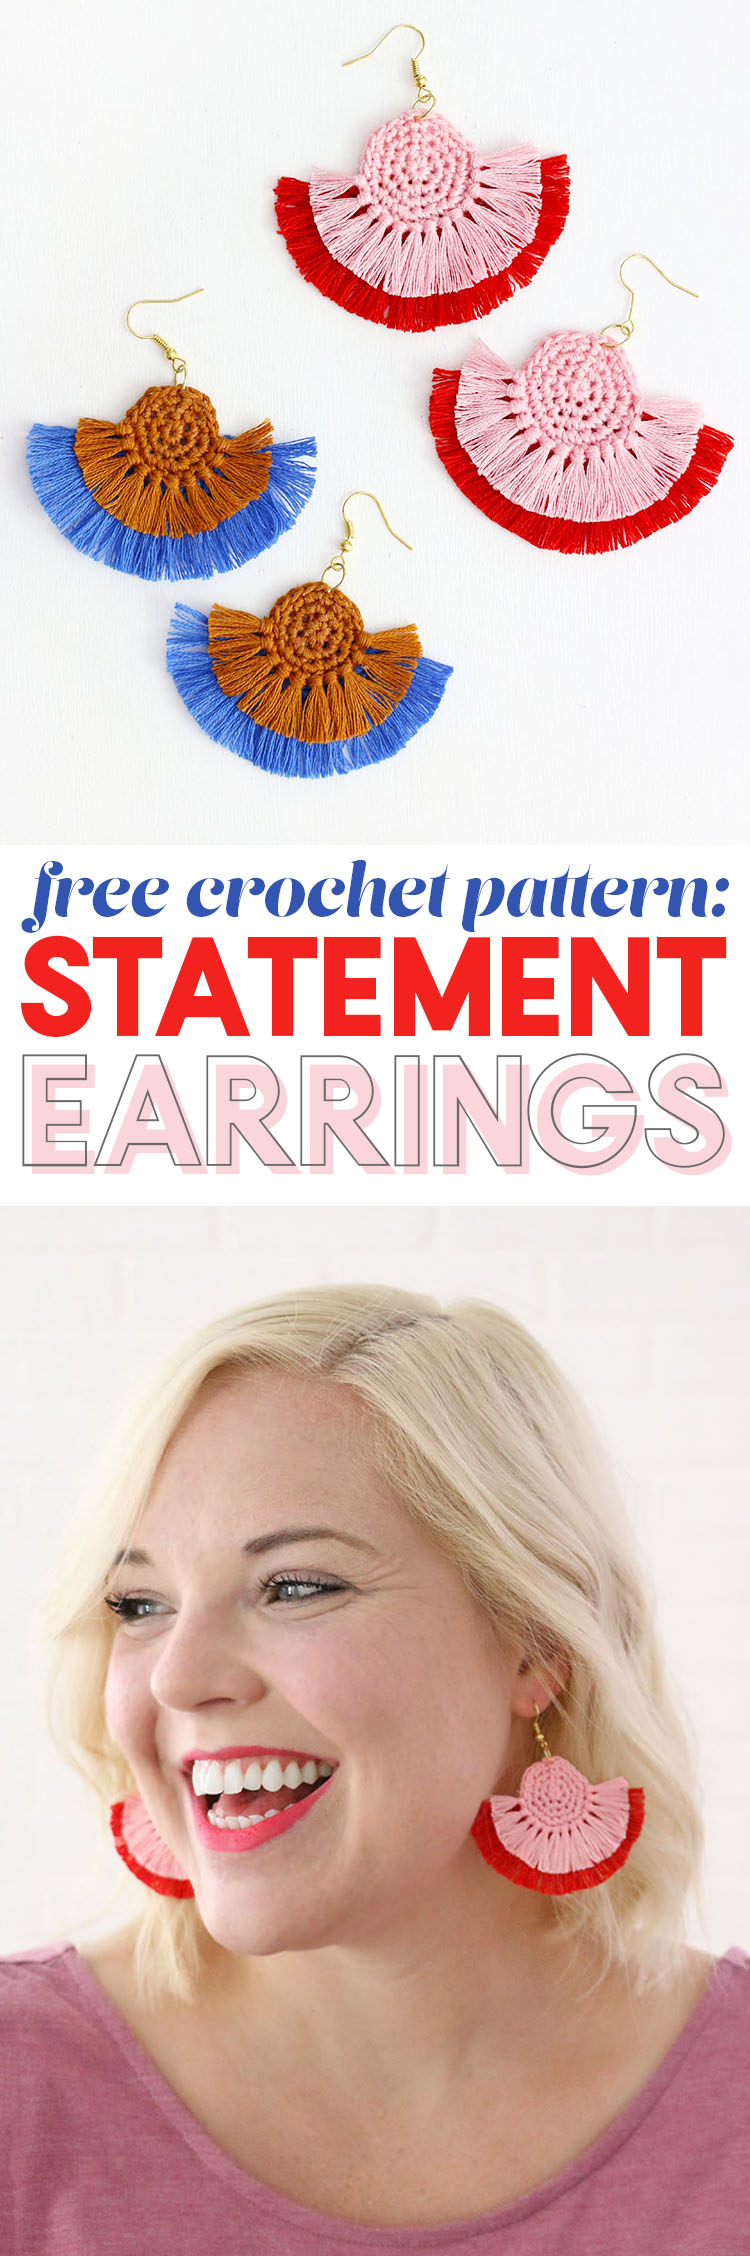
Want some new colorful statement earrings? Why not DIY? You can make these awesomely big, bold, fringed crochet earrings easily at home with this free pattern. This post was originally shared at Crafts Unleashed and contains affiliate links, which help to support this site. Thank you! 🙂

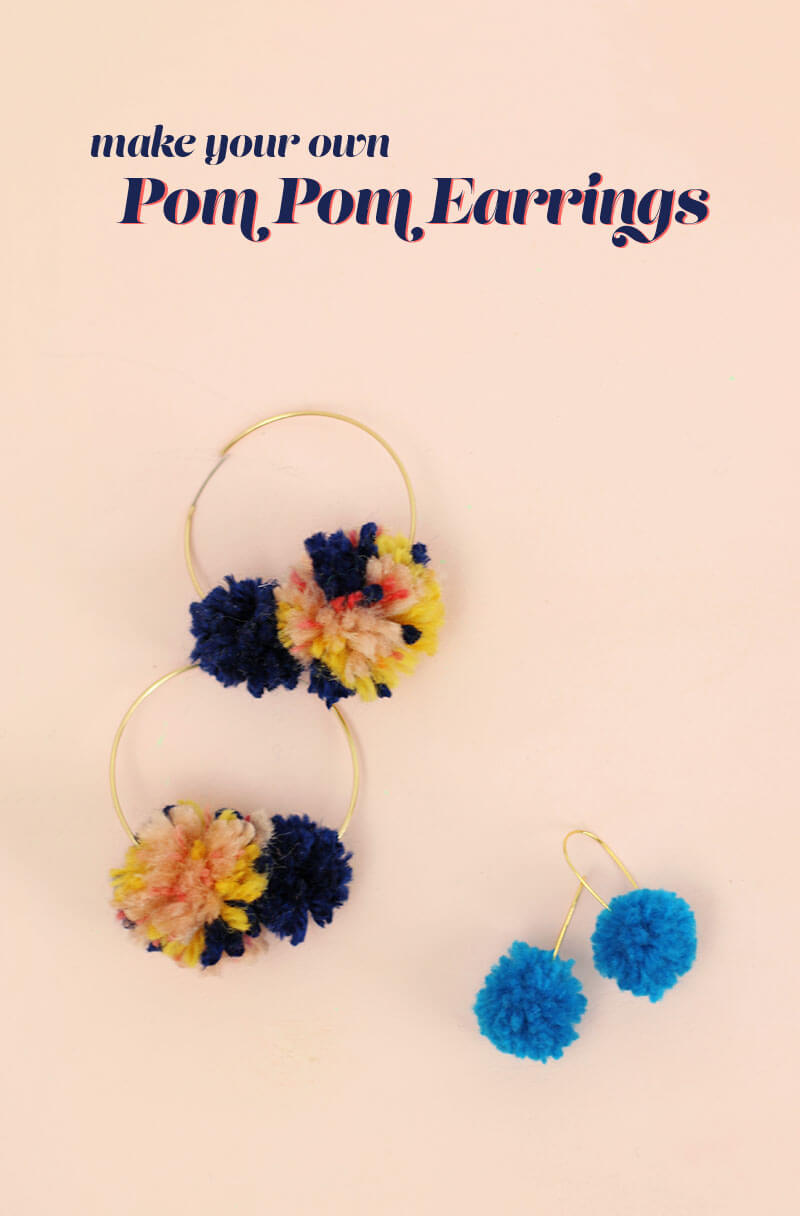
If you know me IRL, then you know that I am a fan of big earrings. I mean, really, I love all earrings, but those big, bold dangly ones have a special place in my heart. All of this means that I am so into the statement earring trend that is happening right now. I’ve already shared one easy idea for some simple pom pom statement earrings, and today I wanted to share my crochet take on the trend! These cute and colorful accessories are really very simple to make and so much fun to wear!
I’m thinking you should definitely make yourself a pair (and maybe one for your best earring loving friend as well), so I’m going to walk you through each step! Here’s what you’ll need:
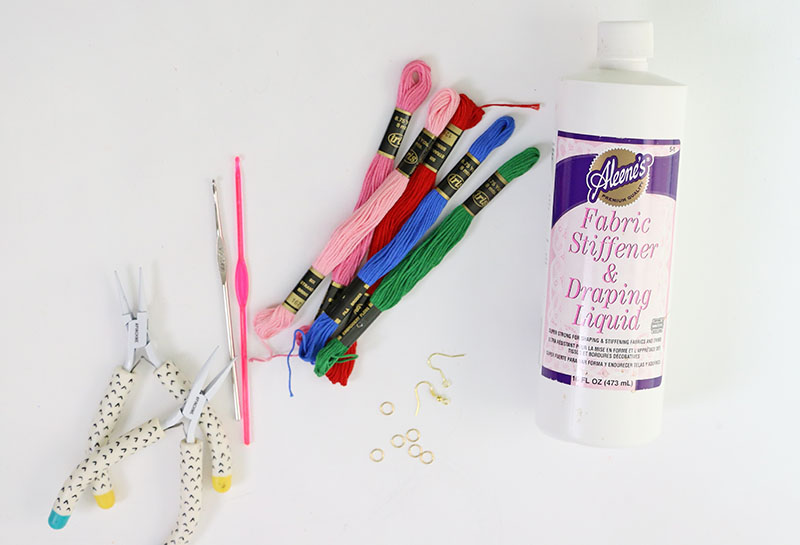
DIY Fringe Statement Earrings – Crochet Earrings Supplies:
- Cotton Embroidery Floss
- 3.00 mm Crochet Hook
- Scissors
- Fabric Stiffener (optional)
- Permanent Fabric Glue
- Jewelry Pliers
- Jump Rings
- Earring Wires
Fringe Statement Earrings – Crochet Earrings Pattern
Please Note: My patterns are free for personal use. You may sell items that you make from the pattern as long as you include a link back to the pattern when possible. Please do not sell or redistribute the pattern in anyway. If you want to share the pattern with a friend, please just send them a link. Thank you for your support!
This pattern uses American crochet terms.

I made these earrings in two sizes – the pink and red earrings are a larger size, and the blue and bronze are just a bit smaller. To make the smaller size, just leave off the last row and round in each pattern (this is indicated in the patterns as well). You could also adjust the size of the finished earring by making the fringe longer or shorter.
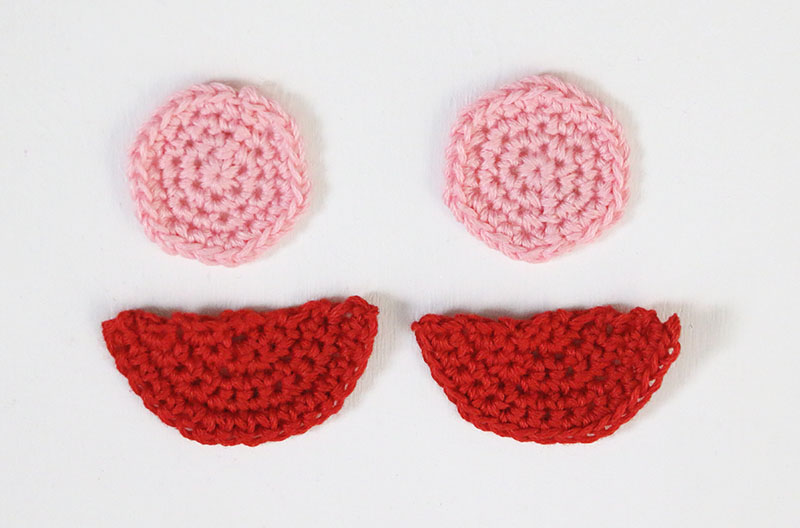
Half Circles Pattern (Make Two)
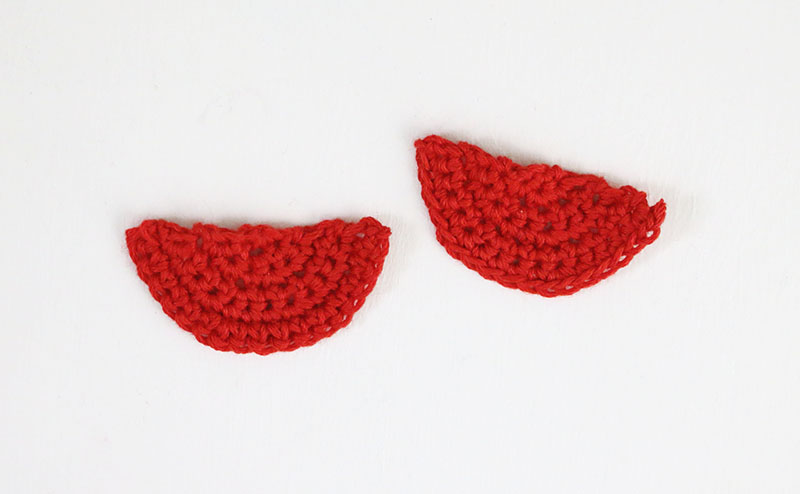
With your embroidery floss in Color A and your 3.00 mm hook:
Row 1: Beginning with a magic loop/magic circle, work 3 sc into magic loop, pull to tighten. Turn.
Row 2: Ch 1, 2 sc in each stitch (6 sc total). Turn.
Row 3: Ch 1, sc in same st, 2 sc, *sc, 2 sc, repeat from * once (9 sc). Turn.
Row 4: Ch 1, sc in same st, sc, 2 sc, *sc, sc, 2 sc, repeat from * once (12 sc). Turn.
Row 5: Ch 1, sc in same st, sc, sc, 2 sc, *sc, sc, sc, 2 sc, repeat from * once (15 sc). Turn. (For smaller size, finish off and weave in ends.)
Row 6 (larger size only): Ch 1, sc in same st, sc, sc, sc, 2 sc, *sc, sc, sc, sc, 2 sc, repeat from * once (18 sc). Finish off and weave in ends.
Circles Pattern (Make Two)

If you want the front and back of your earrings to look the same, make four circles.
Round 1: Beginning with a magic loop/magic circle, work 6 sc in magic loop. Pull to tighten.
Round 2: Ch 1, 2 sc in same st, 2 sc in each stitch around (12 sc).
Round 3: Ch 1, sc in same st, 2 sc, *sc, 2 sc, repeat from * around (18 sc). (For smaller size, finish off and weave in ends.)
Round 4 (For larger size only): Ch 1, sc in same st, sc, 2 sc, *sc, sc, 2 sc repeat from * around (24 sc). Finish off and weave in ends.
And that’s it for the crocheting! Now is the time to add a bit more stability to your pieces with fabric stiffener. This is totally optional, but I do like the result. For small pieces like this, I usually just dip the backside of the piece in the fabric stiffener and then remove the excess stiffener by smoothing it out on a piece of plastic. I just used a little ziplock baggie here. Then I set the pieces aside to dry.
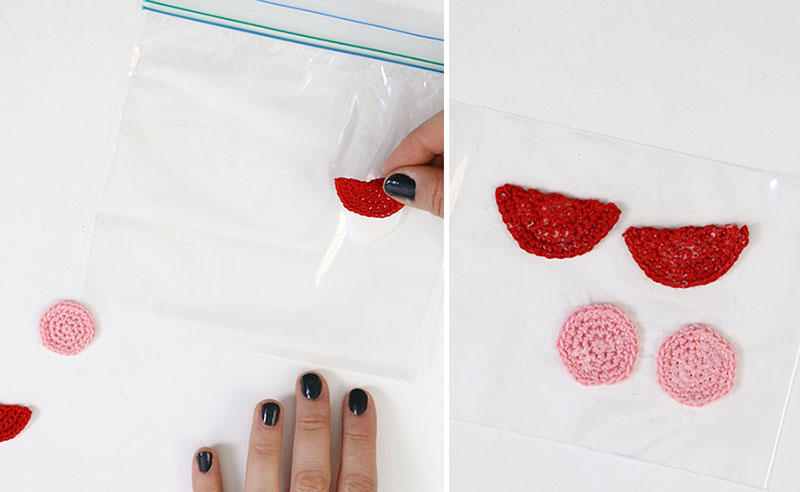
I find that applying the stiffener to the backside only helps to retain the look of the crochet fabric better on the front side of the piece. Once the pieces have dried, it’s fringe time!
On the half circle pieces, the fringe edging will be added to each stitch on the edge, and on the circles it should be added just to half of the outer stitches. Start by cutting several lengths of embroidery thread and then fold them in half to give you a double piece of thread. Use your crochet hook to pull that double length of yarn through the stitch, and pull the tails through the loop and tighten to form a tassel edge. Finally, split the embroidery thread up into it’s individual strands to give the fringe a more frayed look. I found that a fine tooth comb worked perfectly for this.
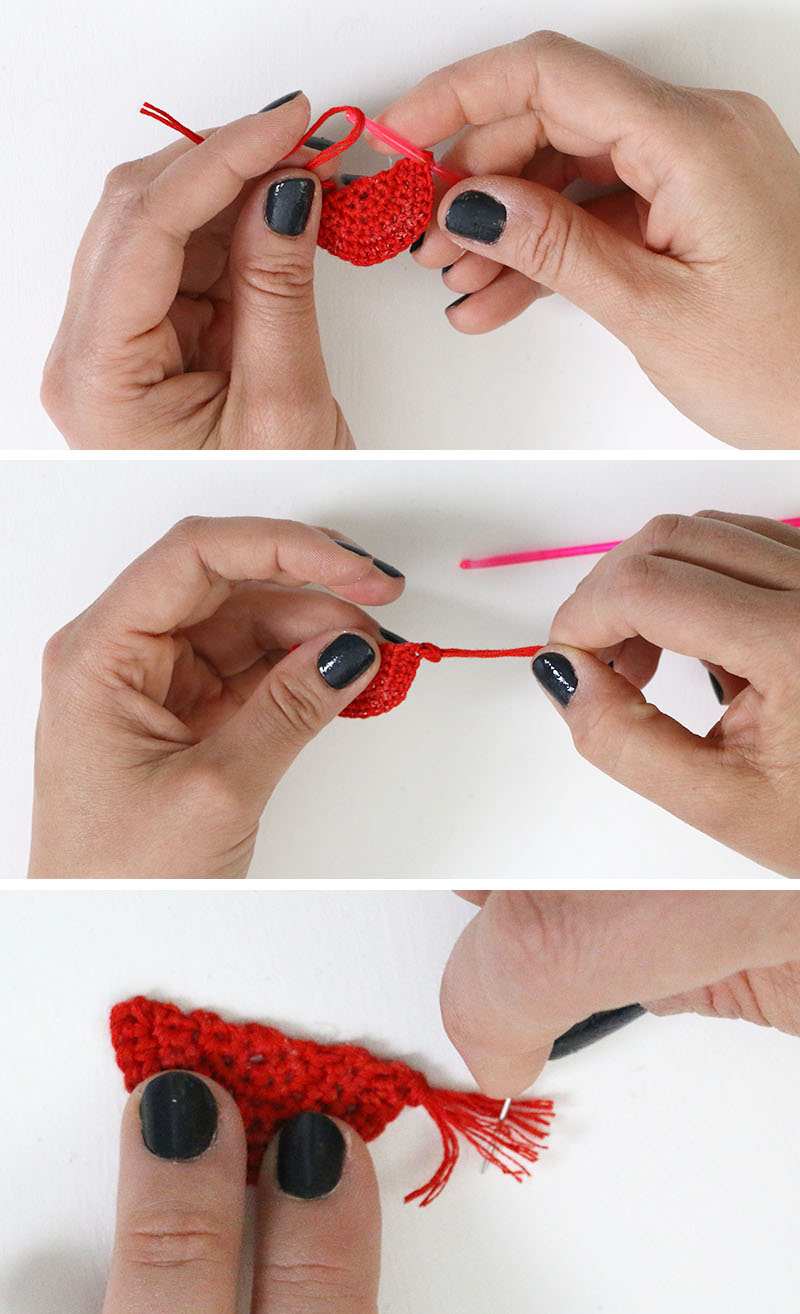
Just repeat this process until you have this fun fringed edge on all of your pieces. Then use a pair of sharp scissors to trim up the tassels to give you a sharp edge. This whole process does take a little bit of time, but I love the finished look SO much! Now all that’s let to do is put it all together.
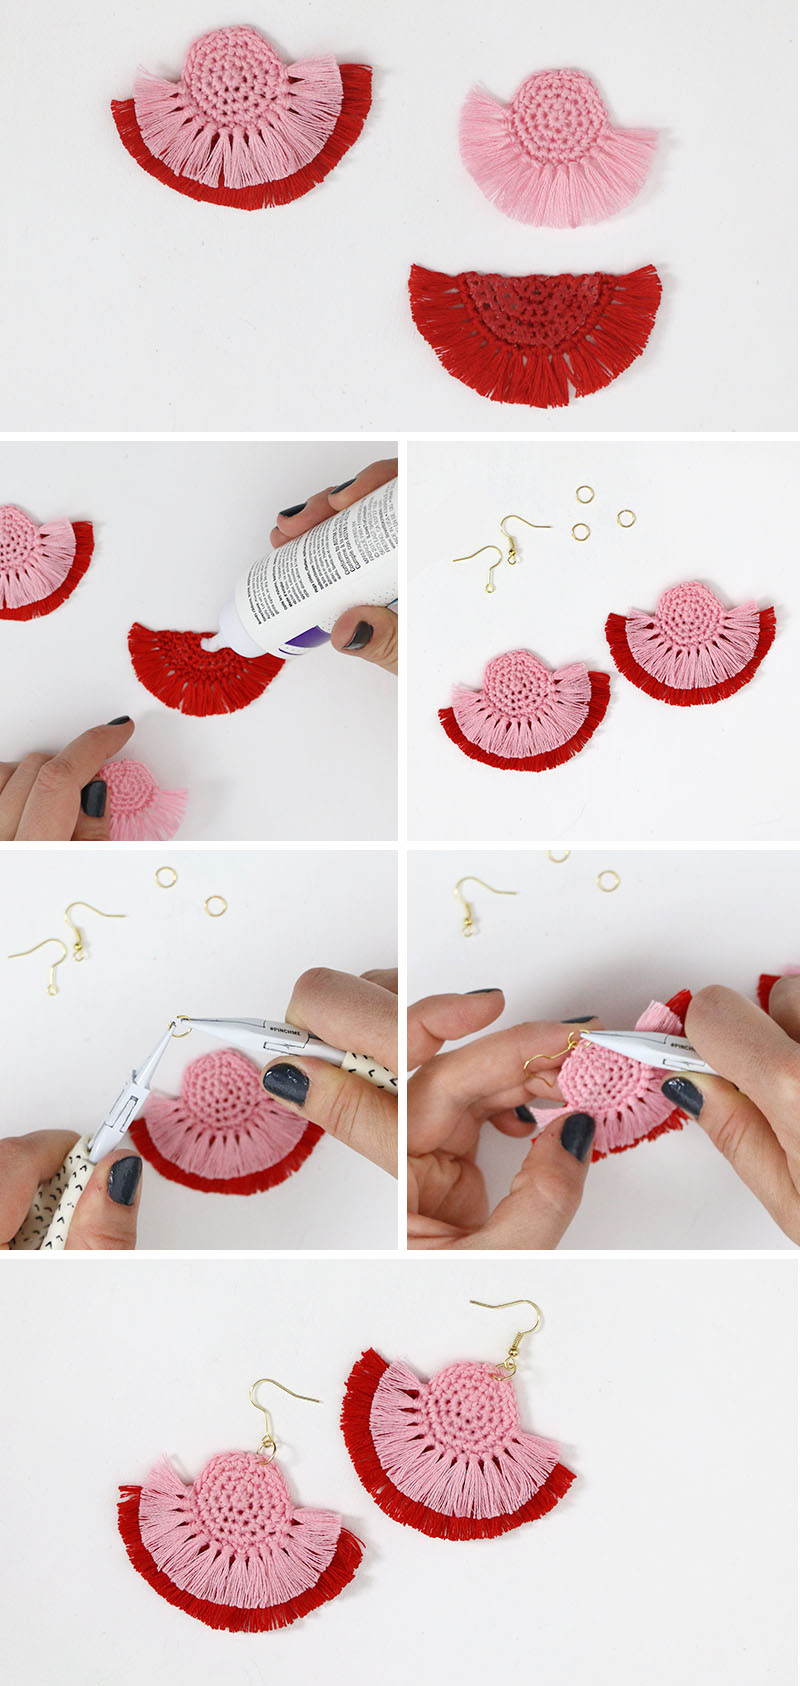
Start by using permanent fabric glue to glue the circle piece on top of the half circle piece. If you want the front and back of your earrings to look the same, you can make four circle pieces (two for each earring) and glue them on both sides of your half circle. After the glue has dried, attach an earring wire to the top of the circle piece using a jump ring. Gently pull the jump ring open using your jewelry pliers, thread it onto the crochet earring, add the earring wire, and close the jump ring with your pliers.
And that’s it! Time to wear your sweet new crochet earrings!
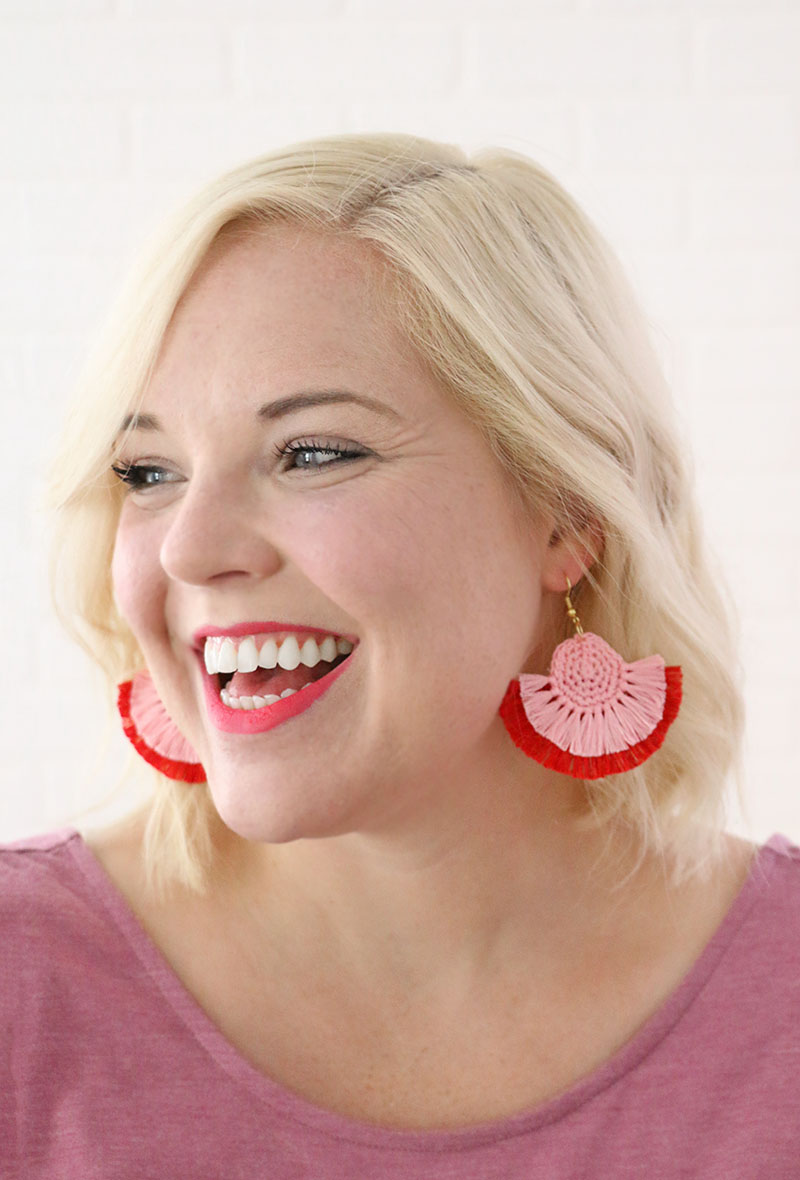
I could use these in like ten different colors I think. It would be really fun to add some beads or other findings into the mix too. I will have to do some experimenting. If you make your own fringe statement earrings, I want to see them! Share your photos to my facebook page or tag me on instagram or twitter (@persialou).
Until next time, Happy Making!

More DIY Jewelry & Crochet Ideas:
Modern Clay and Crochet Earrings


Comments + Project Love
Helen Stemp says
The earrings are beautiful. Would you share any patterns of hats or children’s mittens?
Alexis says
Hi Helen! I have a few hat patterns on the site. You may want to check out these: http://persialou.com/2016/10/30-minute-chunky-crochet-beanie.html, http://persialou.com/2014/12/simple-slouch-crochet-hat-pattern.html, or http://persialou.com/2015/11/black-cat-slouch-hat-free-crochet-pattern.html You can also search “hat” in the search bar at the top of the site. I don’t have any children’s mitten patterns currently, but it’s something I can work on!
rada says
Can you please do a video tutorial on this fringe statement earrings??
Cathy623 says
Very pretty crochet earrings! Thank you very much for your nice and free pattern
Melanie Campos says
Can you use smaller jump rings for this project? I bought a second-hand crafting bric-a-brac box and I only have available smaller jump rings.
Destini Freer says
Is fabric stiffener and glue the only things you can use of can you use tacky glue?