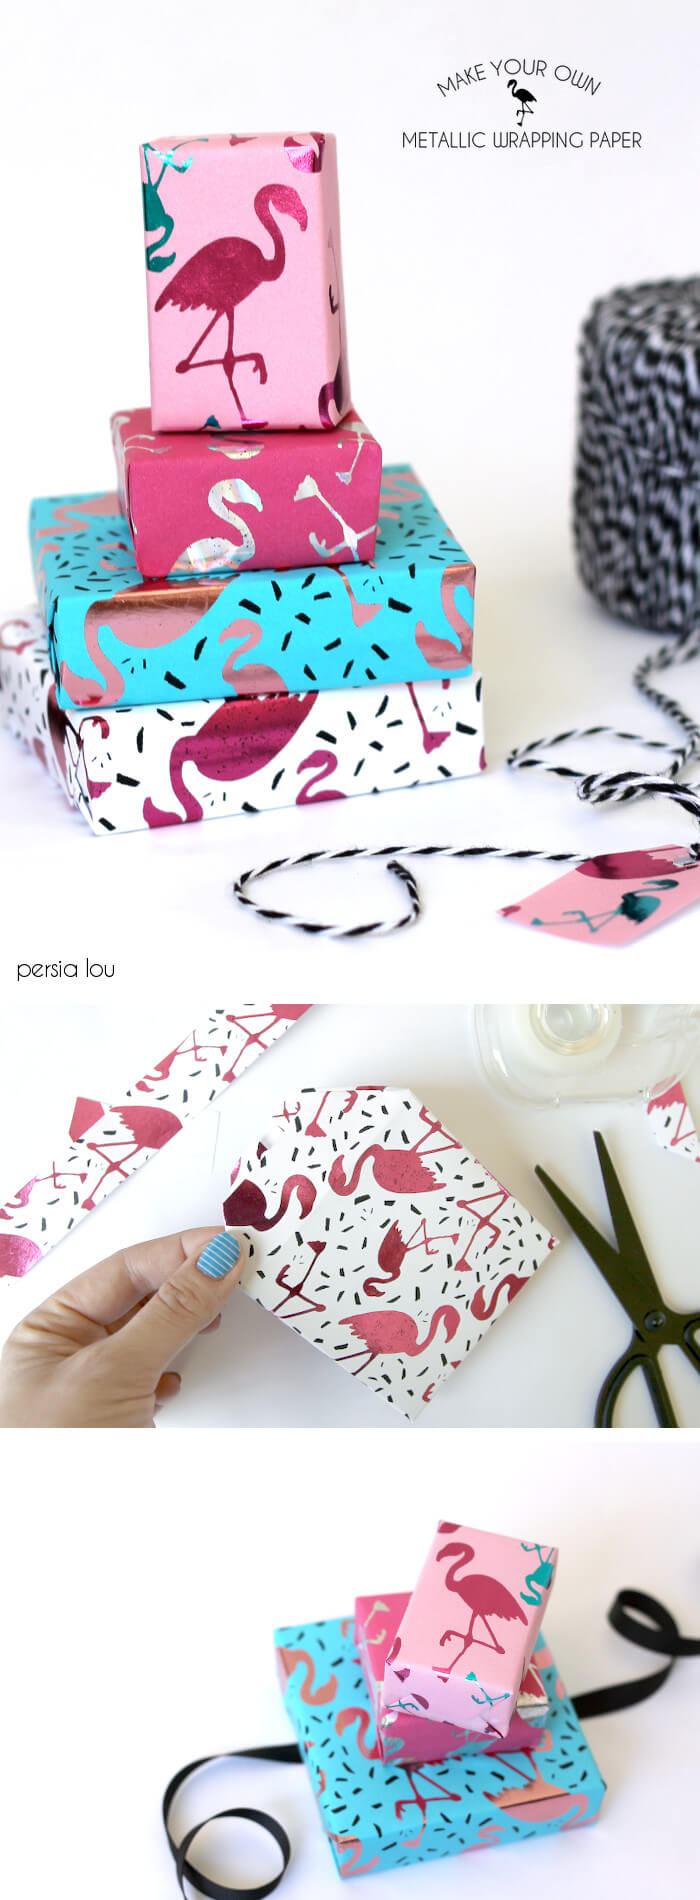
Make your own DIY Metallic Wrapping Paper with the Heidi Swapp Minc. This adorable flamingo print metallic paper is perfect for any small gift. Just print, foil, wrap! Thanks to American Crafts for sponsoring this post, which also contains affiliate links.
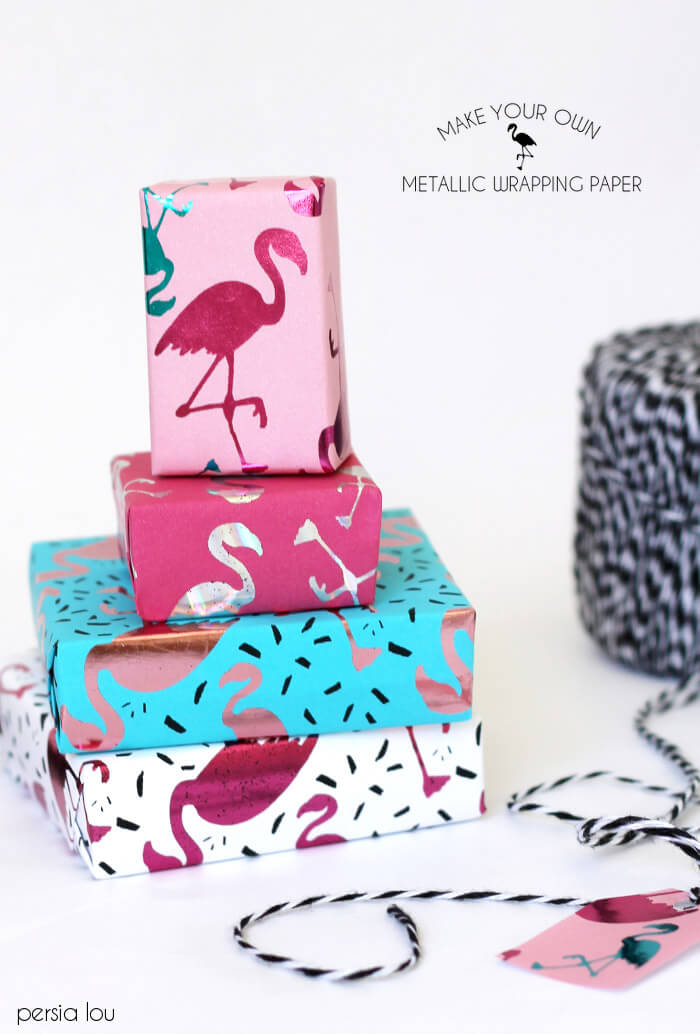
I feel like flamingoes are the party animals of the bird kingdom. I mean, they are definitely dressed for the occasion, right? So, if you are going to make wrapping paper with a bird design, I think you have to go flamingoes. That’s what I did anyway.
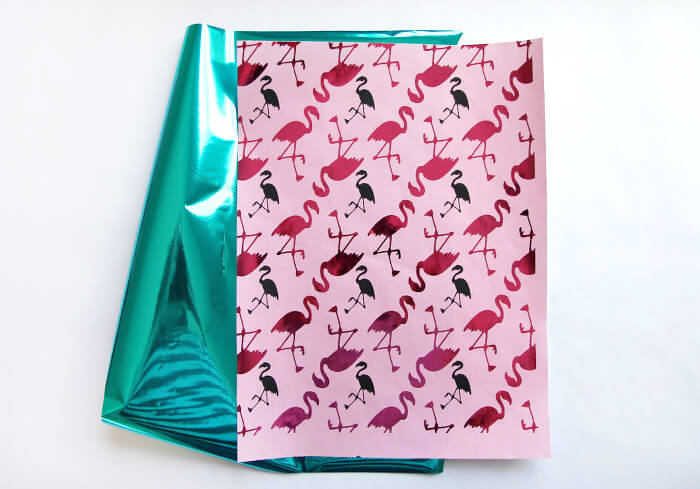
And for extra awesome points we turned our DIY wrapping paper into DIY Metallic Wrapping Paper. Because why not? I’ve raved about it a few times already, so you might have heard me say that the Minc is just one of my favorite crafting tools, but I kind of extra love it when I’m foiling on colored paper. They foil just really pops against colored paper. Totally recommend it.
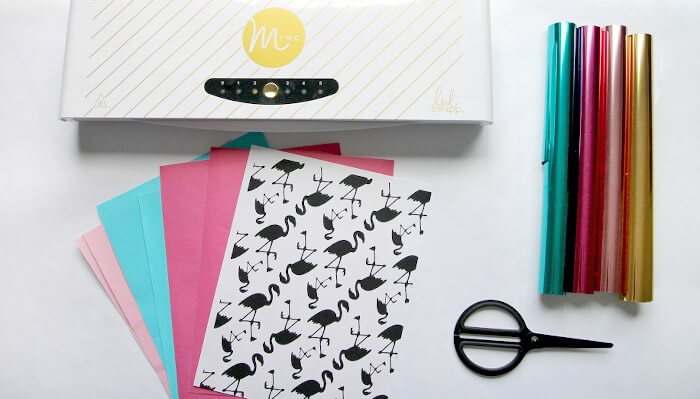
DIY Metallic Wrapping Paper Supplies:
- Heidi Swapp Minc Foil Applicator (or a Thermal Laminator should work too)
- Laser Printer (This is the printer recommended by American Crafts)
- Reactive Foil
- My Wrapping Paper Print Download (PSD – Just Flamingos or With Dashes OR PDF – Just Flamingos or With Dashes)
- Paper (use some fun colors! I actually cut down some butcher paper I had on hand for my colored pieces)
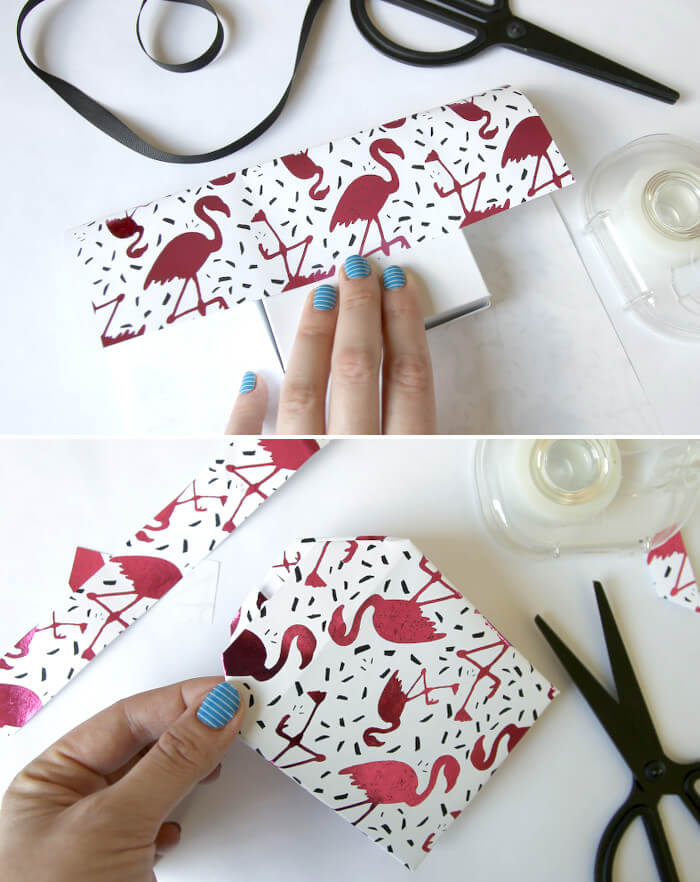
- Scissors (sharp ones work best on the foil)
Start off by printing your chosen design onto the paper. Remember to use a laser printer – the foil reacts to toner and won’t work with an inkjet. If you want to make multicolored wrapping paper, only print the layer you want to foil first.
(I designed the wrapping paper prints so you can make it multi-colored using my multi-colored metallic printing tutorial. The just flamingos version is split into two layers with some flamingoes on one layer and some on the others so you can minc it in two colors if you like. The dashes version has all the flamingoes on one layer and all the dashes on the other.)
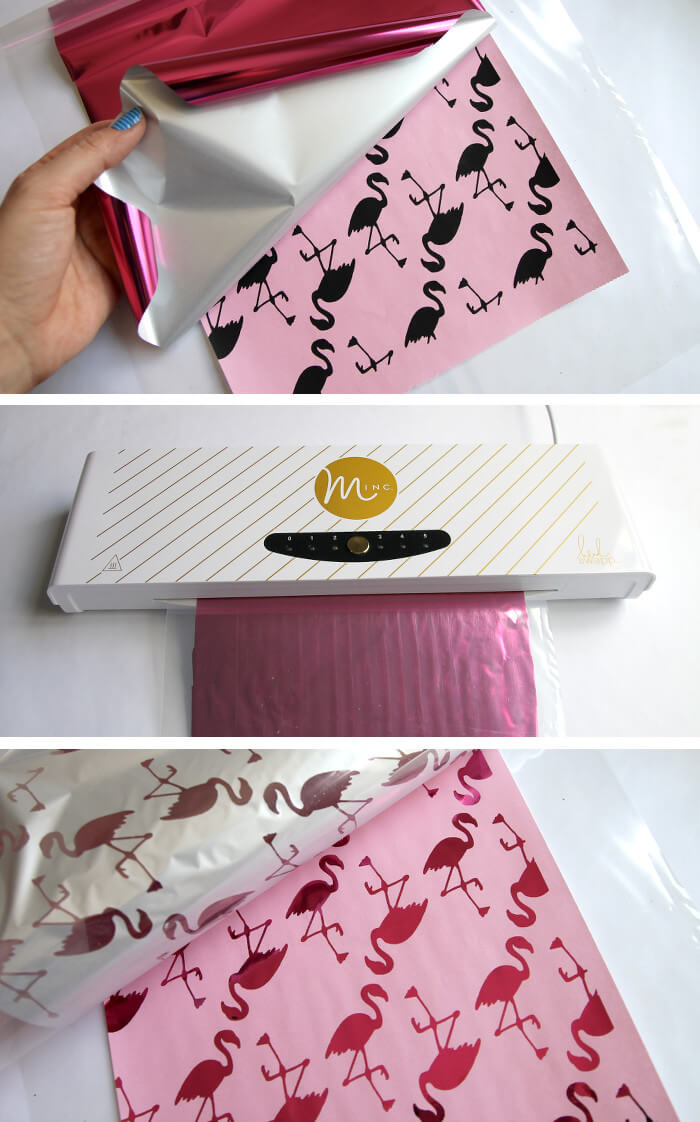
I love that big reveal! It’s so fun to peel back that foil and see all the pretty shininess.
Next, put the paper back in the printer (make sure it’s facing the right way!) and print the next level (see my first tutorial for more detailed instructions). Then run it through the Minc again with the second foil color.
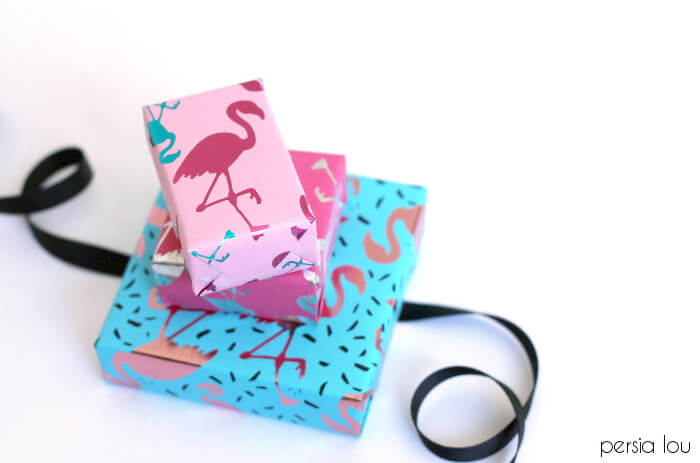
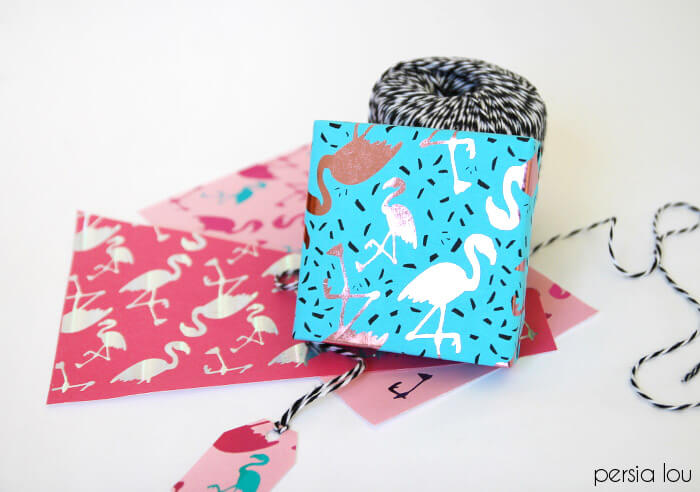
Pretty soon you will have a nice stack of shiny flamingo papers!

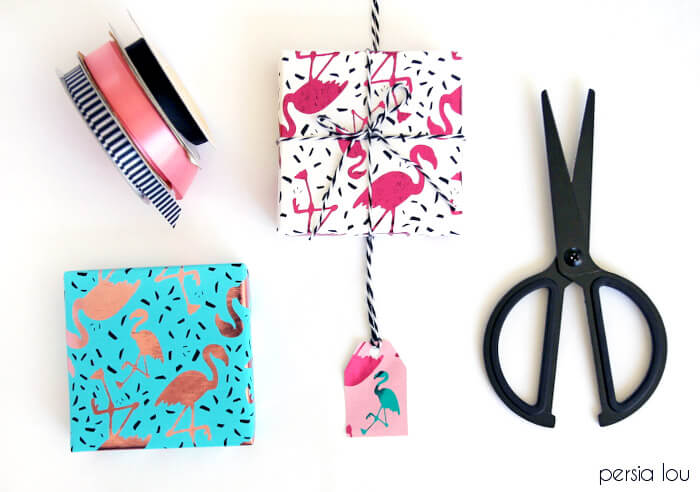
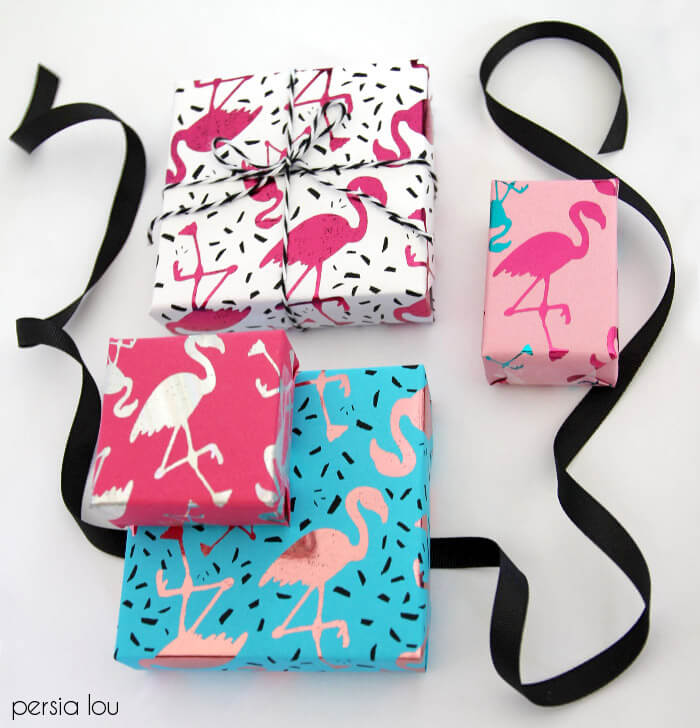
Now, this is obviously a small piece of wrapping paper – you aren’t going to be wrapping any big packages with this stuff. However, these little papers are perfect for wrapping up small jewelry boxes, or you could use a couple pieces together for slightly larger boxes.
You can see in the image above that the hot pink on the white paper has some black spots peeking through and it didn’t foil as cleanly as it normally does. I used heat setting number 2, and when I was done realized I should have used number 3, so I think that was the problem. Honestly, it doesn’t bother me too much – I think it kind of goes with the look.

I really love these papers! I’m having a hard time choosing my favorite, but I’m kind of partial to the blue with light pink flamingoes and black dashes. Does it remind anyone else of Saved by the Bell? No? Just me?
This was my first time experimenting with the holographic foil (on the hot pink paper) and I really kind of love it. I love the contrast on the pink paper. Doesn’t it look cool?
These papers will make any little gift extra special. Or I’m thinking they would be pretty cute framed up and hanging on a wall too. Let me know if you make your own flamingo wrapping paper! I would love to see it!
Happy Making!

Looking for more creative inspiration? Check out these posts:

How to Make Multi-Colored Foil Prints


Comments + Project Love
Laurel (@abubblylife) says
holy crap, i love this
Nikki @ Tikkido says
Oh man, I NEED that foil applicator in my life!
Beth DiIorio says
Wow…what a fantastic idea! Foil? Who knew! Thank you for sharing both the printable and the tutorial. Will definitely give it a try 🙂