Learn how to make this welcoming DIY gather wood sign, which is perfect for decorating your home this fall. This cute feather-shaped wood sign is easy to make with your Silhouette or Cricut and my free hand lettered “Gather Here” cut file (comes with SVG, PNG, and DXF files). I originally shared this project at Crafts Unleashed, and this post contains affiliate links, which help to support this site. Thanks!

Are you guys already switching into Christmas mode or are you still wanting to hang onto fall a bit longer? If you are looking for a simple fall themed decor project (maybe a little something for Thanksgiving?), then I have you covered today with this cute and simple DIY Gather Here sign!
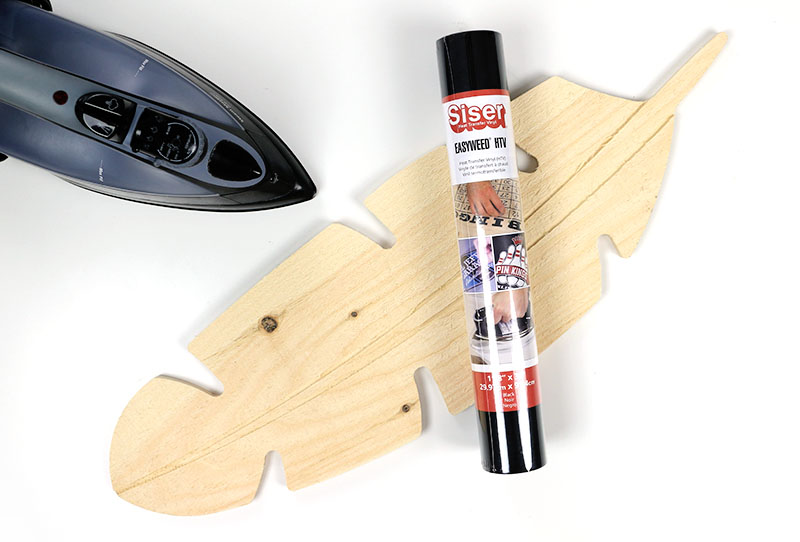
This project started out with an awesome feather shaped wood piece that I immediately wanted to work with. I thought it was such a fun shape and really felt perfect for fall.
Next, I hand lettered a “gather here” phrase to apply to the feather, which I am sharing here as a free cut file (you can find it in the supply list below). The design fits the feather shape, but you can use it on any surface you like.
Ready to get crafting?
DIY Gather Wood Sign Supplies:
- Walnut Hollow Decorative Wooden Feather (Also available on Amazon HERE.)
- Sandpaper
- Silhouette Cameo, Cricut, or other electronic cutting machine
- Heat Transfer Vinyl (I used Siser Easyweed Black)
- Weeding Hook (I love and recommend my Siser hook)
- Iron or EasyPress
- Colored Jute Cord (optional)
- My Gather Here Cut File – Download SVG, DXF, and PNG files HERE (This design is free for personal use only. If you want to use the design for commercial use, you may purchase a Limited Commercial Use License HERE.)
How to Make a Gather Here Wood Sign
This project uses heat transfer vinyl on wood, which is one of my favorite vinyl crafting techniques. For more on why I’m using iron on vinyl on wood instead of adhesive vinyl, you can check out my post (and video!) all about heat transfer vinyl on wood right here.
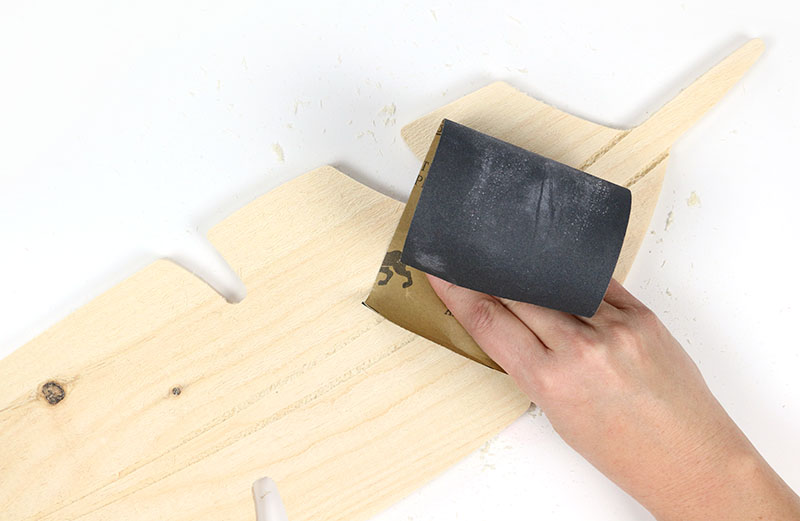
1. Sand and Prep Wooden Feather
The first thing you will need to do is give a little bit of love to that beautiful wooden feather. Because heat transfer vinyl (HTV) applies best to a fairly smooth surface, it’s a good idea to give your wooden feather a light sanding to start.
If you like, you can also paint or stain your feather at this point. I opted to keep the natural wood, but the heat transfer vinyl will apply to stained and painted wood as well. Just be sure to allow the paint or stain to dry completely before moving on.
2. Cut Gather Here Design from HTV
Next, download the free cut file design from the supply list above. Open the design in your cutting machine software. It should already be scaled to fit the feather, but double check the size before cutting.

Since we are using heat transfer vinyl, we will need to mirror the design so that it reads correctly when we apply it. If you are new to working with heat transfer or iron on vinyl, you might want to check out my HTV beginner’s guide right here.
To do this in Silhouette Studio, click on Object > Mirror > Flip Horizontally. Rotate the design to fit on your vinyl and cutting mat. For this larger design, you will either need to use a 12 x 24 cutting mat or cut without a cutting mat.
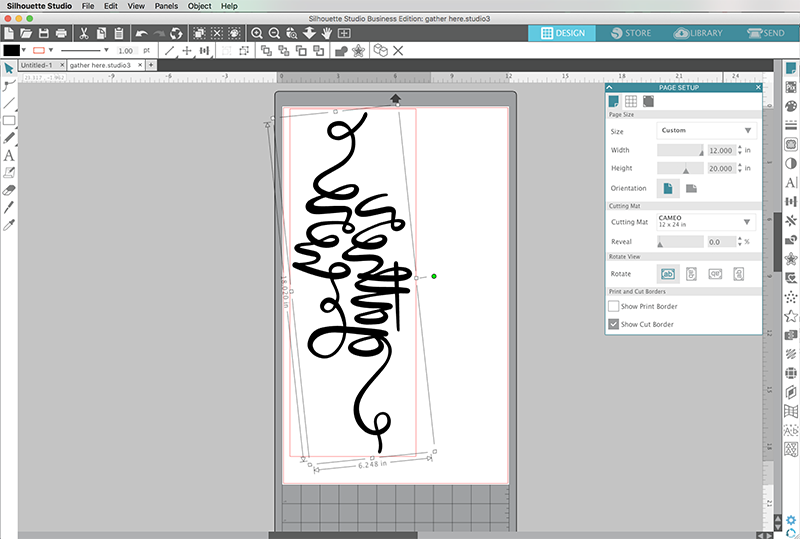
Adjust your cut settings for smooth heat transfer vinyl (or for whatever material you are using), and send to your machine to cut.
3. Remove Excess Vinyl
Next, use your weeding hook to remove the excess heat transfer vinyl from around your design.
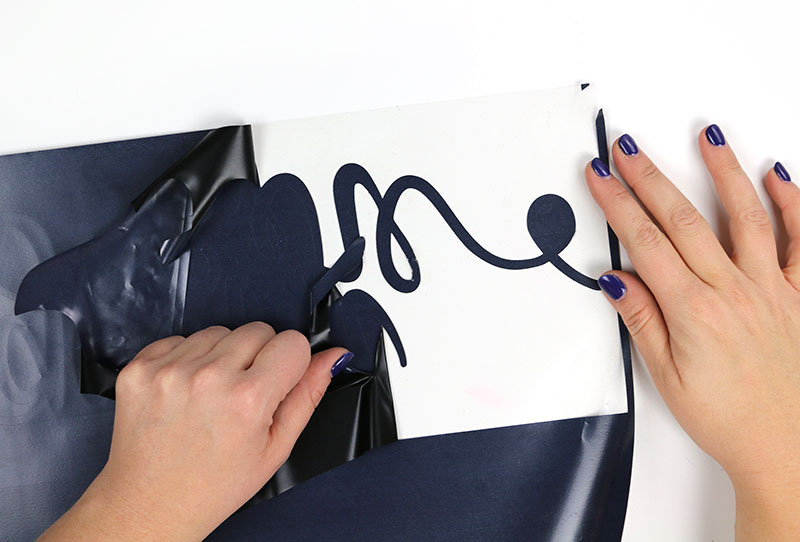
I love my Siser weeding hook so much, and recommend it to everyone. It’s perfect for grabbing those little pieces inside your letters!
4. Apply Heat Transfer Vinyl
Next, place your design on the wooden feather and use your iron on the cotton setting to apply the HTV. Give each section of the design heat and pressure for 10 seconds. I used the edge of my iron to push the HTV down into the groves in the center of the feather shape.
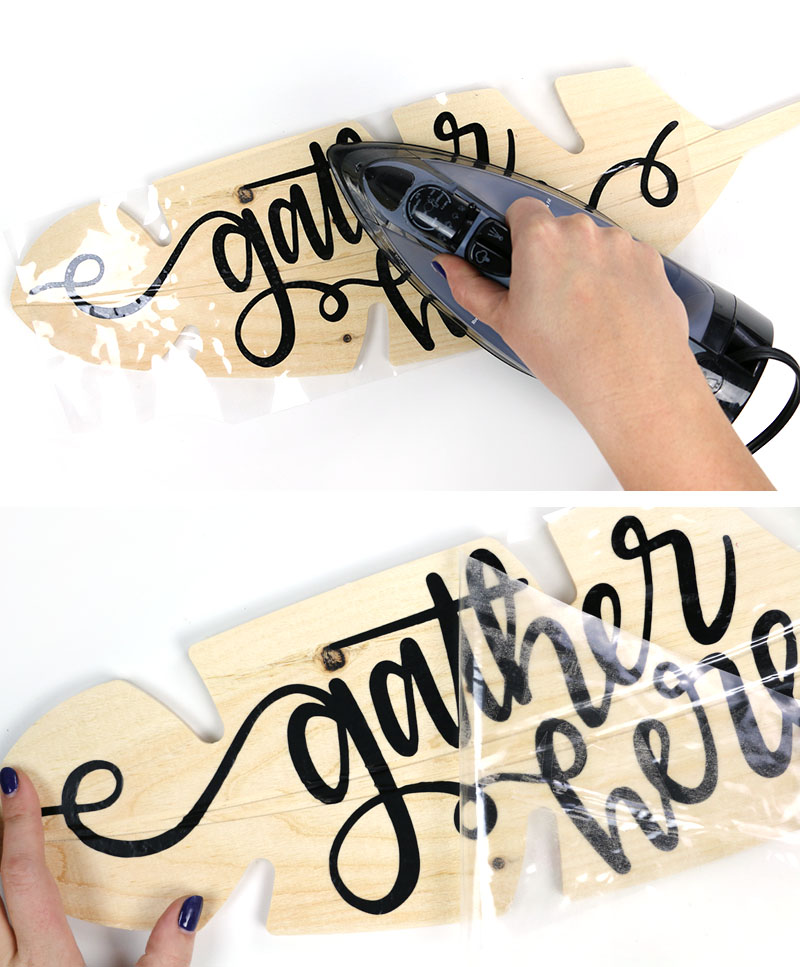
Once the vinyl has adhered to the wood, peel off the plastic carrier sheet. If any portions of the design need more heat, cover with a piece of parchment paper before using the iron again. (Don’t apply the iron directly to the vinyl or you will get a melty mess.)
I love how the heat transfer material melts into the wood.

Finally, I finished off my fall wooden feather DIY sign by tying a piece of coral colored jute cord around the feather shaft. And that’s it!

What do you think? Would you make a gather here sign for your home?
Until next time, Happy Making!

Check out more of my free cut files here:
[the_grid name=”Free Cut Files Footer”]

