*This post originally appeared on Live Craft Love. This post also may contain affiliate links. If you click through and make a purchase, I may make a small commission. It doesn’t cost you any extra, and it helps to support Persia Lou – win win!
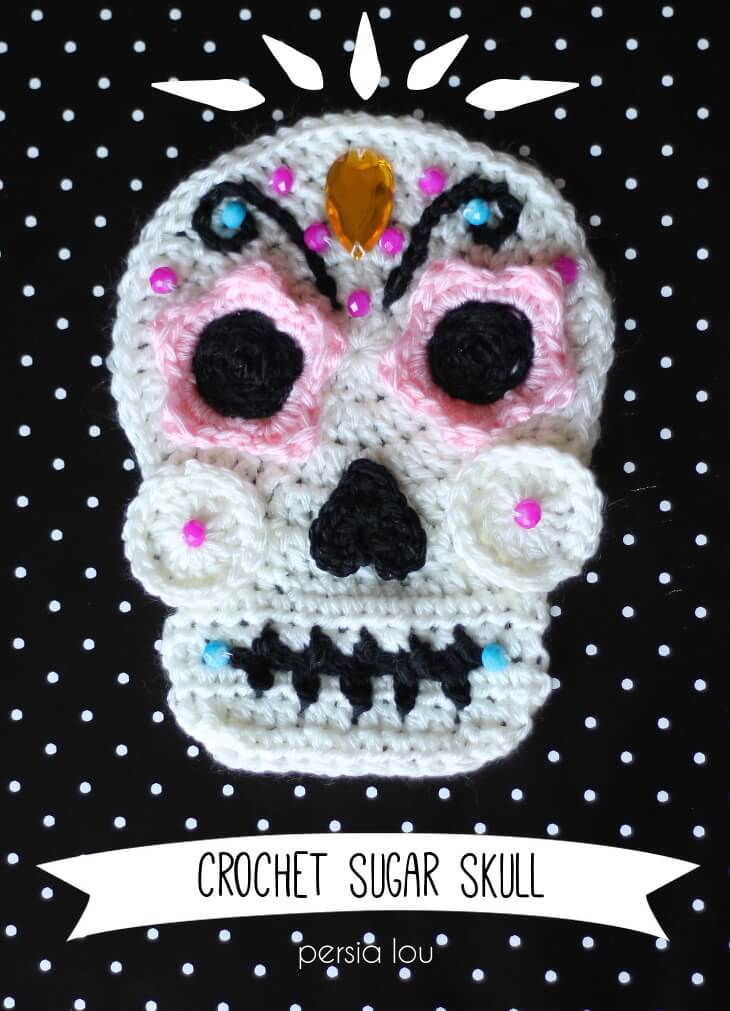
I’ve got a fun little crochet pattern for you all today, and it’s perfect for Halloween!
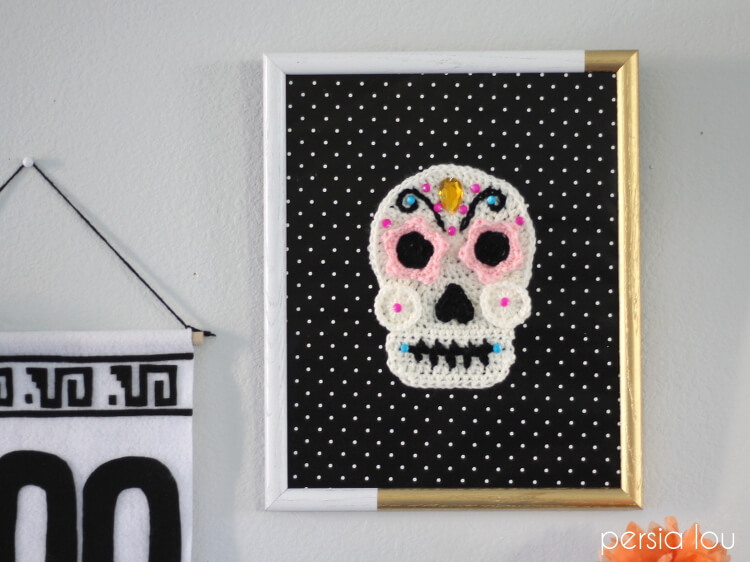
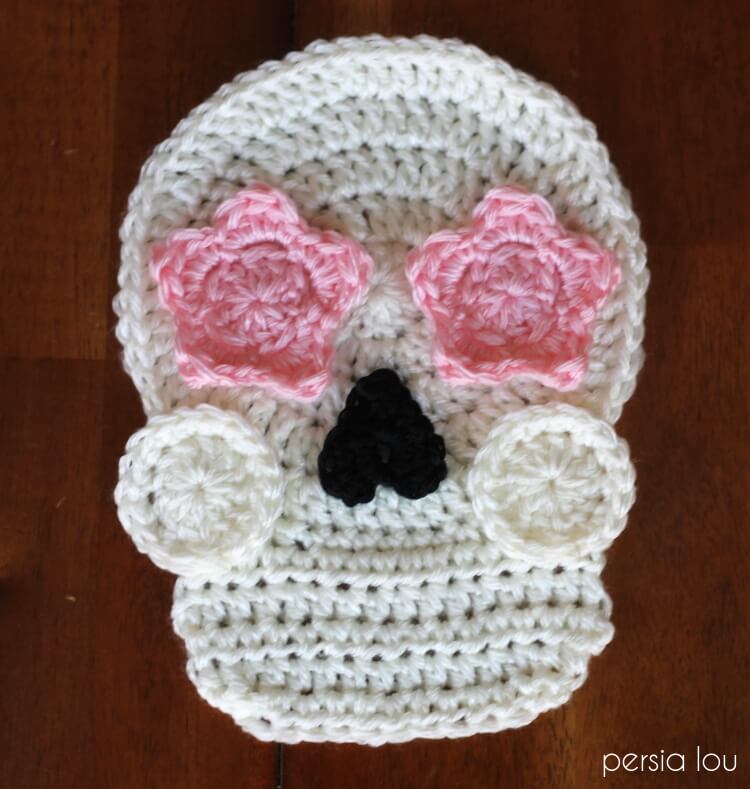
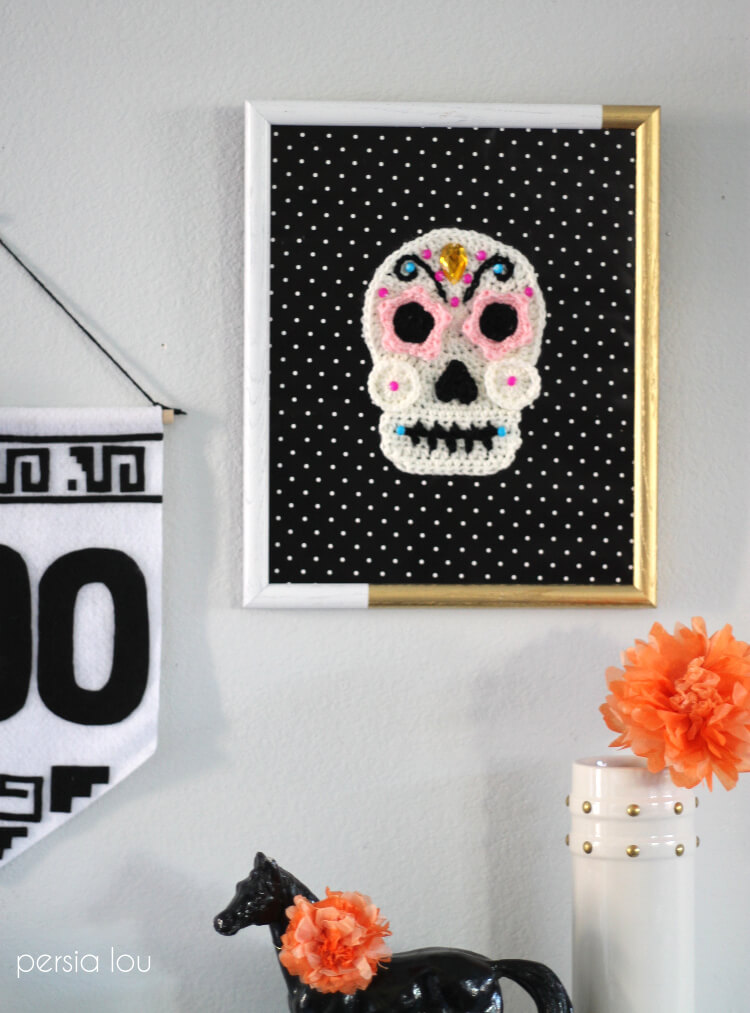
If you have been around here much lately, you know that I’ve been super into Day of the Dead as I’ve been crafting for Halloween this year. This sugar skull pattern can be totally customized and used in lots of different ways. A whole bunch would make a really cool garland, or sew one onto a pillow or tote. I glued mine onto a piece of cardboard covered in wrapping paper and popped it into a frame for Halloween decor.
Here’s how to make your own.
Materials:
- Worsted Weight Yarn in white, black, and accent colors
- Size I (5.50 mm) Crochet Hook

- Needle and thread or fabric adhesive
- Rhinestones and beads
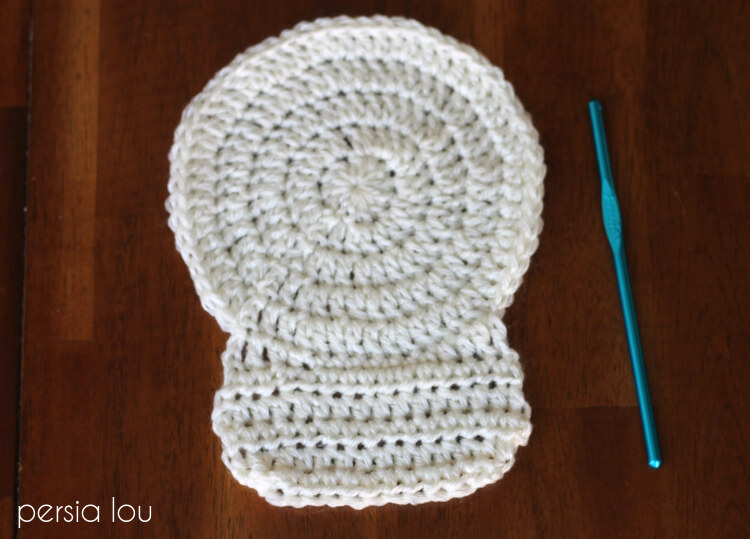
Crochet Skull Base:
Start by making a magic loop. Rnd 1: Ch3 (counts as a dc), 11 dc in loop, sl st to join (12).

Rnd 2: Ch 3, 1 dc in same stitch, 2 dc in each stitch around, sl st to join (24).
Rnd 3: Ch 3, 2 dc in next stitch, *1 dc, 2dc, repeat from * around, sl st to join (36).
Rnd 4: Ch 3, 1 dc, 2 dc, * 1 dc, 1 dc, 2 dc, repeat from * around, sl st to join (48).
Rnd 5: Ch 3, 1 dc, 1 dc, 2 dc, * 1 dc, 1 dc, 1 dc, 2 dc, repeat from * around, sl st to join (60).
The rest of the base will be worked in back and forth in rows.
Row 1: Ch 3, dc in next st, hdc in next 2 sts, 7 sc, 2 hdc, 2 dc, ch 2, turn.
Row 2-5: Hdc across, ch 2 turn, (repeat row 3 times – 4 total)
Row 6: Hdc decrease, 11 hdc, hdc decrease, ch 2, turn, Row7: Hdc decrease, 9 hdc, hdc decrase, finish off, weave in ends.
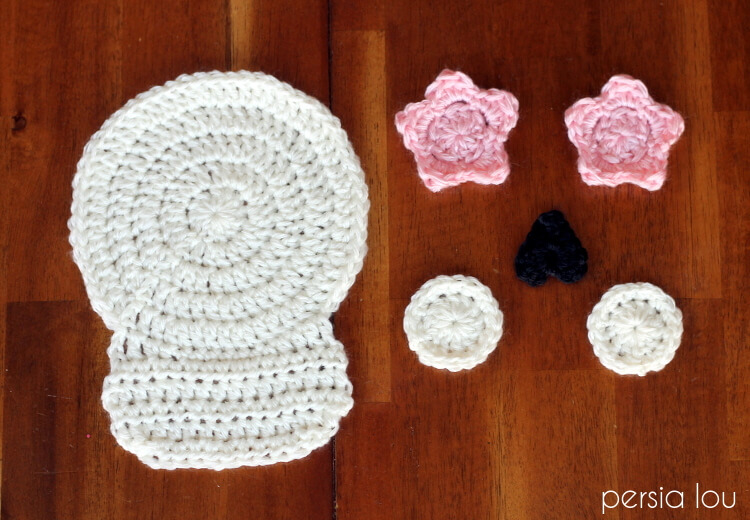
To make the sugar skull face, you will need to crochet flower eyes, a nose, and two cheeks.
Cheek Pattern (Make 2)
Magic loop Rnd 1: Ch 3 (counts as dc), 11 dc in loop, sl st to join, (12).
Rnd 2: Ch 1, sc in same stitch, 2 sc in next st, * sc, 2 sc, around, sl st to join (24). Finish off, weave in ends.
Eye Pattern (Make 2)
Magic loop Rnd 1: Ch 3, (counds as dc,) 9 dc in loop, sl st to join, (10).
Rnd 2: Ch 3, skip one stitch, sl st in the next stitch, repeat from * four times (makes 5 ch 3 spaces).
Rnd 3: Sl st to first ch 3 space, work in ch 3 space: sc, dc, trc, dc, sc; *work in next ch 3 space: sc, dc, trc, dc, sc; repeat from * 3 times, sl st to join (5 petals). Finish off, weave in ends.
Nose Pattern (Make 1)
Ch 3, all stitches worked in first ch
2 dc, 2 hdc, ch 1, trc, ch 1, 2 hdc, 2 dc, ch 2, sl st, finish off, weave in ends.
Attach the cheeks, eyes, and nose to the skull with fabric adhesive or by sewing them on.
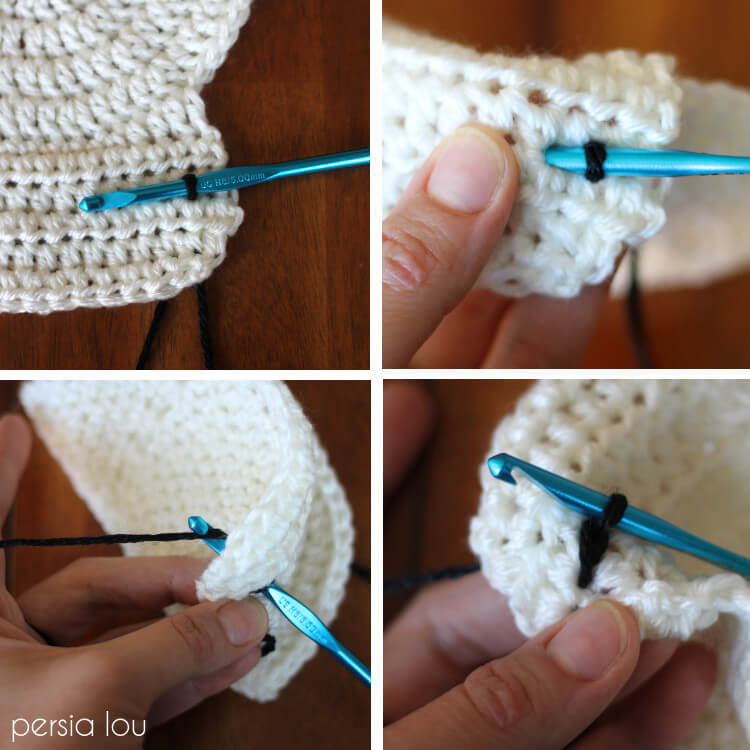
Now it’s time to add some detail to the skull using surface crochet. I haven’t used surface crochet much in the past, but it is so much fun!
To add surface crochet, pull up a loop of yarn through any hole in the piece. Insert your hook into another hole in the direction you want your surface crochet to go. Pull up a loop of yarn through the fabric. Pull that yarn through the other loop on the hook as if you were working a slip stitch. Continue in this way to create all kinds of designs and details.
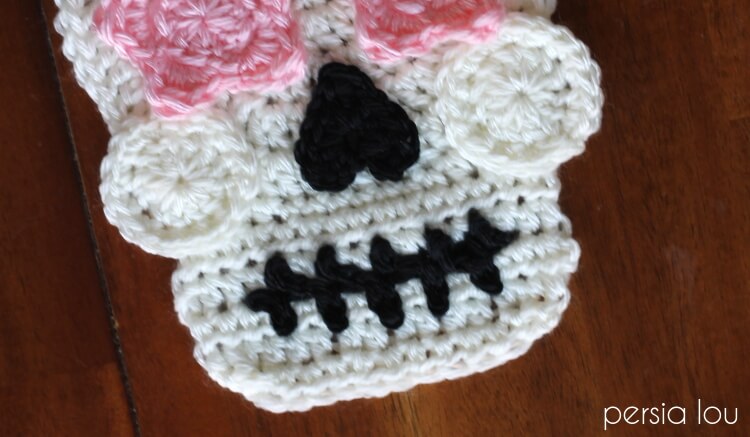
I used surface crochet to create the skull’s mouth.
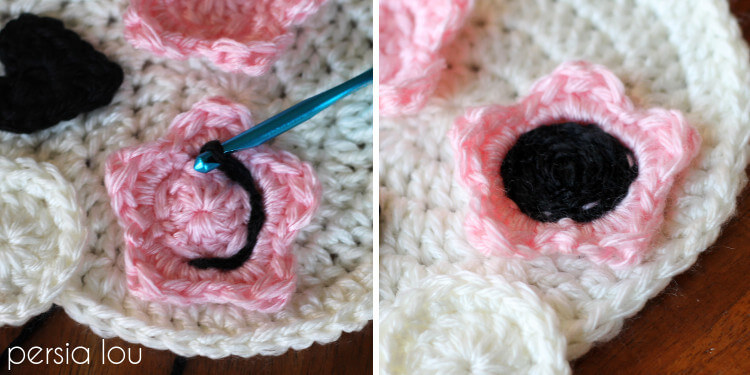
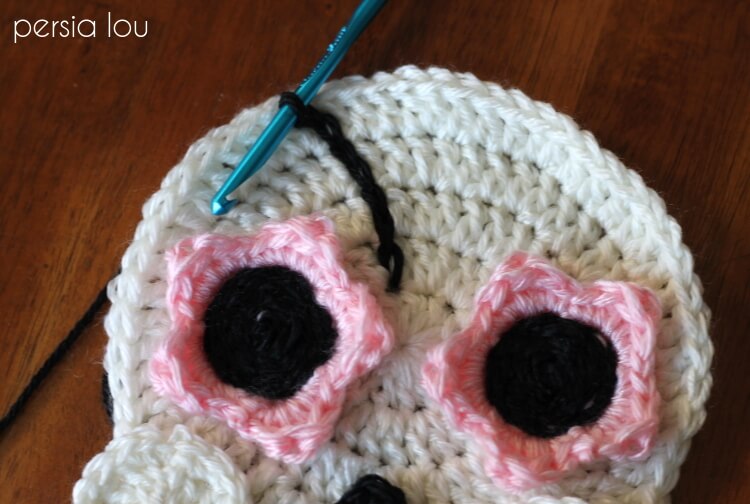
And I worked surface crochet in a spiral pattern over the flower eyes to give them a dark center.
Finally, you can use surface crochet anywhere on the skull to create patterns and designs.
To give your crochet skull pattern extra bling and sparkle, sew or glue on some beads and rhinestones.

And that’s it for this crochet skull pattern! Enjoy your awesome new sugar skull!


Comments + Project Love
Vanessa says
Now that is cool. Love the details.
Romberg Family says
I love this and started making it!!! There isnt a pattern for the chin part of the skull.
Alexis Middleton says
Whoops! So sorry about that! I just updated the pattern to add that part in. Thanks for letting me know!
Romberg Family says
YAH!!! Thank you!!