Learn how to make your own crochet leather bracelet with this free pattern and tutorial. Crocheted leather and colorful tassels make a fun, on-trend piece. I originally shared this pattern at Darice, and this post may contain affiliate links, which help to support this site. Thanks!
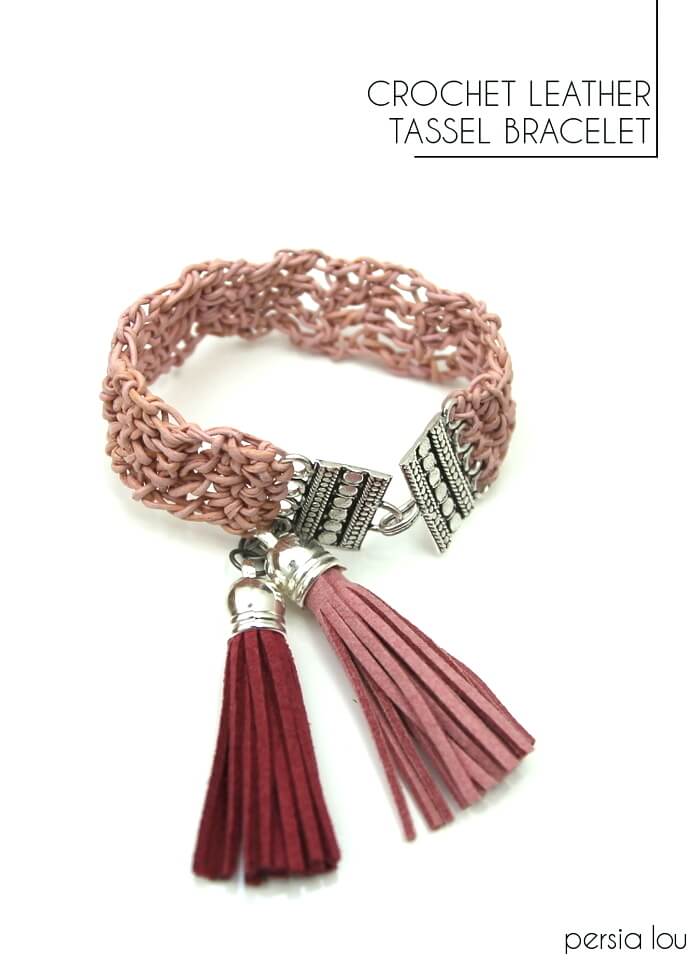
I don’t do a lot of jewelry projects and tutorials, so this post is a bit outside of my wheelhouse, but I’m always looking for new materials to crochet, and when I saw this thin leather cording, I knew it would make some great crocheted jewelry. Plus tassels are definitely trending right now, and they make this bracelet a lot of fun to wear.
Ready to make some bracelets? Let’s do it!
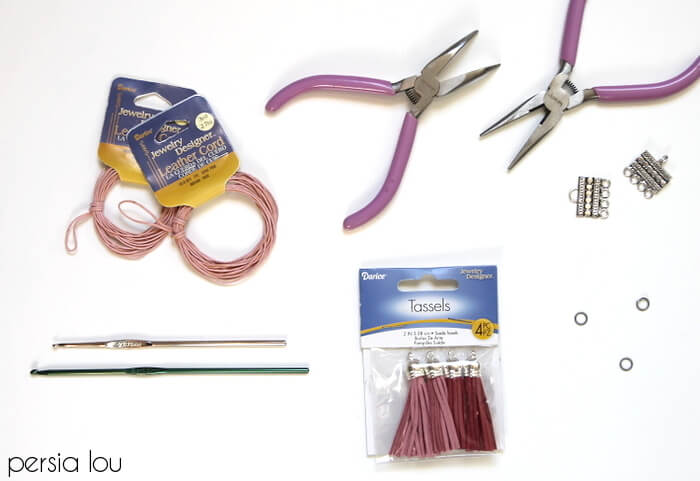
Crochet Leather Bracelet Supplies:
- 6 yards of 0.5 mm leather cording – I chose pink, but I like the blue a lot too
- 4 Hole Latch Clasp
- Tassels – they also come in blue!
- Jump rings
- 2.75 mm crochet hook
- 3.50 mm crochet hook
- Jewelry Pliers
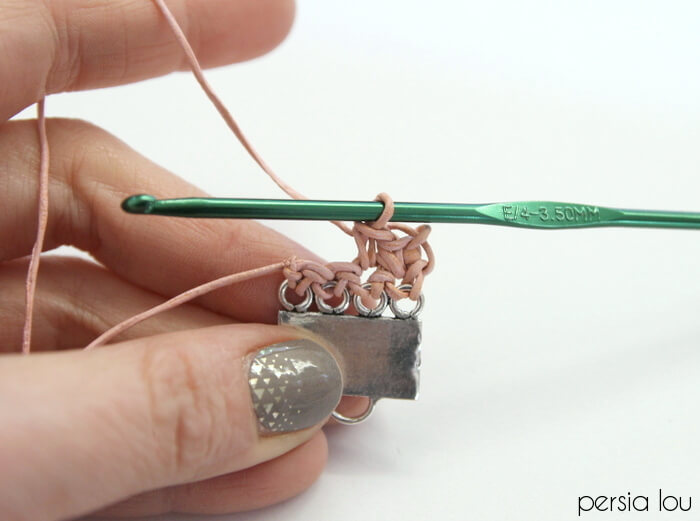
Step One – Begin by attaching your cord to one side of the clasp using a single crochet stitch. I love this clasp because you can crochet the leather cord right onto it! Using the smaller 2.75 mm hook (the other one is too big to fit through the holes in the clasp), crochet one singe crochet stitch over each hole.
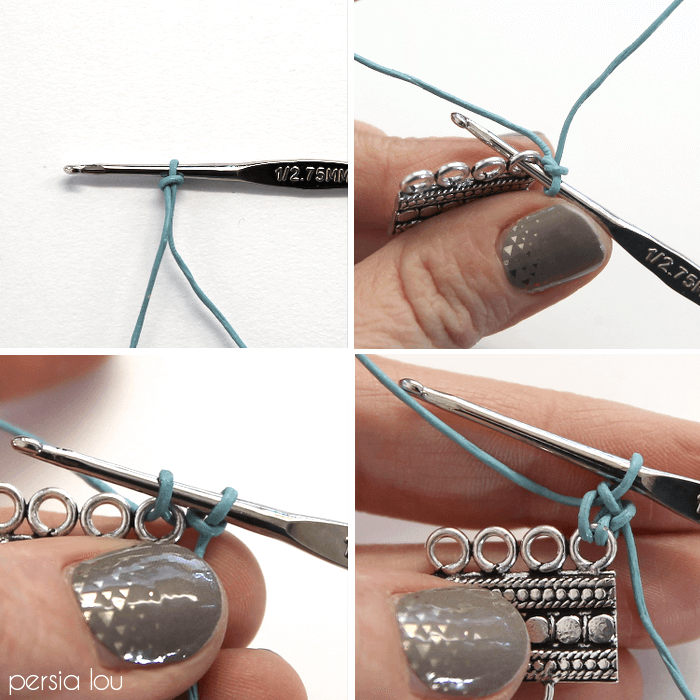
Begin with a slip knot on your hook and work each stitch over each hole in the clasp as shown in the image above. You should now have four single crochet stitches.
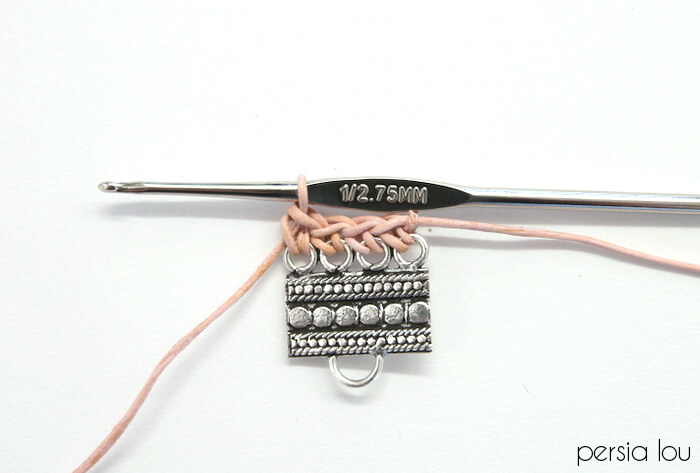
Step Two – Now we are going to switch to the larger 3.5 mm hook to give our stitches a little more room to breathe. With the larger hook, chain 1, turn, and single crochet in each stitch across (that’s four total).
Now we are going to switch over to double crochet, so for the next row, chain 2 (that will count as the first dc in this row), and double crochet in each stitch across.
You will repeat this double crochet row thirteen times until your bracelet is about six inches long (if you want a longer bracelet, add a couple more rows).
About halfway through your crochet bracelet, your first strand of leather cording will run out. To add in the new piece, complete half of the last double crochet in your row, and then pull through the final two loops with the new piece.
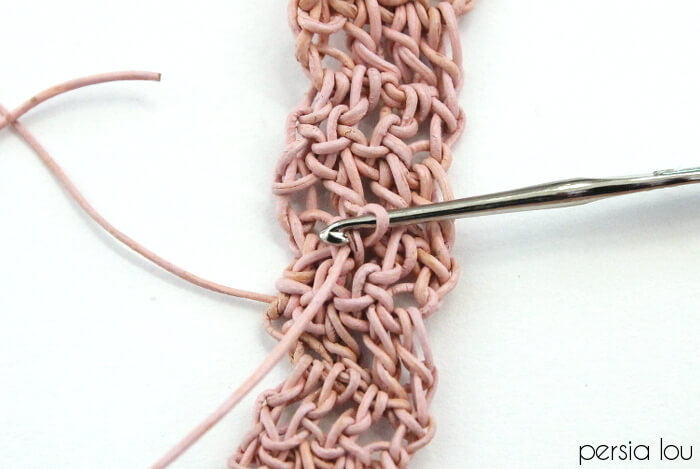
When you are finished with your bracelet, go back and use the smaller hook to weave in the ends along the back of the crochet bracelet, and then just snip off the tail ends.
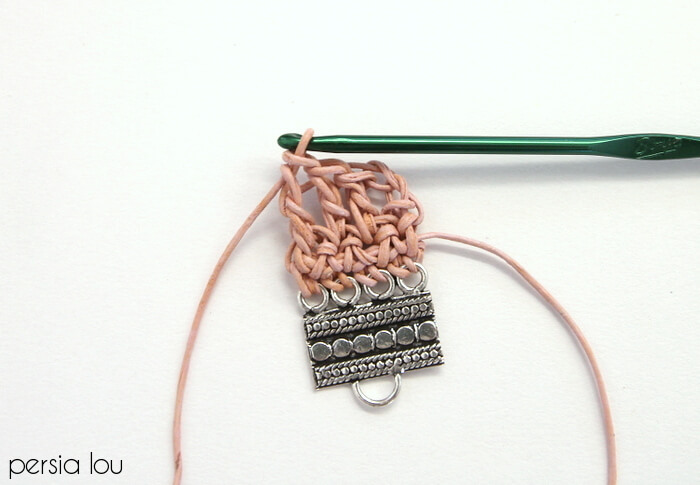
After your 14 dc rows, do one row of sc in each stitch. Then it is time to switch back to the smaller 2.75 mm hook and crochet through the other clasp.
Step Three – To crochet your bracelet to the other side of the clasp, first insert your hook into the stitch in the bracelet and draw up a loop, then insert your hook into the hole in the clasp and draw through a loop.

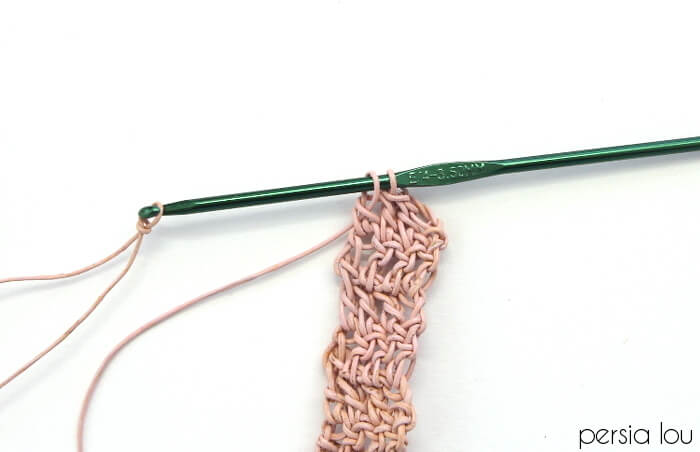
Pull the loop through the two loops on your hook to complete the single crochet. Pull the end of your cord through the final loop, and weave in the end.
Step Four – When your bracelet is all crocheted, it’s time to attach the tassels.
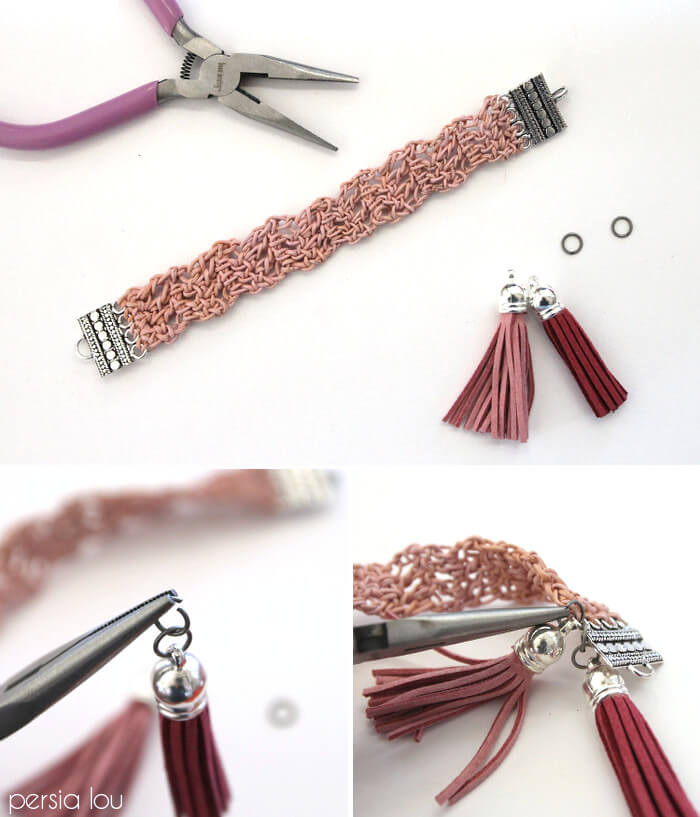
Use your pliers to gently open up a jump rings. Loop the jump ring through the light pink tassel and one of the bottom holes of one of the clasps. Use the pliers to close the jump ring. I attached the darker tassel to the crochet bracelet using three jump rings so it would hang lower than the light pink tassel.
Ta-Da! Your fancy new tassel bracelet is all ready to wear!


Happy Making!

Here are a few more free crochet patterns you might want to check out:


Comments + Project Love
Theresa says
Hi Alexis, Love your tutorial & diy. Pinned it to my jewelry board. Hope I get to try it sometime. Need to practice my crochet though. Theresa @DearCreatives
Linda Scroggins says
Thank so very much for this inspirational bracelet. ♡
Carla says
This is so awesome….I love this…thank you for sharing with us!
mrs vee makes says
Thanks for sharing this tutorial! Crocheting and bracelets a winning combo! Endless color possibilities too! Thanks again:)
johnsonshouseoflove.com says
That's so pretty! You did a great job!
Sue Raddatz says
Thanks for the great tutorial+ your creative design!