
This post was originally shared on Craftaholics Anonymous.
So, I shared my son’s nursery reveal last week, and my kids’ rooms are both officially complete and pretty great (if I do say so myself). But then there is our sad Master Bedroom. Anyone else have this problem in their house? Why does the Master always seem to be the last room in the house to get done?
Anyway – When it comes to decor and design, our bedroom has definitely been one of the most neglected spaces in our home. I did put some effort into it a couple of years ago, but since then I’ve decided the neutral gray and white thing I was going for is less “simple” and more “boring.” Time for an update!
I really love bedding that looks collected and unique, and I am trying to avoid the coordinated bed-in-a-bag look. Some interesting throw pillows were definitely in order!
How to Make Crochet and Cross-Stitch Pillows Tutorial Start off by gathering your supplies. You will need:
- Worsted Weight Yarn: I used 3 skeins of white Caron Simply Soft to crochet the fronts of my pillows and 1 skein of black for my cross-stitching.
- Size K (6.50 mm) crochet hook
- yarn needle
- 1 yard of fabric for the pillow back
- 16″ pillow forms
- thread
- sewing machine
Step 1: Crochet! The pillow fronts are simple sc squares. I wanted bigger stitches but couldn’t find a while (not off-white) bulky yarn, so I decided to hold two strands of worsted weight yarn together and crochet them as one piece of yarn. To get a 17″ square I worked 58 rows of 50 sc. Here’s the written pattern:
Row 1: sc in second ch from hook, sc in each ch (50 sc), ch 1, turn.
Rows 2-57: sc in each st (50 sc), ch 1, turn.
Row 58: sc in each st (50 sc). Finish off. Weave in ends.
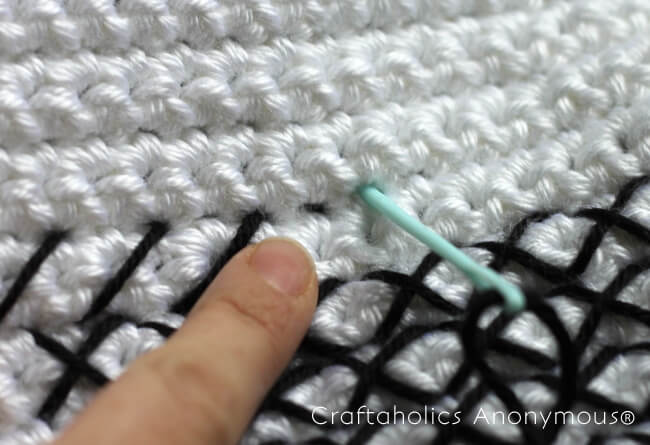
Step 2: Cross-Stitch! The holes in crocheted fabric make it a really great cross-stitch surface. I made up charts for each letter that you can download at the links below. Each square on the chart represents one single crochet stitch; however, the X’s cover 2×2 squares (or are worked over four single crochet stitches).

Using black yarn and a yarn needle, follow the charts to create your “X” and “O.” When working your cross-stitches, just skip one hole to ensure you are stitching into the right space.
There are different techniques for working cross-stitch, but the way I have always done it is to work one half of each stitch across the whole line, and then to go back and cross all of your X’s on that row.
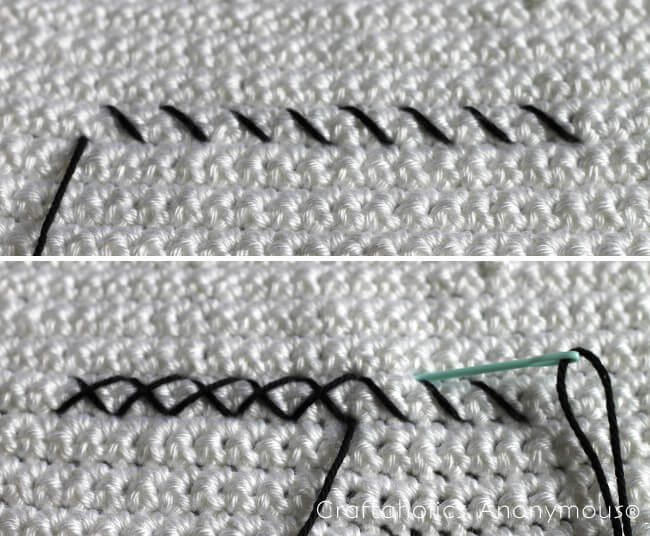
Just follow the chart, make all your little cross-stitches, and pretty soon, you will have your pillow fronts completed!
Step 3: Sew!
When you have completed your cross-stitch “X” and “O,” it’s time to turn them into pillows. Yay! I made simple envelope back pillows because they are so easy, and it gave me the chance to pick a contrasting fabric for a pop of color on the pillow back.
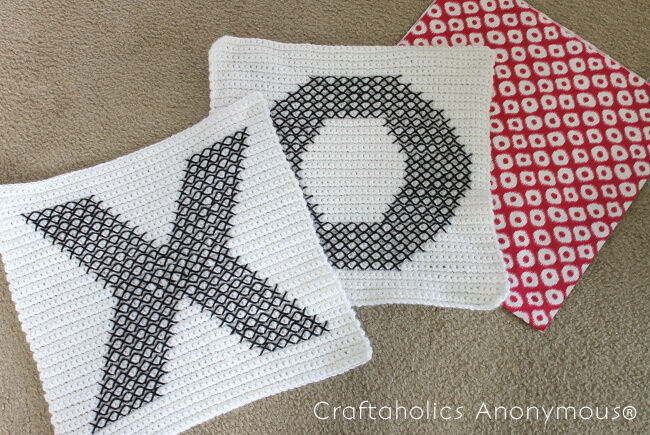
The pillow fronts should be 17″ square. For each pillow back, you will need two pieces of fabric cut to 17″x13″. On each back piece, you will need to hem one 17″ side. Then pin the pillow front to the back pieces, with the right sides together. You may have to stretch the crocheted fabric a bit as you pin.

Sew the front and back of the pillow case together leaving a half inch seam allowance. (I found it was easier to run the pillow case through my sewing machine with fabric side facing down.) Flip the case right side out, and stuff your pillow form in.
Step 4: Enjoy!


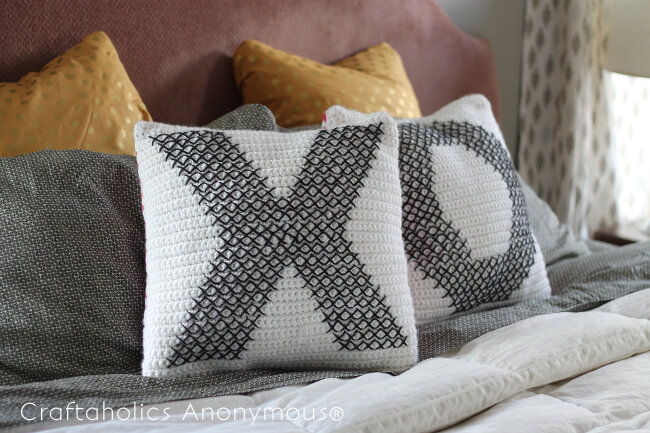
This bed still has a ways to go, but it is feeling a bit less boring to me with my new pillows. I love that they feel traditional and modern at the same time. And I’m really digging that little pop of pink on the back.
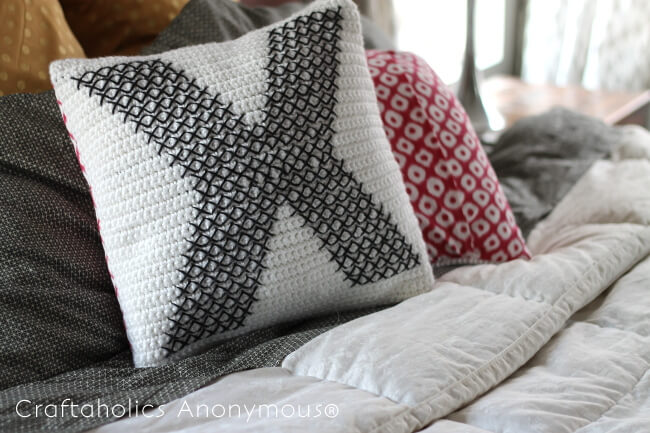
Don’t you love a new pillow? These two little guys are definitely making me smile.
Now I’m looking for some exciting fabric to reupholster the headboard we made a few years ago. I’ve been thinking I want some cool embroidered fabric. Like maybe something like this vintage suzani. What do you guys think? I always love your input.
Linking up at some of my favorite parties.


Comments + Project Love
Pieced Pastimes says
Your pillows turned out so nice. Love that you used a pink print for the pillow backs. My master is long overdue for an update, so I understand completely your thoughts on the matter.<br />Have a Great Day,<br />Suzanne<br />Pieced Pastimes
Brandi says
How cool! I love your pillows!!!
Lisa {grey luster girl} says
Love these! So many possibilities too!
Julie Reinwald says
I absolutely love these pillows and wish that I could crochet! But I do cross stitch, so you have inspired me. And I agree about master bedrooms…ours is pretty sad right now, haha.